Facial templates development
Facial templates recognize a face in a photo and insert it using the coordinates of facial points: the centers of the eyes and corners of the lips. Templates of this kind are often called face in hole effects, but we’re going to stick to the term facial templates for brevity.

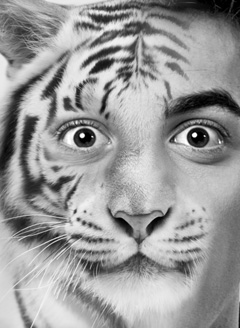
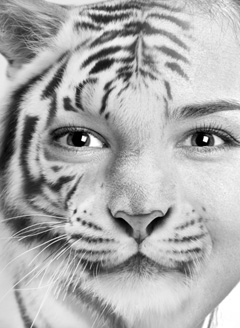


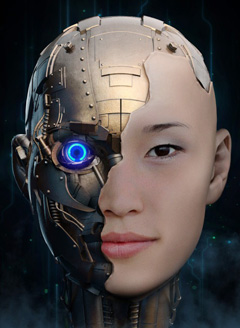
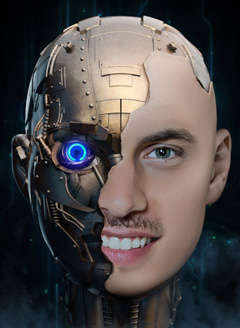


Examples of facial templates can be found in the Photo Lab application in the ‘Face montages’ category.
Facial templates can be used together with stickers — just add the Rasterization filter in your project.
In order for a template to be properly processed by the Template Creator, it needs to have a certain structure in Photoshop. Read this page for rules and special aspects regarding layers arrangement in a PSD document.
Creating a project in the Template Creator
To work with the Template Creator, you should associate your PSD file, containing layers, with a .pttp2 format project file.
Use the Template Creator to generate drafts for any template you want. The Template Creator generates a set of groups with valid names, thereby minimizing the chance of error while creating the template structure.
How to start: a step-by-step guide
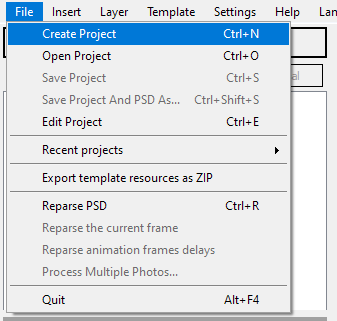
Open the Template Creator when Photoshop is already launched (if Photoshop is not running, it will start automatically when you open the Template Creator). Go to the "File" menu, and select "Create Project":
A dialog will open, where you need to fill the parameters of your template and save it in a selected directory.
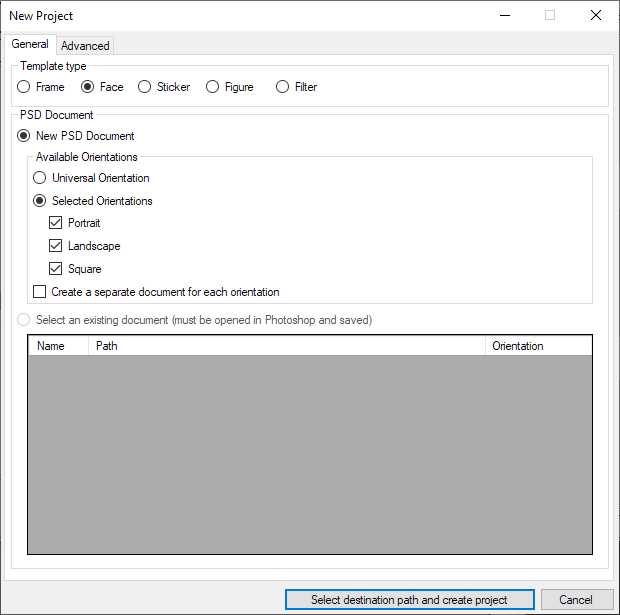
This dialog allows you to create several types of PSD documents. In case of a facial template, "Universal orientation" option should be checked.
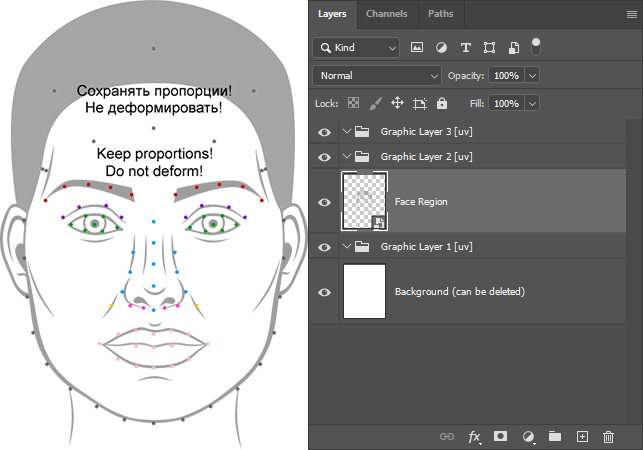
When you are done with the dialog, The Template Creator will generate a new PSD file in Photoshop. This file is associated with a new project and has the necessary structure of groups:
If there are open documents in Photoshop, the project creation dialog will allow you to make a project based on an existing document:
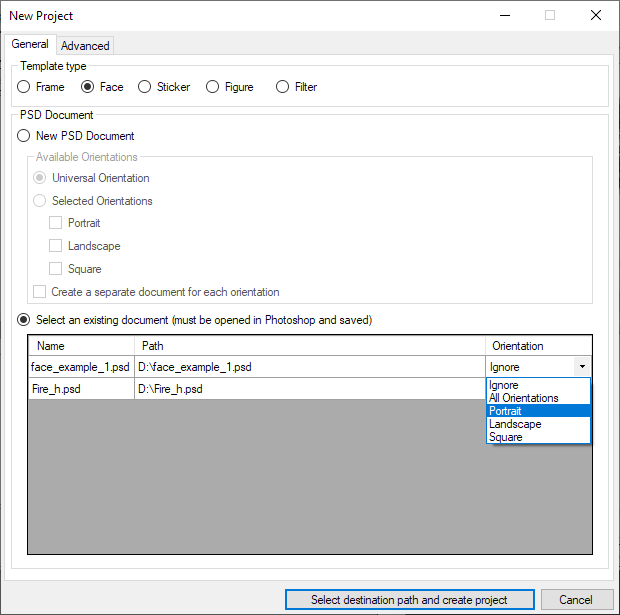
Select a PSD document to include into the project, then open the Orientation drop-down menu and select “All Orientations” (as facial templates are universal). Select “Ignore” for the documents you don’t want to include into the project.
You can change the binding of a PSD document to the project at any time by clicking “File” > “Edit Project” (CTRL + E).
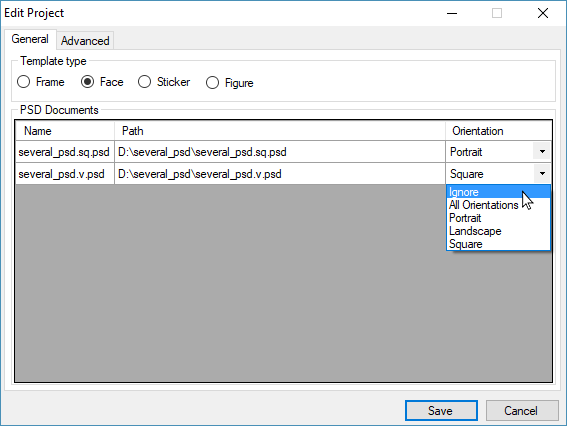
Besides, you can also change template type - it can affect the result, all other things being equal.
More information about the Template Creator and how to test ready templates can be found in this section.
Face region
A face region is defined by a smart object located on the same level with the subgroups of the layers. Depending on the type of a template, smart objects have their own characteristics.
A smart object of a face region defines the points (the centers of the eyes and the corners of the lips) using which a user's face will be inserted into the template.
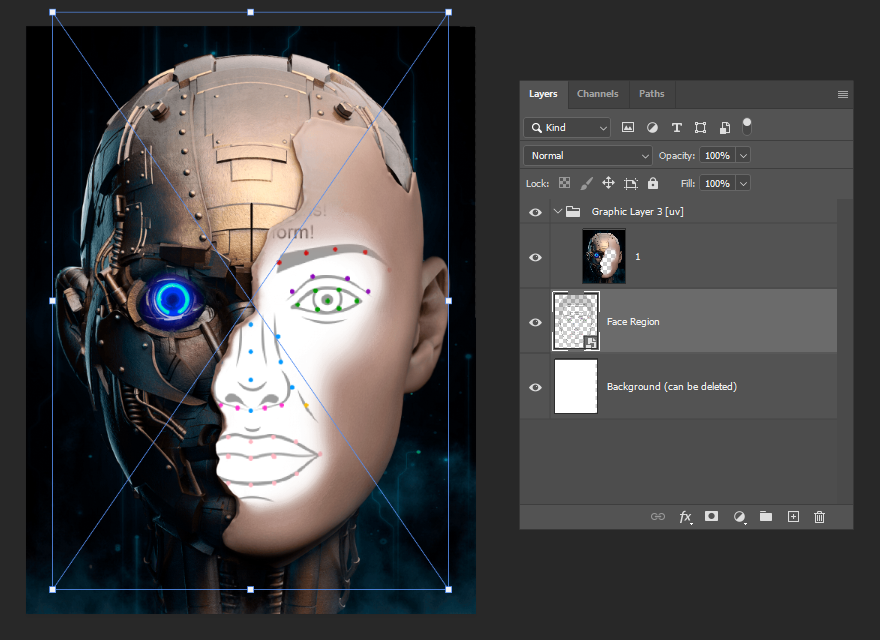
Inside this smart object there is a "Correction color" layer (it can be filled with a color to bring different skin tones to approximately the same shade) and another smart object (used by the Template Creator for technical purposes).
Besides, you can add test images into the smart object, if needed.
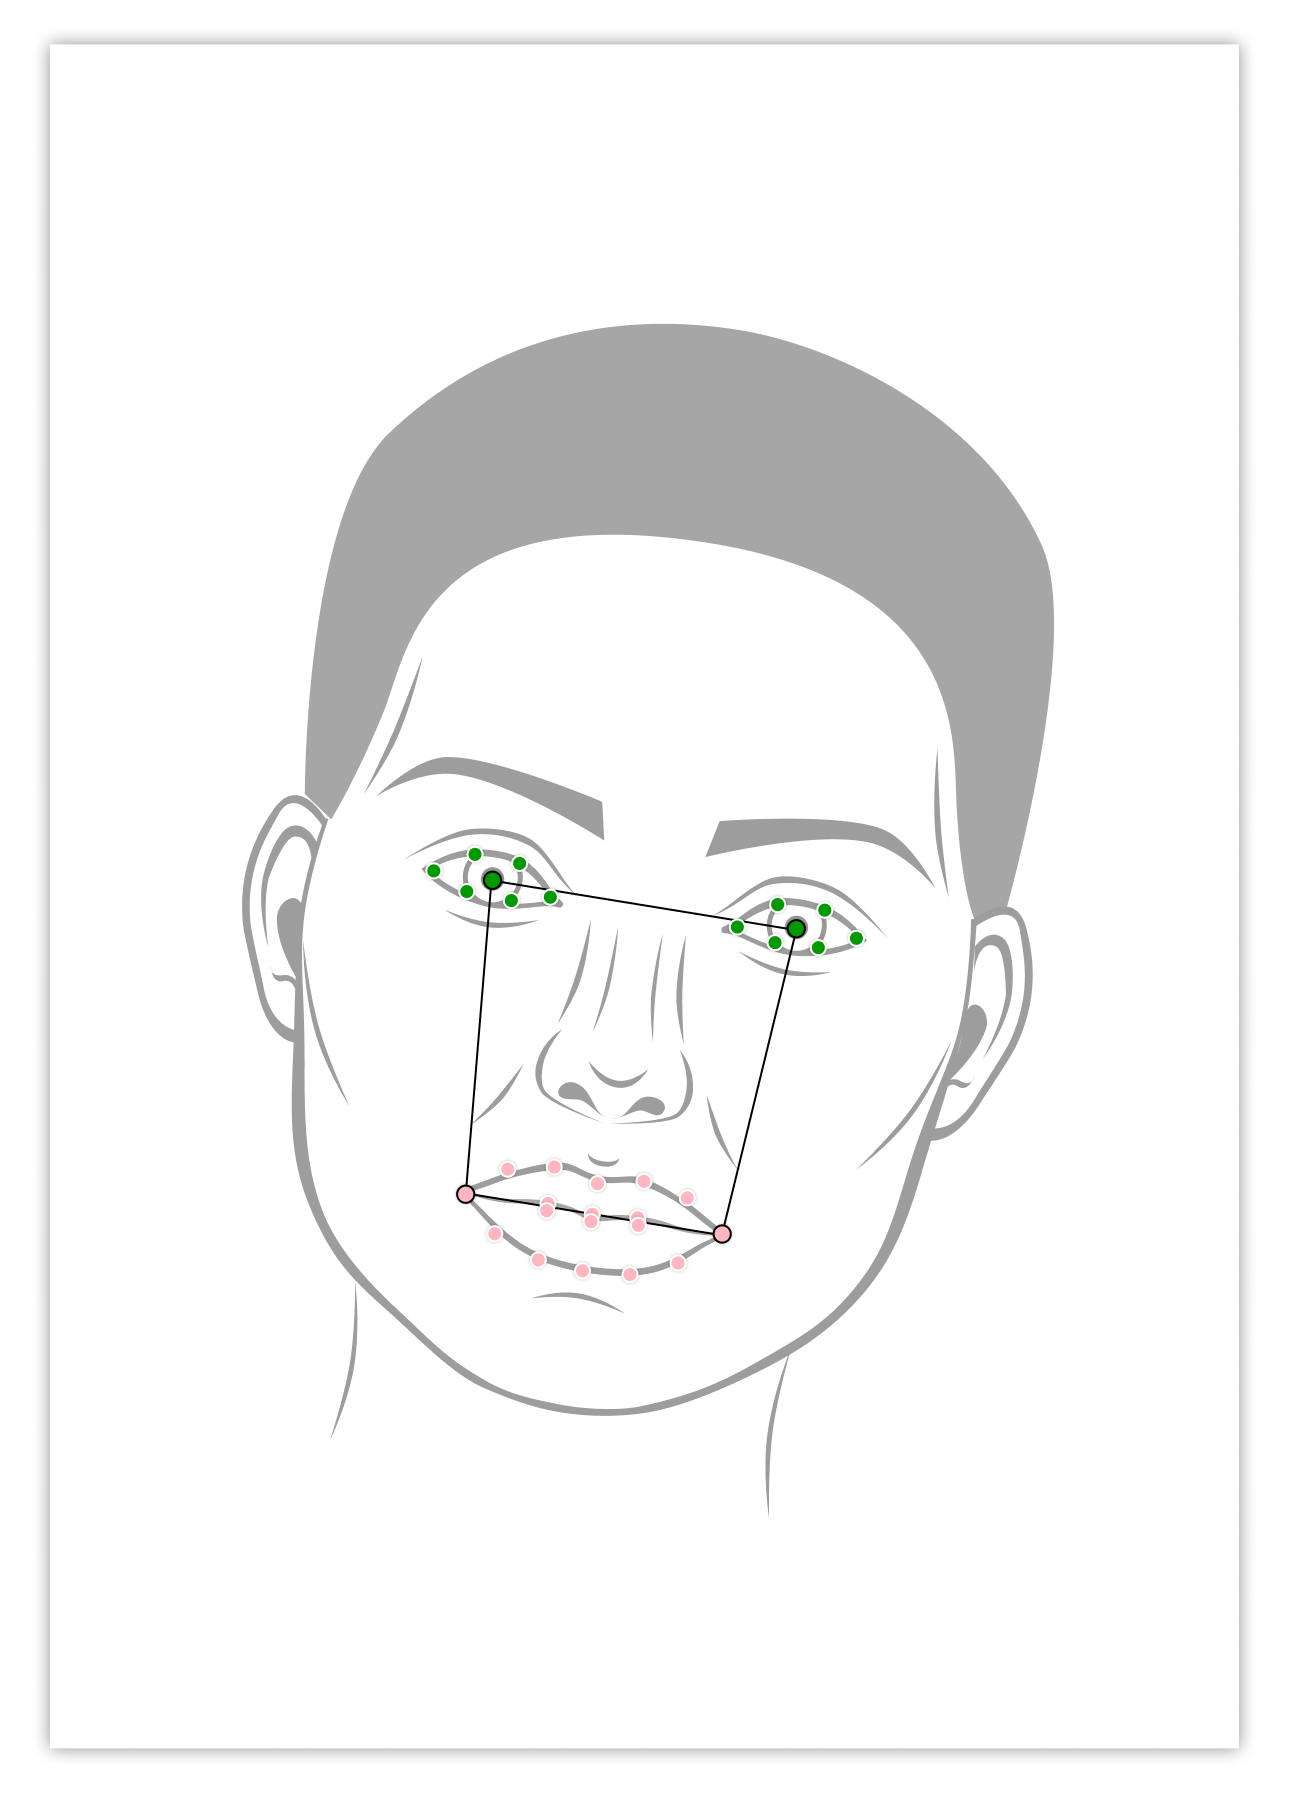
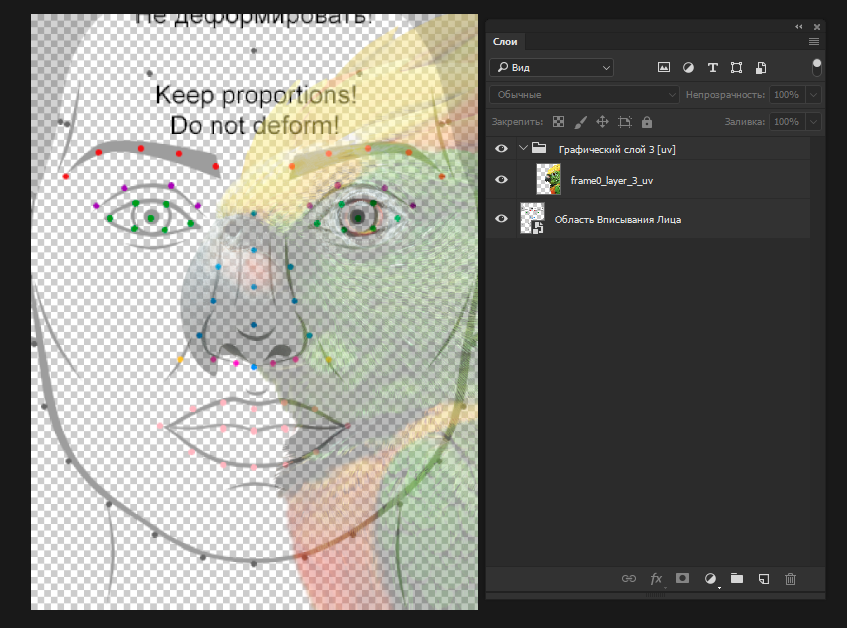
This smart object contains 94 unique facial points. Each of them is located in a certain part of the face. These points are used to position a face from a user photo in the template. The Template Creator uses 4 points by default: the pupils of the eyes and the corners of the lips.
The position, scale and rotation of the smart object relative to the canvas in the PSD file determines the position of the face from a user photo in the resulting template, to a large extent. A more accurate position is configured in the face position editor in the Template Creator.
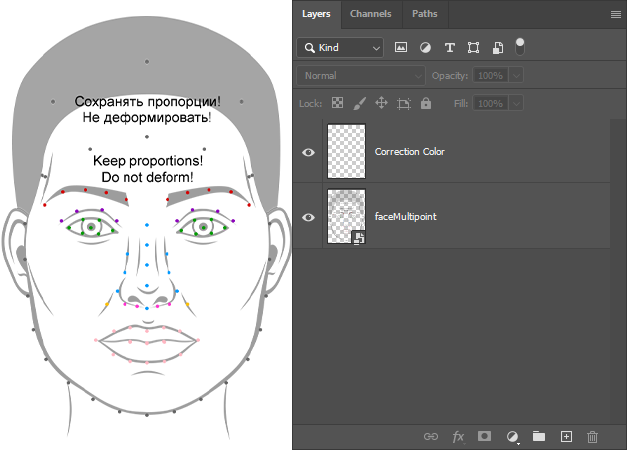
 When you change the size of the smart object of the face region, always keep its proportions. To do so, click the ‘Maintain aspect ratio’ button in the parameters panel of the "Transformation" tool.
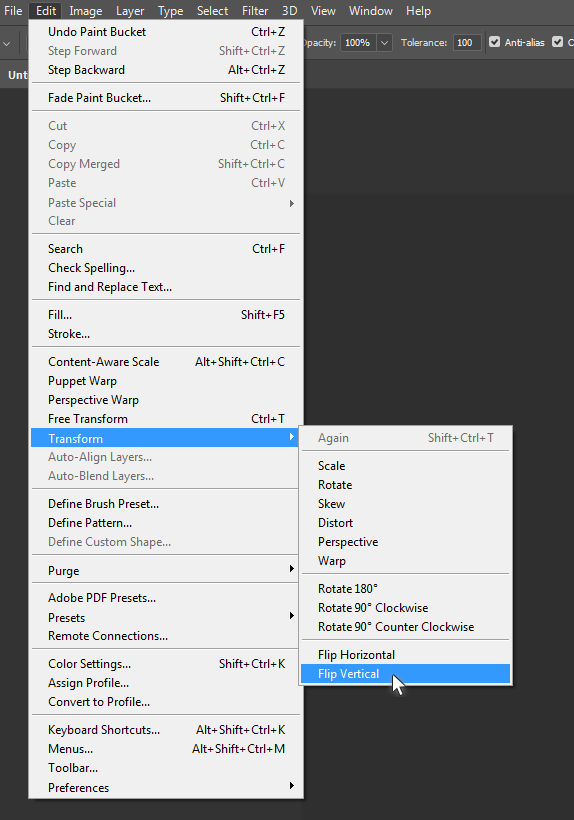
The Template Creator lets you flip smart objects of the face region horizontally or vertically.
To flip a smart object of the face region, use standard Photoshop tools. For example, go to Edit menu > Transform > Flip Horizontal / Vertical.
When you reparse your Photoshop document (PSD), you tell the Template Creator that one or several face regions have been flipped. Later, when you process test photos, make notice that images placed into a specified face region are flipped horizontally or vertically.
Flipping works in the same way for all user photo regions regardless of the template type.
Let's get back to face positioning. So, the smart object containing facial points inside the face region is somewhat like a "face coordinate plane", within which a face gets positioned. The position, scale, as well as selected marker points in this "face coordinate plane" determine the position of the face in the resulting template. The diagram below illustrates this principle*:
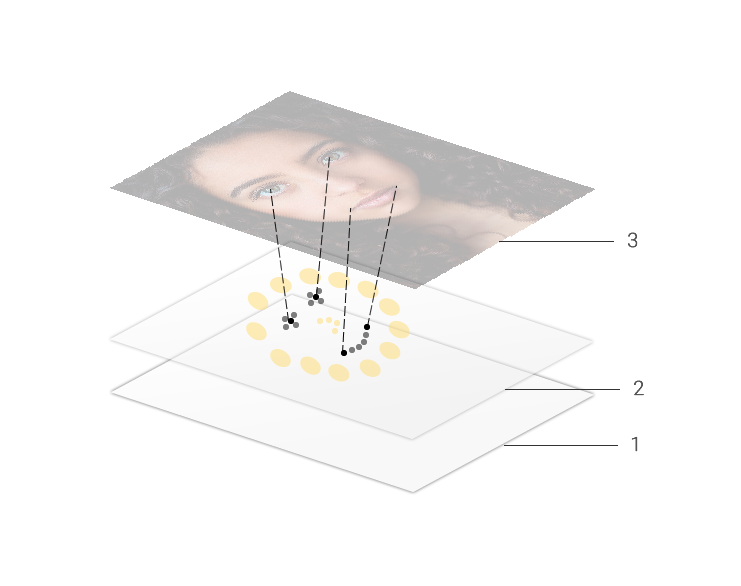
Diagram legends:
1 - template canvas
2 - layer with the face region positioned relative to the canvas
3 - face found in a user photo.
* dashed lines indicate the force of attraction of particular facial points to the chosen marker points in the Face region.
After all the necessary manipulations with the Face region in the PSD document have been done, all further actions regarding face positioning take place in the Template Creator.
Before getting familiar with the face positioning tools in the Template Creator, let's take a closer look at how a face from a user photo gets positioned in the template canvas. We’ll consider this process in detail, step by step.
After the smart object of the face region has been positioned in the proper place in the PSD-document and the PSD document has been reparsed, the Template Creator obtains information about how to position the face in the template.
| A schematic diagram of a face region in the canvas, in a PSD document |
|---|
 |
The Template Creator analyzes the smart object of the face region and extracts information about its location and rotation angle. Besides, it applies the Face insertion filter, which is responsible for the accurate positioning of the face in the template, to the face region.
If default settings are used, then 4 facial points out of 94 available ones are selected by default - these are the pupils of the eyes and the corners of the lips (that is why the other points are not displayed in the diagrams above and below).
| A schematic diagram of face positioning, with the Face insertion filter applied. |
|---|
 |
Besides selecting facial marker points, one of the most important things to do during face positioning is adjusting the force of attraction to these points.
The force of attraction is a factor determining how intensely a particular facial point on the canvas coordinate plane attracts corresponding facial points in a user photo. The fact is that proportions of human faces can vary greatly - faces may be round or oval, wide or narrow, etc.
The Template Creator uses an "average" facial point scheme, but due to the differences in facial proportions of real people, their faces will not fit in the universal scheme perfectly. For example, different people may have different distances between the corners of the lips and the centers of the eyes. Therefore, by adjusting the force of attraction, you can increase its value for the eyes points, then the eyes will always be positioned predictably, and the mouth will be positioned a little more "randomly".
By default, the force of attraction is evenly distributed between the 4 facial points. This means that all facial points have equal priority during face positioning. In many cases that is enough for simple templates, yet it is important to understand that you can adjust the face position relative to certain points.
Below is an example showing how the force of attraction works when 4 standard marker points are selected. From left to right: the force of attraction is shifted to the eyes, the force of attraction is in the middle, the force of attraction is shifted to the lips.

So, if we consider the mechanics of template development from its realization in Photoshop to inserting a user photo into it, then all manipulations with a face can be divided into the following steps:
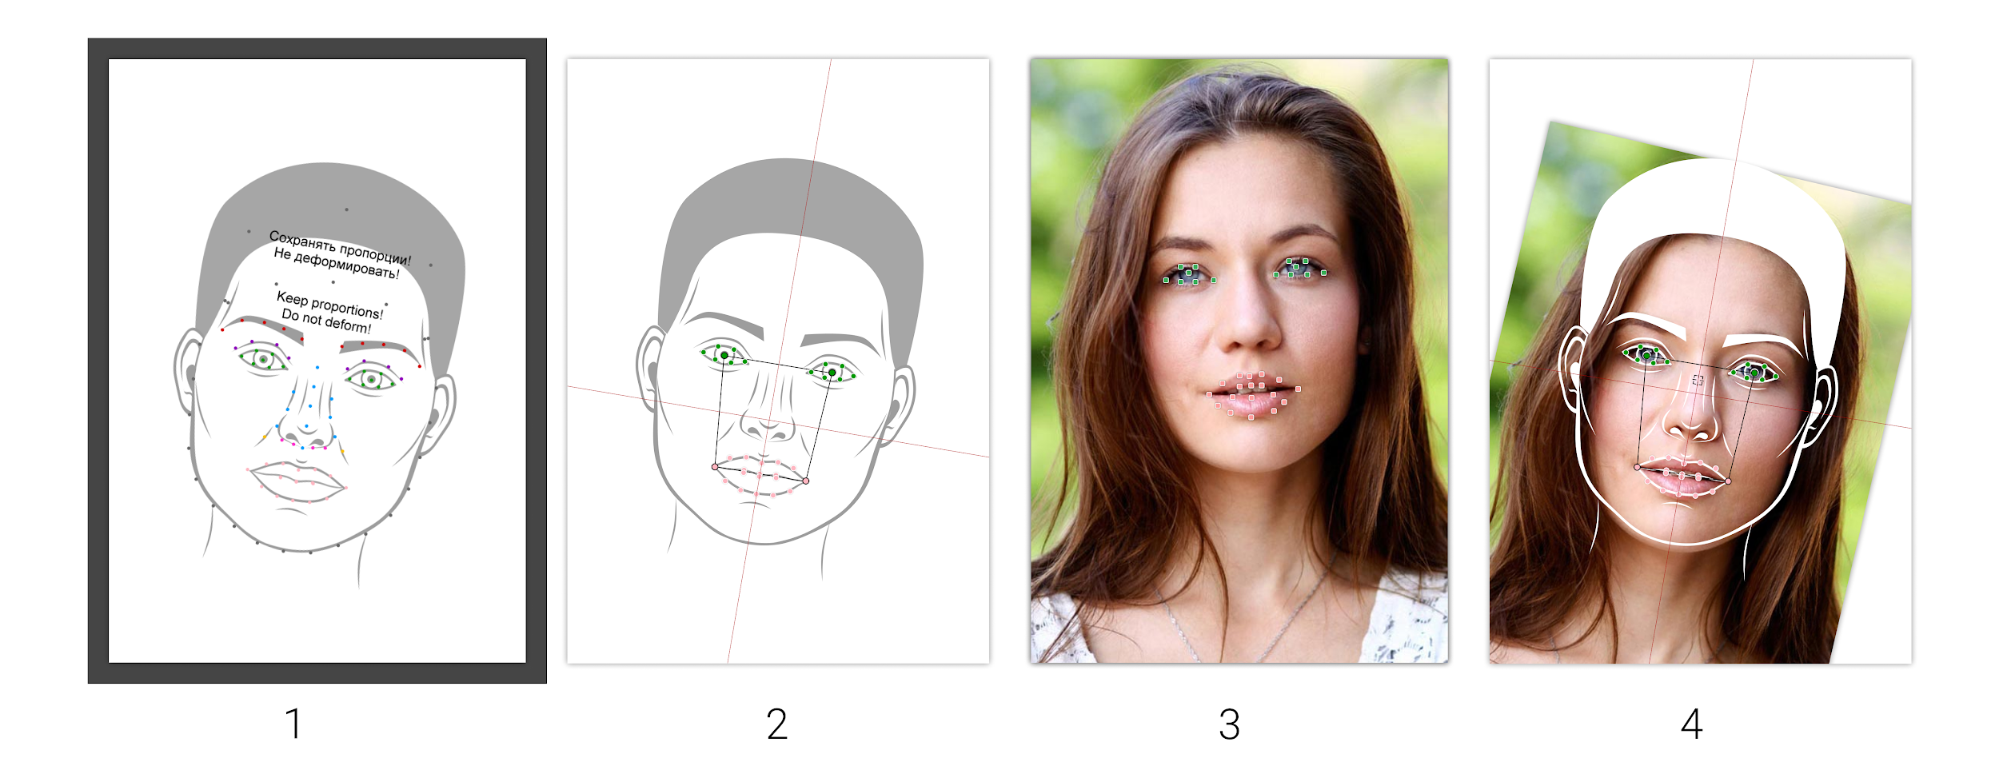
- Creating a template in Photoshop. Let’s consider a simple template consisting of a white background and a face region set in a certain position, scale, and at a certain angle. All available 94 points are visible in the PSD document. However, when positioning a smart object, you should only monitor the position of the points that you are going to use for face positioning.
- Interpretation of the template by the Template Creator after reparsing its PSD and applying the Face Insertion filter to the face region. At this step you determine marker points that you are going to use during face positioning, as well as the force of attraction for the selected points.
- A user photo. For convenience, we’ll display only those groups of points that are involved in face positioning in the template (that is, selected at step 2). These are the eyes points and the mouth points.
- Positioning a user photo on the template canvas relative to the specified facial points, with a certain force of attraction.
Face positioning is performed with the help of the Face insertion filter. This filter has a built-in Face position editor, that allows to control the position of the face relative to the template canvas with more accuracy. To open the Face position editor, click the Position parameter in the Face insertion filter settings.
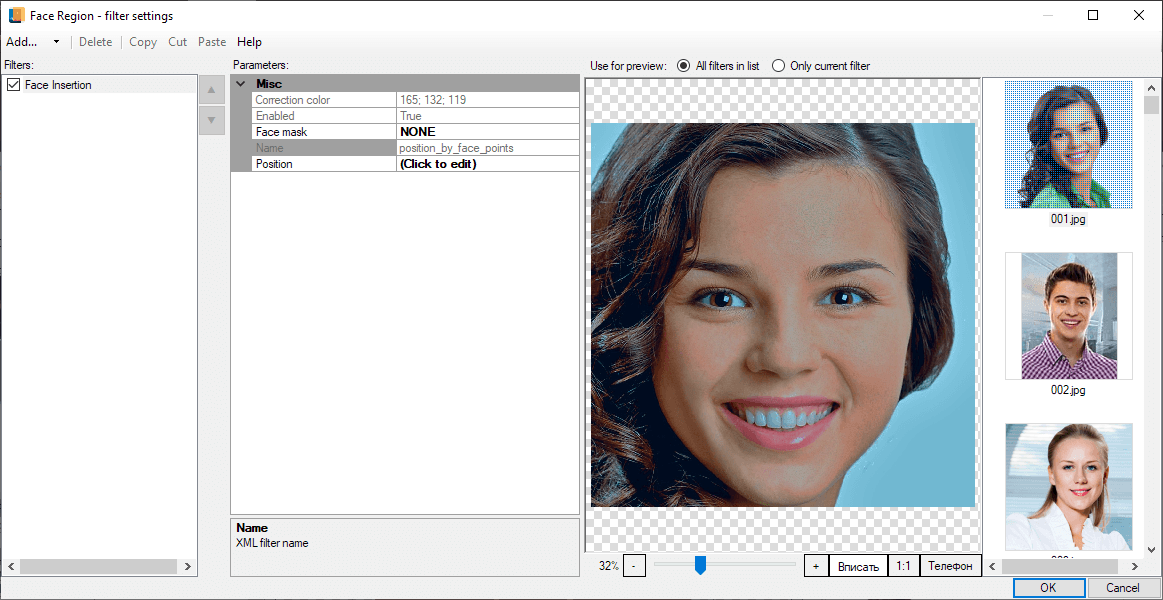
As we’ve said before, the Face position editor lets you adjust the position of the face relative to the template canvas.
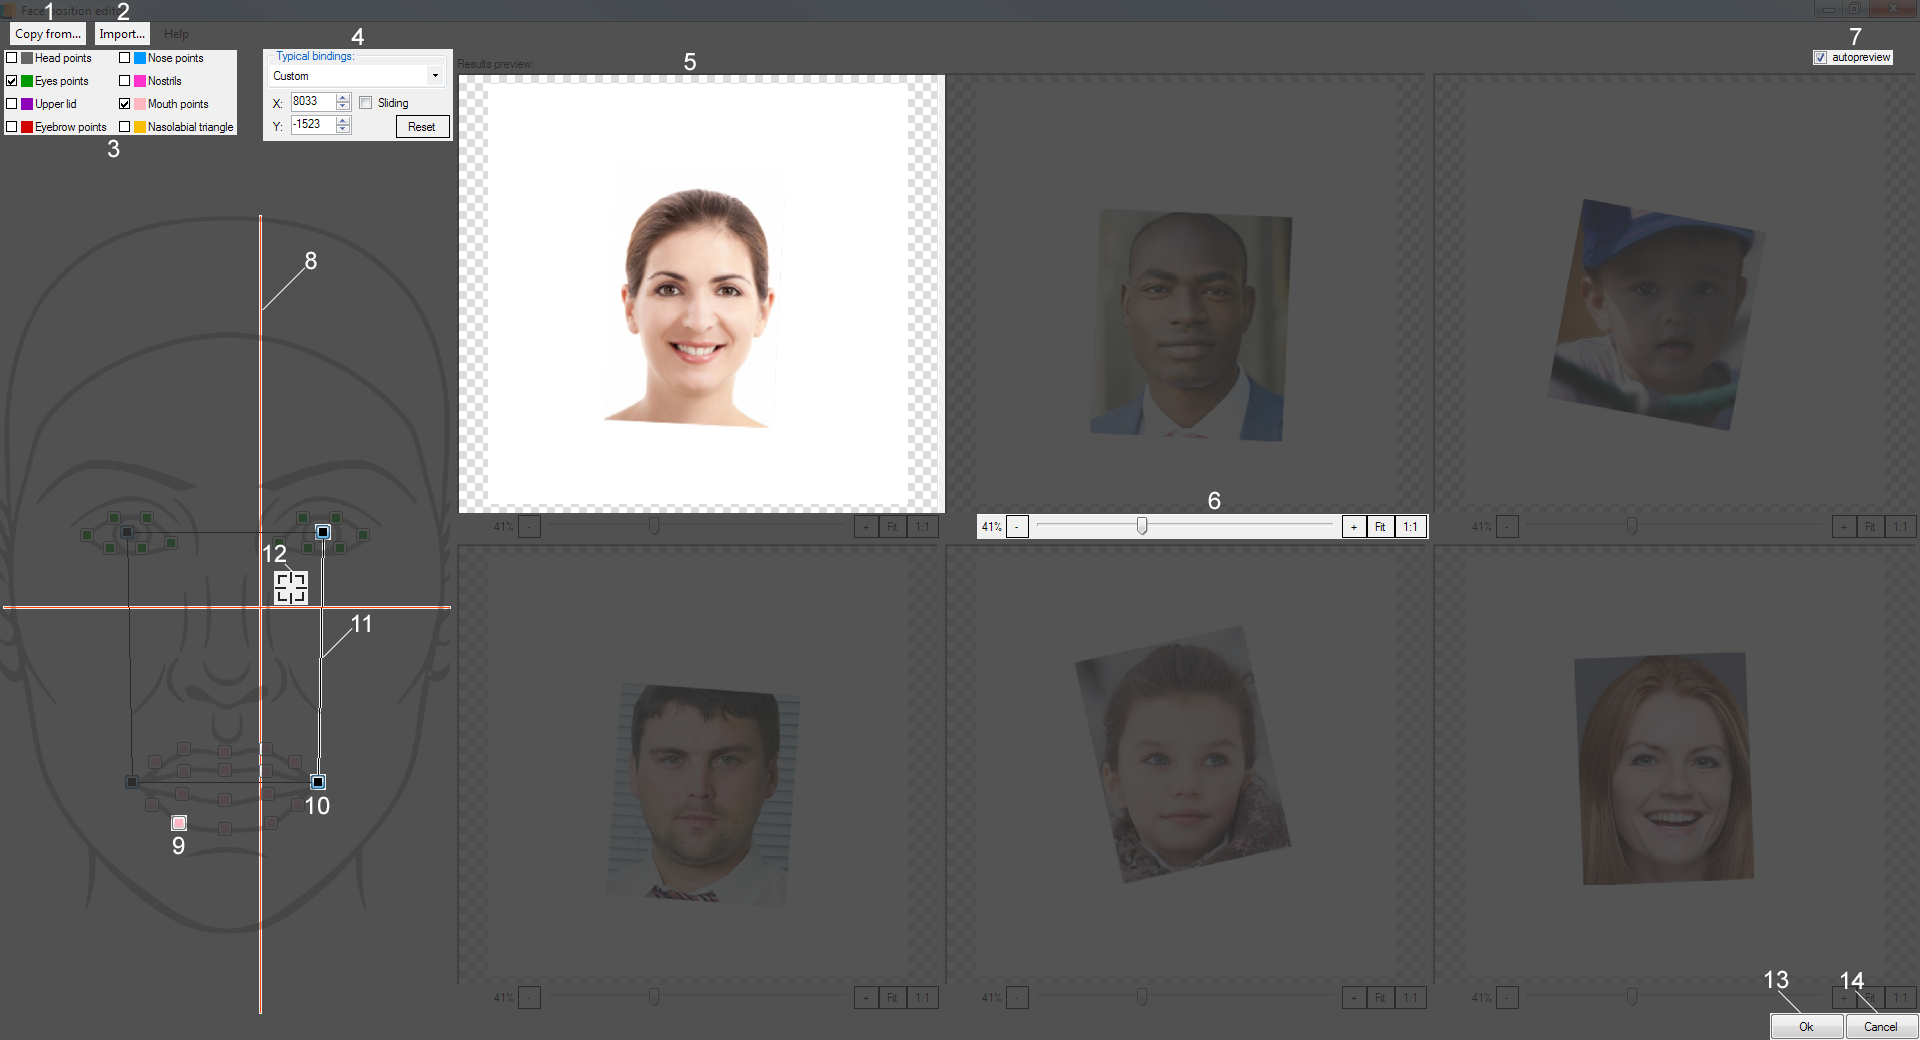
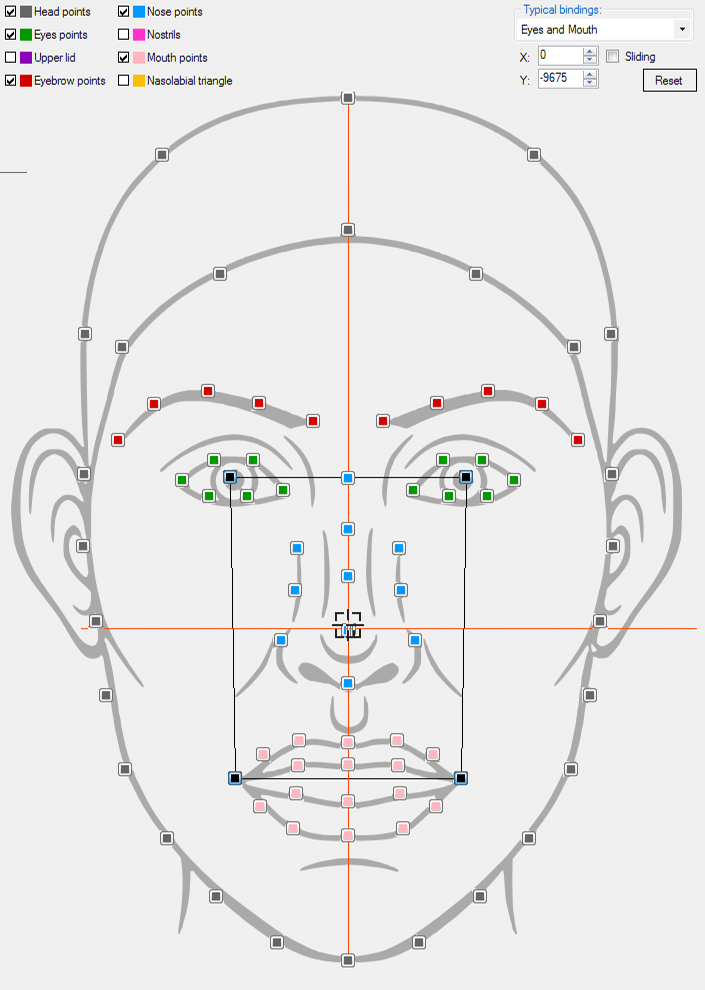
The position editor contains the following elements:
- This option lets you copy position settings from other face regions in the current document.
- This option allows to display additional template elements (e.g. graphic layers) in the preview window.
- Check boxes letting you enable / disable the visibility of facial marker points that can be selected for face positioning.
-
Typical bindings and coordinates of the force of attraction aim icon.
- A drop-down menu with a set of pre-configured bindings.
- The Reset option lets you reset your binding settings (i.e. selected marker points) to the default settings - the eye pupils and the corners of the mouth.
- Changing the coordinates of the force of attraction aim icon along the X and Yaxes.
- The Sliding checkbox. If the force of attraction aim icon runs across the boundary line along either of the axes, the aim icon slides along the boundary line. If Sliding is disabled, the aim icon will bump up against the boundary line.
- Result preview window.
- Result preview scaling panel.
- Check box allowing to enable / disable automatic preview updating when you change the settings.
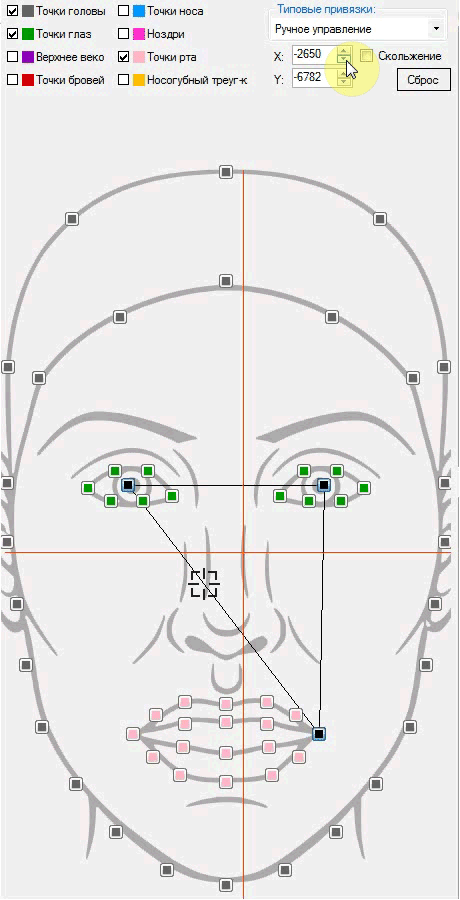
- The center of mass of selected marker points, with the specified force of attraction. If the red crosshair is close to one of the selected control points, it will be impossible to calculate the position of a face*.
- A facial marker point (not selected for face positioning, in this particular case).
- A selected facial marker point.
- Allowed location range for the force of attraction aim icon. It is determined by selected marker points and can be a polygon or a line segment. To correctly determine the face position, the force of attraction aim icon should be inside the allowed area.
- The aim icon of the force of attraction to selected facial marker points.
- The Ok button applies the changes made in the Face position editor.
- The Cancel button cancels the changes made in the Face position editor.
* To correctly determine the scale and rotation of a face, at least two points need to be selected. Also, if the red crosshair on
the face scheme is too close to one of the selected facial marker points, this will mean that only this point will affect the position,
while the influence of other selected points will be negligible. In this case, it is impossible to correctly determine the scale and
rotation of the face relative to the canvas, so this will be indicated by the error message in the preview: To fix this error, you can either change the set of selected marker points or move the aim icon of the force of attraction. Either of
these actions will redistribute the force of attraction and will shift the red crosshair.
To fix this error, you can either change the set of selected marker points or move the aim icon of the force of attraction. Either of
these actions will redistribute the force of attraction and will shift the red crosshair.
A fair question may arise - why do we need to select our marker points in a separate editor, if we can set the size, rotation and position of the face region in the PSD document and limit it to that?
Indeed, the 4 default points selected in the Template Creator can be enough in some cases. However, this will be of little use if you need to create a template similar to the one below.
The artistic effect of this template is achieved thanks to the fact that the positions of the parrot’s eye and the eye in a user photo coincide. Face positioning with the help of the 4 default marker points will not give the expected result, because this type of positioning aims at providing an optimal position for all 4 points, therefore it cannot guarantee the accurate position of the eyes. This fact is well illustrated by the screenshots below. In order to make the difference in the positions of the parrot’s eye and the eye from a user photo more visible, let’s make the graphic layer semi-transparent.
| Layers arrangement in the Photoshop document (PSD) | Location of default facial marker points in the Face position editor |
|---|---|
|
|
Examples of resulting images:
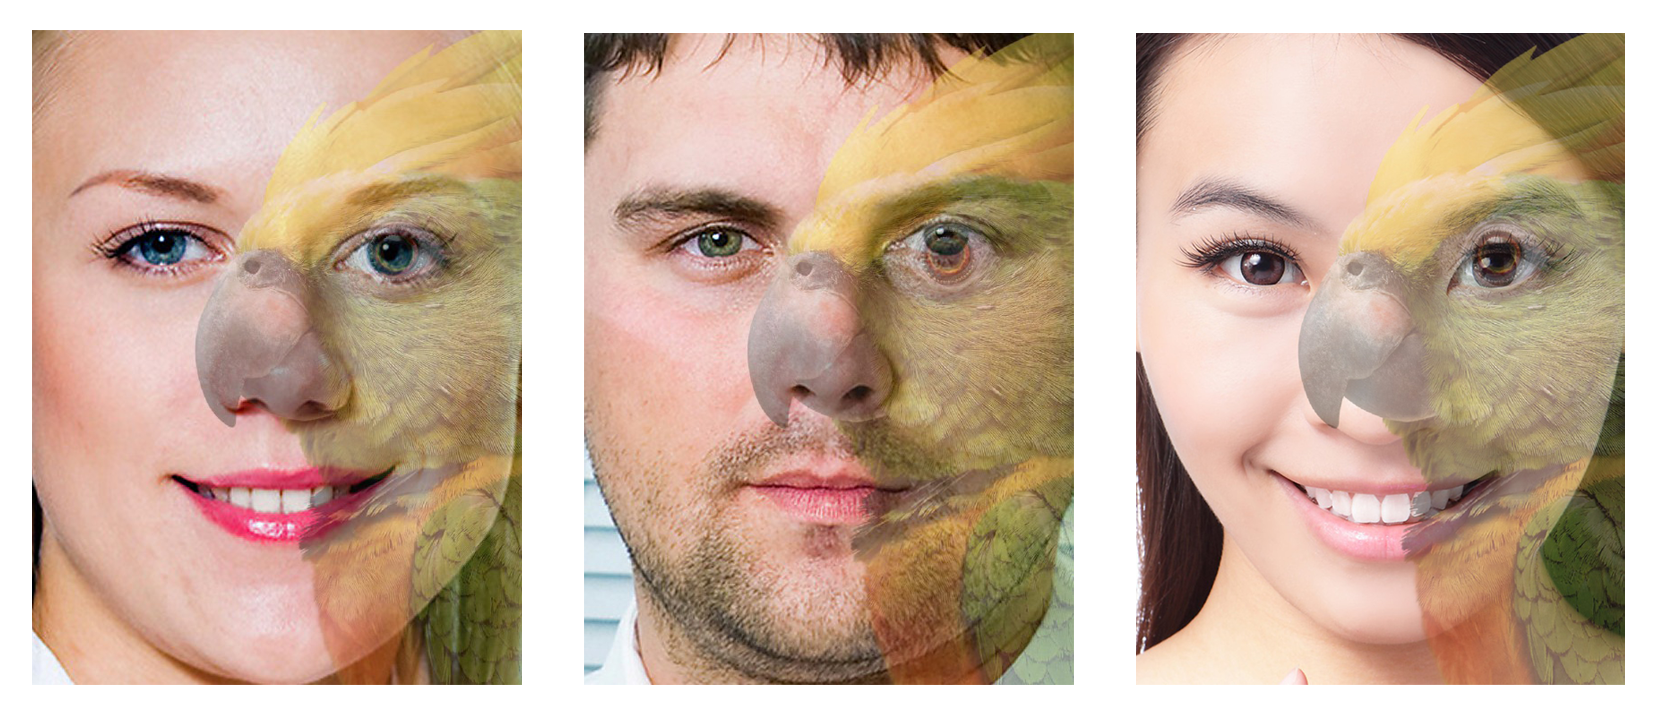
As can be seen, the positioning of the eyes is close to ideal only in the first resulting picture. As for the other examples, the parrot’s eye is either shifted down (as in the second example) or shifted up (as in the third example).
In order to fix the position of the eyes, we need to change the set of selected marker points in the Face position editor, that is, deselect the points located in the corners of the mouth.

If we process the same photos again after this, we can see that the shift of the position of the parrot’s eye relative to the human eye has become much less noticeable.
Examples of resulting images:

This is a clear example of how changing your selected marker points can help achieve the desired effect.
It is worth noting that there is the "Insertion Mode" parameter in the Face Region property grid, although changing its option will not affect anything. It happens because the position of a face can only be set using facial anchor points in the Face Position Editor which makes the "Insertion Mode" parameter not applicable to Face Regions.
Additional information
Automatic resizing of templates
If a user photo is smaller than the template, the photo will be upscaled to match the template size. If the difference in their sizes is quite noticeable, the user photo will look blurred and low quality in the template.
To avoid problems related to size mismatch, use the automatic resizing option.
Creating templates with several user photos
The Template Creator makes it possible to create projects with several different user photos inside one template. Read more about it here.
Animated templates
This template type can be animated. More information on animated templates development can be found here.
There are some temporary restrictions regarding using animation in templates. Learn more about them here.
Facial templates: examples of development
Step-by-step example of facial template development
Important video tutorials
- A facial template
- Some techniques for working with facial templates
- Color correction when working with facial templates
- Creating facial templates: facial marker points
- Creating facial templates: face region boundaries
- Creating facial templates: working with shadows and highlights
See this page for other video tutorials (e.g. lessons about templates with several face regions and working with filters).