Step-by-step examples of creating figure templates
Creating a figure template with ‘FSQ’ user photo region
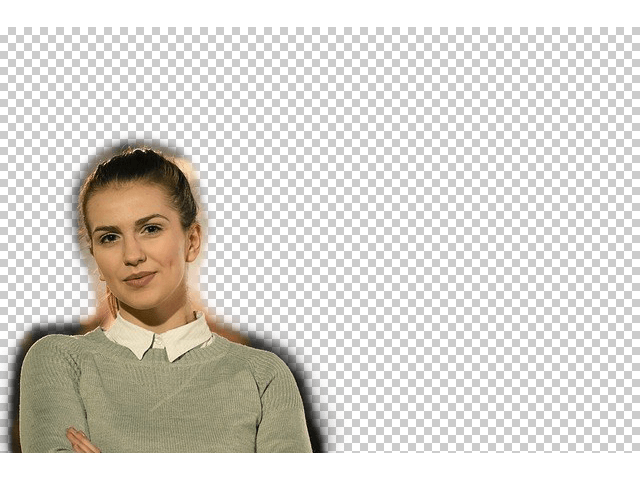
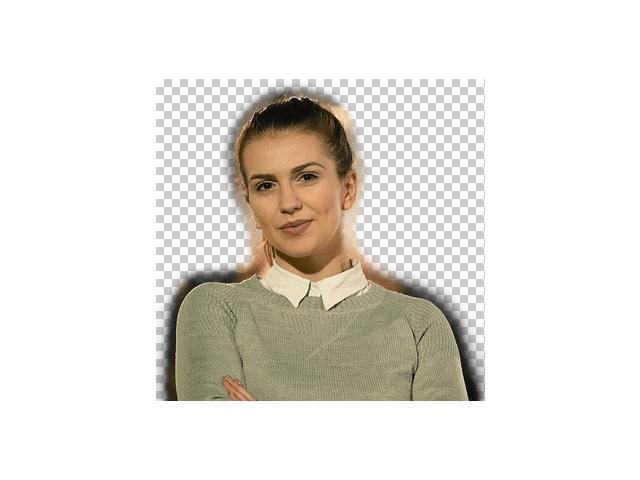
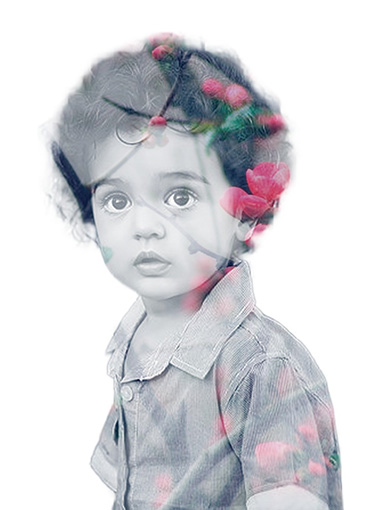
Let’s create a simple template where a figure from a user photo is isolated from the background and then placed onto the same background in B/W.
The project with the resulting sample template can be downloaded here.
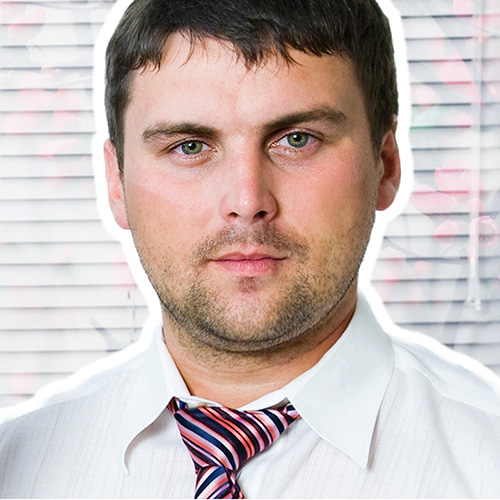
| Original photo | Photo processed with a template |
|---|---|
 |
 |
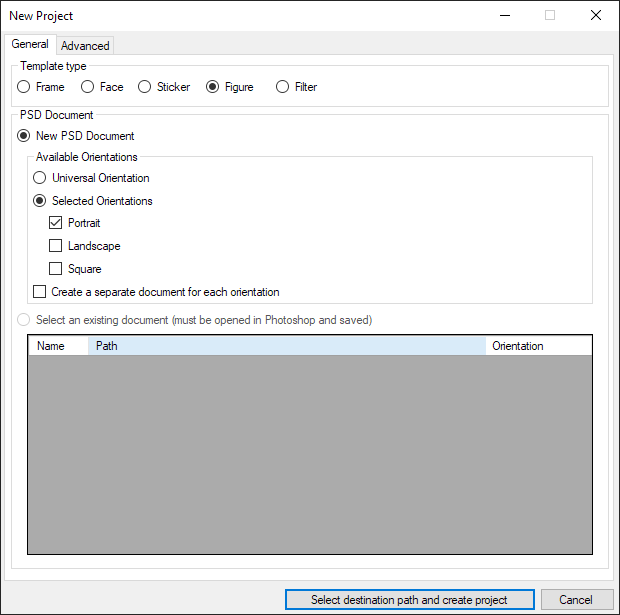
Create a project in the Template Creator. To do so, select File menu → Create Project. A New Project window will open. Select the Figure template type and Square orientation.
Select where to save your project and specify its name (e.g., ‘figure’).

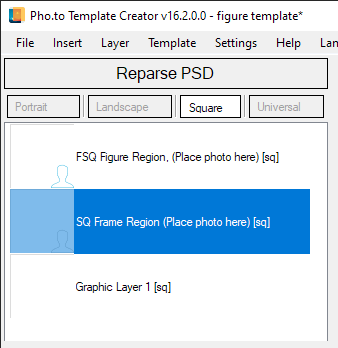
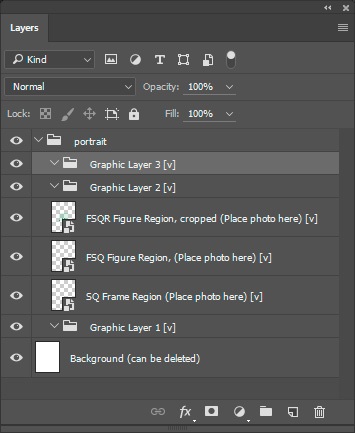
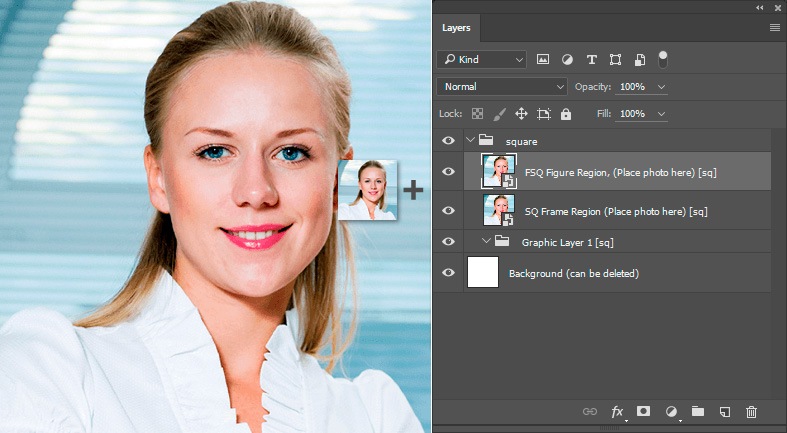
The Template Creator has generated a PSD document in Photoshop. The document has the following structure:
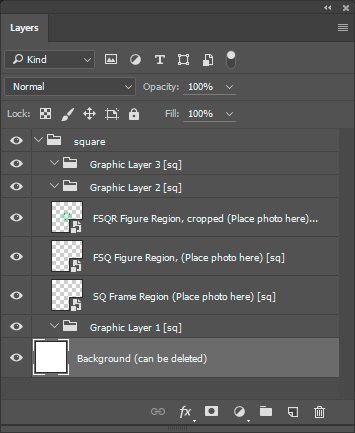
The PSD document of a figure template contains 3 types of user photo regions:
- FSQR — figure region with cropping.
- FSQ — figure region without cropping.
- SQ — frame user photo region.
Different types of figure regions let you solve different tasks and implement different creative ideas.
We need only the FSQ and SQ user photo regions for our template, so let’s delete the FSQR region.
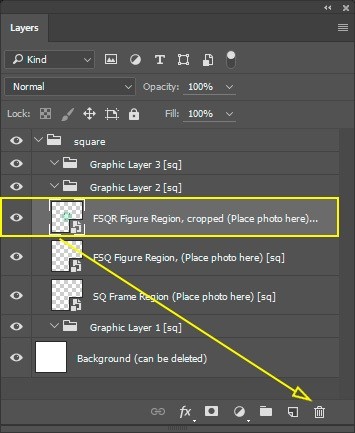
If you don’t know the difference between different types of figure user photo regions, you can read about it here.
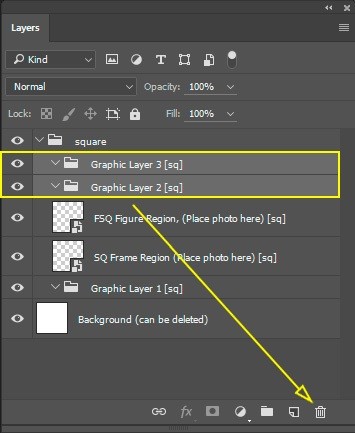
Delete the subgroups you are not going to use - Graphic layer 3 [sq] and Graphic layer 2 [sq].
Reparse the PSD document in the Template Creator.
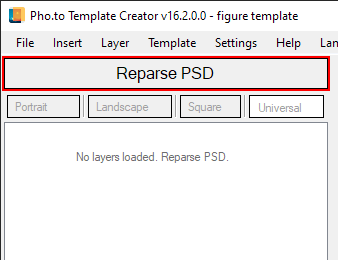
The Template Creator will export all the necessary layers from the PSD document.
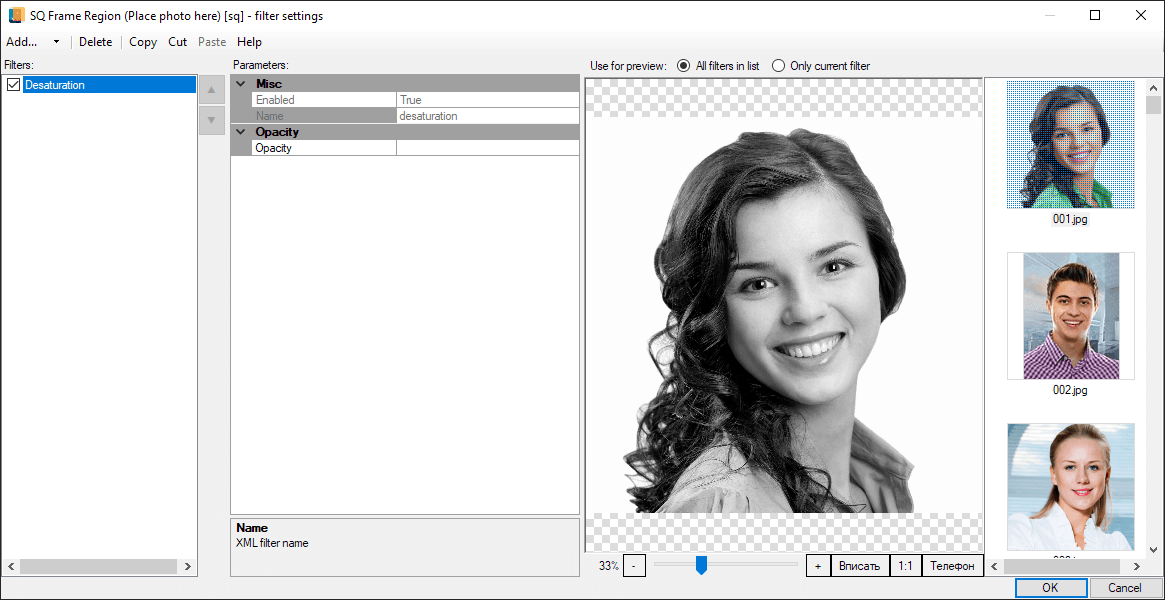
Double-click the frame user photo region (SQ Frame Region...) to open its filters list. Click the small arrow to the right of the Add button and select the Desaturation filter.
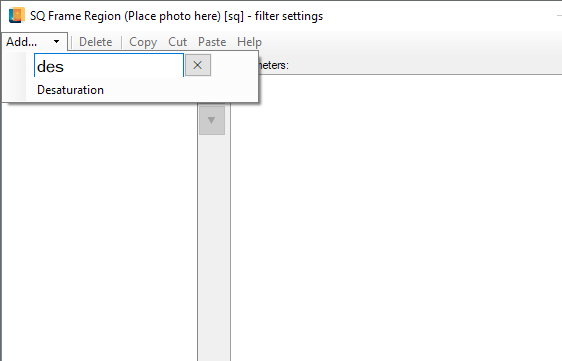
Click ОК to confirm the changes.
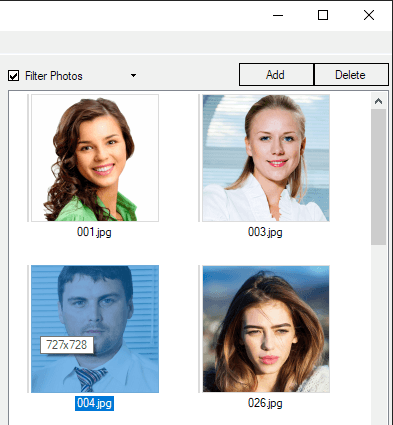
Check the Filter photos box in the upper right corner of the Template Creator. By default, the images will be filtered by orientation (the Template Creator will create a list with square photos, as the template was designed for the Square orientation).
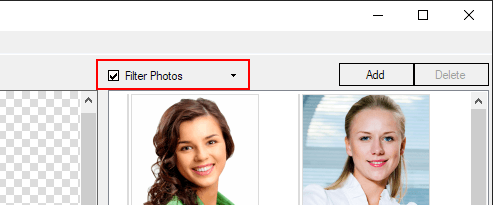
Select a photo and click the Process Selected button in the Template Creator.
As a reminder: taking into account the template design, it is best to test it using photos with colored background.
This is the result we got:
The project with the resulting sample template can be downloaded here.
Creating a figure template with ‘FSQR’ user photo region
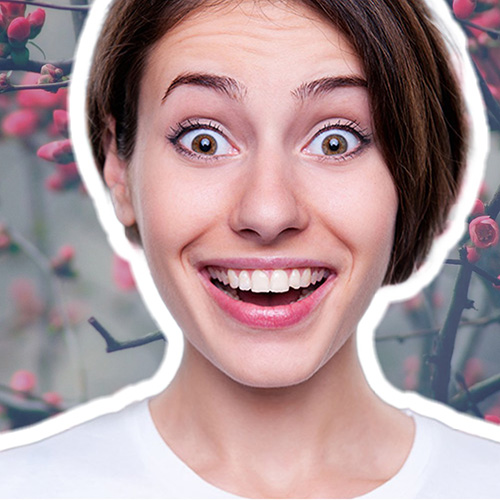
Let’s create a template that adds the following effect to user photos:
| Original photo | Photo processed with a template |
|---|---|
 |
 |
As shown in the example above, a figure from a user photo should be positioned centrally in the template and occupy a large part of it.
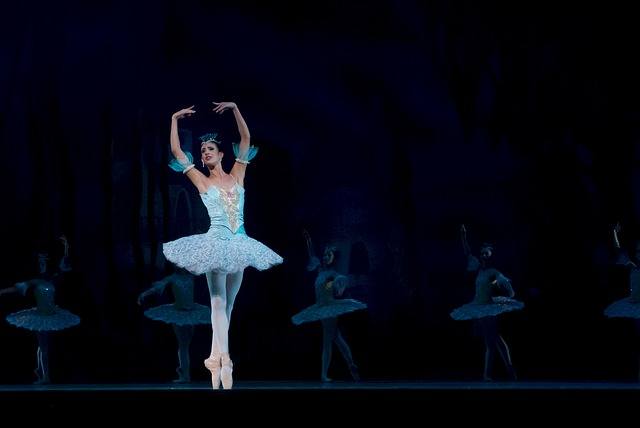
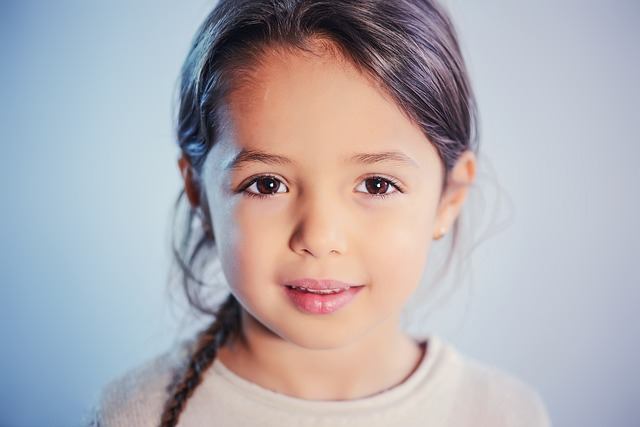
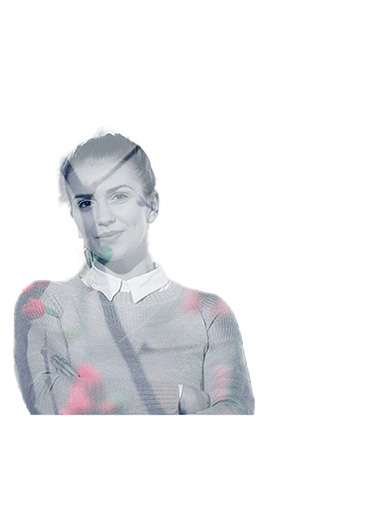
It should be kept in mind that figures in user photos can be of different sizes (large or small) and can be positioned in different parts of user photos. Sample photos below illustrate this fact.
 |
 |
 |
 |
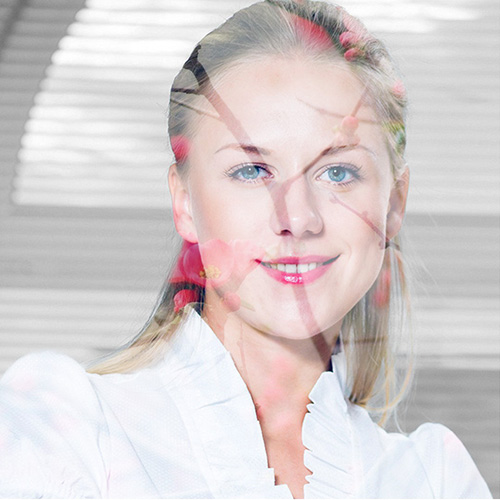
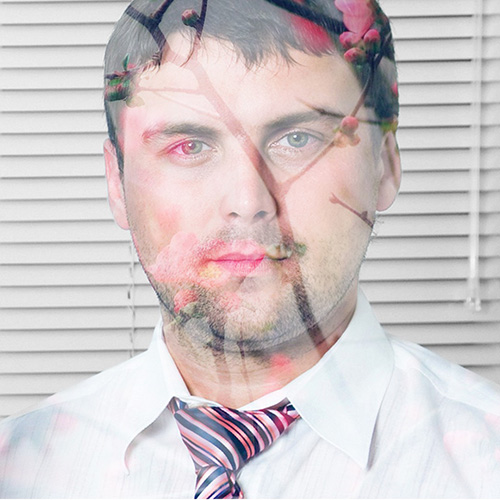
As a reminder, different types of figure regions lead to different results in processed user photos. Here is how the ‘FSQ’ and ‘FSQR’ user photo regions look when applied to one of the sample photos shown above:
| FSQ (original photo is not cropped) | FSQR (original photo is cropped) |
|---|---|
 |
 |
As seen in the example showing the FSQ user photo region, the figure is isolated from the user photo without the image being cropped. In this case, the result of user figures positioning and scaling in a template may be rather unpredictable. So, if you want to control the position and size of a user figure in your template (position it in a particular place of the template), the FSQ user photo region is not what you need.
Using the FSQR user photo region instead to isolate figures from user photos will lead to better results in this task, because source photos will be cropped to the rectangle containing a figure.
So, let’s start creating a template with a FSQR user photo region (original photos will be cropped to the rectangle that fits the figure bounds).
The project with the resulting sample template can be downloaded here.
Create a project in the Template Creator. To do so, select File menu → Create Project. A New Project window will open. Select the Figure template type and Portrait orientation.
Select where to save your project and specify its name.
The Template Creator will generate a PSD document with the following structure:
The PSD document of a figure template contains 3 types of user photo regions:
- FSQR — cropped figure photo region.
- FSQ — figure photo region without cropping.
- SQ — frame user photo region.
Different types of figure regions let you solve different tasks and implement different creative ideas.
We need only the FSQR user photo region for our template, so let’s delete the FSQ and SQ regions.
If you don’t know the difference between different types of figure user photo regions, you can read about it here.
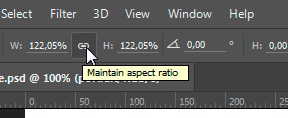
Select the user photo region in the main document and enable the free transform mode. After you have enabled the transform mode for the smart object, click the small chain button to constrain proportions.
| Enabling the transform mode | Constraining the smart object proportions before transforming it |
|---|---|
 |
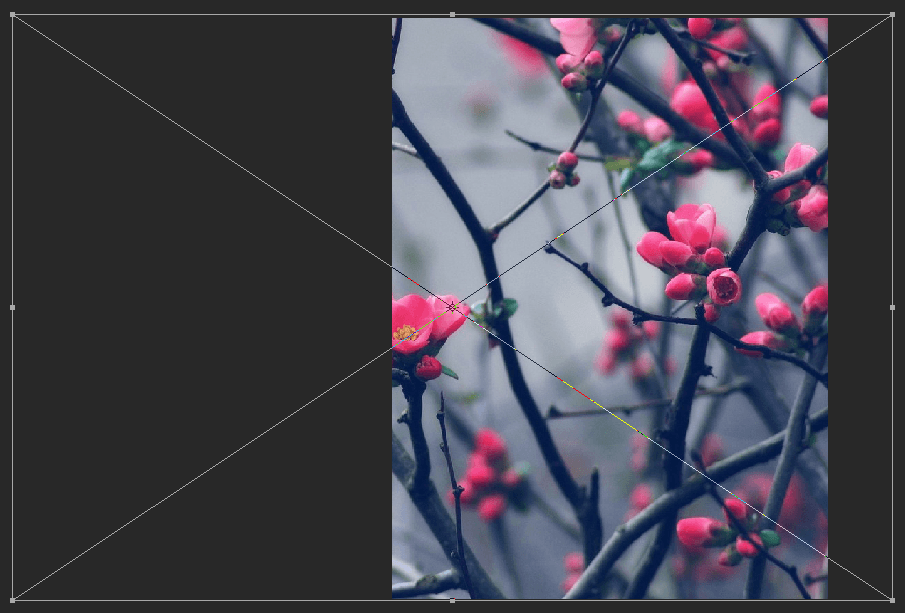
Scale the smart object up, so that it occupies a large part of the PSD document canvas. Position it centrally and make sure that its lower side is next to the bottom edge of the canvas.
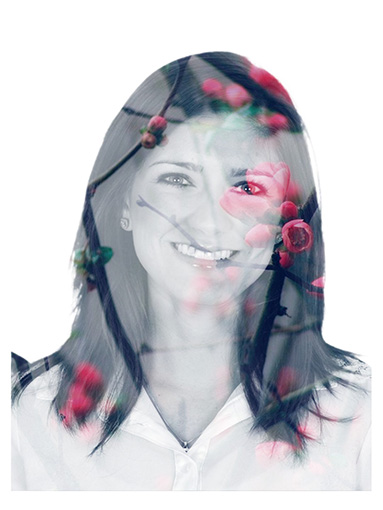
Place this ready-made image (download) into the Graphic Layer 2 [v] subgroup. Position it so that mainly its right side with blooming flowers and branches is included into the template.
Apply the Screen blending mode to the Graphic Layer 2 [v] subgroup. Set the opacity to 75%.
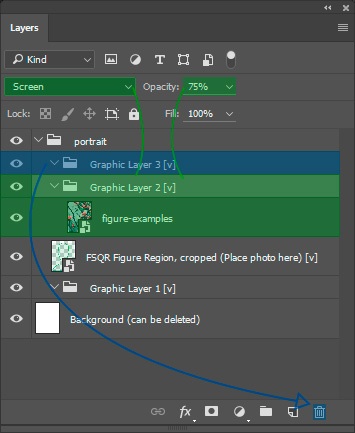
Delete the empty Graphic Layer 3 [v] group.
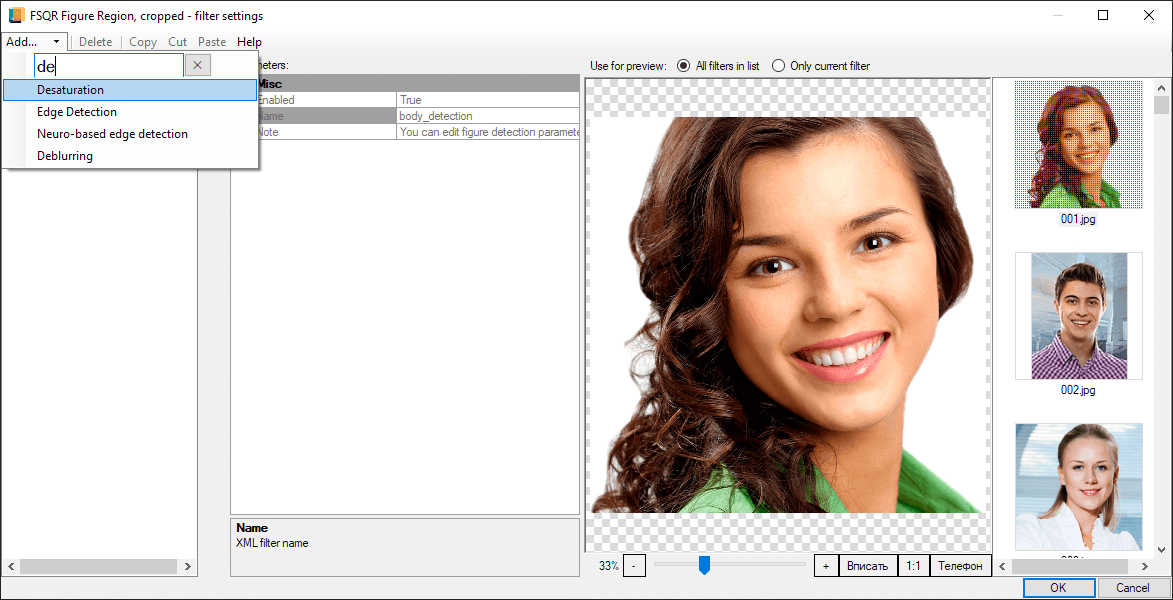
Go to the Template Creator and reparse the PSD document. Go to the user photo region (FSQR Figure Region... ) and open its filters list. Add the Desaturation filter and save the changes.
You can search the list for the filter you need manually, or you can use the search field: start typing the filter name in the field to find it.
Filter test photos by orientation.

Process several test photos. You should get results similar to the following.
| Results of processing: | ||
|---|---|---|
|
 |
 |
Let us look at the second and the third result picture in more detail. Despite the fact that the boy’s figure was positioned in the right half of the original photo, it is positioned centrally in the resulting picture.
As for the third picture, the figure is positioned much higher than the bottom edge of the template canvas, as you can see. The point is that when the FSQR user photo region is used, the Fit insertion mode is used by default (in this case a user photo is inserted into the template so that its longer side fits into the canvas). In this particular case the figure width exceeds its height, that is why it was fitted into the template with its longer side (its width), and after that transparent margin was added on top and bottom. This is an acceptable result for some photos, so this is not a problem.
All in all, the result is exactly what we expected.
The project with the resulting sample template can be downloaded here.
Creating a figure template with dynamic masks
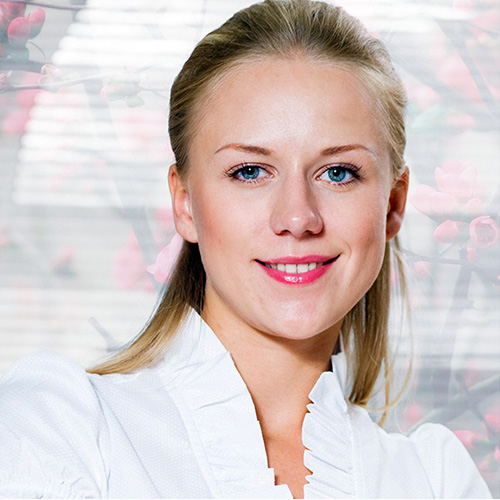
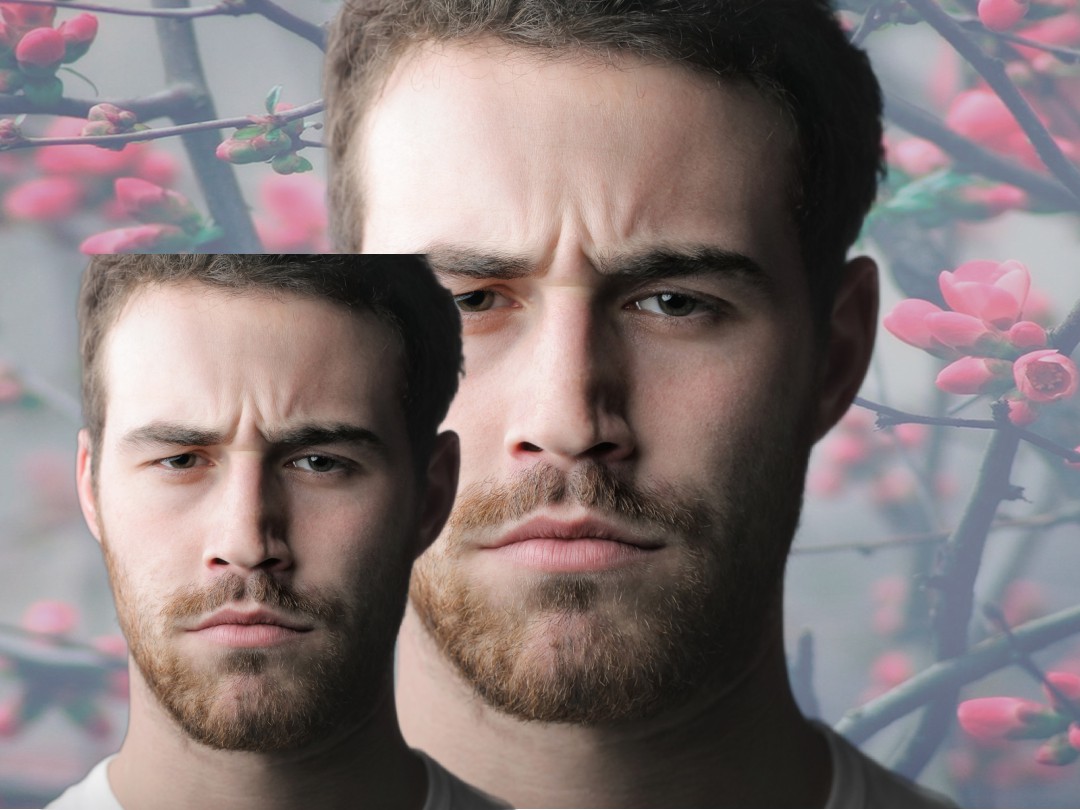
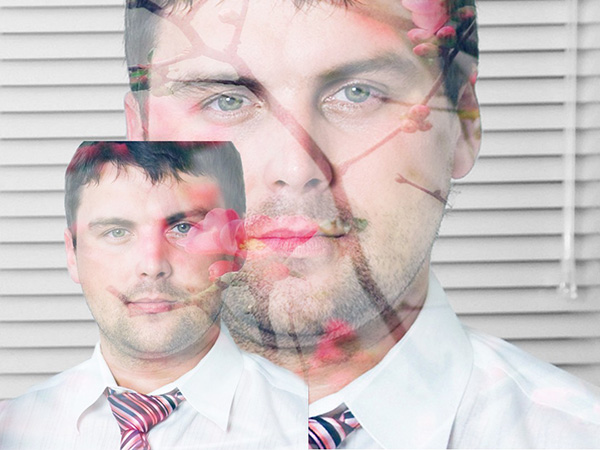
Let us now take the template from the first section (Creating a figure template with ‘FSQ’ user photo region) and create its advanced version with a graphic layer applied over the isolated figure, as shown in the picture below.
 |
 |
So, we aim to create an image where the background is desaturated (black and white), while a user’s figure remains colored, and a graphic layer with flowers is applied over the figure.
If you don’t have the template described in the first section (Creating a figure template with ‘FSQ’ user photo region), download it here; the image for the graphic layer can be downloaded here.
Please note that this graphic layer is only applied to the figure and does not affect the background. This effect is achieved thanks to a dynamic mask that is built based on a figure detected in a source user photo. This mask is then applied to a particular graphic layer.
The project with the resulting sample template described in this section can be downloaded here.
Open the template you created (or downloaded) in the first section and add provisional photos into both smart objects - this will let you work with dynamic masks conveniently. Save the changes and close the smart objects.
If necessary, adjust the image size inside smart objects, so that the aspect ratio is 1:1 (square) - the same is that of the test photos. These actions will not influence the template or its results at all, they only make it possible to display the template sketch correctly in the PSD document.
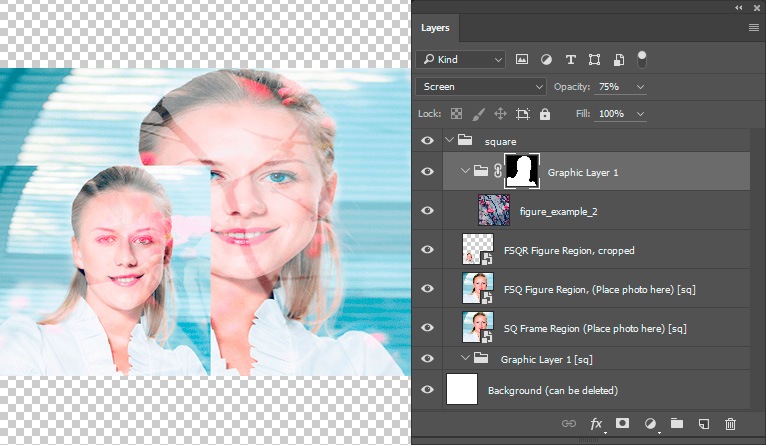
To implement our idea, we need to add a graphic layer into the PSD document (so that we could later add an image with flowers into this layer).
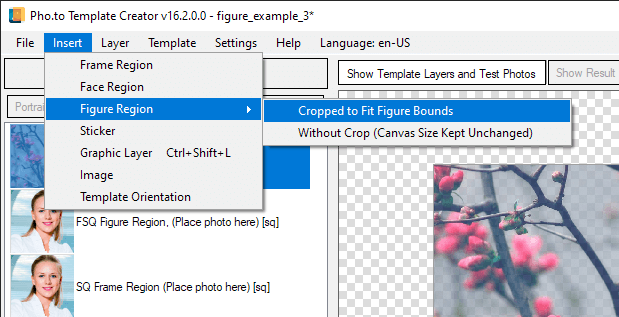
Go to the Template Creator and select Insert → Graphic Layer.

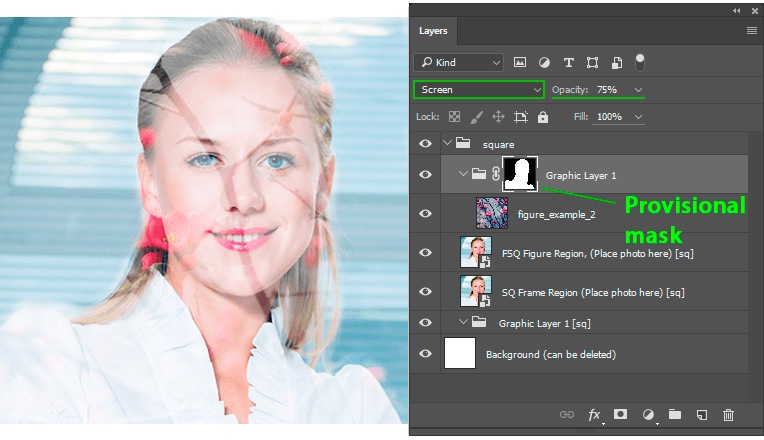
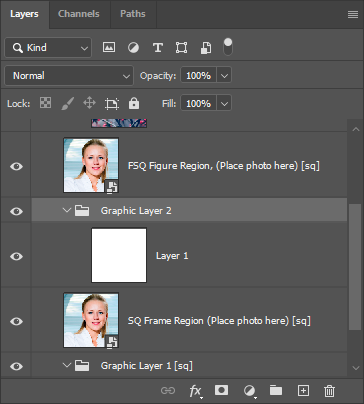
Add the flowers image into the Graphic layer 1 group and position it properly.
Then, add a figure mask in the smart object of the user photo region into Graphic layer 1. Note that we do so for trying purposes only within the PSD document. Set the graphic layer opacity to 75% and apply the Screen blending mode to it.
Go to the Template Creator and reparse the PSD document.
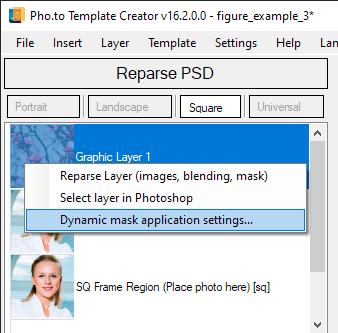
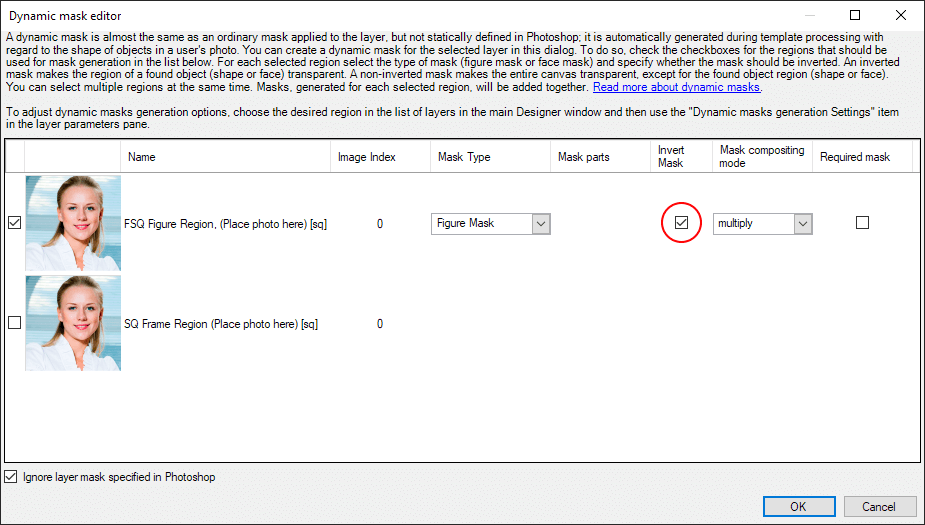
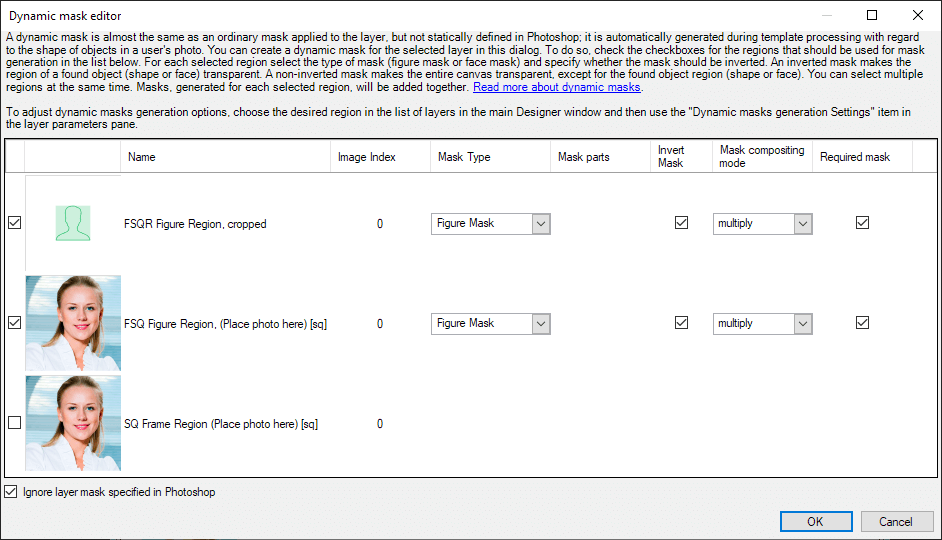
Right-click the graphic layer to open the context menu and select ‘Dynamic mask application settings…’.
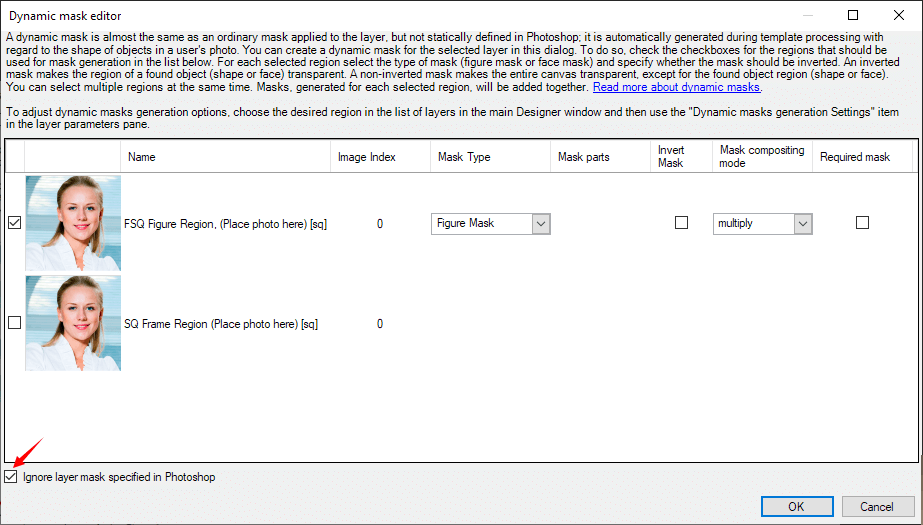
The ‘Dynamic mask editor’ window will open. Select the current user photo region there.
Check the ‘Ignore layer mask specified in Photoshop’ box. This option lets you disregard the provisional mask specified in Photoshop earlier, as masks for the graphic layer will be built dynamically - different user photos will have different masks depending on figures found in them.
Confirm the changes and process several test photos.
|
|
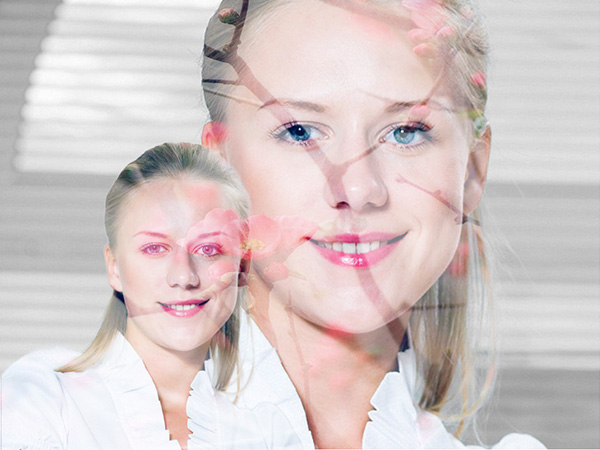
The result is exactly what we expected. However, we can create another type of effect with the help of the dynamic mask. If we invert the mask, the flowers layer will be applied to the background, not to the figure. If you want to invert the dynamic mask in the current template, follow the instructions in Step # 5.
Open the Dynamic mask editor for the graphic layer with flowers in the current template. Check the box in the Invert Mask column and click OK to confirm the changes.
Compare photos processed with figure templates with ‘normal’ and inverted dynamic mask:
| non-inverted dynamic mask | inverted dynamic mask |
|---|---|
|
 |
As you can see, you can choose whether to use inverted or non-inverted dynamic masks to build creatively different templates.
The project with the resulting sample template can be downloaded here.
Creating a figure template with an inverted dynamic mask for several figures
Let us now make a modified version of the template from the previous section: we’ll add one more user photo region into it and mask both figures to create an effect shown below.
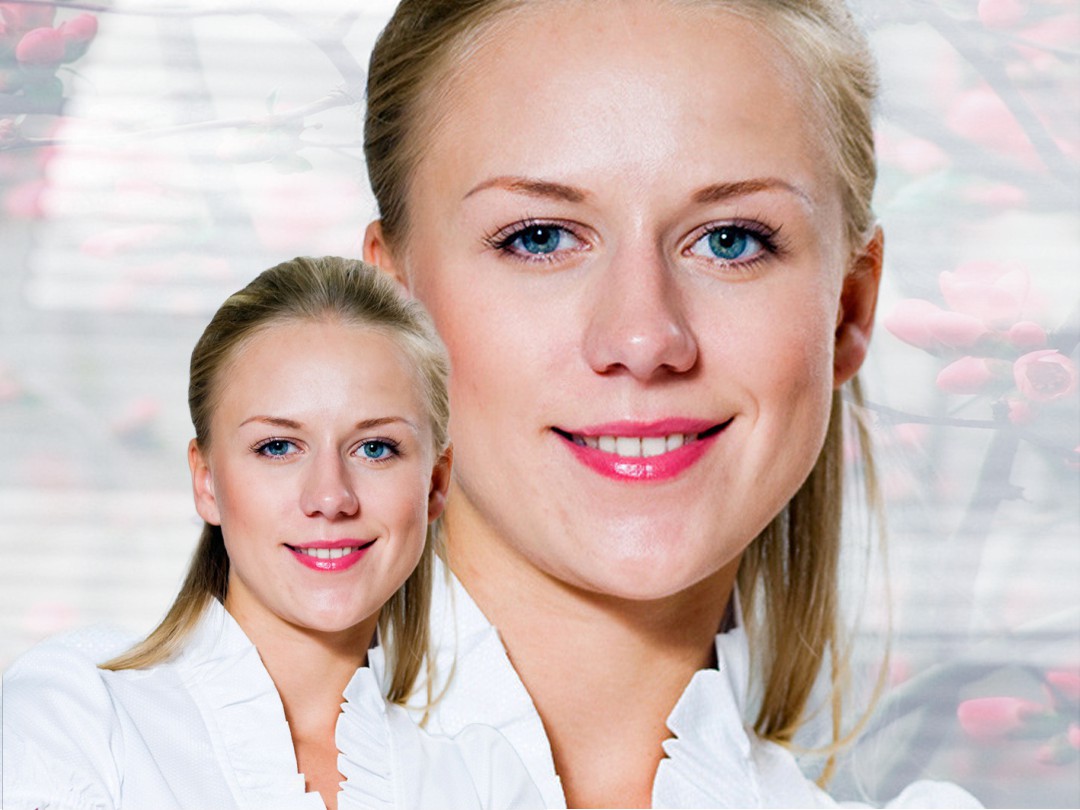 |
 |
 |
If you don’t have the ready-made template from the previous section, you can download it here.
The project with the resulting sample template described in this section can be downloaded here.
Add another user photo region (FSQR) in the Template Creator.
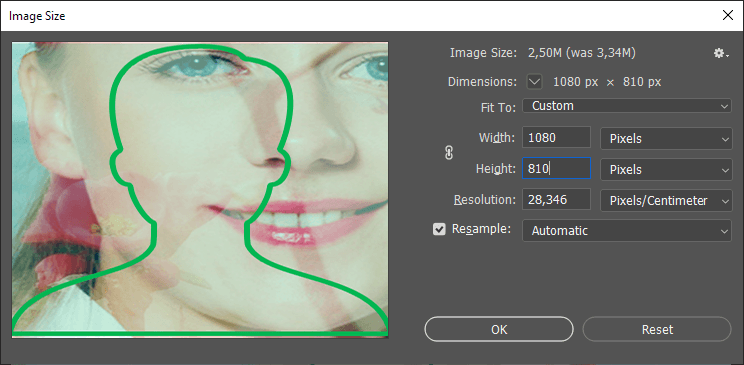
Go to Photoshop and change the image size in the main document to make the template orientation horizontal (landscape), so that we could place 2 figure regions in the template. Set the width to 1080px, and the height to 810px.
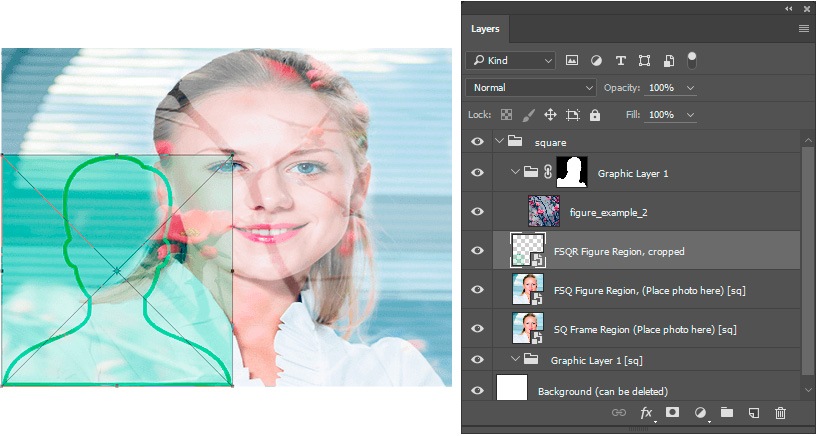
Position and scale the smart object of the FSQR figure region in the PSD document. Enable the Constrain proportions mode before you transform the smart object.
Edit / add provisional masks for smart objects.
Note that this step is optional, as well as adding test photos into smart objects of the user photo regions. If you want more visual clarity, use the provisional mask with dynamic masks and add test photos into the appropriate smart objects.
Go to the Template Creator and reparse the PSD document to export new and updated layers.
Right-click the graphic layer to open the context menu and select ‘Dynamic mask application settings…’.
The Dynamic mask editor will open. Select the new user photo region and check the box in the Invert Mask column for this region. Click OK to confirm the changes and process several test photos.
|
|
|
As you can see, the desired result has been achieved: the dynamic mask has been built for two figures and the graphic layer is applied to the the background only.
Note that a figure can be positioned differently for a FSQ region - this depends on a figure’s position in a source image. The combination of FSQ and FSQR regions shown above cannot guarantee the exact relative position of the two figures in resulting photos.
This example is for practicing purposes only. In actual practice, combining and positioning of different types of figure regions can lead to unpredictable results.
The project with the resulting sample template can be downloaded here.
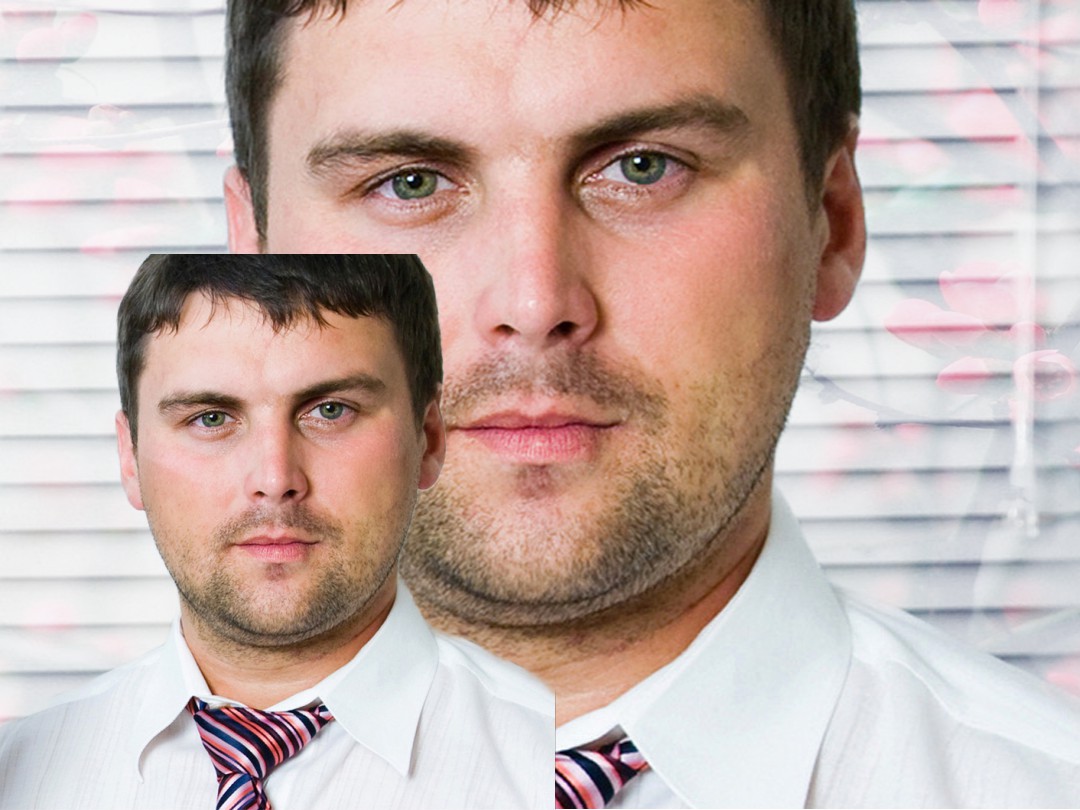
Creating a figure template with a non-inverted dynamic mask for several figures
Let us now take the template from the previous section and create its modified version, with the flowers layer applied not to the background, but to the figures. If you don’t have the template from the previous section, you can download it here.
The project with the resulting sample template described in this section can be downloaded here.
Most probably, you will do the same steps you did before (open the Dynamic mask editor and uncheck the box in the Invert Mask column). But after you process several test photos you will see that the result is not what you expected:
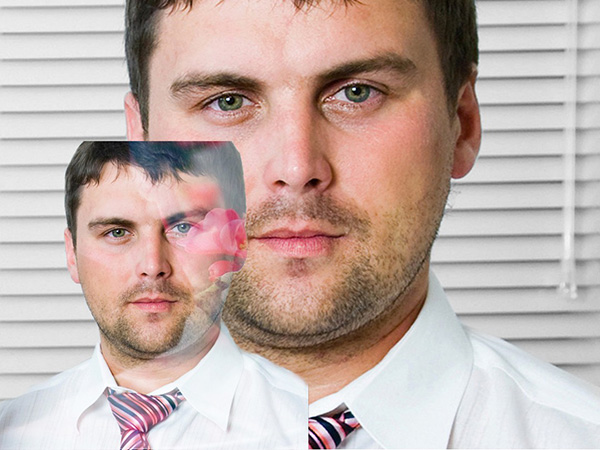
The flowers layer has appeared only in the area where the two figures overlap. This result is quite predictable as the dynamic masks based on the two figures were combined in the Multiply mode. That’s why the ‘multiplication‘ of the two masks becomes visible in the area where they overlap. You can read more about this point here.
To get the desired result, where the graphic layer with a blending mode is applied to both figures, follow the steps below:
Go to the Dynamic mask editor and uncheck the boxes in the Invert Mask column for both user photo regions. Then, set the mask compositing mode for the second user photo region to addition. The blending mode for the dynamic mask of the first user photo region is irrelevant in this case, so you can leave it as is.
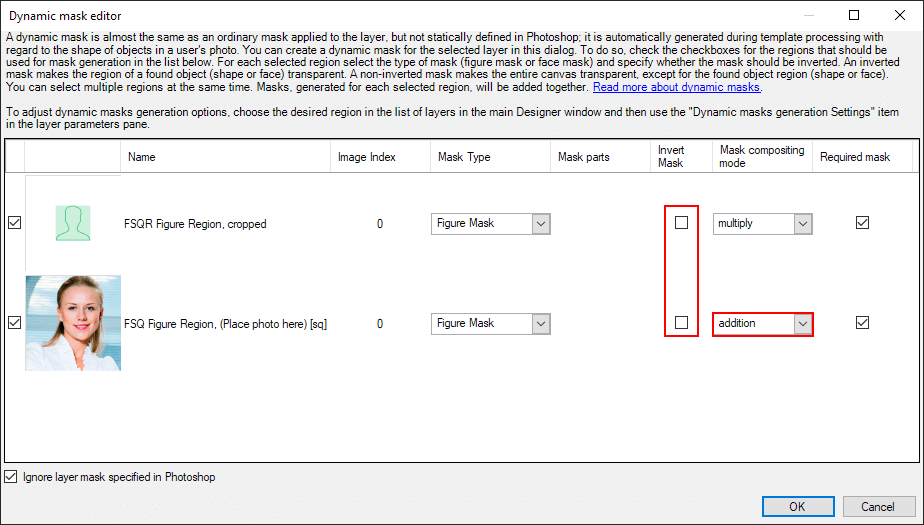
Confirm the changes and process several test photos.
 |
 |
So, we have achieved the desired result. The project with the resulting sample template described in this section can be downloaded here.
Creating a figure template using a dynamic mask with a negative eroding width value
Let's take a template from one of the previous sections (Creating a figure template with dynamic masks) and make its modified version that will add a white outline around the figure in a user photo, like shown below. You can download the above mentioned template here.
The project with the resulting sample template can be downloaded here
 |
 |
 |
Add a new graphic layer in the Template Creator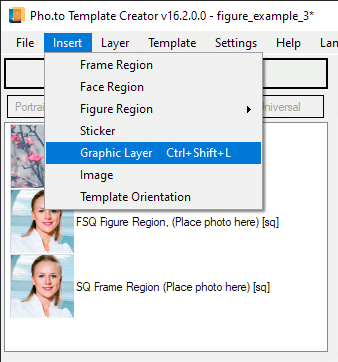
In Photoshop, select the layer in the newly created group "Graphic layer 2" and fill this layer with white.
Then, arrange the "Graphic layer 2"group between the existent user photo regions FSQand SQ.
Go back to the Template Creator and reparse PSD.
In the Template Creator, right-click the "Graphic layer 2" and select "Dynamic mask application settings…".
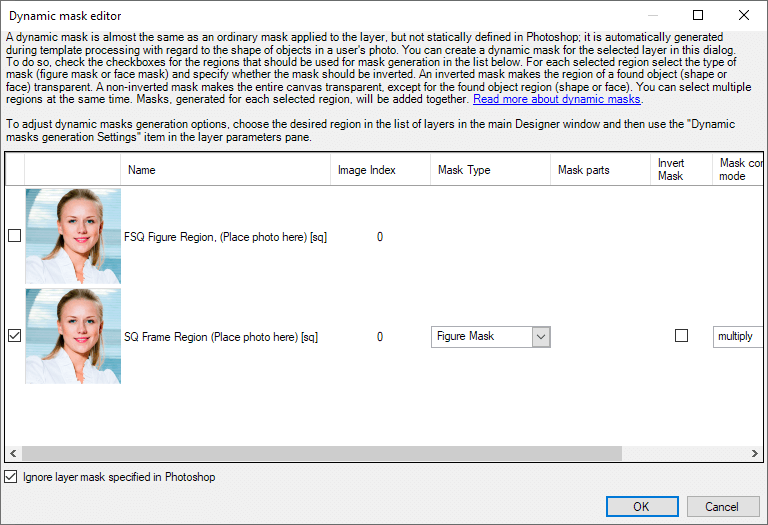
The "Dynamic mask editor" will open. Select "SQ frame region"and build a dynamic figure mask based on it.
To outline a figure, we need to change the value of the eroding width for the frame region that we have used for mask generation. Learn more about figure eroding here .
Right-click the "SQ frame region"to open its context menu and select "Dynamic mask generation settings…".
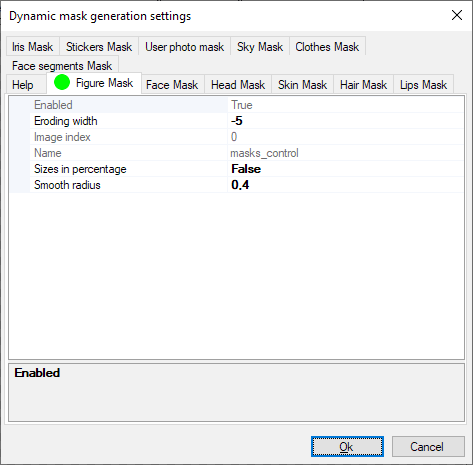
A dialog box will open. Select the "Figure mask" tab and adjust the settings as follows:
Eroding width: -5;
Smooth radius: 0,4;
Sizes in percentage: True.
Process the images and check the result.
|
|
As you can see, we have achieved the desired result. You can download the project with the resulting sample template here.