Frames development
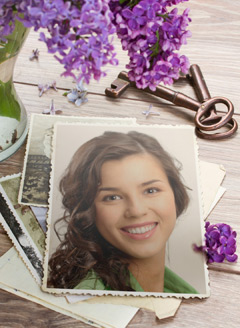
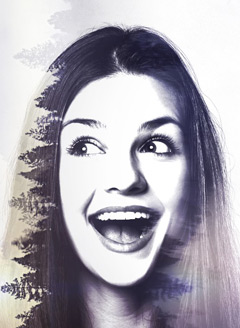
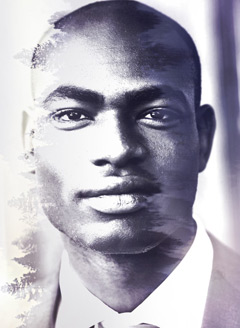
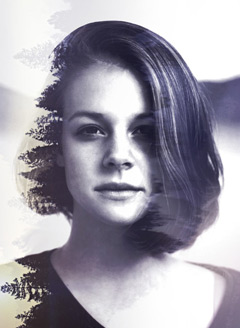
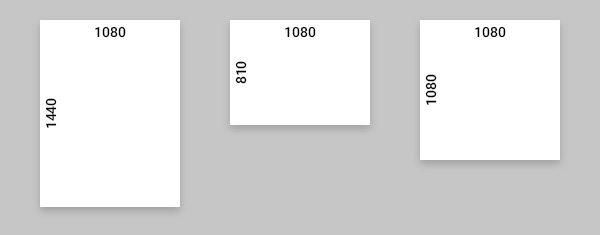
Frames are templates in which user photos are inserted using the coordinates of the corner points of a quadrangle area. This area can occupy only part of the whole image (see the example on the left) or, alternatively, the entire canvas (see the double exposure effect example on the right).


Frame templates can be found in the Photo Lab application in the "New Reality", "Double exposures", "Magazine covers" and "Amazing frames" sections. These templates often have versions for portrait, landscape and square photos.
Frame templates can be used together with stickers — all you need to do is add the ‘Rasterization’ filter in your project.
In order for a template to be properly processed by the Template Creator, it needs to have a certain structure in Photoshop. Read this page for rules and special aspects regarding layers arrangement in a PSD document.
Creating a project in the Template Creator
To work with the Template Creator, you should associate your PSD file containing layers with a .pttp2 format project file.
Use the Template Creator to generate template drafts easily. The Template Creator generates a set of groups and subgroups with valid names, minimizing the error probability while creating the template structure.
How to start: a step-by-step guide
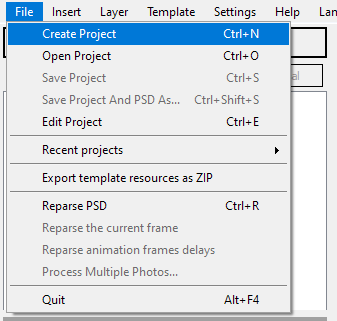
Open the Template Creator when Photoshop is already launched (if Photoshop is not running, it will start automatically when you open the Creator). Go to the "File" menu, and select "Create Project":
A dialog will open, where you need to fill in the parameters of your template and save it in a selected directory.
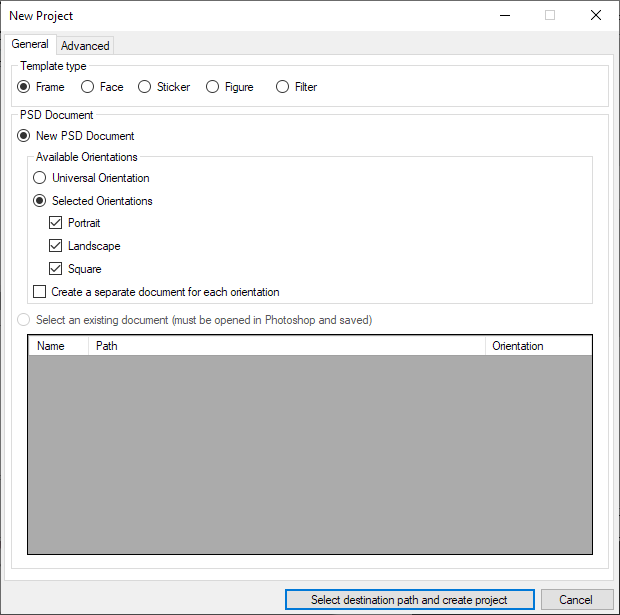
This dialog allows you to create several types of PSD documents:
- Universal orientation.
- Several orientations in a single PSD document (learn more here).
- Several orientations, with each of them stored in a separate PSD document (learn more here).
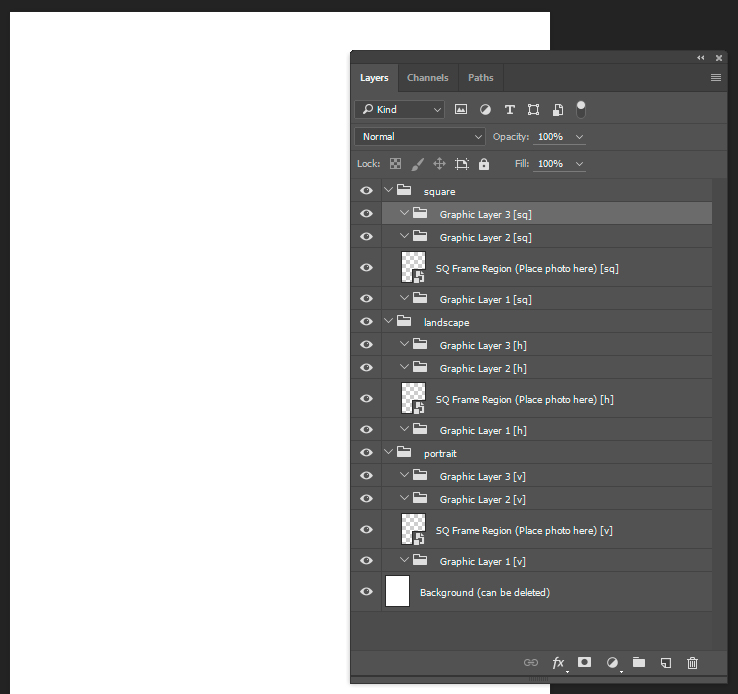
When you are done with the dialog, The Template Creator will generate a new PSD file in Photoshop. This file is associated with a new project and has the necessary structure of groups and subgroups:
If there are open documents in Photoshop, the project creation dialog will allow you to make a project based on existing documents:
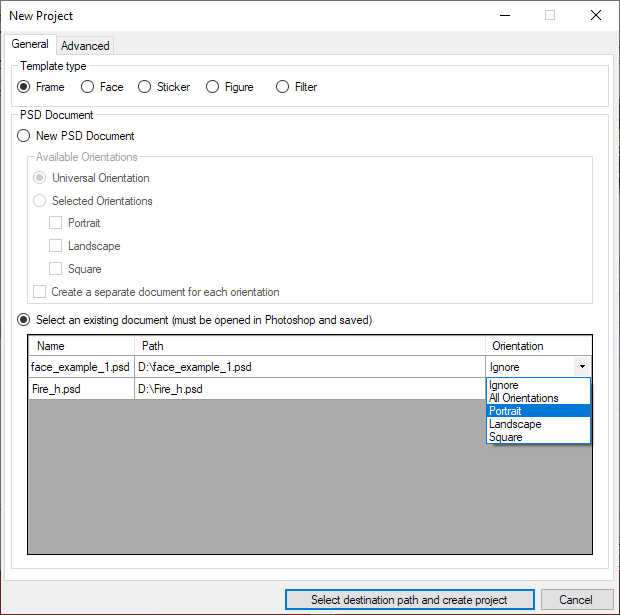
Select one or several PSD documents to include into the project, depending on your template type. To select a PSD document, specify its orientation. As a reminder: you can use several PSD documents for one template. To do so, specify an orientation for each PSD document (learn more).
You can change the binding of a PSD document to the project at any time by clicking “File” → “Edit Project” (CTRL + E).
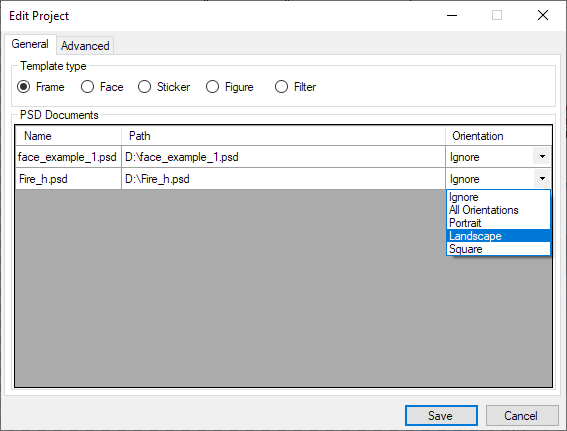
Besides, you can also change template type - it can affect the result, all other things being equal.
More information about the Template Creator and how to test ready templates can be found in this section.
Template orientations
Different orientations support
Template orientations may require PSD documents with different aspect ratio of their canvases. In such cases the Template Creator lets you store each orientation in a separate PSD document.
Duplicating template orientations
The Template Creator allows you to add additional orientations into your template.
E.g. if your template includes only one orientation at the moment, you can use it later as a prototype for other orientations of this template.
Splitting orientations into separate PSD documents
If your template has several orientations inside one PSD document, and you need to split them into separate PSD documents, use this option offered by The Template Creator.
Frame user photo region
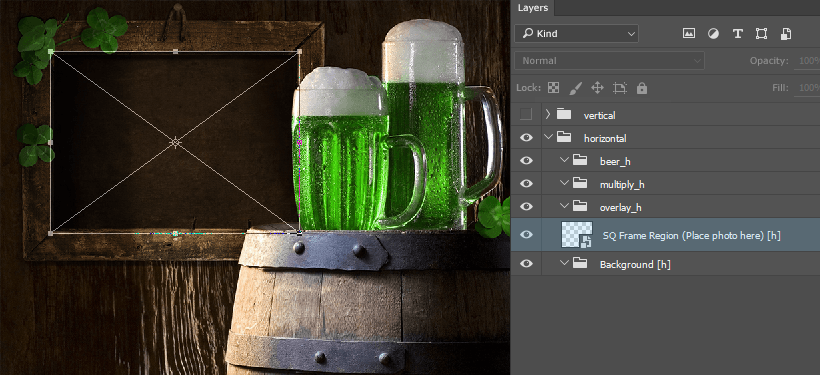
A user photo region is defined by a smart object, located on the same level as the subgroups of layers. Depending on the type of a template, these Smart Objects may have their own characteristics.
In this case, the Smart Object is a quadrangular frame which name starts with "SQ". A user photo region should be slightly larger than the hole in the base layer, to ensure that the base layer overlaps the borders of a user photo.
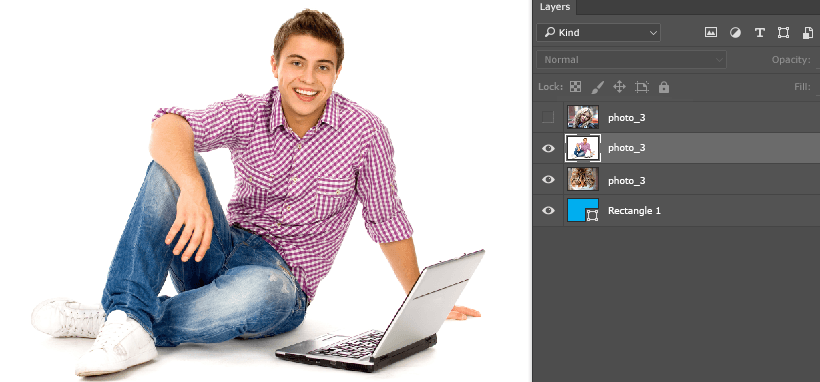
You can put test photos inside the Smart Object for additional convenience. In order to open a Smart Object, double-click on its icon:

Copy test photos to new layers, select one of them and save the Smart Object:
Let's return to the template. The test photo is located where it was intended to be. Then you can switch between test photos in the Smart Object to see them appear inside the template.
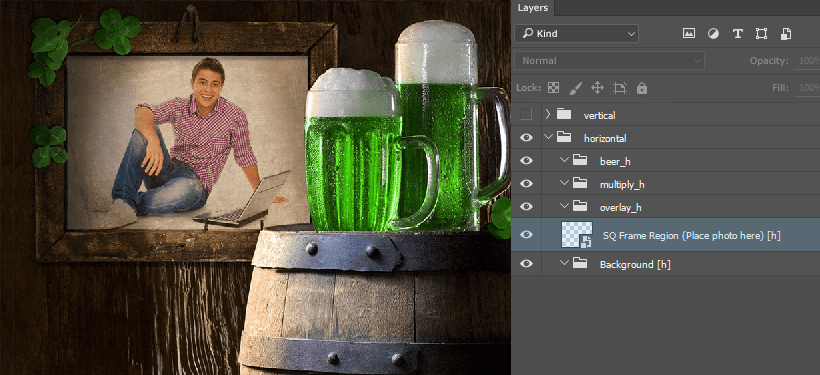
If you transform the Smart Object in your template, test photos will also be affected, and you will not have to customize the photos separately. This is especially convenient if a template has some perspective distortion.
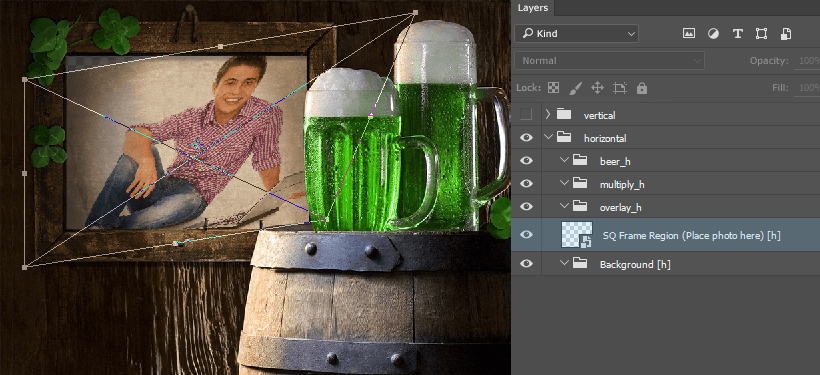
The Template Creator lets you flip smart objects of the user photo region horizontally or vertically.
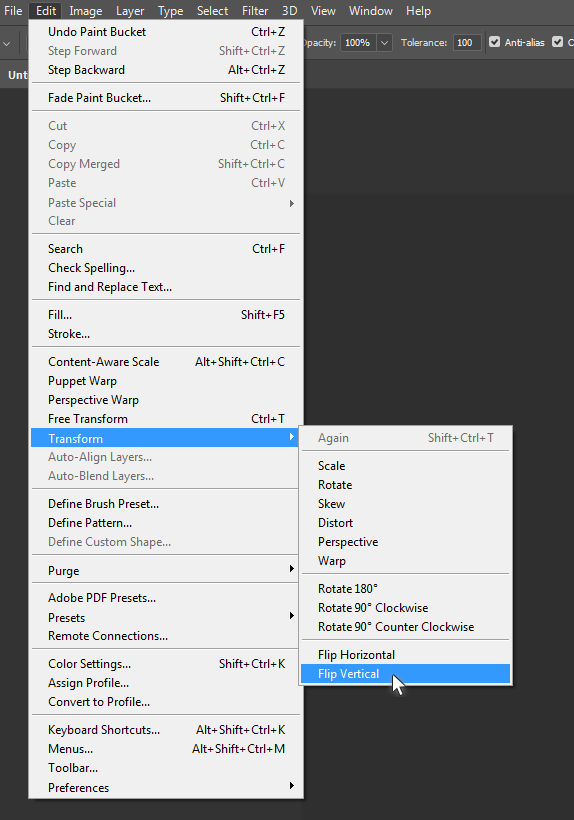
To flip a smart object of the user photo region, use standard Photoshop tools. For example, go to Edit menu → Transform → Flip Horizontal / Vertical.
When you reparse your PSD document, you tell the Template Creator that one or several user photo regions have been flipped. Later, when you process test photos, make notice that images placed into a specified user photo region are flipped horizontally or vertically.
Flipping works in the same way for all user photo regions regardless of the template type.
Additional information
Automatic resizing of templates
If a user photo is smaller than the template, the photo will be upscaled to match the template size. If the difference in their sizes is quite noticeable, the user photo will look blurred and low quality in the template.
To avoid problems related to size mismatch, use the automatic resizing option.
Creating templates with several user photos
The Template Creator makes it possible to create projects with several different user photos inside one template. Read more about it here.
Animated templates
This template type can be animated. More information on animated templates development can be found here.
There are some temporary restrictions regarding using animation in templates. Learn more about them here.
Frame templates: examples of development
Step-by-step example of developing a template with a quadrangular user photo region
Important video tutorials
- A basic template
- A quadrangular user photo region
- Making edits to a template
- A template with versions for landscape and square photos
- Elaborated templates with several user photo regions
See this page for other video tutorials (e.g. lessons about how to work with filters).