The Template Creator greatly facilitates the process of creating and testing templates, as follows:
- generates a PSD file with the necessary template structure;
- adds filters to user photos;
- makes it easy to test a template on a large number of photos simultaneously.
Download Template Creator (latest version, worker v4)
System Requirements:
- Photoshop CC (2015.5+)
- Windows 7+
You can check release notes and versions history here.
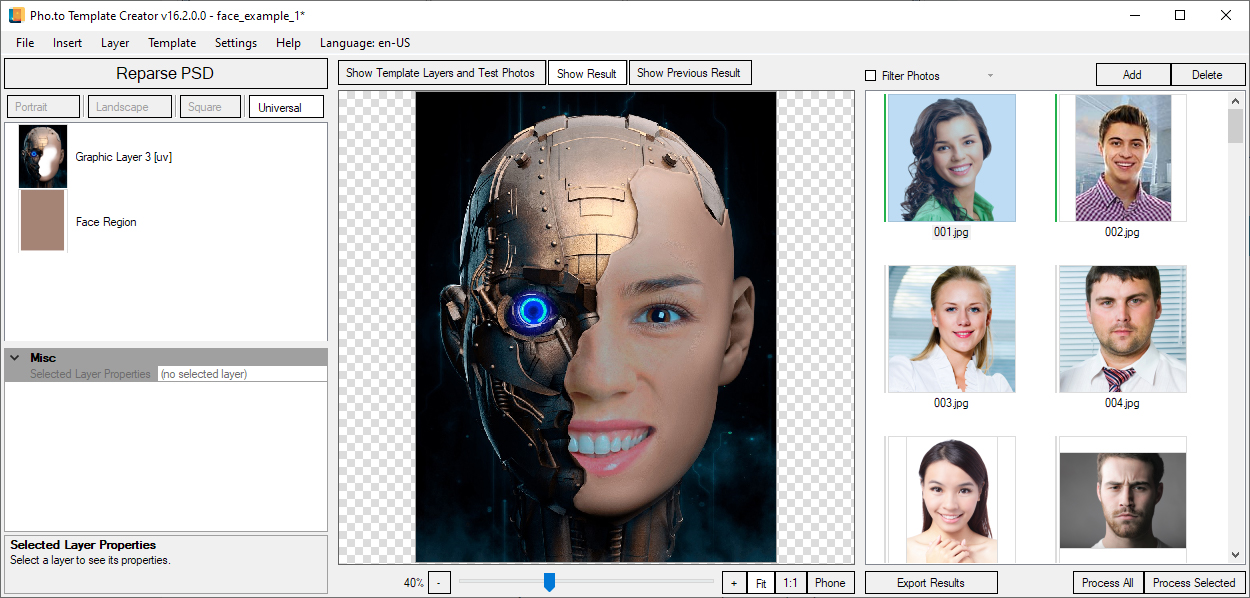
Template Creator interface
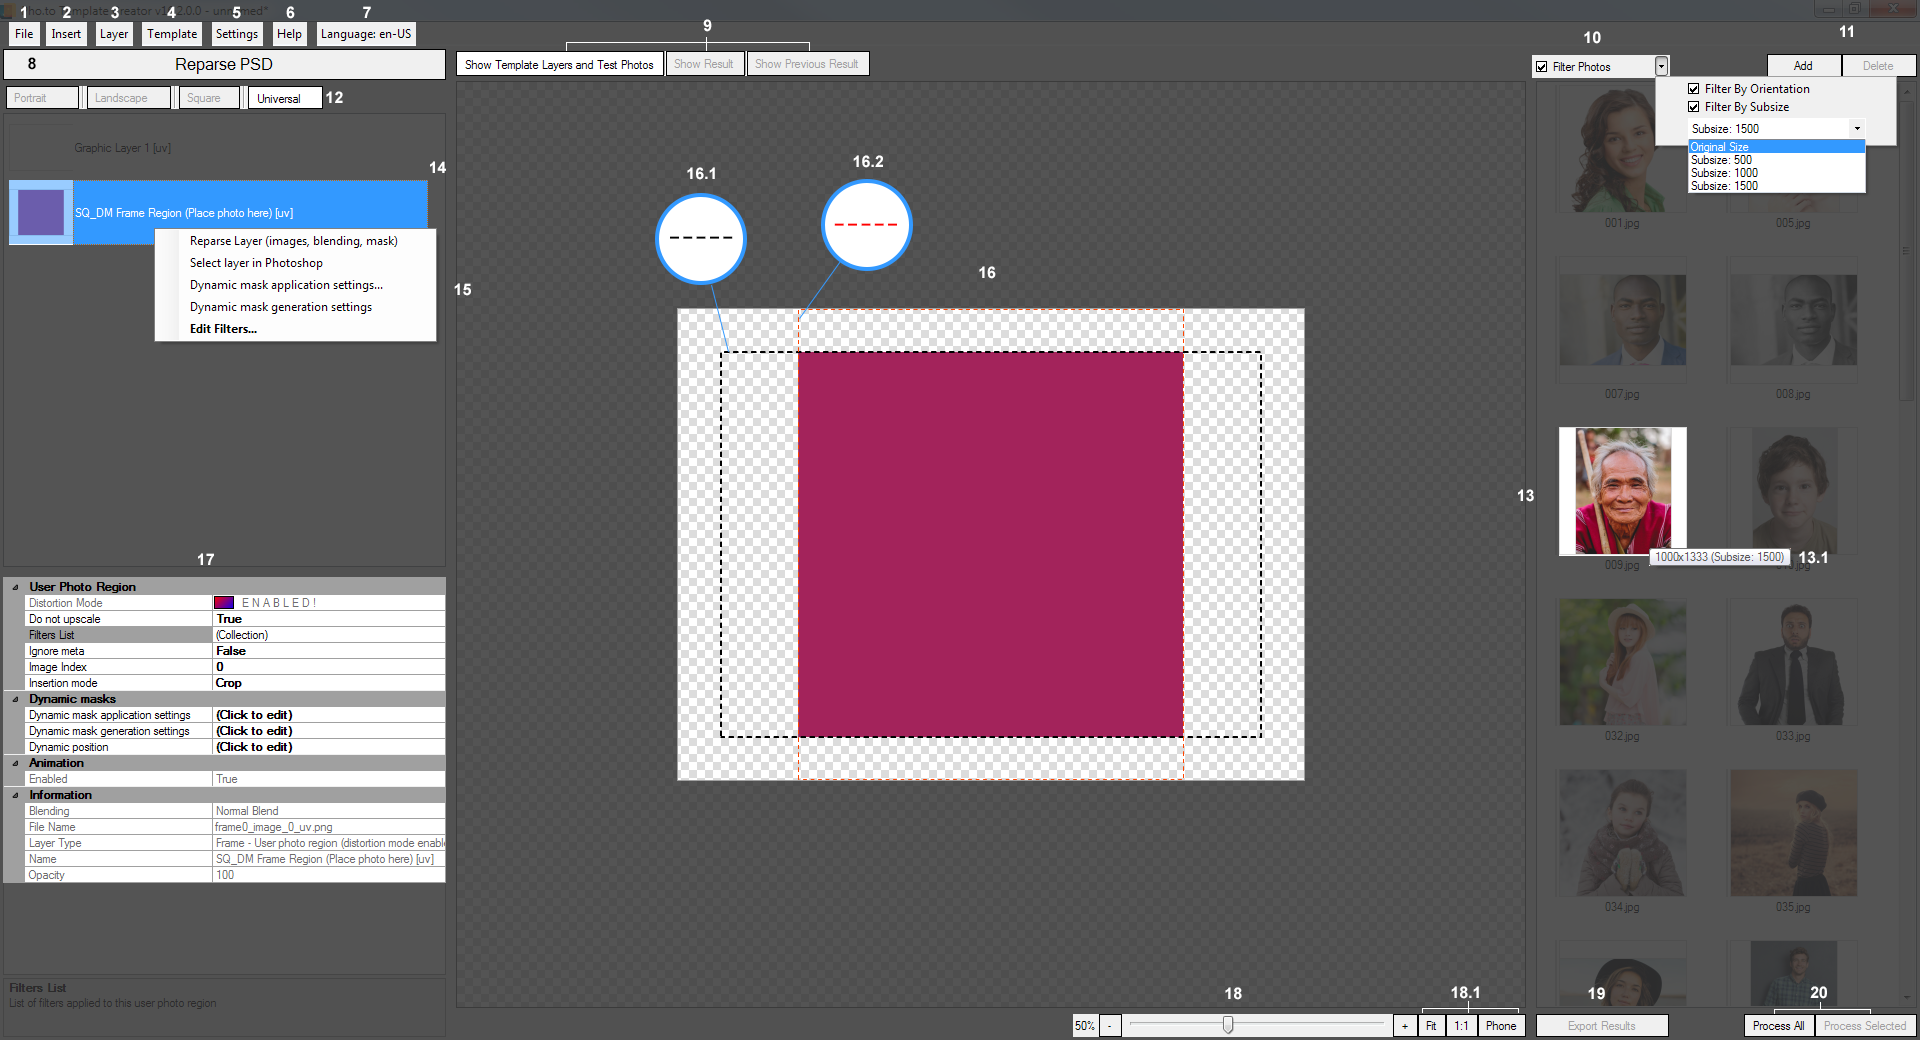
This is the Template Creator main window:
 User interface elements of the Template Creator:
-
The File menu allows you to perform main operations with the template project.
-
The Insert menu allows you to insert layers, stickers, template orientations, etc.
-
The Layer menu allows you to reparse a layer, enable or disable Distortion Mode, work with filters, dynamic masks,
dynamic position, change user photo region type while preserving all the settings.
-
The Template menu lets you split template orientations/merge them into a single Photoshop document (PSD).
It also enables you to work with frames when the animation mode is on.
-
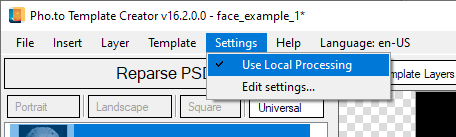
The Settings menu allows you to enable/disable the local processing mode, as well as edit settings.
-
The Help menu lets you open online help on the website dedicated to the Template Creator, download an additional set of test photos and see information about your version of the Template Creator
-
The Language menu lets you toggle the interface language (English / Russian).
-
A click on the Reparse PSD button reparses the PSD related to the current project.
-
The Show Template Layers and Test Photos / Show Result / Show Previous Result buttons let you switch between the modes that display template layers, the result of the last processing
operation and the result of the previous operation to compare the results.
You can also switch between the results of processing by pressing the Ctrl button while clicking on a processed image.
-
The Filter Photos checkbox lets you filter test images by their orientation and/or subsize. To specify how exactly you want to filter photos, open the drop-down menu by clicking the small arrow on the right.
-
The Add / Delete buttons let you edit the list of available test photos.
-
The Portrait / Landscape / Square / Universal buttons allow you to display the layers contained in a selected template orientation.
-
Test photo
-
A hint showing the actual size of a photo as well as the sub-size that will be used when the photo is processed (if the template uses sub-size).
-
A template layer (in this particular case, it is a frame region).
-
Layer context menu. This menu can look different depending on a layer type.
-
The preview picture of a selected layer / test photo/ result of processing.
- The black dotted frame indicates the border of a template canvas.
- The red dotted frame indicates the border of the user photo region.
-
The list of parameters of a selected layer.
-
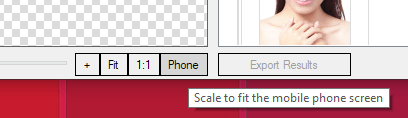
Preview image zoom scale.
- Zoom buttons: Fit — fit a preview picture to the window by its longer side, 1:1 — display a preview picture in its actual size (100%), Phone — scale a preview picture down to a mobile phone screen size.
- Export Results — export results of processing by the current template into a specified folder.
- Process All / Process Selected — buttons used to process all or only selected test photos.
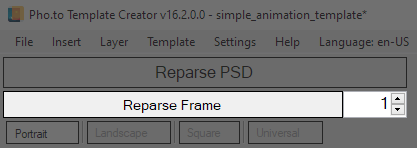
When the animation mode is on, several important control elements are added into the user interface. First of all, you will find the
Reparse Frame button on the main screen, as well as the field where you specify its number.
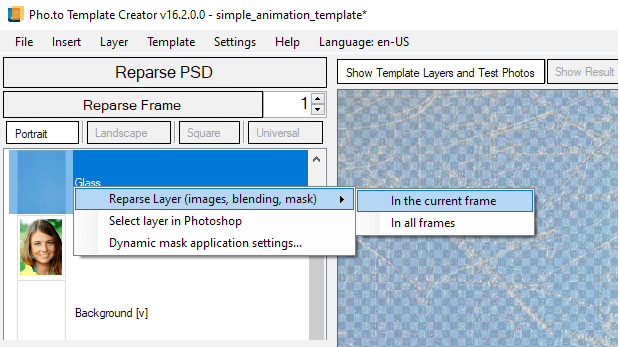
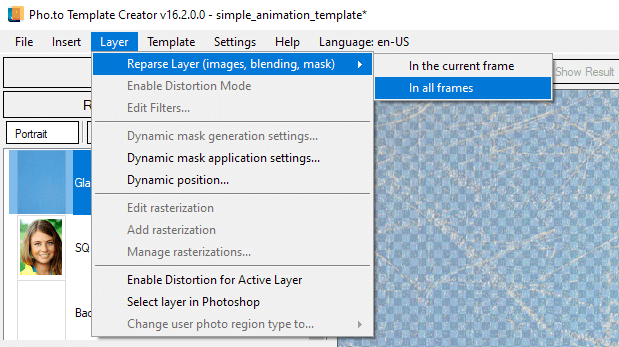
Further on, there is an option to reparse each layer either in the current frame, or in all frames. You can do so in two ways:
- via the layer context menu,
- via the Layer menu > Reparse Layer (...).
|
|
| Via the layer context menu |
Via the Layer menu |
The template testing dialog with multiple test photos:

The Template Creator settings window:
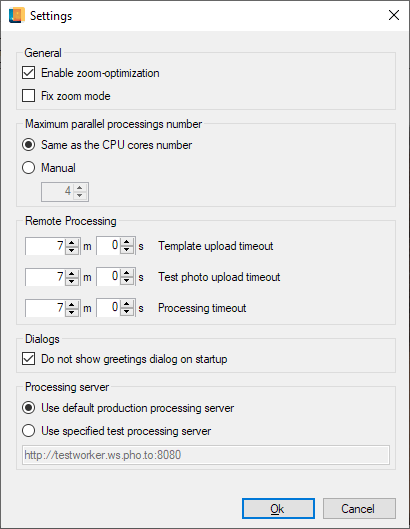
The settings window consists of several panels; each panel contains differently targeted settings.
- General settings:
- Enable zoom-optimization — this option makes it possible to accelerate the PSD reparsing process on some computers. If this option
is enabled, the Template Creator scales a Photoshop document (PSD) down to the minimum during reparsing.
When reparsing is finished, the PSD is returned to its original scale.
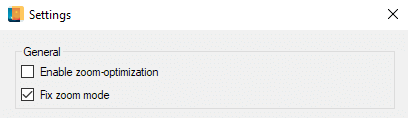
- Fix zoom mode — this option allows you to automatically scale any preview picture (a layer, a test photo or a processing result) when switching them over, to scale it down to a mobile phone screen size or to make it fit the preview area of the Template Creator. To take advantage of the Fix zoom mode, check this option box, then go to the Template Creator main window and click Fit or Phone in the preview area.
|
|
| Fixing zoom mode in the settings window |
Setting a scaling preset |
- Maximum parallel processings number:
- Same as the CPU cores number
- Manual
In this settings panel, you can specify how many parallel processings of test photos the Template Creator will perform. The number of parallel processings, in its turn, can affect the processing speed of a large number of test photos. If you have a high-power computer, you can check the Manual option and increase the value (which, by default, is the same as the CPU cores number). If your computer is low-power, you can select this option and, on the contrary, decrease the default value.
However, the Same as the CPU cores number option (which is set by default) suits most computers perfectly.
- Remote Processing:
- Template upload timeout
- Test photo upload timeout
- Processing timeout
Remote processing settings let you set timeouts for different operations.
Timeout in this case is time allowed for performing a certain operation. After the specified timeout expires, the operation is aborted. If the Internet connection speed is low, you may increase timeouts for these operations.
The Test photo upload timeout parameter appears in two cases:
1. During remote processing - it is the timeout for uploading a test photo.
2. During local processing - it is the timeout for uploading an intermediary result to S3 when working with neurofilters / extracting figures / building dynamic masks, etc.
So, if you often get the following error: ‘Error uploading to S3’, it might be helpful to adjust this parameter.
The default timeout for each operation is 7 minutes, which is sufficient in most cases.
- Dialogs:
- Do not show greetings dialog on startup
Check this box if you don’t want to display the startup dialog that appears immediately after the Template
Creator is launched and allows you to create / open a project or reparse PSD in case there is a document open in Photoshop.
- Processing server
- Use default production processing server
- Use specified test processing server
Use this option to switch between the production server and the test server. The test server is intended for
beta testing of features that are in development. Templates created on the production server and processed on
a test server can produce a result different from expected. And vice versa: if a template was created on a
test server, it should not be processed on the production server. The test server URL can be obtained directly
from the developers.
Creating a template project
A template project consists of a .pttp2 project file and a PSD file. The Template Creator lets you create a project file together with a PSD file.
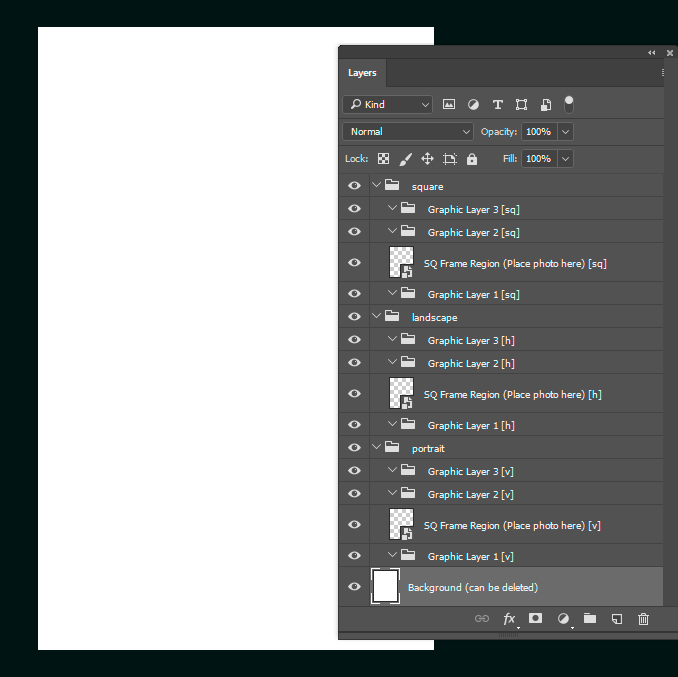
The Template Creator allows you to generate drafts for all types of templates. It generates a set of groups and subgroups with valid names, minimizing the error probability while creating the template structure.
As soon as you launch the Template Creator, Photoshop will start automatically (if it is not already open). The Template Creator startup dialog (The Beginning) will appear. It lets you create / open a project or reparse a PSD file open in Photoshop.
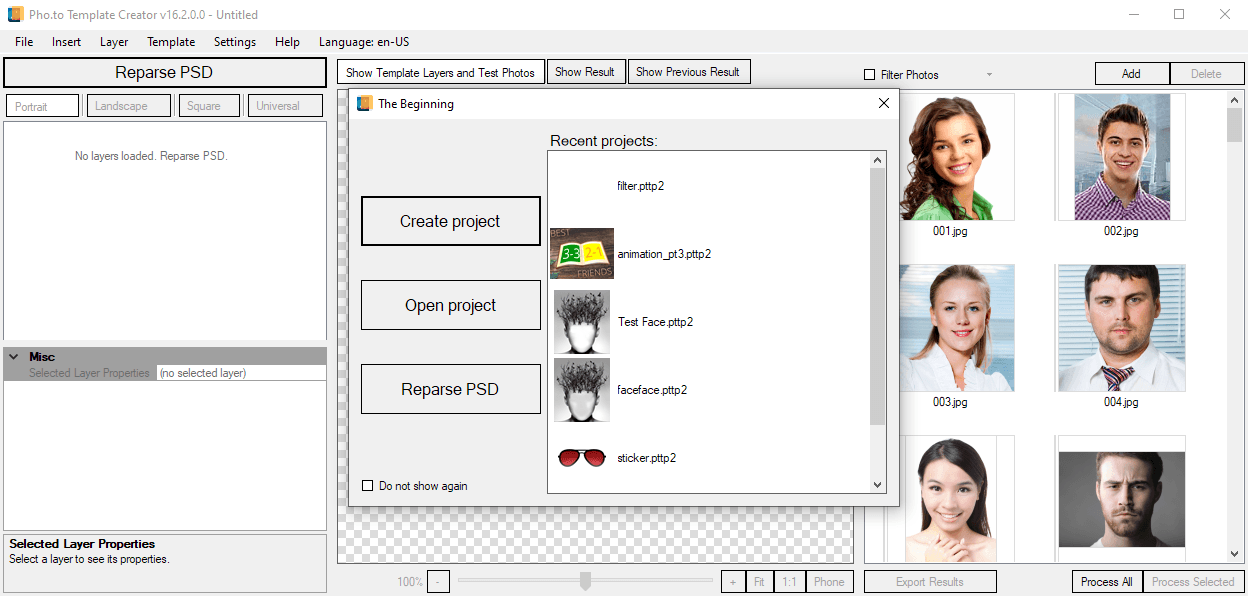
You can ignore this dialog, or even disable it from appearing each time you launch the Template Creator, if it bothers you.
Alternatively, to create a new project, go to the "File" menu and select "Create Project".
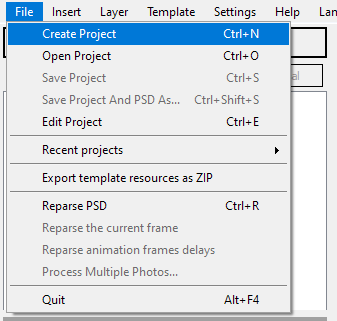
A dialog will open, where you need to fill the parameters of your template and save it in a selected directory.
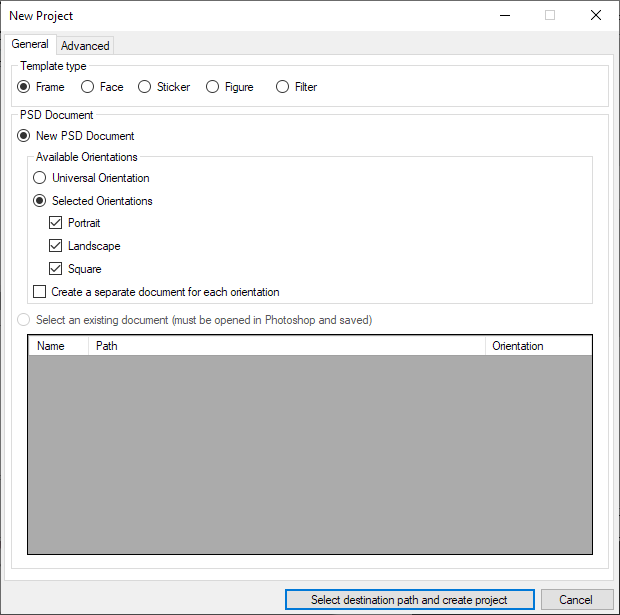
The new project dialog allows you to:
- Select a project type. Depending on a project type, the Template Creator generates drafts with different structure in a Photoshop document (PSD). Also, different template types let you employ different artistic means.
- Specify template orientation:
-
Universal orientation.
-
Several orientations inside the same document (more information here).
-
Several orientations, while each of them will be stored in a separate document.
- Create a project based on existing PSD files open in Photoshop.
- Specify sub-sizes.
- Tell the Template Creator to avoid photo scaling, that is not to scale up user photos when processed by the template (automatic resizing of templates).
- Use animation in your template.
If you selected the ‘New PSD document’ option, the Template Creator will generate a new PSD file in Photoshop. This file is associated with a new project and has the necessary structure of groups and subgroups of layers, according to your project settings.
If there are open documents in Photoshop, the new project dialog will allow you to make a project based on an existing document:
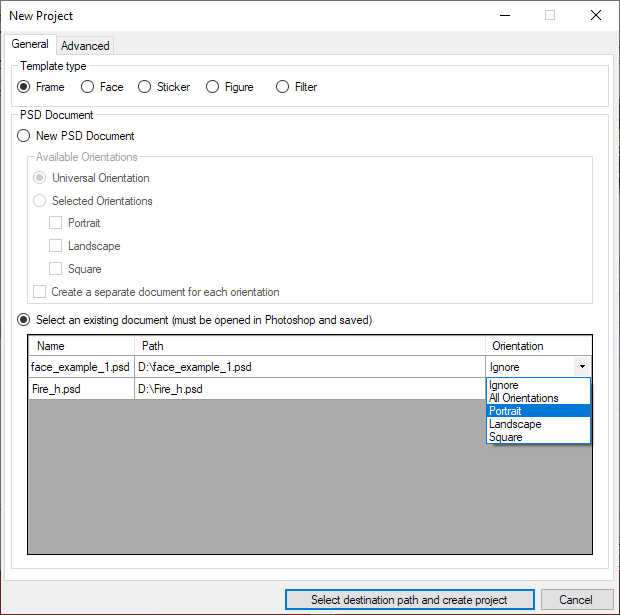
Select one or several PSD documents to include into the project, depending on your template type. To select a PSD document from the list of existing ones, specify its orientation using the drop-down list on the right. As a reminder, you can use several PSD documents in one template. In this case, specify an orientation for each of them.
Binded PSDs as well as other parameters of the project can be changed , if needed, after the project was created.
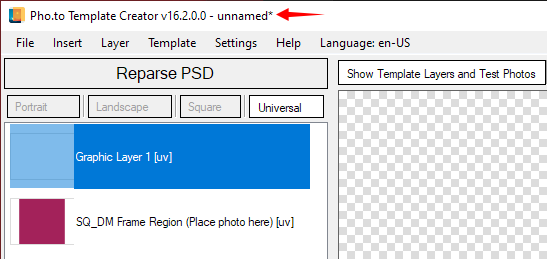
When you finish working with your template, be sure to save the project. If there are unsaved changes in your project, an asterisk will appear in the Template Creator window title bar.
Saving a project means that only the project file is saved; changes in the PSD document are not saved automatically. Save your PSD document manually, if needed.
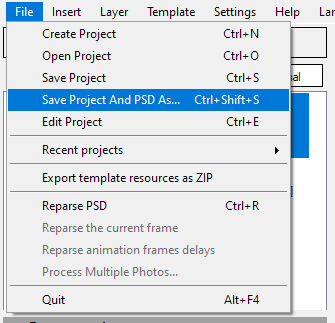
Besides, you can use the Save Project and PSD as option letting you save the project file and related PSD documents with a new file name.
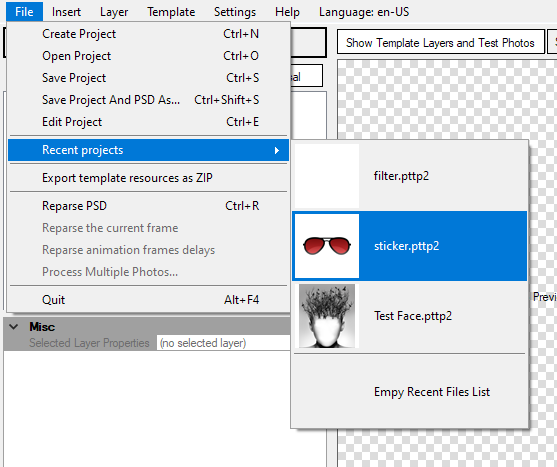
You can see the projects you recently worked with, if you select File -> Recent Projects.
If you want to work with several projects at the same time, launch a separate copy of the Template Creator for each of them.
Editing Project
It is possible to edit the an existing template project. To do that, open the Edit Project window via File — Edit Project (Ctrl+E).

In the tab General you can:
- change the type of a template;
- change the PSD, assigned to the project files
- change the orientation of the assigned PSD.
Please note that changing the project type may affect the result.

The Advanced tab will let you:
Editing Preprocess Rules
The list of preprocess rules may be edited in the Edit Preprocess Rules window.
The preprocess lets the user modify the list of input photos according to the set conditions before processing them with the template.
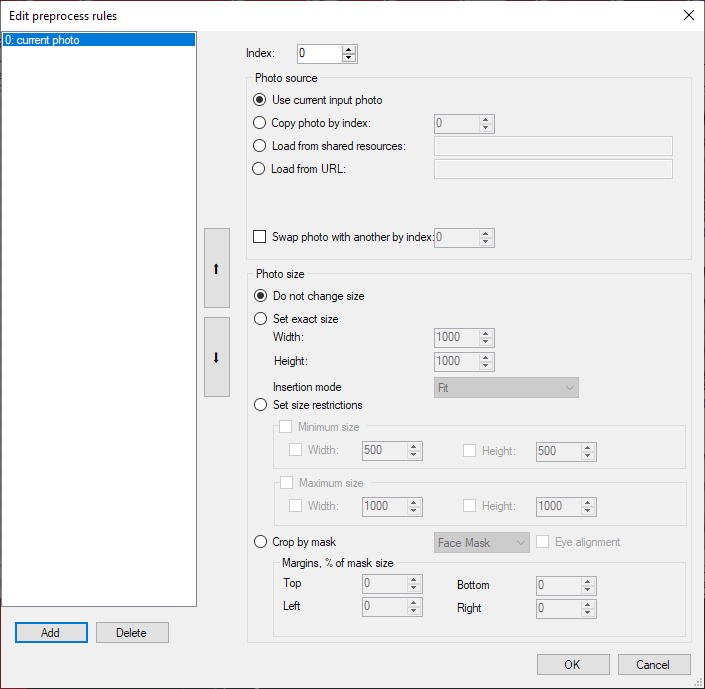
Possibilites of the Preprocess Rules Editor:
- add or delete a new rule;
- specify the source of the input photo
- use the current input photo;
- use copy of a photo with specified index (available in templates with several photos);
- use photo from the worker common resources (specify address in the folder);
- load from URL (specify http address. NOT https!);
- Swap input photos by index;
- resize the input photo
- use the original size of the input photo;
- set exact size (and specify the insertion mode);
- Set size restrictions (specify the minimum and maximum size);
- crop the input photo by mask ( by figure, by face, by head).
Working on multiple projects simultaneously
You can launch several copies of the Template Creator at the same time and work with them in parallel. It can be very convenient if you work with similar templates, or if you want to reproduce a trick used in one template in another one. For instance, you can copy user photo region filters from one project and paste them into another one opened in another copy of the Template Creator.
However, there are some restrictions you should know about when using several copies of the Template Creator:
- You cannot open the same project in several copies of the Template Creator.
- You cannot perform simultaneous actions that need Photoshop*, such as:
- creating a document;
- reparsing something;
- enabling Distortion Mode;
- inserting orientations / layers / user photo regions.
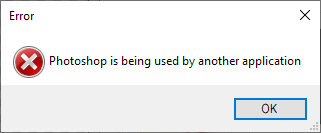
* Performing two operations simultaneously means that an operation has been launched in one Template Creator, and it is still running when the same operation is launched in another copy of the Template Creator. The task queue appears, and a new operation in Photoshop can be performed only after the previous one is completed. The Template Creator will let you know that Photoshop is busy with the following error message
Working with filters
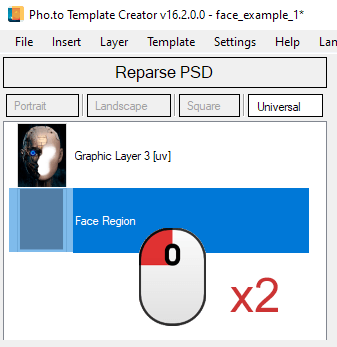
To start working with filters, open the ‘Filter settings for User Photo Region’ dialog in the Template Creator. To open the dialog, use one of the methods below:
- Double-click a user photo region layer:
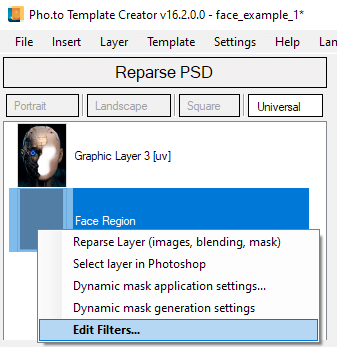
- Right-click a user photo region layer and select Edit filters... from the context menu:
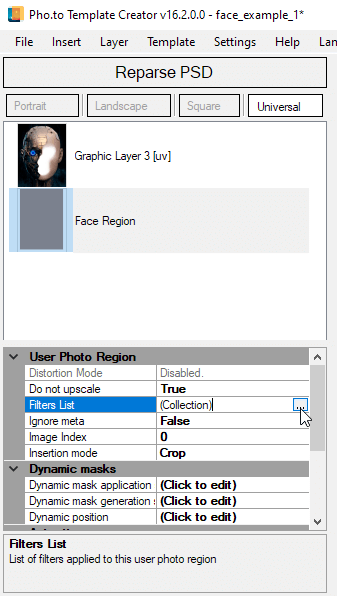
- Find the filters list in the selected layer info panel:
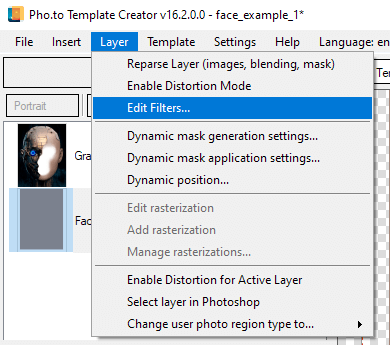
- Go to the Layer menu and select Edit filters…:
The filter settings dialog contains 3 columns:
- The left column shows filters added to the current user photo region.
- The middle column displays parameters of a filter selected in the left column.
- The right column contains preview area of all filters in the list or only current filter.

You can add filters using one of the methods below:
- Click the Add... button to open the ‘Add new filter’ dialog.
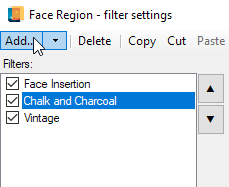
- Click the small arrow to the right of the Add... button and select a filter from the context menu (the context menu can also be opened by right-clicking the Add... button)
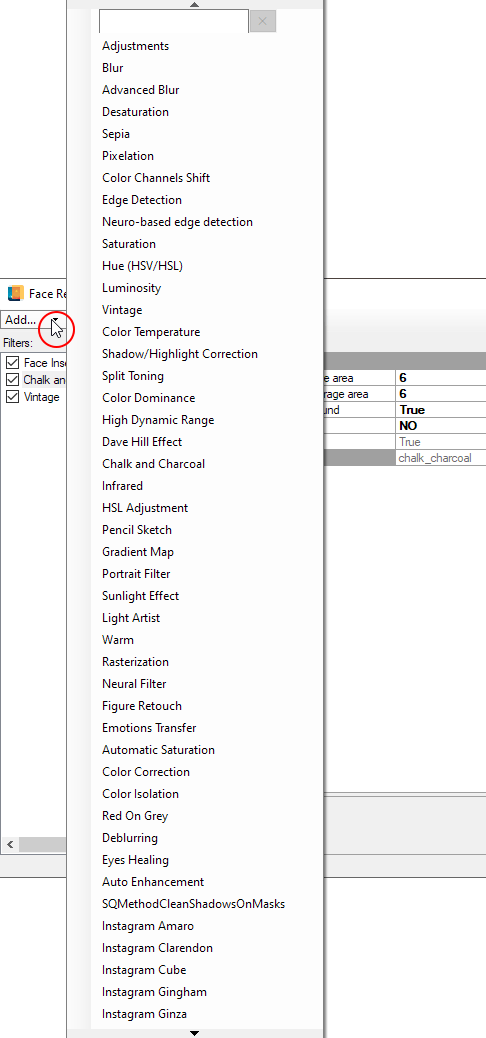
The ‘Add new filter’ dialog contains two columns. The left column shows the list of filters; the right column displays information on the current filter.
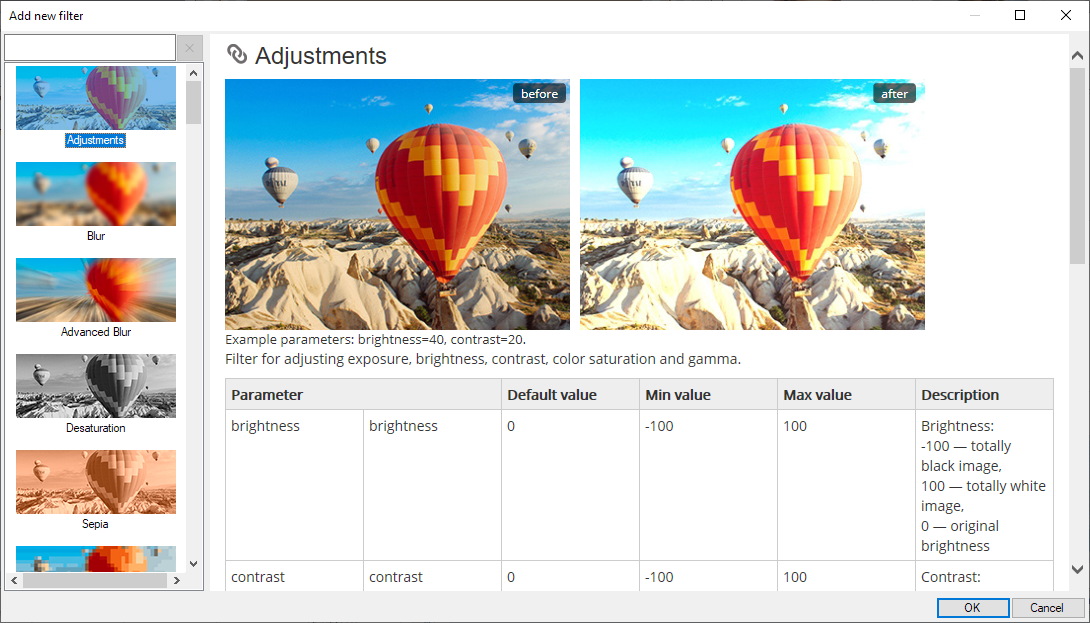
Filters can be searched by name. To do so, start typing a filter name in the search field in the left column. Selecting a filter in the left column and clicking OK in the bottom right corner will add the filter to the current user photo region.
Filters are added in sequence, one after another, but you can shuffle them (change their order), as well as add, remove, copy and move them in the way you want it.
Filters can be copied and moved:
- inside one orientation;
- from one orientation into another;
- from one project into another.
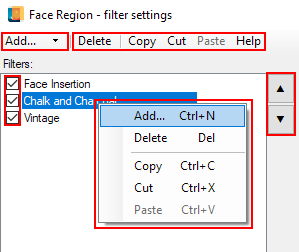
You can perform different operations on added filters using the following:
- use the arrows to the right of the list of added filters to change the order of the filters (move a filter up or down in the list);
- use the buttons above the filters list to remove, copy, cut and paste filters;
- use your mouse to drag and drop, as well as copy, paste and remove via the context menu;
- use the ‘Add’ context menu to add filters;
- use the check boxes in the list of added filters to temporarily disable a filter / filters.
Changing the order of filters application affects the eventual result.
Talking about copying and disabling filters, we must pay special attention to Face Insertion, Figure Extraction and Rasterization filters.
The copying filters option cannot be applied to the Face Insertion and Figure Extraction filters. Instead of copying the Face Insertion filter, you can copy the face region in the PSD document or create a new face region with the help of the Template Creator. The Face insertion filter will be added automatically when you reparse the document.
In a similar way, instead of copying the Figure Extraction filter, you can copy the figure region in the PSD document or create a new figure region with the help of the Template Creator. The Figure Extraction filter will be added automatically when you reparse the document.
As for disabling filters, it should be kept in mind that the Face insertion and Figure Extraction filters
cannot be disabled since they act as important structural components of a template and determine its composition.
When copying the Rasterization filter, make sure that the correct sticker is specified in the copied filter settings.
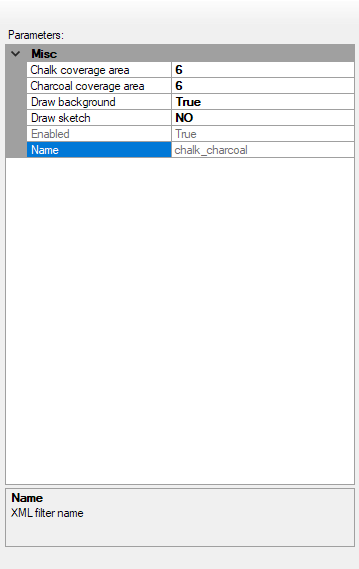
You can edit the settings of a selected filter in the middle column. At the bottom of the column you can see brief context help messages for a selected parameter.
If you want to specify a non-integral value in one of the filter parameters, please use decimals. A comma or a period are used as a delimiter, depending on system regional settings. In case you use an invalid delimiter, the Template Creator will warn you about that with an error message. If you have trouble using a a period as a delimiter, try using a comma instead, and vice versa.
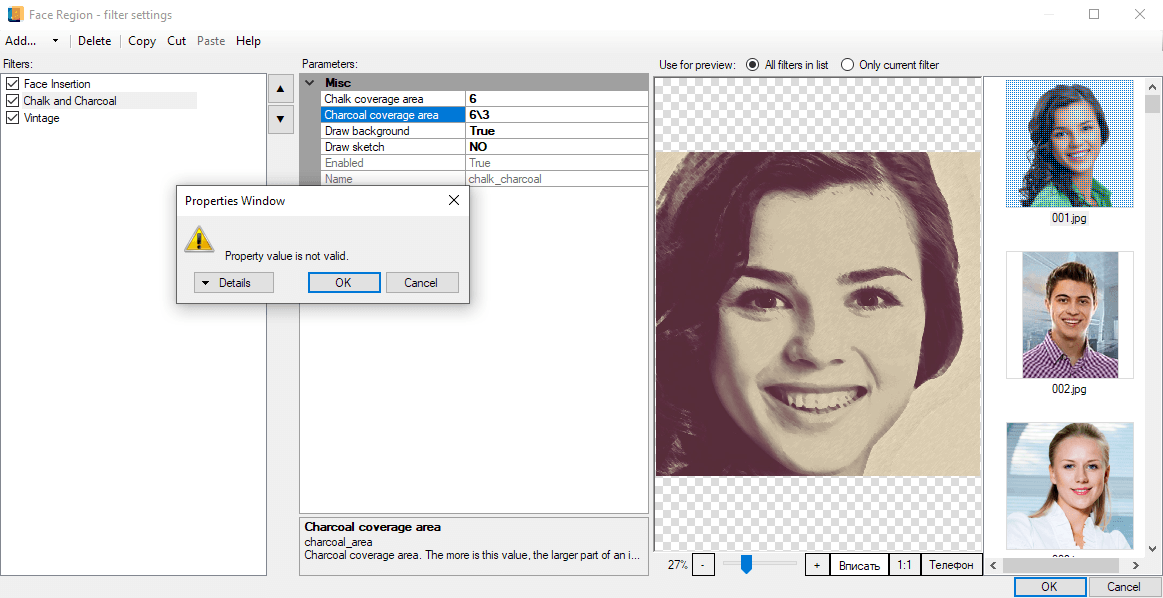
The right side of the filter settings dialog contains preview area.
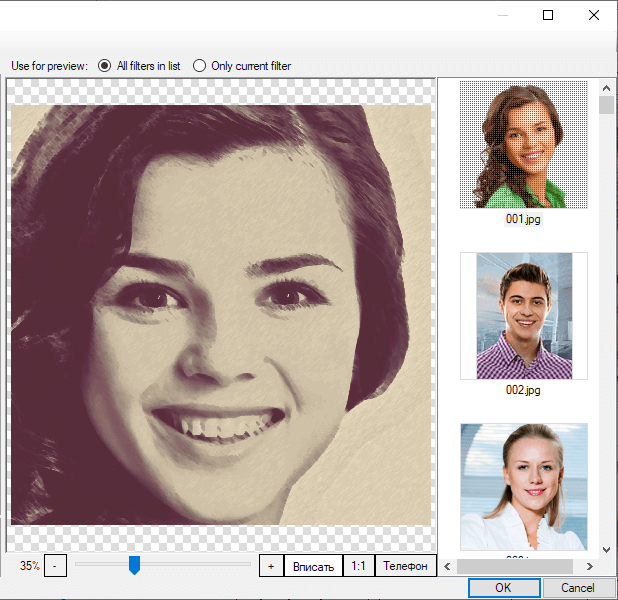
The preview area has several limitations:
-
The preview area does not display the whole template, but only a user photo with applied filters from the list.
No other settings of user photo region are used.
-
The preview area only supports local processing of whitelisted photos.
- The Use for preview radio buttons on top of the window let you switch between showing all filters from the list and only one filter selected in the list.
-
Some filters require internet connection for processing.
Click the Help button (or press the F1 key) to display the filters on-line documentation on the Template Creator website.
If you need help regarding a particular filter, select it in the list first. In this case a built-in help section dedicated to this particular filter will open.
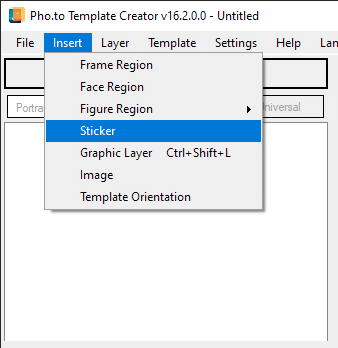
Working with stickers
To add a sticker into your project, select Insert > Sticker from the menu.
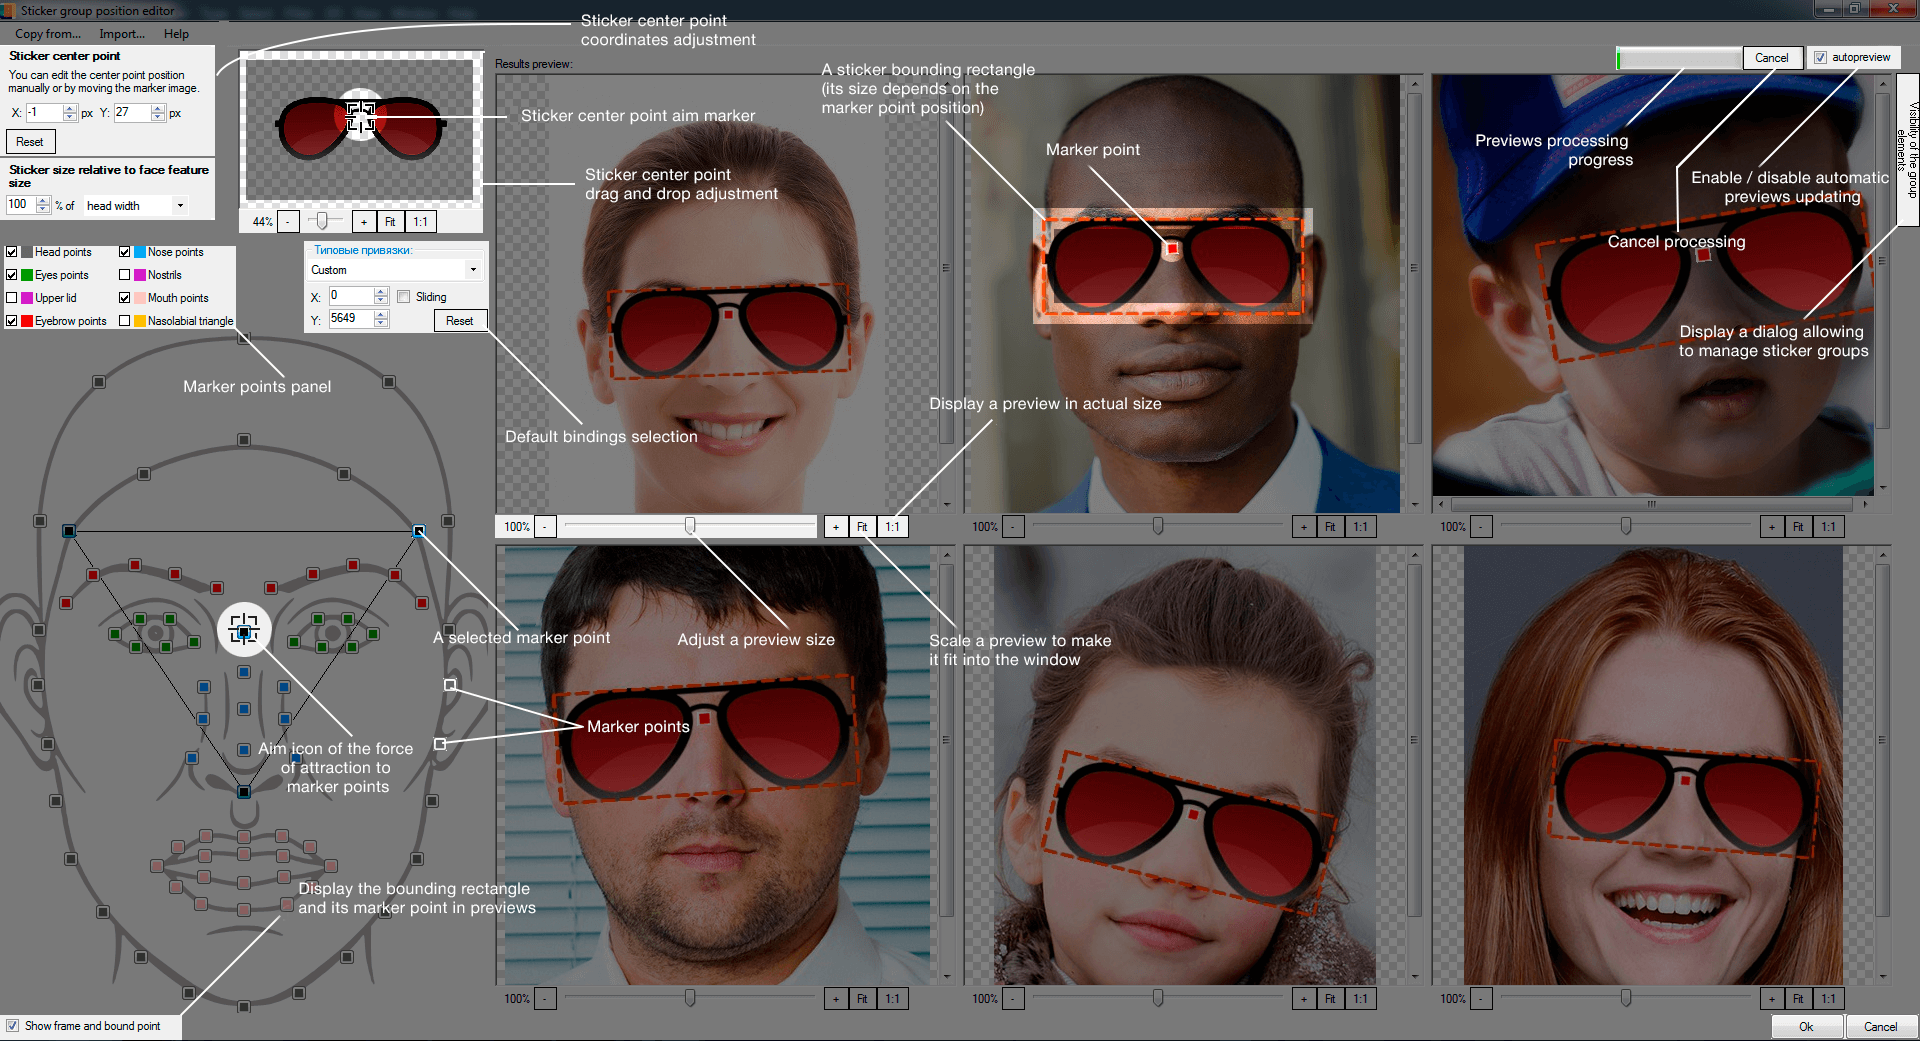
The position of each sticker (or group of stickers) is determined with the help of the sticker position editor (or sticker group position editor). To open the sticker position editor, do one of the following:
- Right-click a sticker layer to open its context menu, then select Edit rasterization > Frame Region > Rasterization.
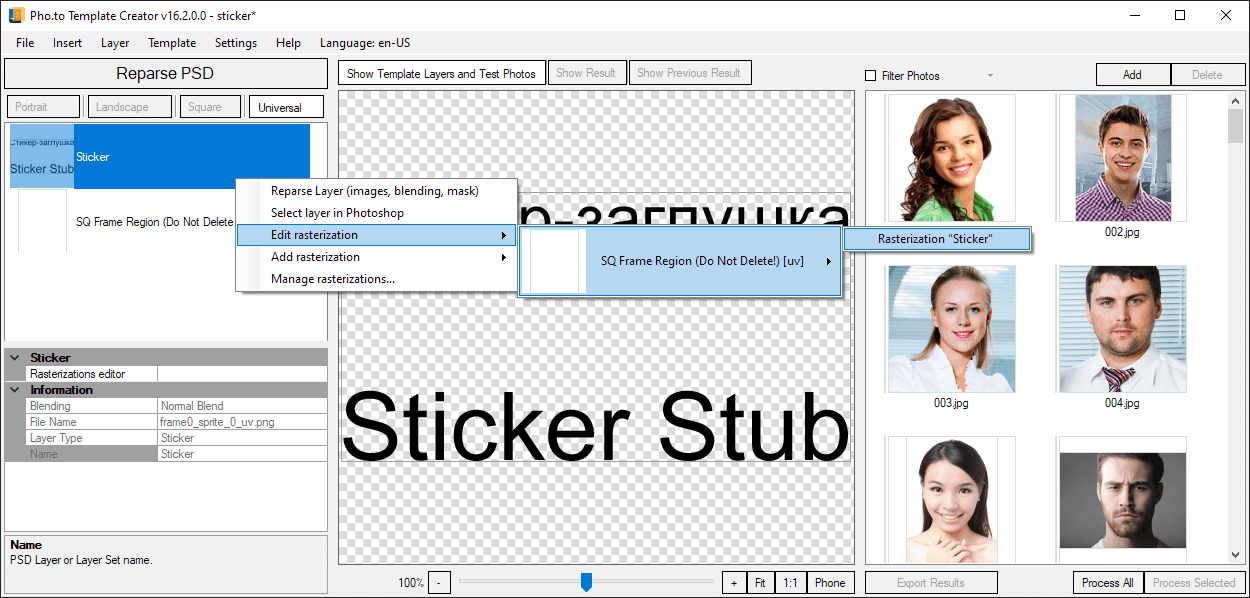
- Select a sticker layer, then go Layer > Edit rasterization > Frame Region > Rasterization.
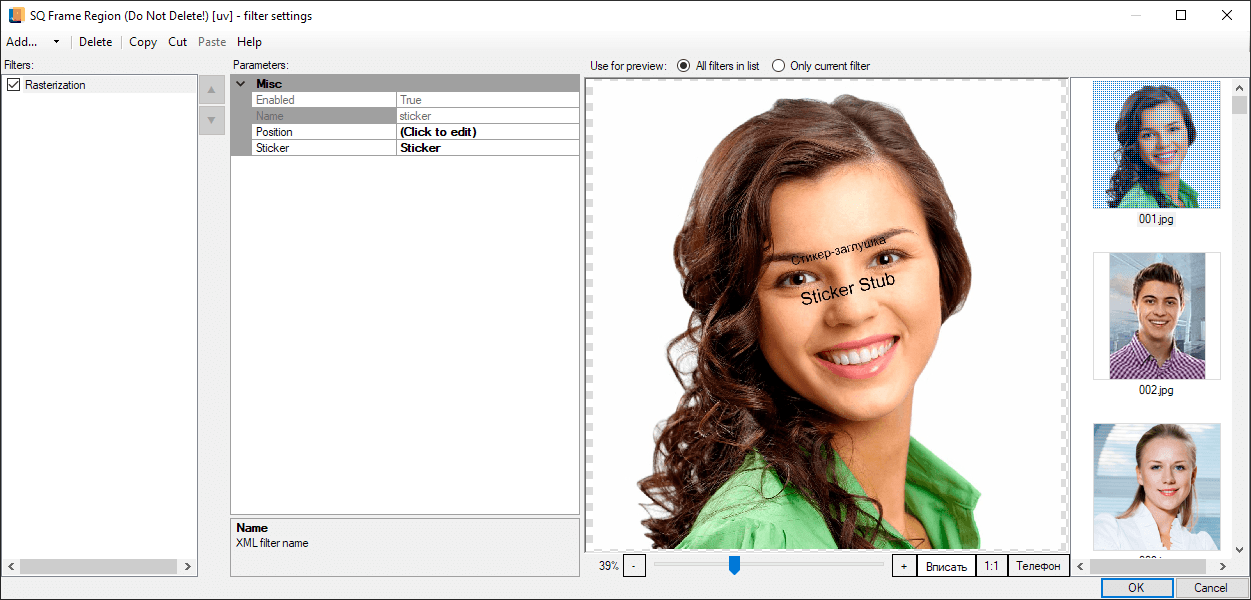
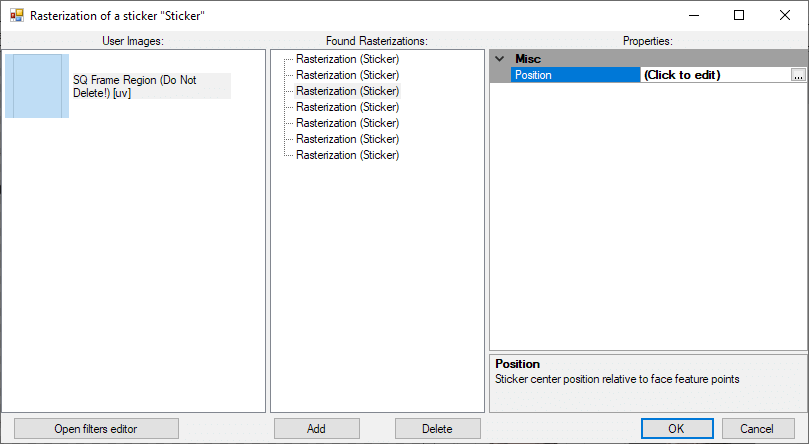
- Open the Filter settings dialog for the user photo region, select the Rasterization filter and click ‘Position (Click to edit)’.
- Via the Rasterization manager.
Below is a sticker (or a sticker group) position editor:
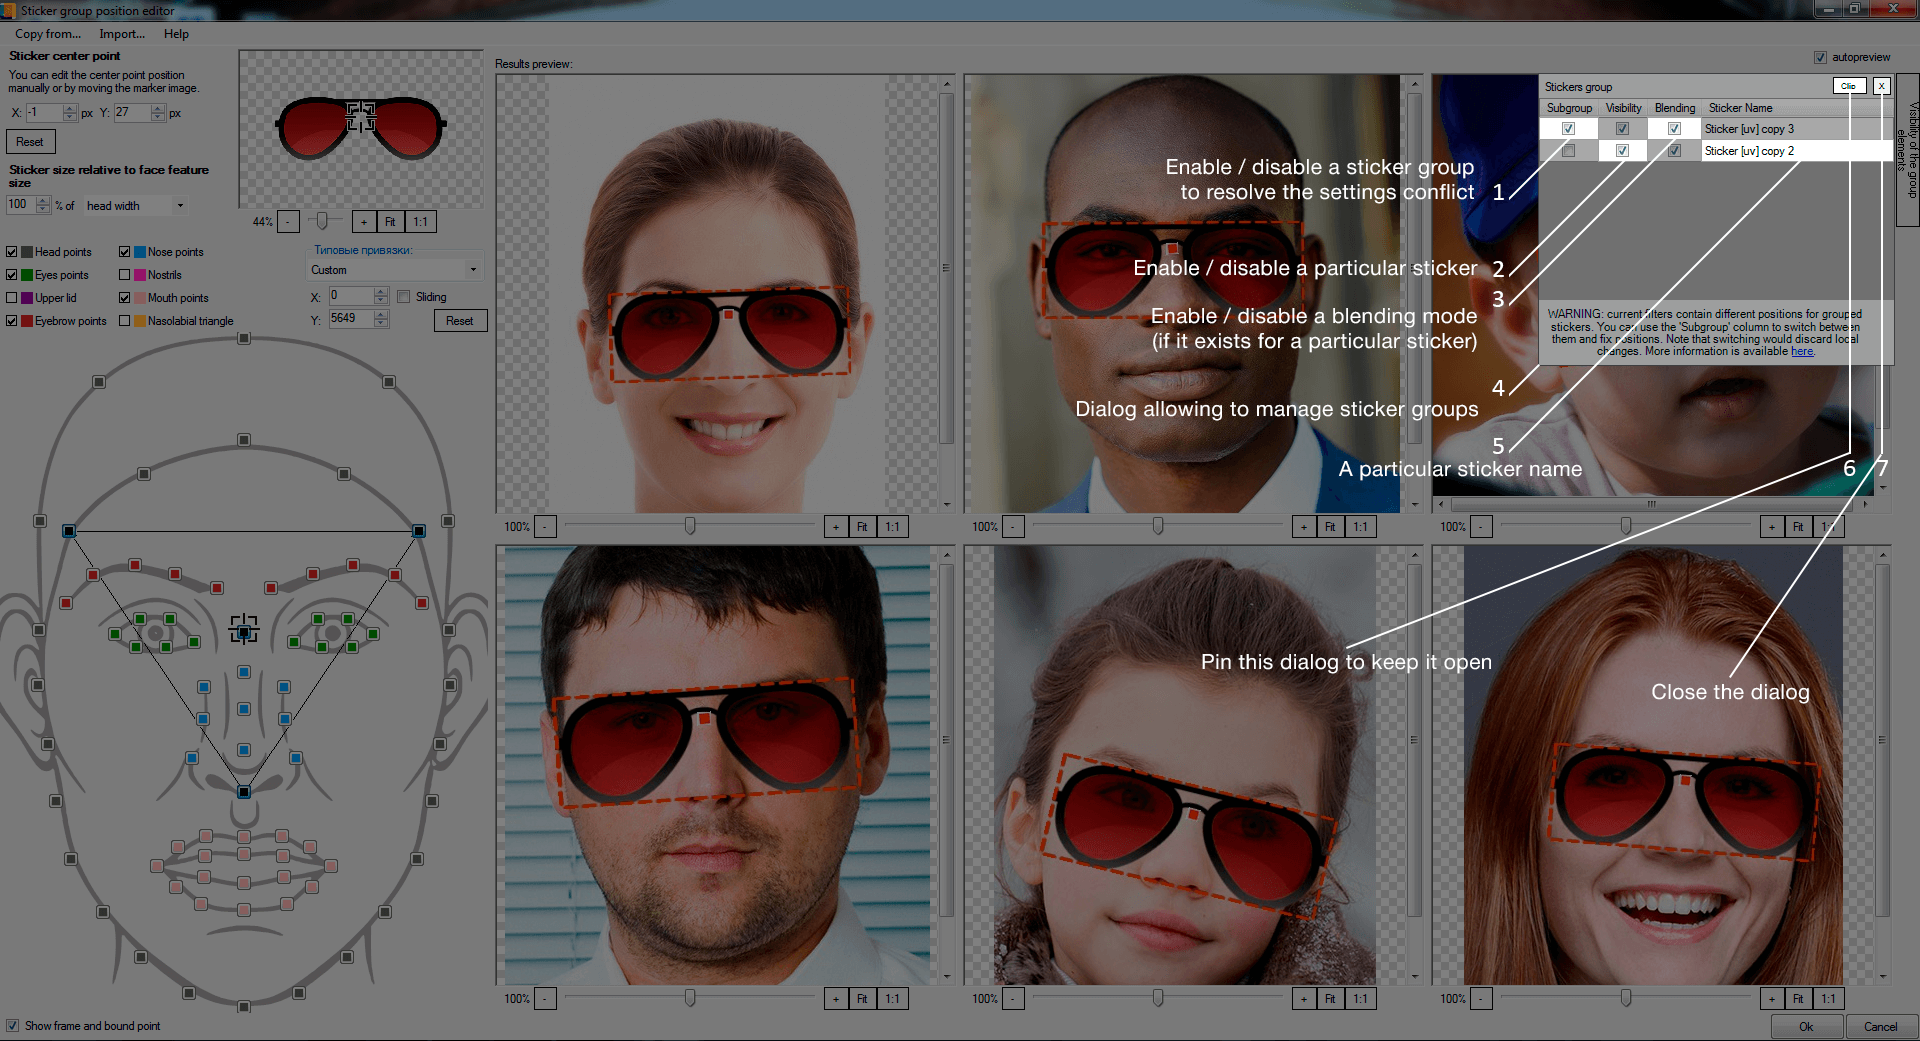
Certain sequences of actions with groups of stickers may lead to conflicts in stickers positions. This affects the final positioning of groups of stickers. Below is a sticker / sticker group position editor with an active conflict resolution dialog:
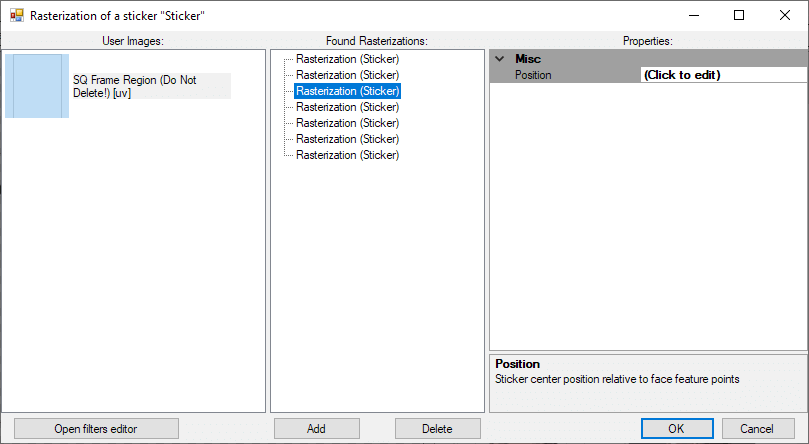
If you work with a project containing a large number of stickers, the Rasterization editor will help you manage all your rasterization filters conveniently, from a single dialog. The Rasterization editor can be accessed in one of the following ways:
- Right-click a sticker to open its context menu, then select Manage rasterizations...
- Select a sticker, then select Layer > Manage rasterizations… from the menu.
The Rasterization editor dialog consists of three blocks:
- User photo regions - this block displays a list of all user photo regions contained in the project. You can also access the filter editor for any of the user photo regions from this block.
- Rasterization filters - this block displays a list of rasterization filters applied to this particular user photo region (please keep in mind that the number of rasterization filters can differ from the number of stickers, because one sticker can be repeatedly applied to one and the same user photo region). The name of a sticker this particular rasterization filter refers to is indicated after each filter in brackets. Those rasterization filters that are not related to the current sticker are shown in grey color and are not active. Besides, you can add or remove rasterization filters for a particular sticker in this block.
- Properties - this block displays properties of a selected Rasterization filter. A sticker / sticker group position editor can also be accessed from this block.
Checking a template
- Open your template in Photoshop.
- Use the Start menu to launch the Template Creator. Create or open the project associated with the template using the File menu.
- Click the "Reparse PSD" button. Wait for the Template Creator to load all the layers: graphic layers and user photo regions.
- Next, click one of the test images in the right part of the window (or add your own test images), click the "Process Selected" button and wait for the result to appear in the central block.
- Alternatively, click the "Process All" button to process all added test photos. The processing time will be increased in this case. You can see the result of processing of individual photos by clicking on the corresponding test photo.
- The "View result" and "View template layers and test photos" buttons allows you to switch between the result and the source files.
- If the result is far from what you expected, go back to Photoshop and edit your PSD file, then check the results later.
Important:
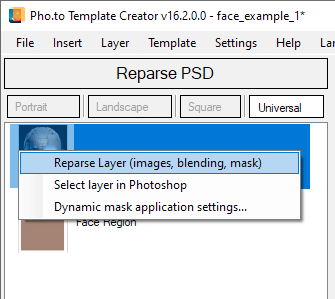
Using the Template Creator, you can reparse only those layers that have been edited. It lets you save a lot of time in case you are working on large templates.
To reparse a particular layer, right-click a layer in the layers list to open the context menu and select ‘Reparse Layer (images, blending, mask)’, as shown on the picture on the left.
Server and local processing of test photos
The 2.0 version of the Template Creator lets you choose between server and local processing of test photos.
This allows to speed up processing greatly, as local processing is much faster than processing on the server side. You don’t have to wait for the server to reply, as the server can be busy / fail to reply or even return an error.
It is recommended that you use local processing in most cases, as it is faster and more stable, but it imposes some restrictions regarding the usage of test photos.
If you want to test a template using a photo that is not in the whitelist or make a template preview picture with a different photo, go to the Settings menu and disable the Local Processing option (see the screenshot above). In other cases it is strongly advised to use local processing.
Important: each time you restart the Template Creator, the local processing mode is enabled by default.
Restrictions regarding test photos
If you want to process test photos locally in the Template Creator, you can only use a previously approved set of photos (photos from the whitelist). Other photos can be processed using the server-side processing.
- Local processing mode is enabled by default each time you launch the Template Creator.
- Local processing allows you to test a template using the whitelist of photos only (specially selected images).
-
Some of the photos from the whitelist (30 portraits and 30 different photos) are installed together with the Template Creator. When you start the Template Creator, you can see only part of these photos. You can add the rest of the pictures manually, from the catalog located here: C:\Pho.to\PhotoTestTool2\TestPhotos\.
There is also an additional set of test photos including more than 200 images. It is available to designers who work with pho.to on a regular basis.
Lean more about this additional set of test photos here.
-
Photos from the whitelist can be moved, placed to different folders and renamed, but they cannot be resaved, converted or modified in any way. Local processing is not available for modified photos from the whitelist.
-
If you need to process a photo that is not in the whitelist, i.e. to make a template preview, it is advised to use server-side photo processing.
-
If you have trouble processing photos from the whitelist, they have probably been modified. Some programs that you might be using can modify your files without you knowing it. Try replacing your whitelist photos with original images from this archive. If that does not help, contact the developer at pho.to.testtool@gmail.com. Attach a zipped photo that causes problems and describe the problem in detail.
Additional set of test photos
There is an expanded set of test photos available to those designers who work with us on a regular basis. Photos from this set are intended for internal use only and for testing templates. This means that they cannot be used for creating template preview pictures.
Download the archive and ask your manager for a password to unlock it. Extract the archive and add selected photos using the Add button in the upper right corner of the Template Creator (see Template Creator interface).
As a reminder, test photos from the whitelist cannot be modified in any way (which includes editing, converting or resaving). Local processing is not available for photos from the whitelist if they have been modified.
Download an additional set of test photos