Using a mask based on a user photo
Creating a template with a semi-transparent color fill
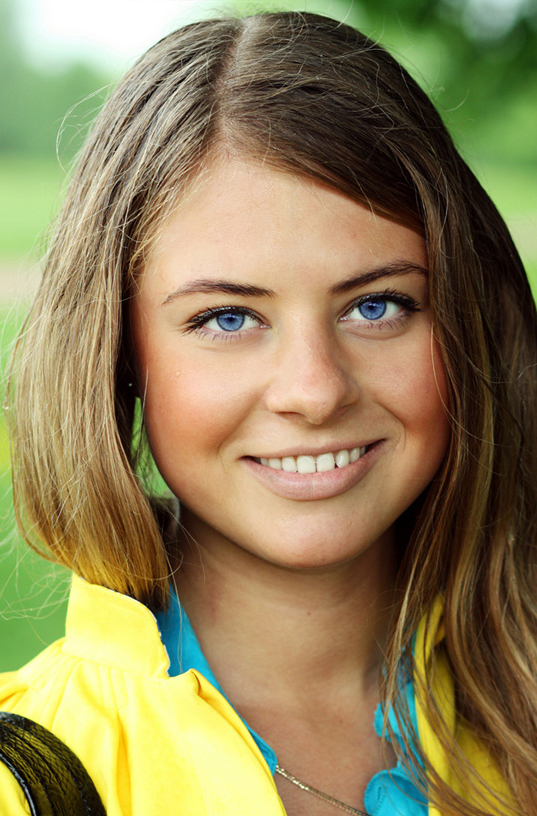
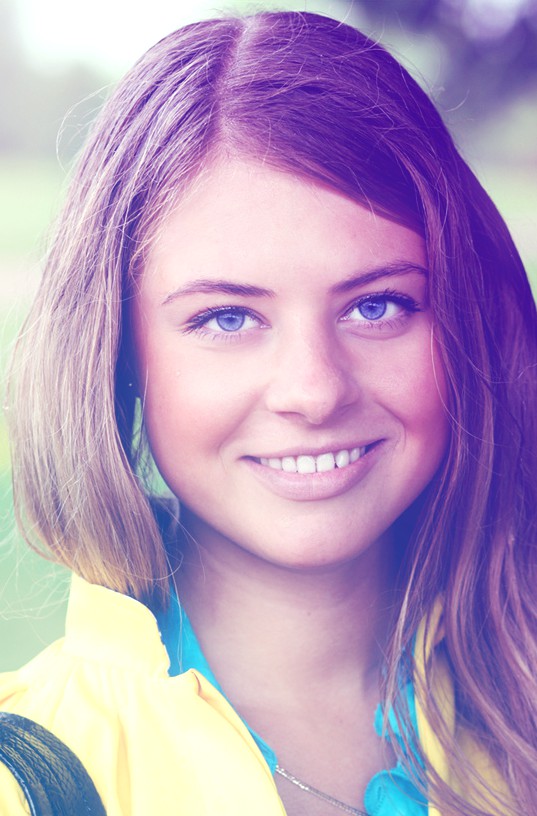
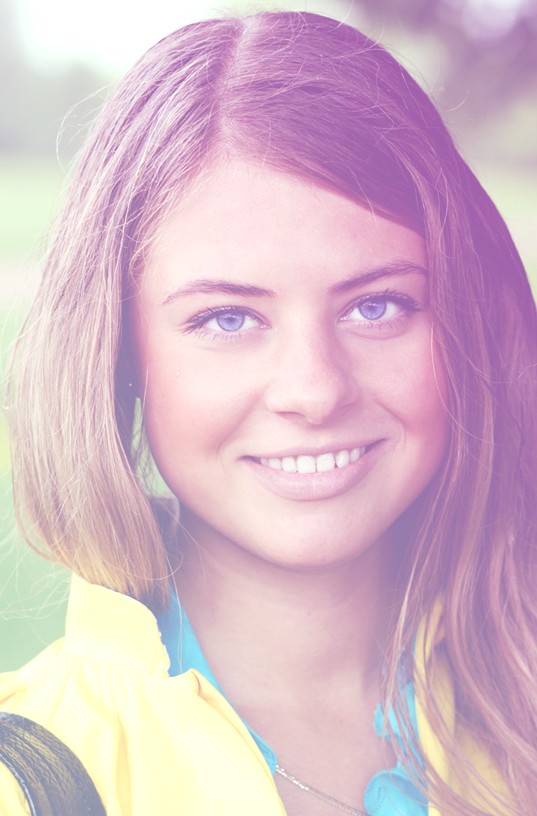
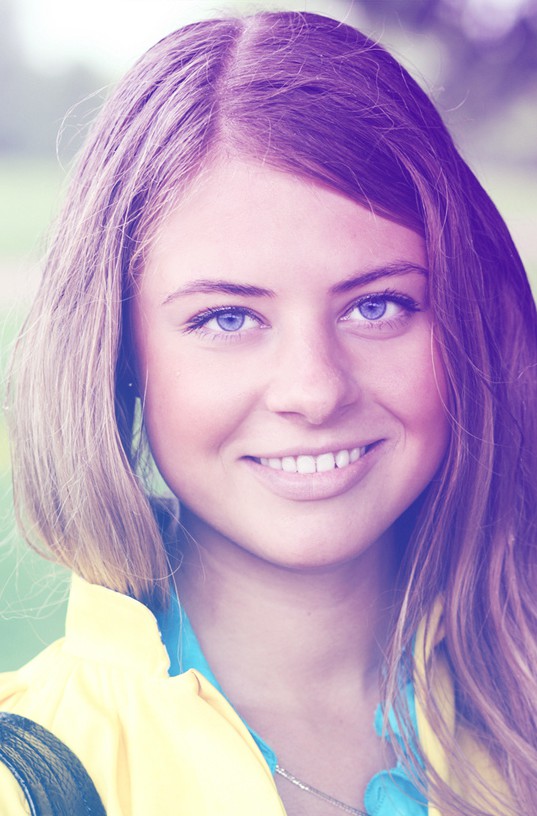
Let’s build a simple template where we’ll use several color layers and a dynamic mask based on a user photo, to create an effect like shown below:
| Original photo | Result |
|---|---|
 |
 |
The resulting template can be downloaded here.
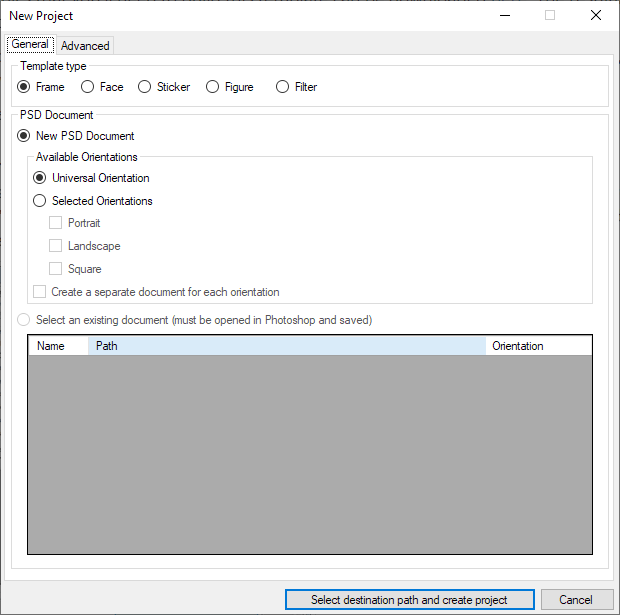
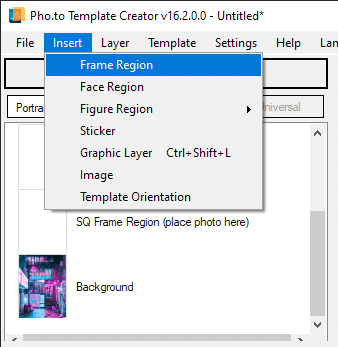
Step # 1Go to the "File" menu, select "Create Project" then choose the "Frame" template type and universal orientation. Name your project and select where you want to save it. 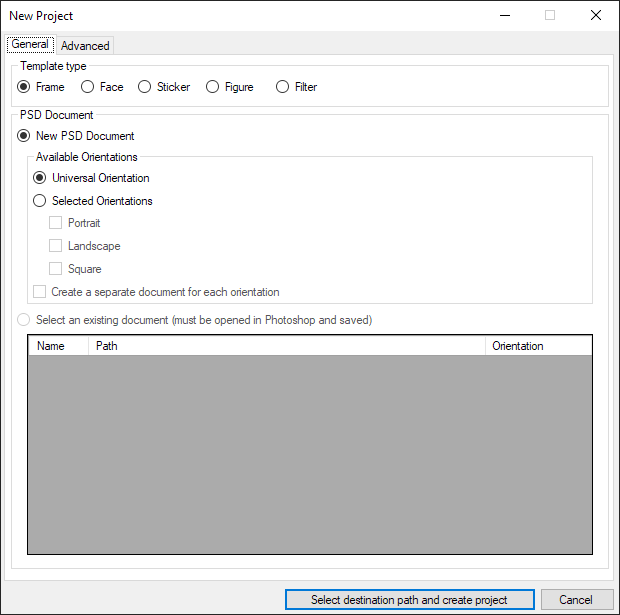
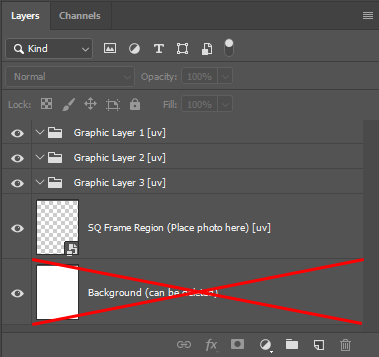
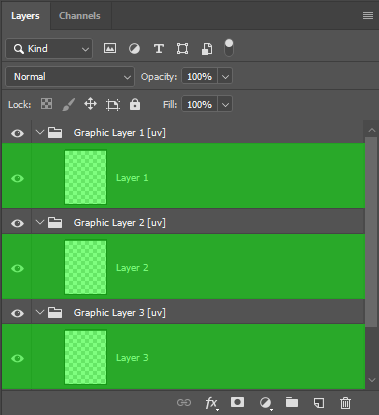
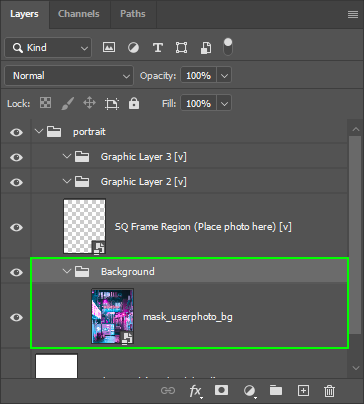
Go to Photoshop. Place the graphic layers above the frame region in numerical sequence. Delete the Background layer, as we won’t need it.
 Step # 3
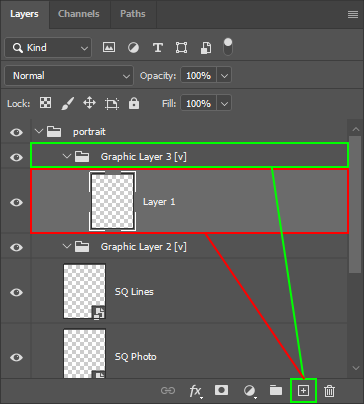
Add color fill layers. To do so, create a new layer in each "Graphic layer" group of layers.
 Step # 4
Fill the layers with colors with the parameters given below:
| Graphic layer 1 | Graphic layer 2 | Graphic layer 3 |
|---|---|---|
 |
 |
 |
|
Color: #feb067 Blending mode: Screen Opacity: 50% |
Color: #b945cd Blending mode: Overlay Opacity: 30% |
Color: Any color Blending mode: Screen Opacity: 50% Effect: Gradient (default parameters) |
Go back to the Template Creator and reparse your PSD document.
Step # 5As can be seen, the photo has undergone some color correction, but it looks too light and washy now, mainly due to the orange-colored graphic layer on top "Graphic layer 1".
Let us try to fix it by adding a dynamic mask based on a user photo to "Graphic layer 1".
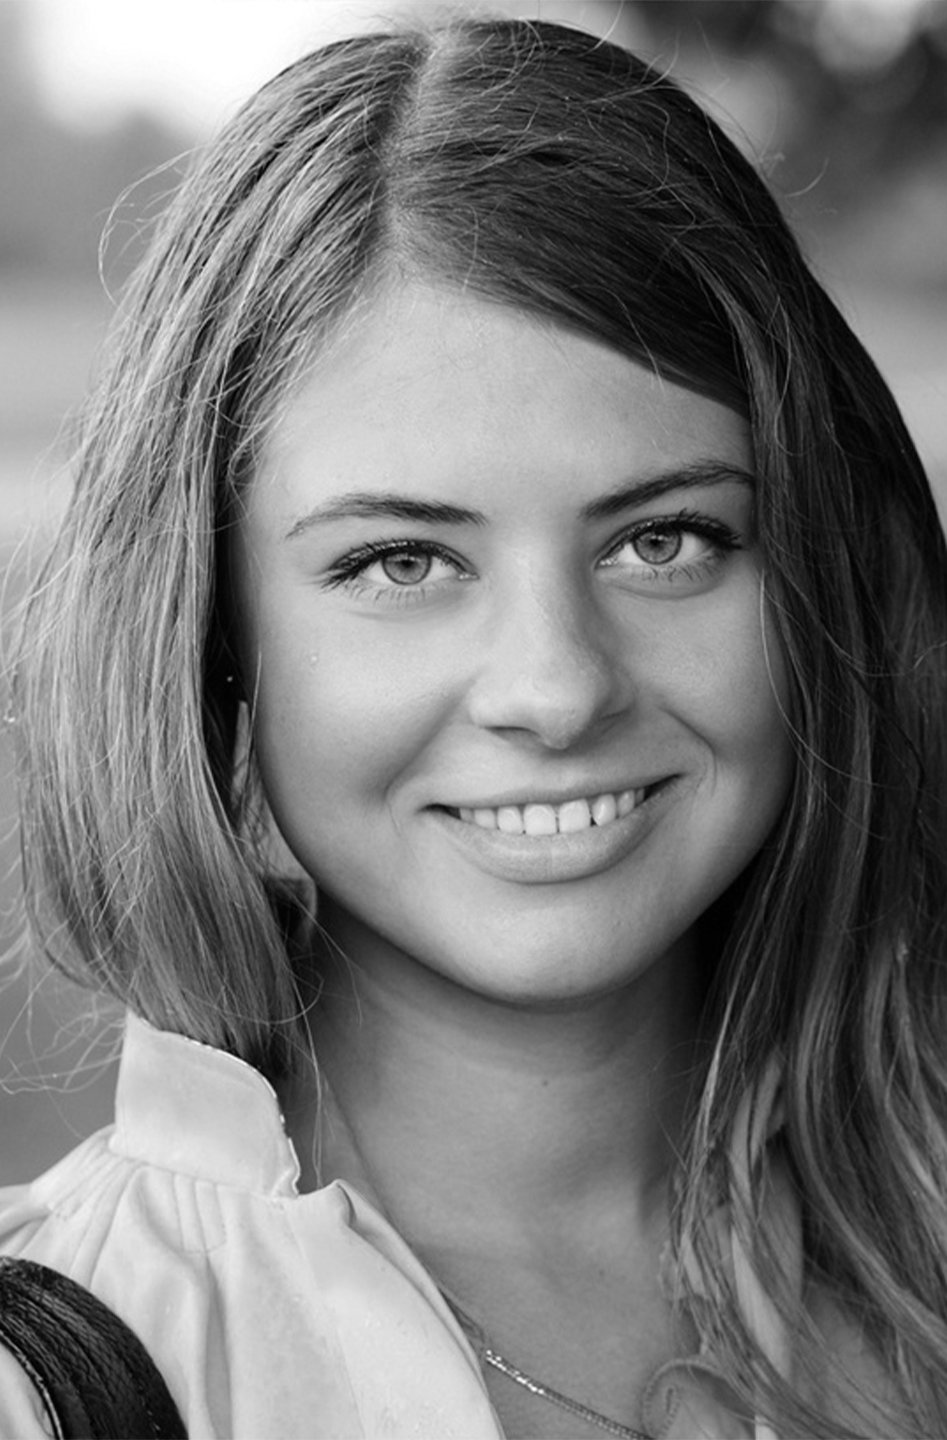
As you may know, a mask based on a user photo is created by converting an original image to grayscale mode and the resulting image is then used as a layer mask.
| Original image | Grayscale mode | Resulting layer mask (opacity: 50%) |
|---|---|---|
|
 |
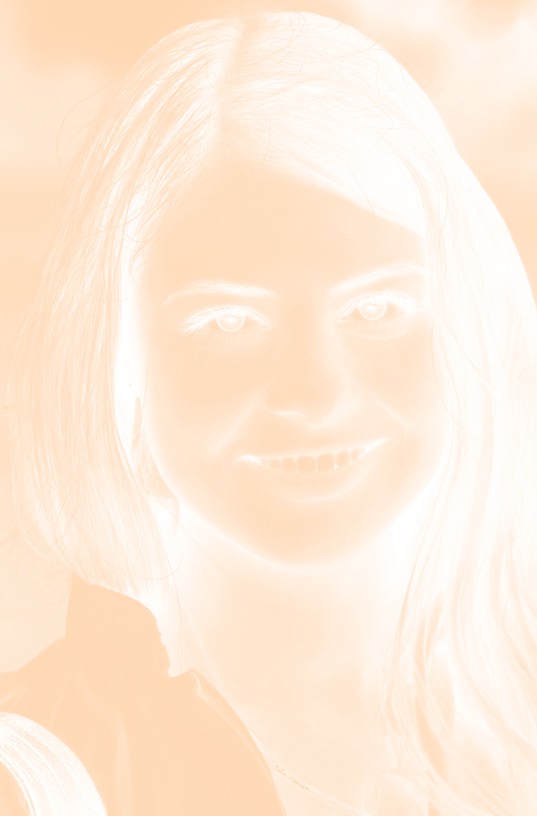 |
The resulting image looks a bit better after we have applied a dynamic mask based on a user photo, but the picture still looks too light and washy in places.
Let’s adjust the mask so that it applies mainly to the face. To do so, set eroding to 3. To make the mask borders look smoother, set the smooth radius to 5.
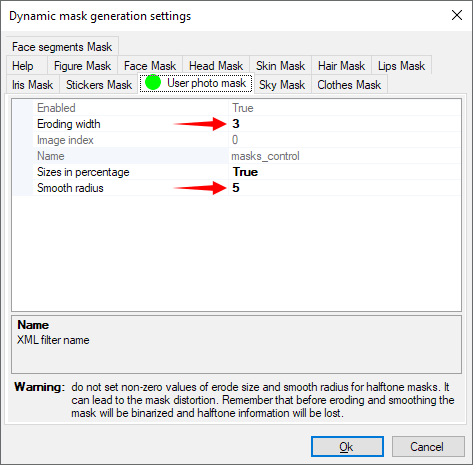
| Original mask | Eroding without smoothing | Eroding with smoothing |
|---|---|---|
|
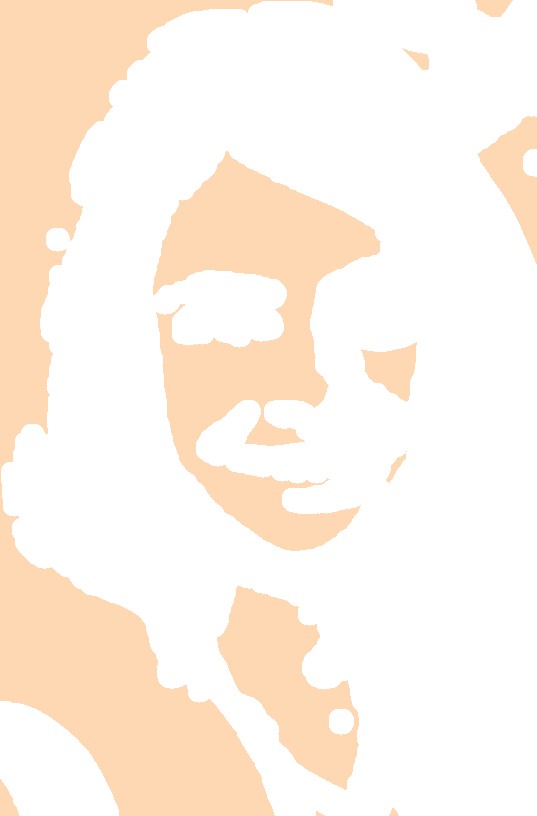 |
 |
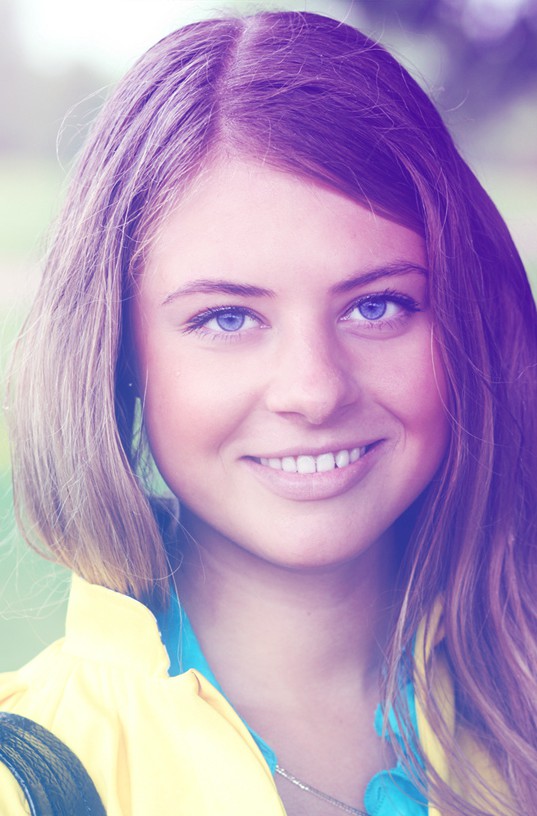
After we’ve adjusted eroding and smooth radius settings, the resulting picture looks almost perfect.
Please note that changing eroding and smooth radius parameters may lead to unwanted results when you work with a mask based on a user photo.
Now all we have to do is add some contrast to the resulting image. To do so, double-click the frame region, open the "Filter settings" dialog and add the "Correction" filter. Change the value of the "Contrast" parameter from 5 to 8.
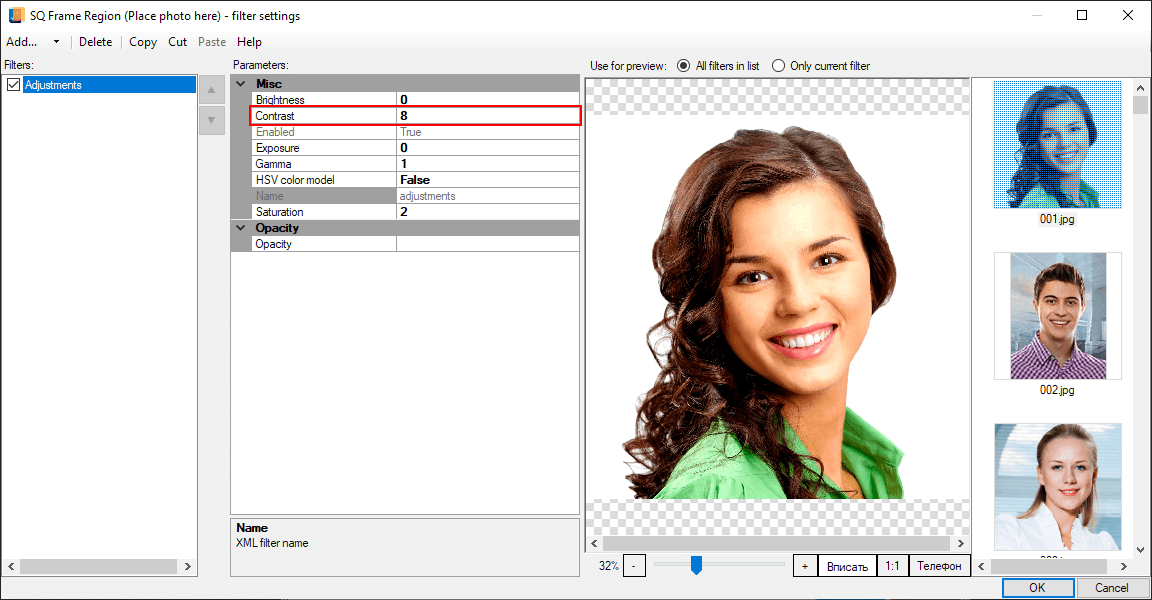
Finally, we got the result we wanted.
| Original photo | Result |
|---|---|
| |
|
The project with the resulting sample template can be downloaded here.
Creating a template with neon flares effect
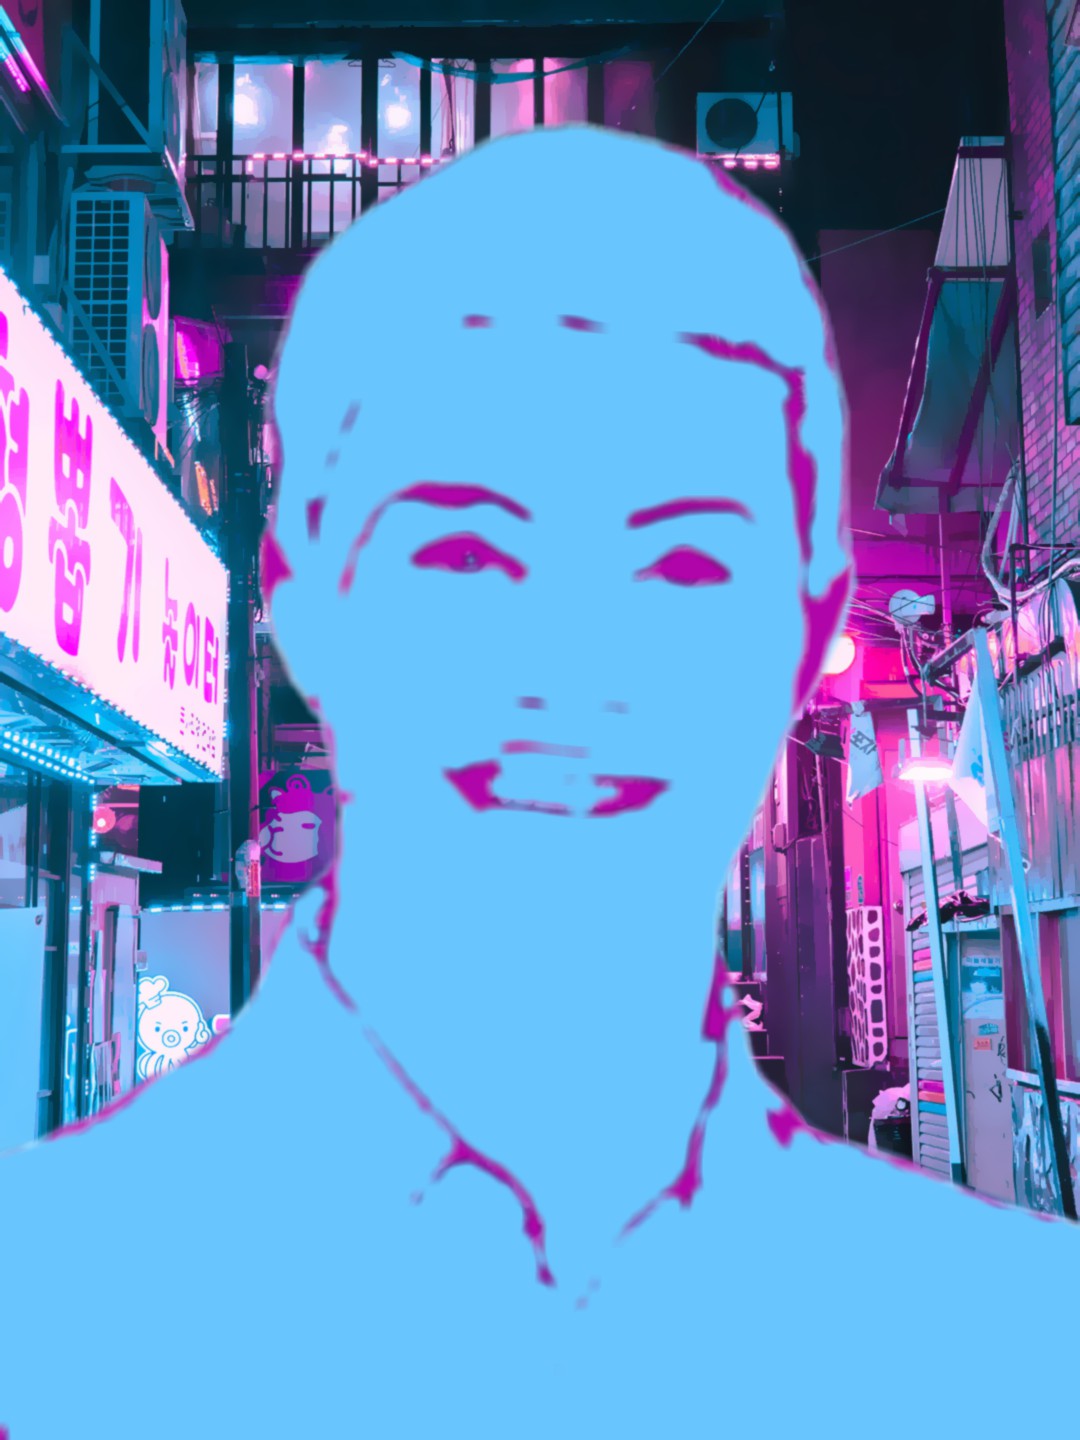
Let's create a template that adds neon flares to images like shown below:
| Original photo | Result |
|---|---|
 |
 |
All graphics that you'll need to build this template can be downloaded here. The resulting template is available at this link.
As can be seen from the 'after' image, the template extracts a figure from a user photo, puts it on a new background and adds neon flares to it.
Below is a step-by-step guide on how to achieve this effect.
Step # 1Create a project in the Template Creator. To do so, go to the "File" menu and select "Create Project". Select the "Frame" template type and "Portrait" orientation in the dialog window. Then set the path to your project and its name.
Step # 2
In Photoshop, add the background image (download here) into the subgroup named "Graphic Layer 1", then rename the subgroup to "Background" for convenience. Reparse PSD.
 Step # 3
To get a picture with a figure placed on the chosen background, apply a dynamic mask based on a figure to the frame region. This is the result you are going to get:
 Step # 4
Now we need to add some filters to the user photo to make it look natural enough with the new background. To do so, double-click the frame region to open the filter settings dialog and add the following filters:
- Neural Filter (Neural filter name "Caramel Mood", opacity 50);

- Adjustments (contrast 14, brightness 15);

- Warm (strength 0,8)
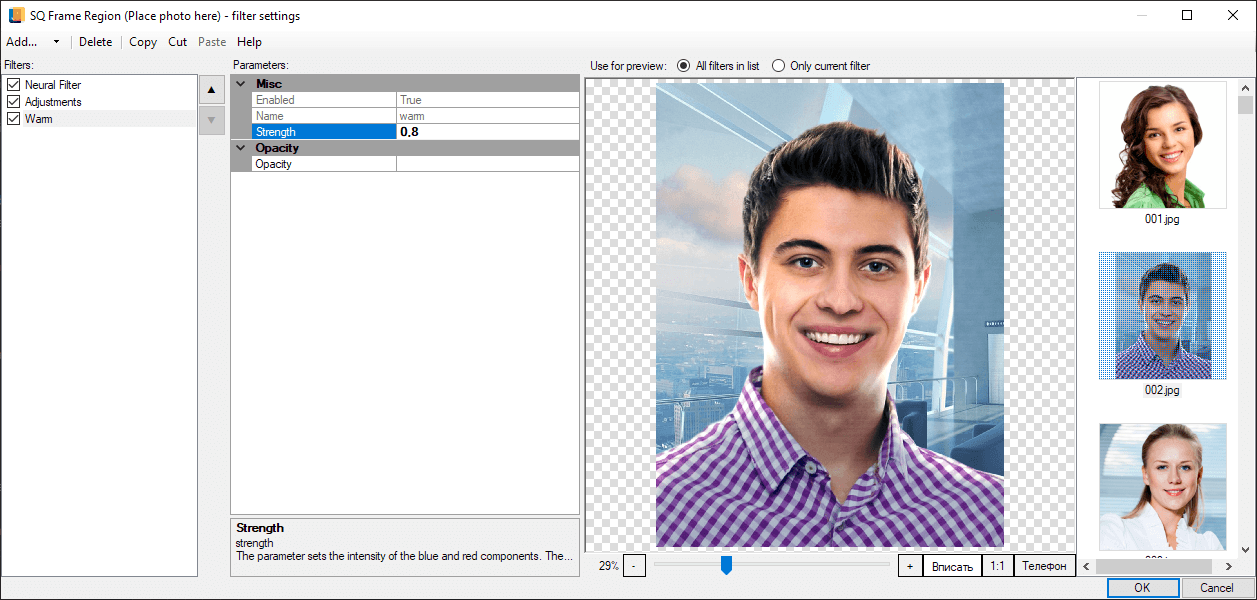
This is what the picture will look like after you have applied all the filters:
 Step # 5
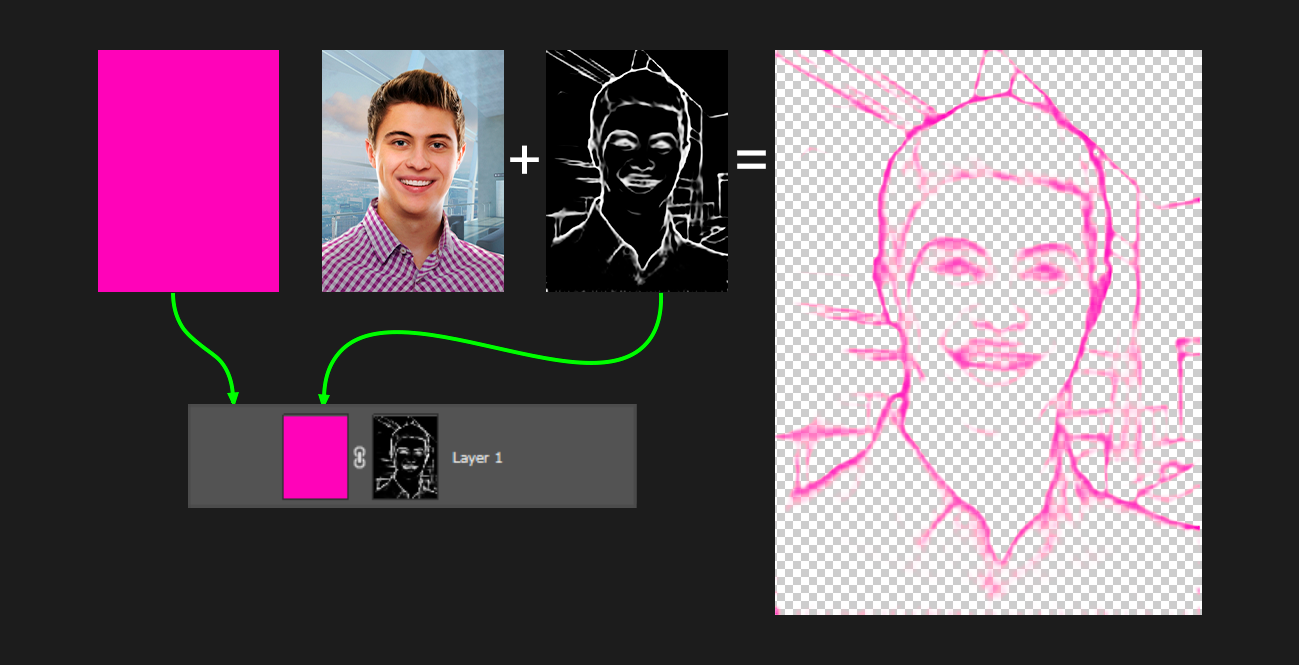
To achieve the desired result, we need to add neon flares to the user photo. As can be seen, there are two prevailing colors in the background image, cyan and magenta. We'll use these colors as flares in the user photo.
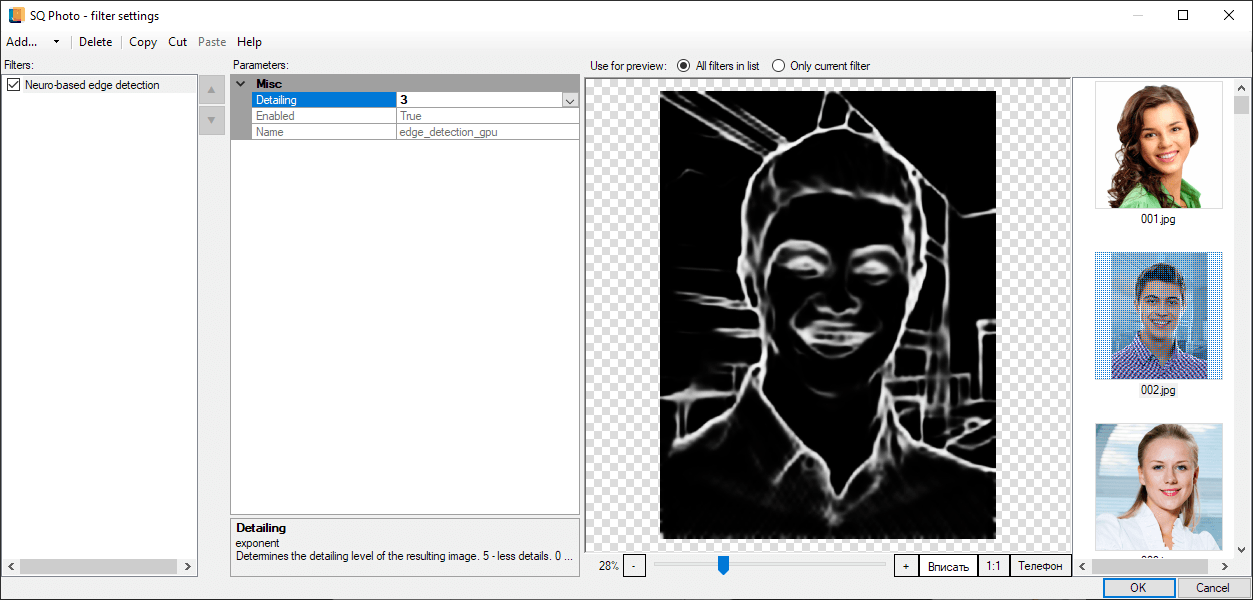
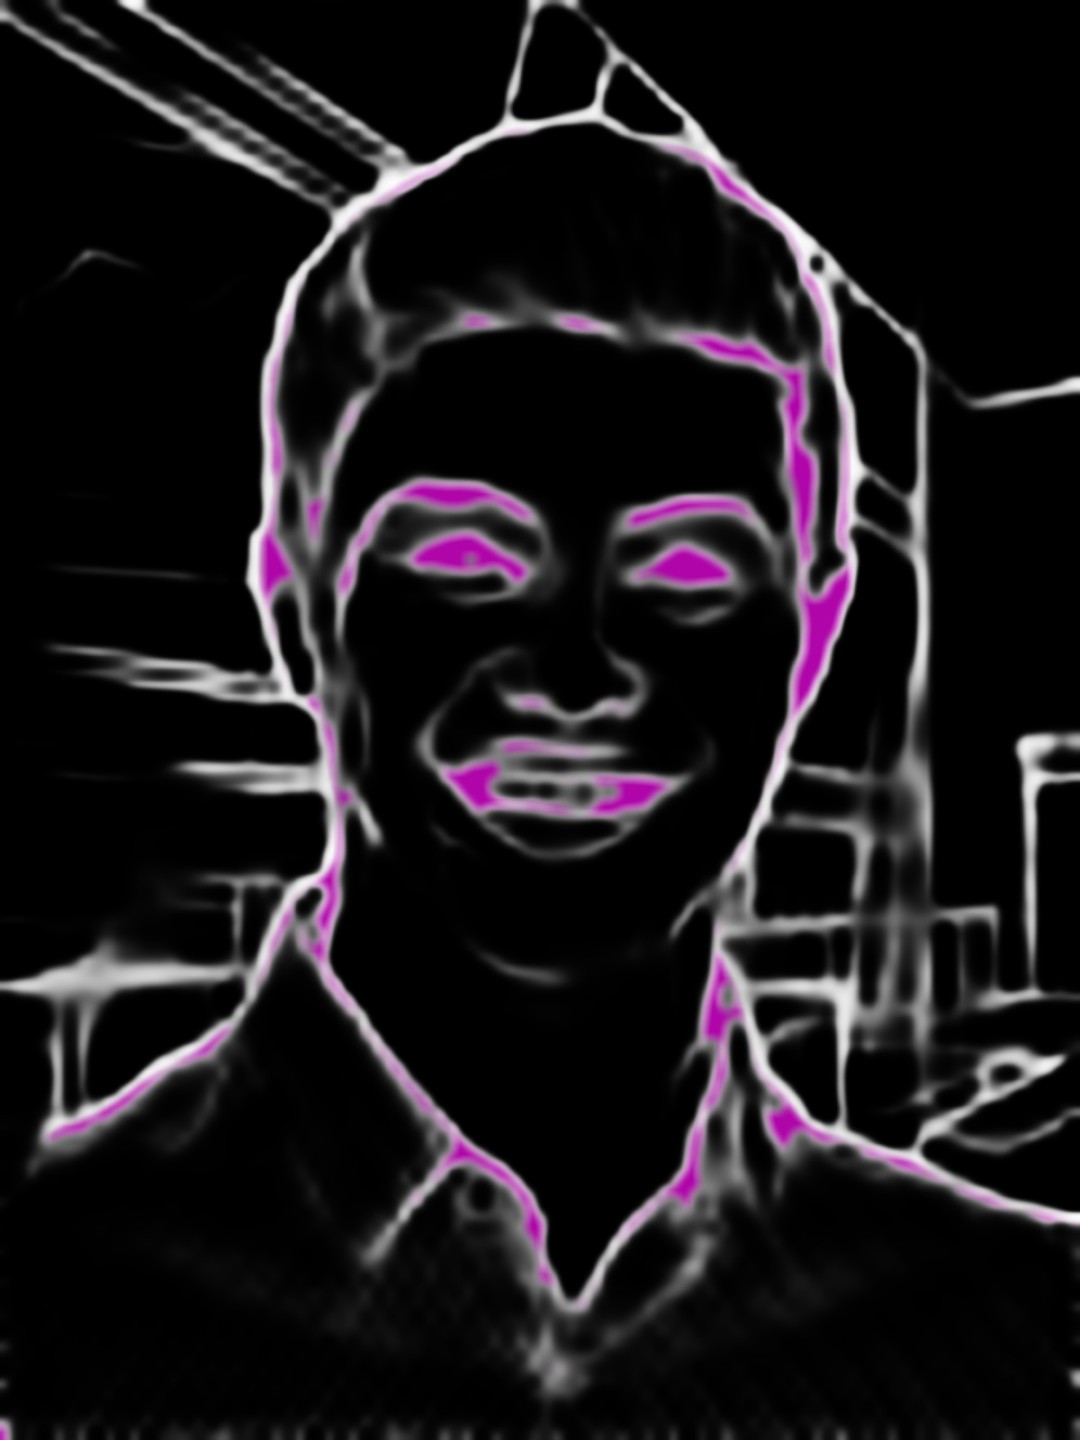
To add neon lines to the user photo, use the "Neuro-based edge detection" filter (detailing: 3). After you've applied this filter to the photo, you will get an image with edges highlighted in white on a black background. We'll use this resulting image as a mask later on.
If we add this filter to the current frame region, together with the filters mentioned in the previous step, the result will be unsatisfactory.

To improve the situation, create a new frame region.
Place the new frame region above the existing one and rename the layers for convenience (SQ Lines, SQ Photo).
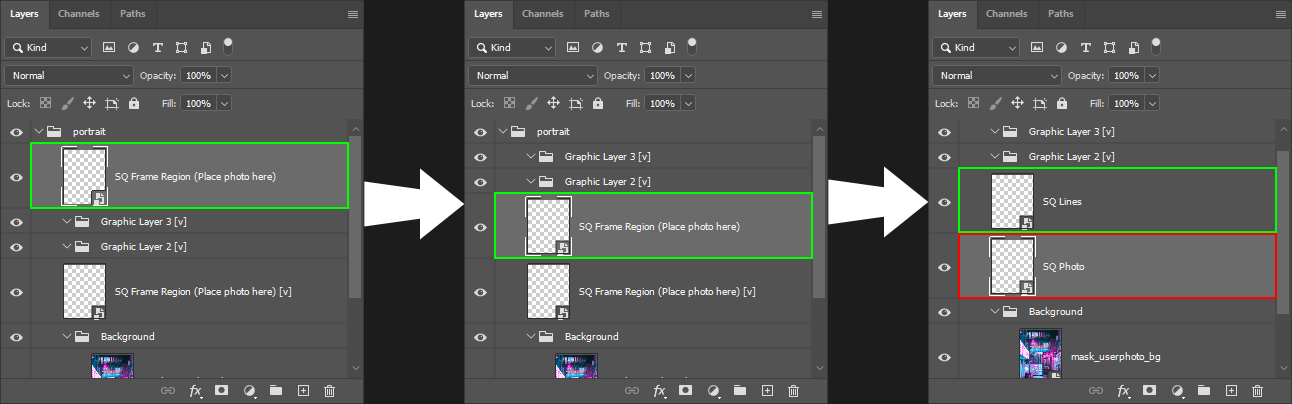
Reparse PSD and apply the "Neuro-based edge detection" filter to the "SQ Lines" frame region. Make sure that this filter has not been applied to the "SQ Photo" layer.
The result is now similar to what we have seen before, but now we can manage the frame region without the concern of affecting the main image.
 Step # 6
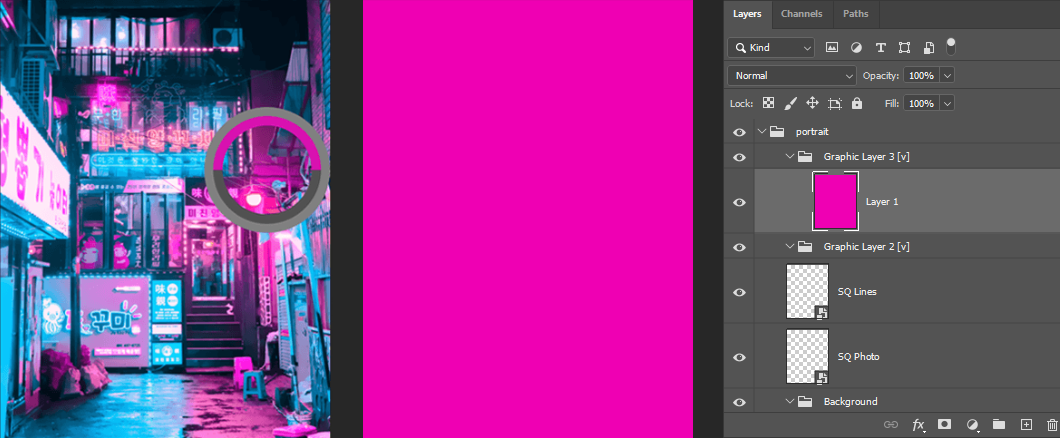
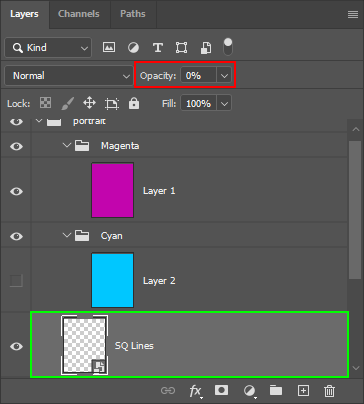
Let’s now add colors to the template. To do so, go to Photoshop and create a new layer in the "Graphic Layer 3" subgroup.
Use the Eyedropper tool to pick up a sample of the magenta color (#af05a9) from the background image. Then fill the layer with this color using thePaint Bucket tool.
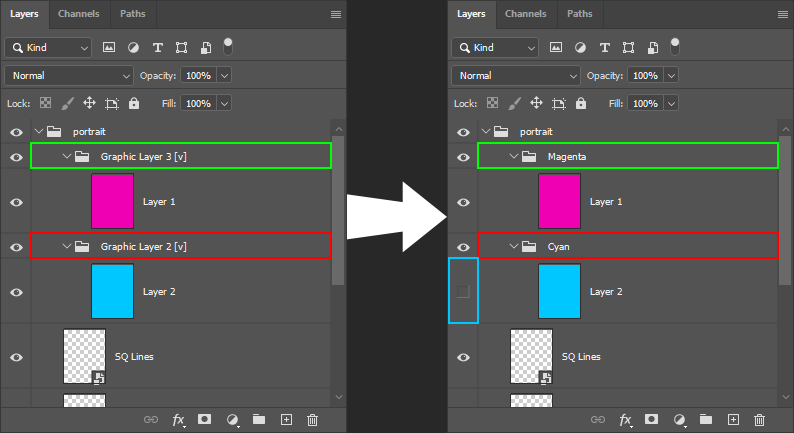
Perform the same actions with the "Graphic Layer 2" subgroup, but use the cyan color (#68c5fe) this time. Rename the subgroups using the layer colors as names, then temporarily hide the cyan color layer and reparse PSD.
 Step # 7
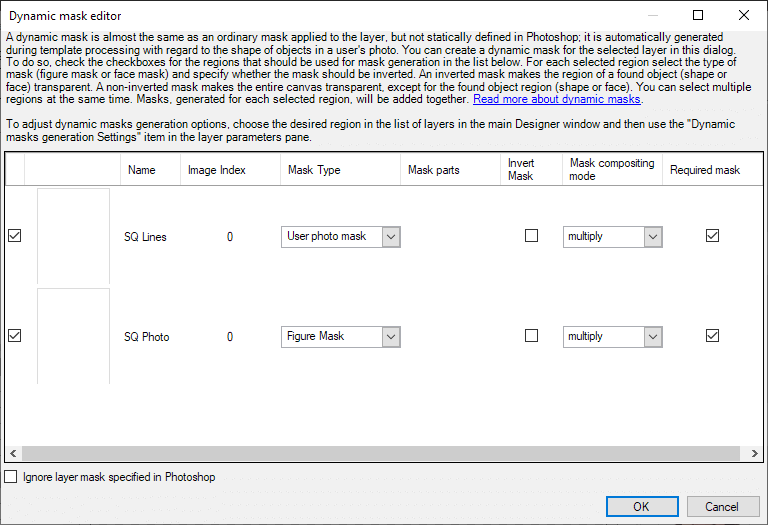
Go back to the Template Creator. Apply a user photo dynamic mask based on the "SQ Lines" frame region to the "Magenta" layer. To apply the mask to the figure only, build a figure mask based on the "SQ Photo" frame region on the same layer. Leave the mask compositing mode (multiply) unchanged.
If we build a user photo dynamic mask based on a frame region with the "Neuro-based edge detection" filter applied to it, then the result will be converted to grayscale, and grayscale colors will be used to build the mask.
As can be seen, we have an image with magenta lines on the black background, drawn on a figure that is taken from a user photo. Now we need to undo the effect of applying the "Neuro-based edge detection" filter to the photo, so that only magenta lines are left visible. To do so, go to the "SQ Lines" layer in Photoshop and make it transparent.
Reparse the layer and check the result.
 Step # 8
Now let’s add cyan flares into the template. To do so, go to the "Cyan" layer and apply a user photo dynamic mask to it, as well. But this time it should be based on the "SQ Photo" frame region.
Let’s see in detail how a mask is built in this case.
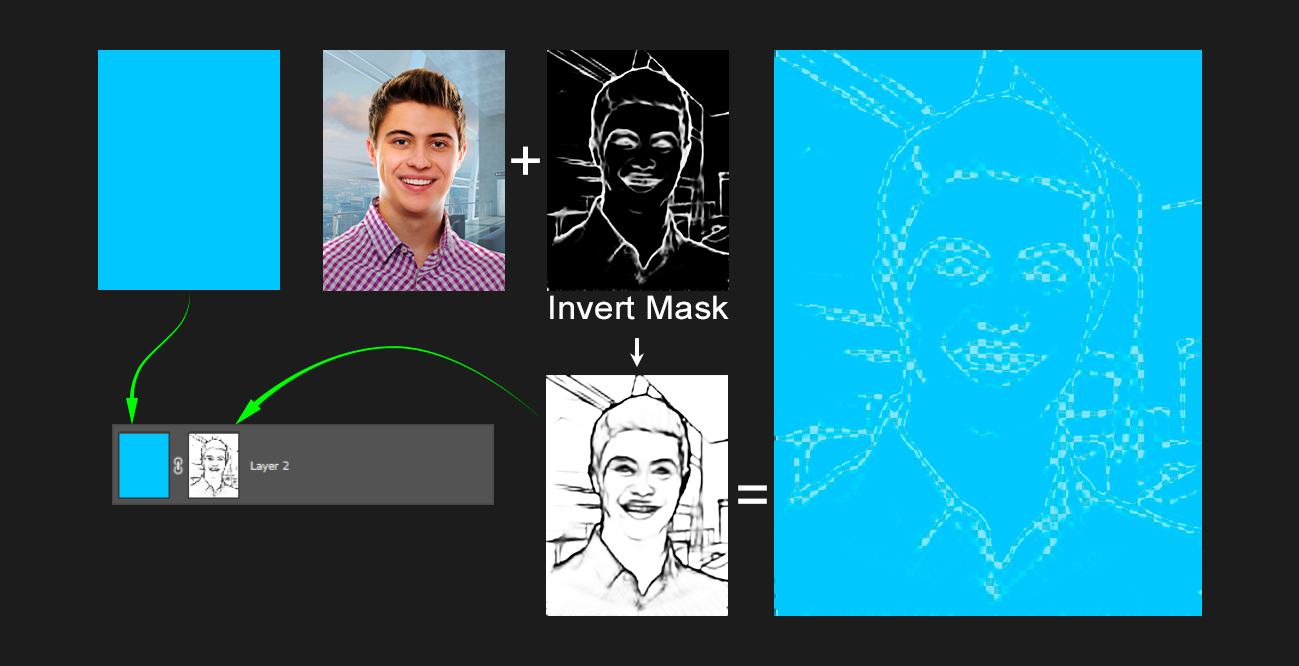
To apply the mask only to areas free from the result of the magenta mask from the previous step, we need to invert it, and then build an additional figure mask based on the "SQ Lines" frame region (this needs to be done in order to limit the mask to the figure boundaries). Mask compositing modes should be left unchanged, as in the previous step

As you remember, we hid the visibility of the cyan layer earlier in Photoshop. Now let's go back and make it visible again, then reparse the layers and process a test image.
As a result, we now have an image with a figure filled with the cyan color with purple boundaries.
Step # 9To achieve the desired effect, we need to reduce the area filled with cyan and make the magenta lines more visible, as well as make the edges smoother.
To do so, open the Dynamic mask generation settingsdialog, select the "user photo mask" tab and adjust eroding and smooth radius values. Set "Eroding width" to -2and Smooth radius to 1,5 for the "SQ Lines " frame region, which is in charge of the magenta lines. As for the "SQ Photo" frame region, set Eroding width to -3 and Smooth radius to 3.
| SQ Lines | SQ Photo |
|---|---|
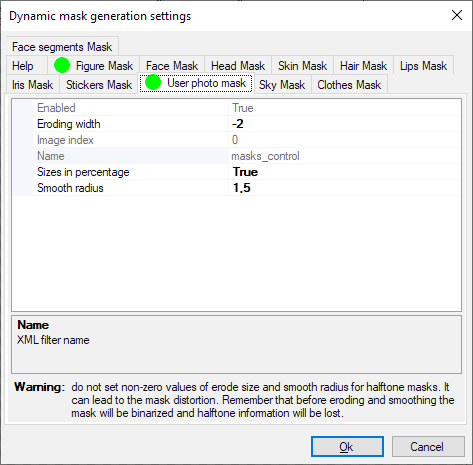
|
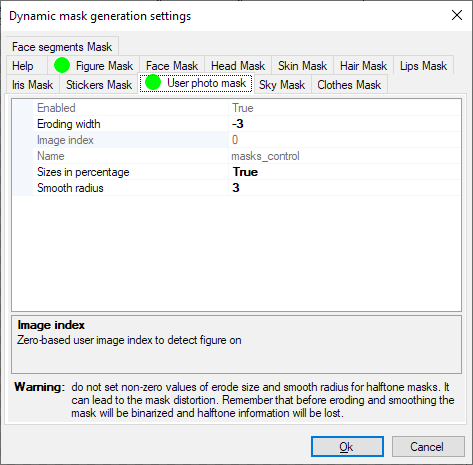
|
Please note that changing the "eroding width" and "smooth radius" values while working with a user photo mask may lead to unwanted results.
Finally, all we need to do is adjust the blending modes for the graphic layers. Go to Photoshop and set the blending mode to Screen and opacity to 70% for the "Magenta" subgroup. As for the "Cyan" subgroup, set the blending mode to Soft Light and leave the opacity settings unchanged.
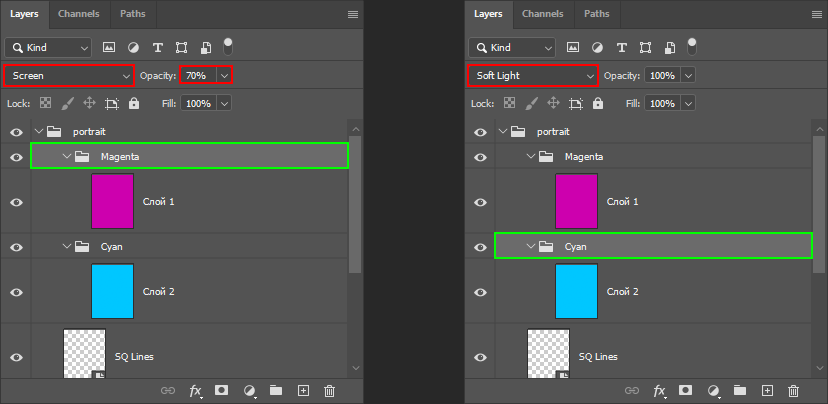
Reparse PSD and process your photo.
You can download the project with the resulting sample template here.