Examples of animated templates development
Creating a basic frame template with animation
Here is a step-by-step guide on how to create a simple frame template with an animated graphic layer. In this template, it is an animated layer with a spider. The artworks needed for this template can be downloaded here.

Step # 1
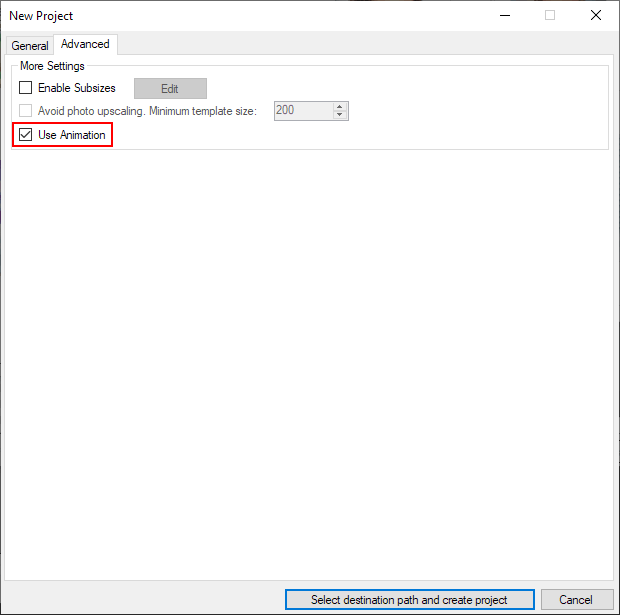
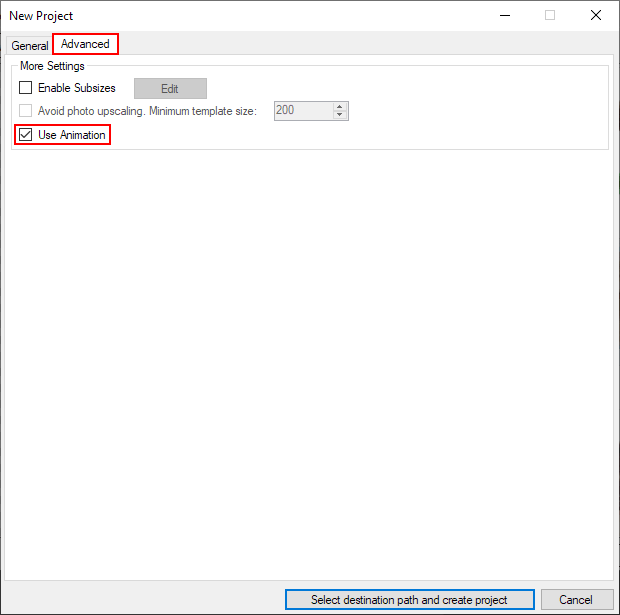
Create a project with the Portrait orientation in the Template Creator. Check the Use Animation box in the Advanced tab. After this the Template Creator will generate the necessary structure for an animated template.
Step # 2
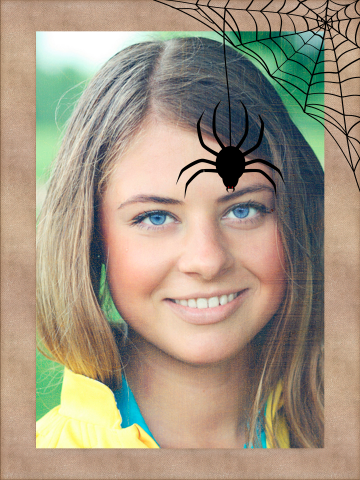
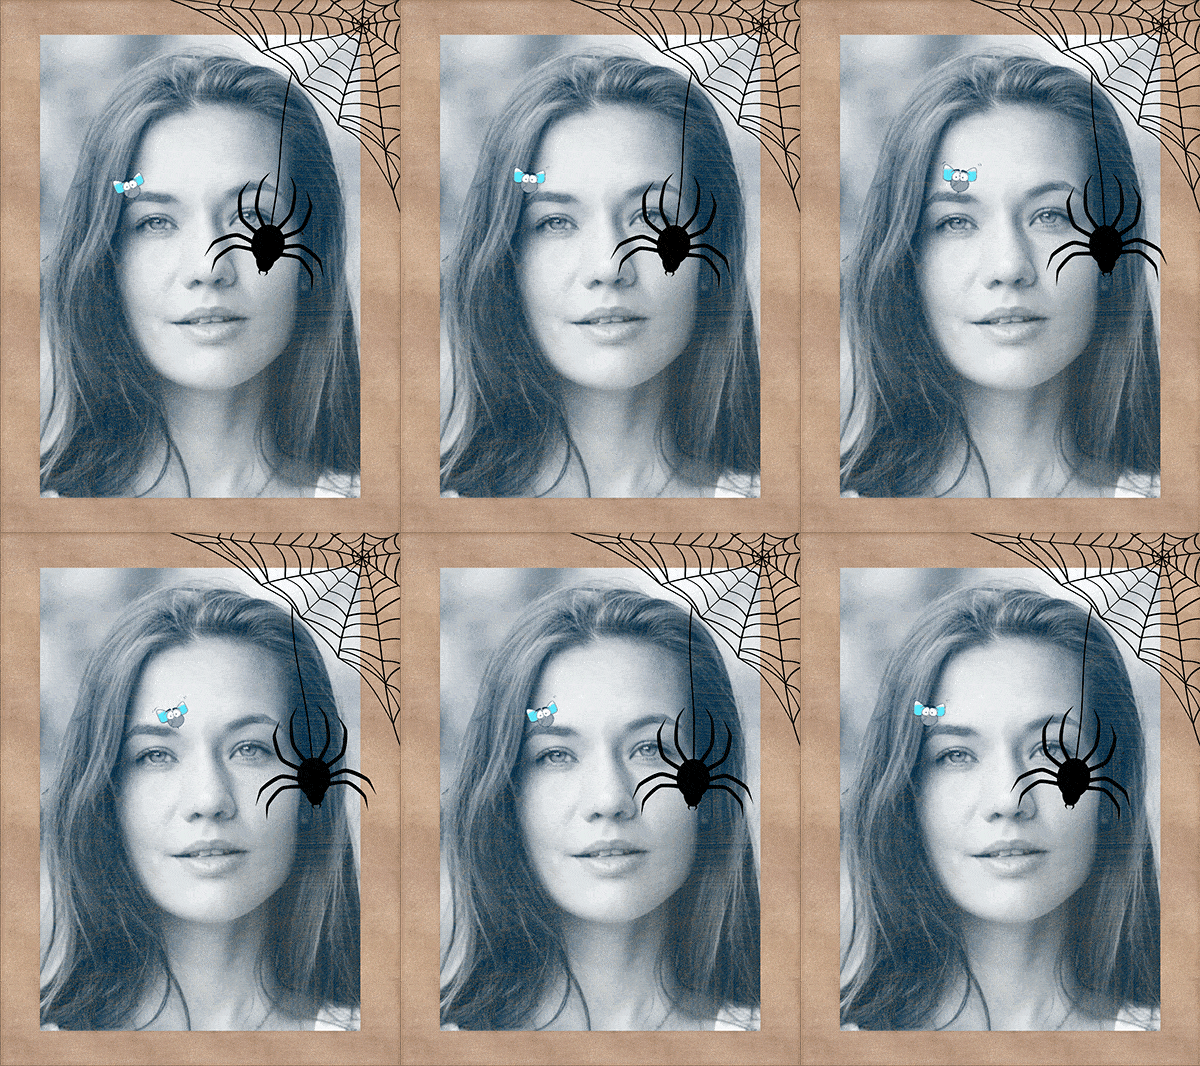
Judging by the sample gif image given above, one can easily imagine the template structure. The template consists of a frame user photo region with three graphic layers placed above: a photo frame, a layer with scratched glass texture and a layer with a spider and spiderweb.
You can see that the PSD document contains only two graphic layers at the moment (while we need three of them), so we need to add one more graphic layer into the PSD document. To do so, go (Insert -> Graphic layer or use the Ctrl+Shift+L) key combination, then go to Photoshop.
Step # 3
For convenience, give the following names to the graphic layers, from the top downward:
- Spider and spiderweb;
- Frame;
- Glass.
Add a corresponding layer to each graphic subgroup. Apply the Screen blending mode to the Glass subgroup and set its opacity to 40%.
| the current result | the desired result |
|---|---|
You must have noticed that the current position of the spider and spiderweb is different from what we expect it to be in the resulting template. Let us leave it as is for now - we’ll adjust the position of the spider and spiderweb later.
Step # 4
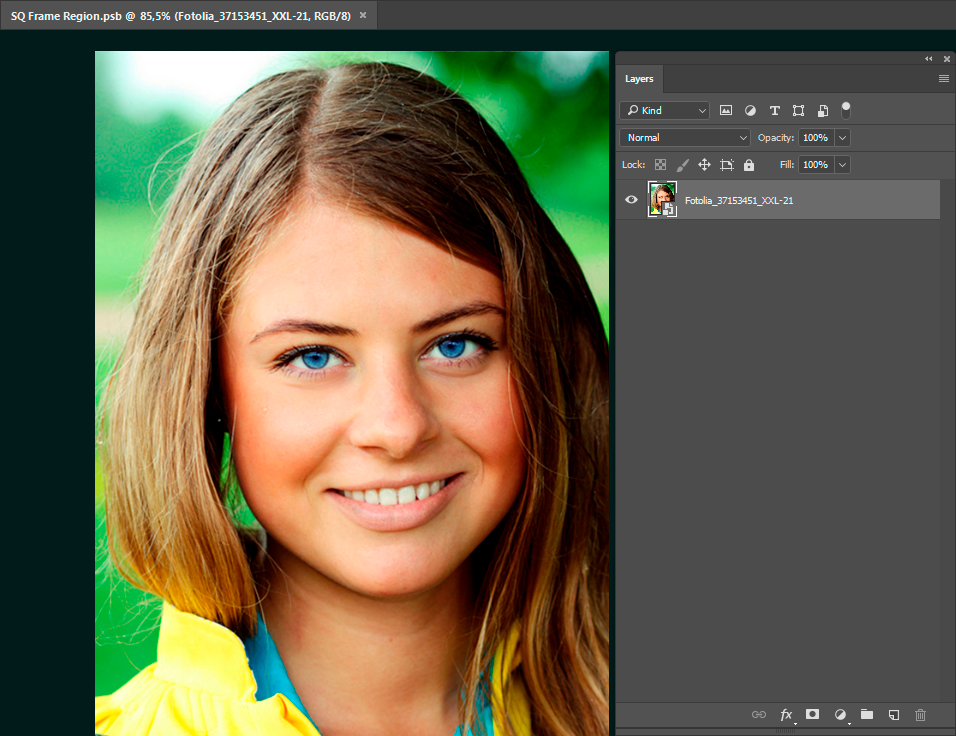
Then go to the smart object of the user photo region and set its size to 600 * 800 px (the 3:4 aspect ratio for the portrait orientation). Add a portrait-oriented test photo and convert it to black and white. Save the changes you’ve made to the smart object and close it.
Step # 5
Position the smart object of the user photo region in the main document in the way we want it to be positioned in the template.
Step # 6
Go into the Template Creator and reparse the PSD document. Add the Desaturation filter to the user photo region. Now you are ready to start creating animation..
Step # 7
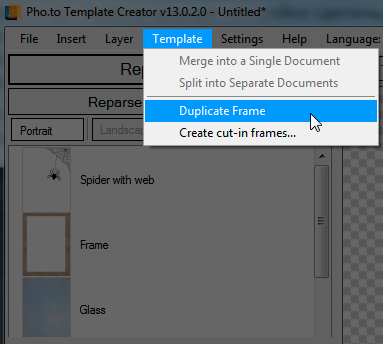
As has been mentioned in the theoretical section, each frame can store a local (independent) state of graphic layers and user photo regions. At the moment, the template contains only one frame. Now, after you've configured the primary settings, copy the current frame using the Template Creator GUI. When you copy a frame via the Template Creator, it is copied together with its settings. This spares you the need to add the Desaturation filter to the current user photo region on each frame.
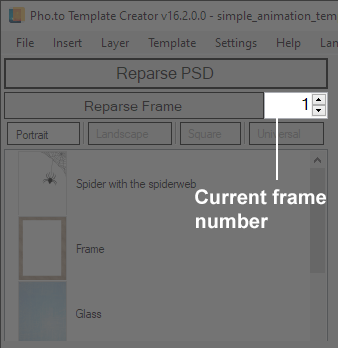
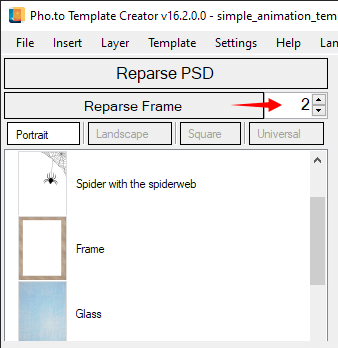
The number of current frame is displayed under the Reparse PSD button on the right side. To copy a frame, select Template menu > Copy frame.
| Selecting a frame | Copying a frame |
|---|---|
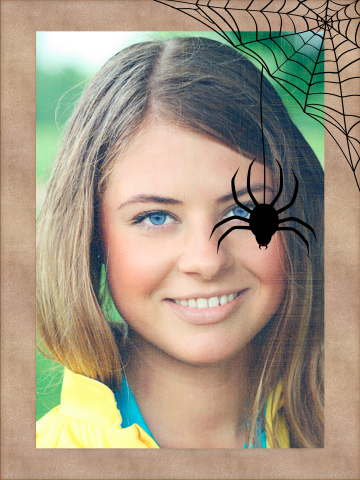
Let’s add 4 more frames, so that there is 5 of them, all in all (4 frames with different positions of the spider to the right and to the left, and one frame with its central position, see the scheme below).
|
Frame 1: The extreme left position |
Frame 2: The left position |
Frame 3: The central position |
Frame 4: The right position |
Frame 5: The extreme right position |
|---|---|---|---|---|
Step # 8
Now head to Photoshop. You can see that there are 5 frames now in the frame animation panel. Before we start working with frames, let us get back to the question of positioning of the spider and spiderweb.
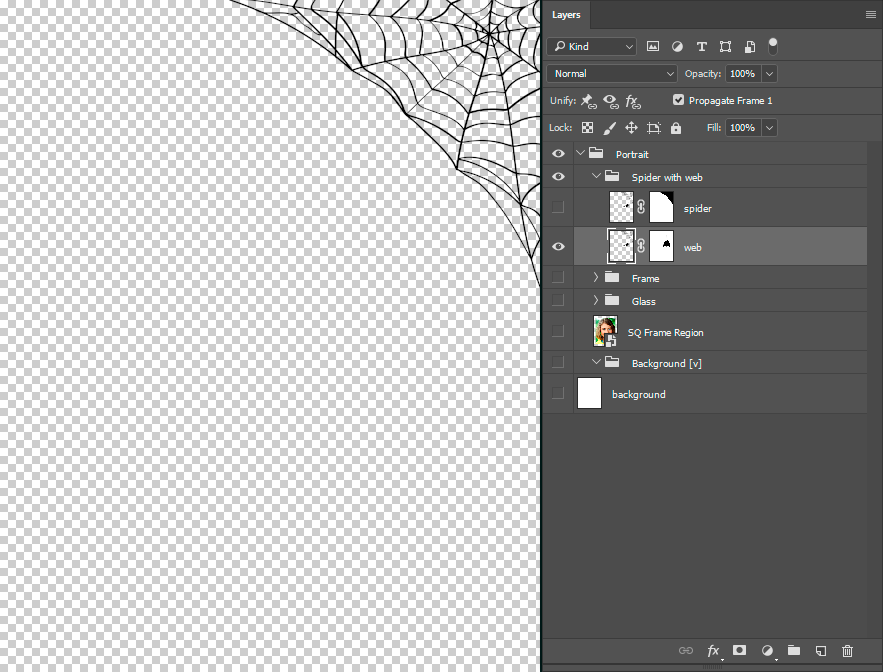
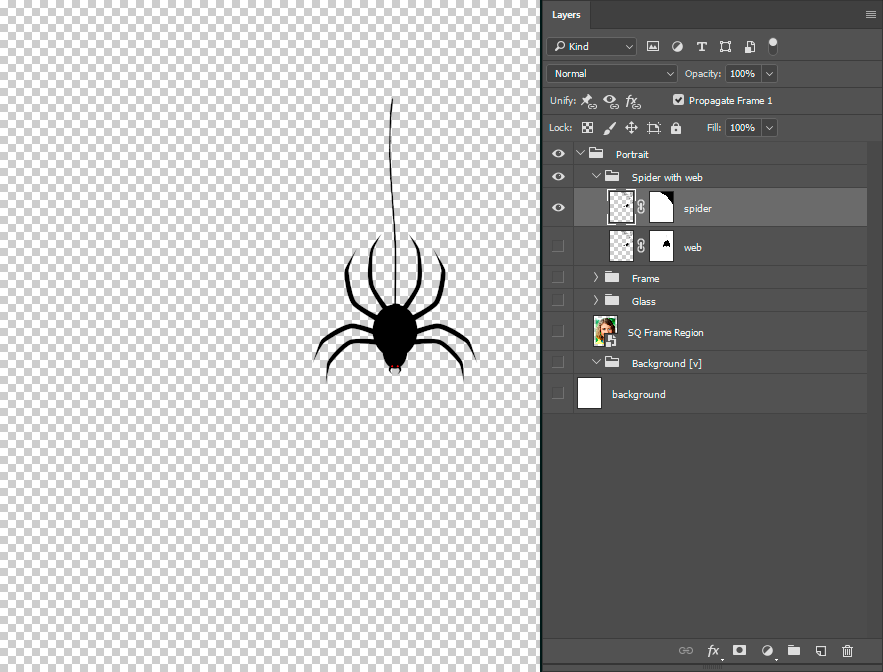
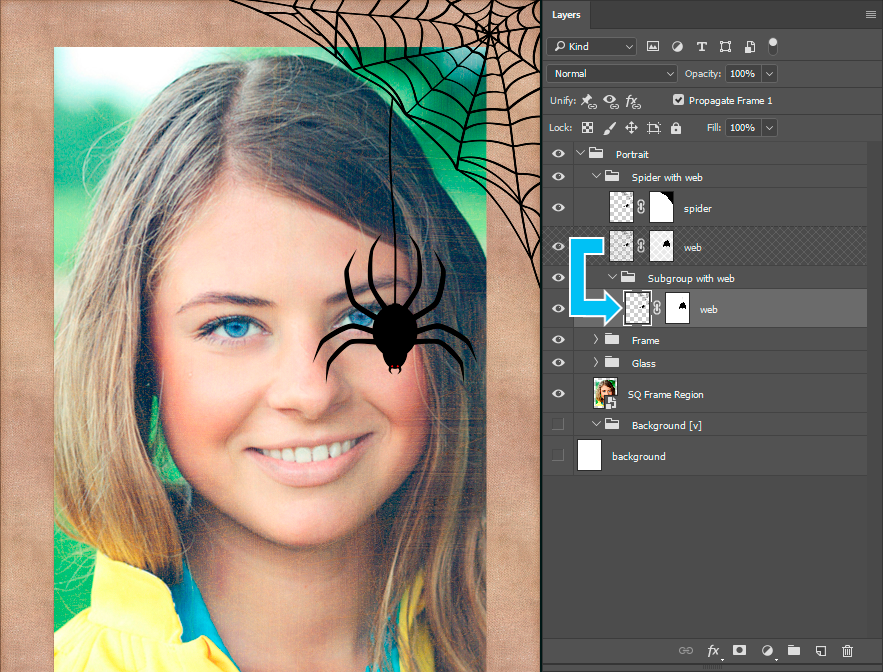
The layer with the spider needs to be edited, so that we could animate it. Create a copy of the graphic layer with the spiderweb and the spider inside the subgroup. Add masks to the layers so that one of them contains only the spiderweb, and the other one - the hanging spider.
| Only the spiderweb | Only the spider |
|---|---|
We need to separate these elements, because we’re going to animate the spider movements only.
Step # 9
Photoshop can animate a very limited set of actions. Unfortunately, rotation is one of actions Photoshop cannot animate straightforwardly. So, if you rotate the spider in one of the frames, it will be rotated by the same angle in all other frames. That’s why we’ll have to use creatively different animation methods for graphic layers.
Create one more subgroup inside the Spider and spiderweb subgroup. Place the layer with the spiderweb inside this new subgroup. This action is optional, but this structural arrangement will let you avoid mistakes in further manipulations.
Step # 10
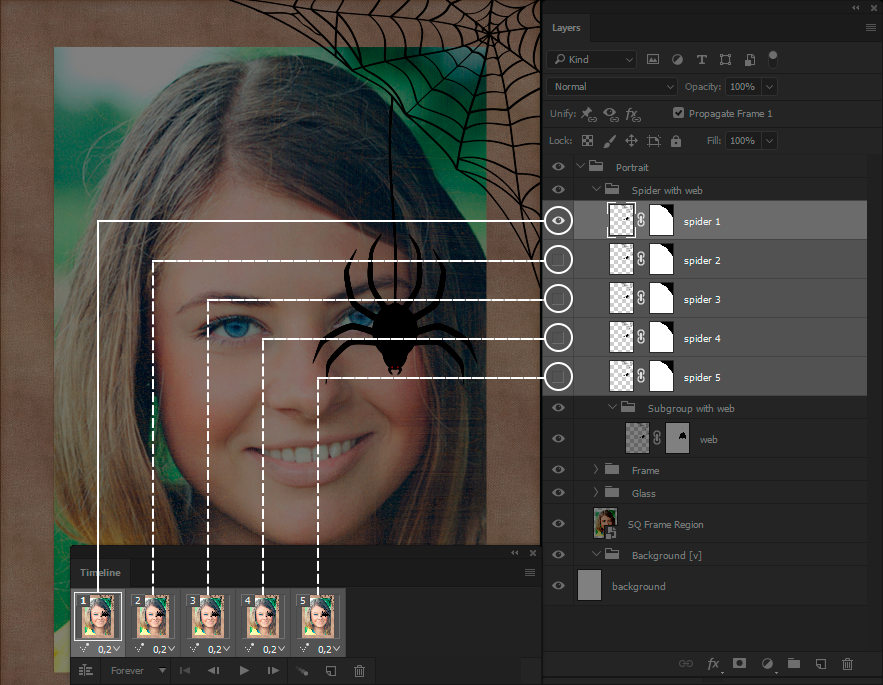
Create 4 copies of the layer with the spider. Click on each frame in Photoshop to set the visibility of each layer so that only one unique layer is visible in each frame. In other words, only the first copy of the layer with the spider will be visible in the first frame; only the second copy will be visible in the second frame, etc. Rotate the layer with the spider in each frame as shown at the end of step # 7.
For convenience, you can disable the visibility of all layers with the spider in the first frame, and then unify the frames using the first frame as a sample. This will let you avoid confusion when setting the visibility of the necessary layer in each particular frame.
Step # 11
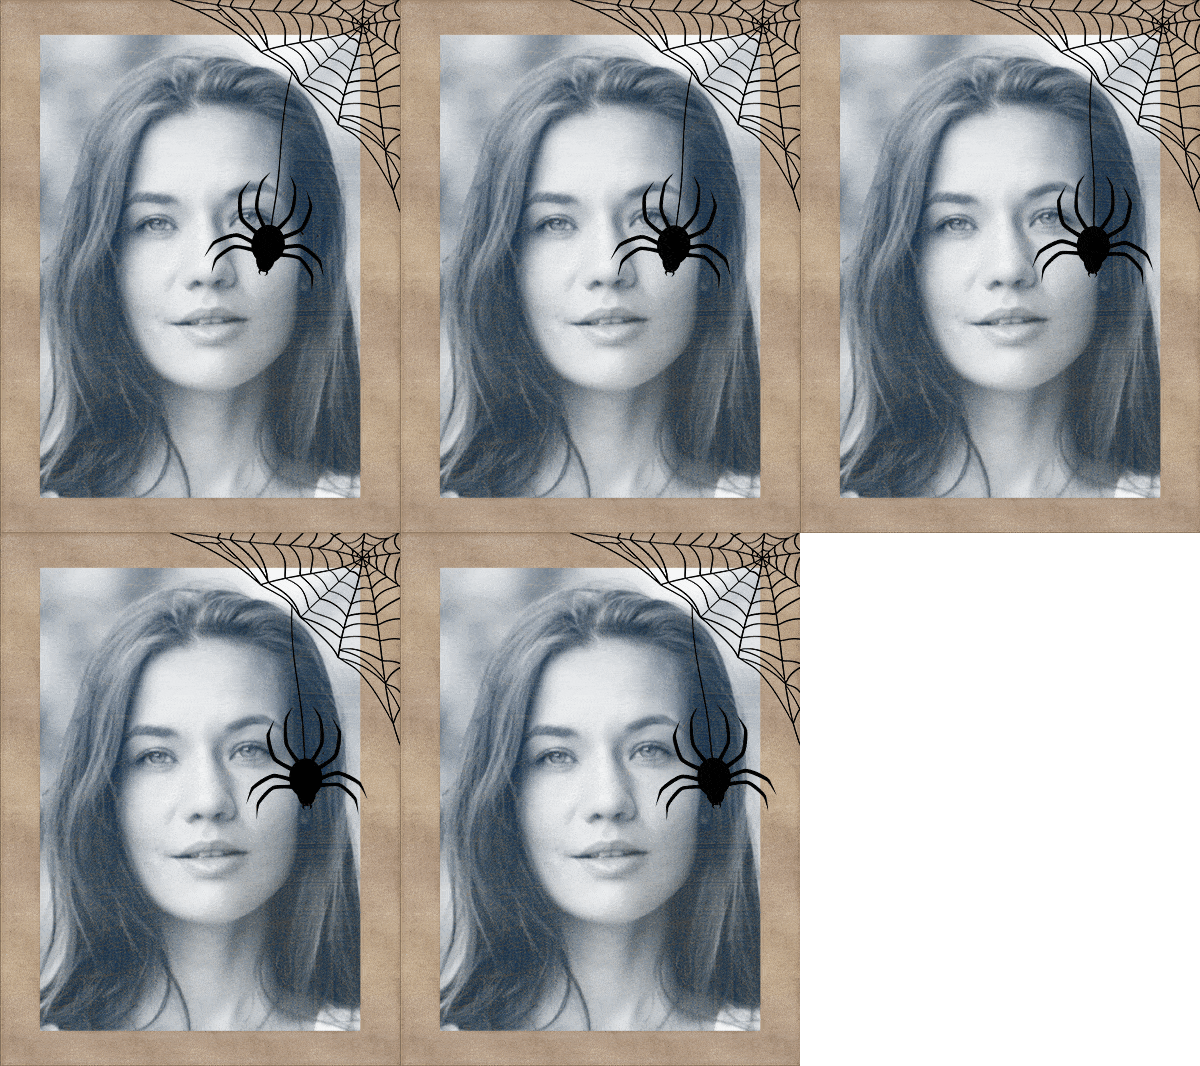
Go to the Template Creator and reparse the PSD document. This will take more time, as the template contained only one frame when you reparsed the PSD for the first time, and now there is 5 of them. Process a test photo and evaluate the result. If you did everything right, you are going to get an animation similar to what is shown below:
Step # 12
The animation looks discontinuous, as the spider moves only from the left to the right, while in real life its movements are similar to a pendulum motion (it should move from the left to the right, then from the right to the left).
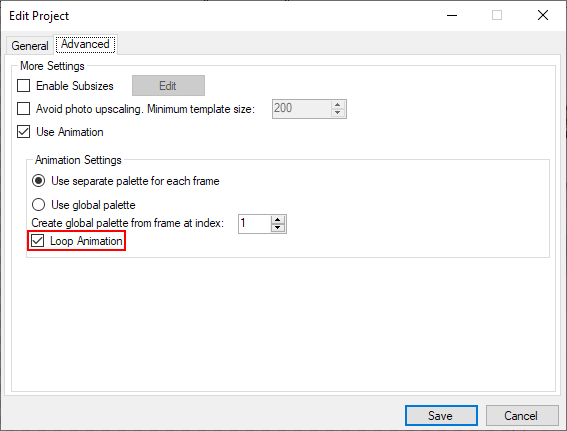
You can go back to Photoshop and add more frames manually to make the spider move in the reversed direction, but there is an easier way to do so. You can loop the animation symmetrically in the Template Creator.
Go to File, menu and select Edit project. Go to the Advanced tab and check the Loop animation box. Save the changes and process a test photo again.
After the animation has been looped symmetrically, the result will look much more natural
| The animation is looped asymmetrically | The animation is looped symmetrically |
|---|---|
Creating a template with an animated sticker
Let’s take the template we created before (if you don’t have it, download it here) and use it as a basis to turn it into an animation like shown below:
Please make notice of the fact that the little bug’s path of motion follows the line of the left brow regardless of the face position in a photo and the brow shape.
This result is achieved thanks to animation of the Rasterization filter. Follow the steps given below to turn the existing template (the one we created earlier) into the animation with the bug sticker shown above.
Step # 1
In the Template Creator, add a sticker into the existing project.
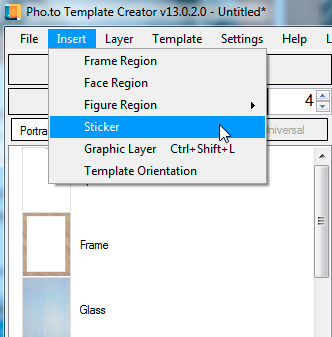
Step # 2
Go to the PSD document and place the graphic layer with the bug (download). Scale it and rotate counterclockwise a little bit.
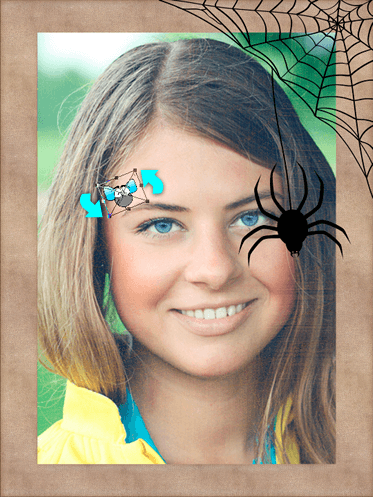
Step # 3
Create a copy of the bug layer inside the sticker subgroup. Rotate it the other way round (clockwise).
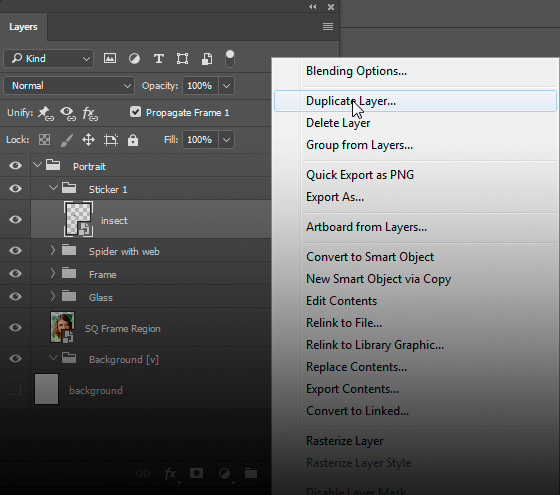
Step # 4
Set the visibility of each layer inside the sticker subgroup as shown in the scheme.
|
Frame 1: |
Frame 2: |
Frame 3: |
Frame 4: |
Frame 5: |
|---|---|---|---|---|
 |
 |
 |
 |
 |
NB: there is no need to create 4 copies of the layer with the bug in order to get 5 layers in sum, like we did it with the spider. Two layer copies (rotated differently) inside a group are enough. The resulting animation for stickers is set in the Template Creator, in the Rasterization filter. Switching the visibility of the graphic layers inside the sticker is necessary to boost the effect of the bug’s movement with the help of the Rasterization filter.
Step # 5
Go to the Template Creator and reparse the whole PSD document. After the information about the layers contained in frames has been updated, go to the first frame and the user photo region. Apply the Rasterization filter to the user photo region and go to its position editor.
For convenience, you can disable the visibility of all marker points, except for brow points.

Such face scheme will be easier to work with for the purposes of this task.
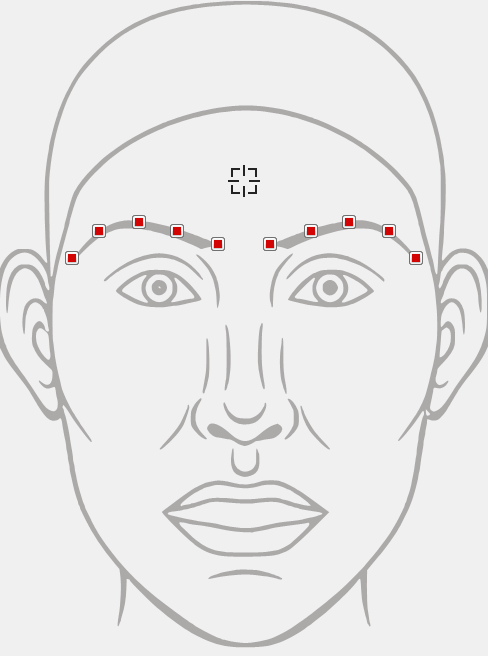
Select the brow marker points and set the aim icon of the force of attraction as close to the left point as possible.
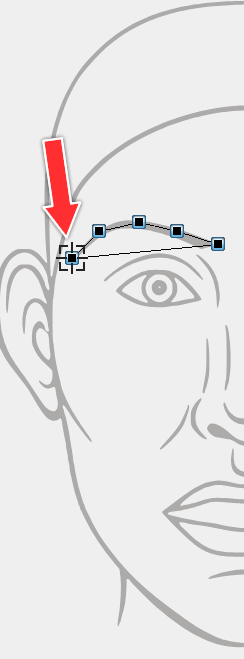
Reposition the sticker center point closer to the bug’s tail - this will raise the bug slightly above the brow. (1)
Then, scale the sticker relative to the head width and set the size value to 20%. (2)
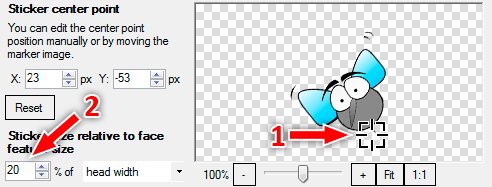
When the result of positioning suits you, save the changes in the sticker Position editor.

A successful result of positioning
Step # 6
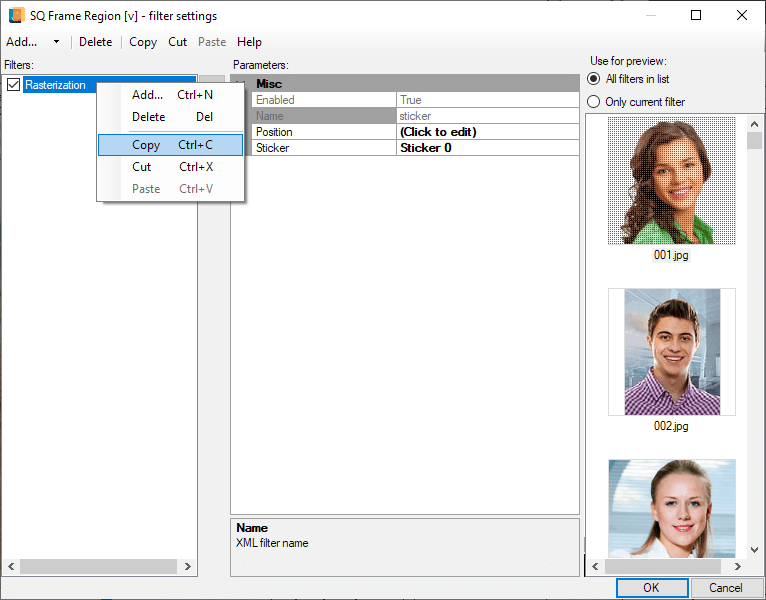
Go to the filters list for the user photo region of the first frame. Right click the Rasterization filter in the list and select Copy from the context menu (as a reminder, you can also use the CTRL + C key combination to perform copying). We need to copy the Rasterization filter together with its parameters to avoid adding and configuring it for the next frame all over again.
Step # 7
Go to the next frame.
Go to the user photo region filters list and paste the Rasterization filter that you copied from the previous frame..
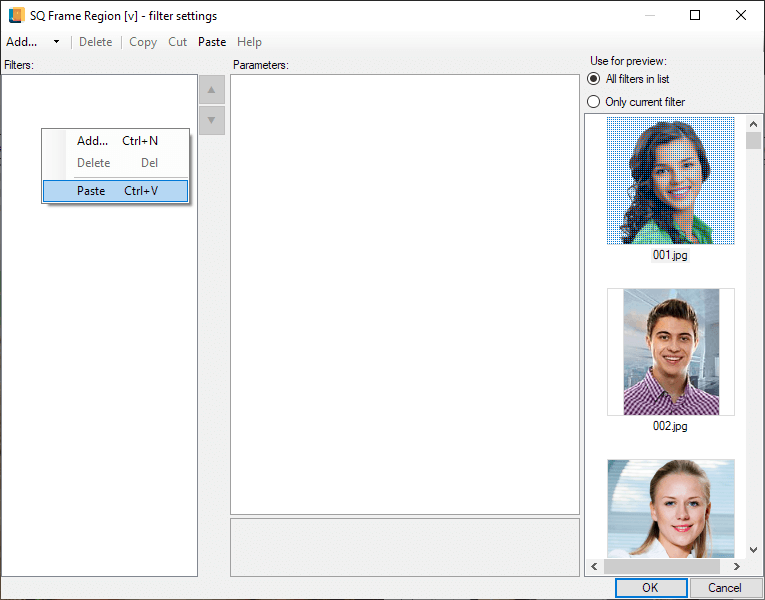
Go to the Position editor of the Rasterization filter that you’ve just pasted and adjust the force of attraction of the sticker center to selected marker points. Move the aim icon of the force of attraction one fifth of the brow length to the right (see the scheme below). As a result, we need to make the bug move the same distance in each frame, so that it eventually moves to the other end of the brow.

If after doing so you don’t like the bug’s position on the brow, reposition the sticker center point by moving it up or down along the Y-axis.
Save the changes in the position editor and copy the current Rasterization filter in order to use it in the next frame.
ДRepeat the same actions for the next frames (3, 4, 5) - paste the Rasterization filter that you copied from the previous frame into the current frame, then adjust the force of attraction of the sticker center to selected marker points in the Position editor (see the scheme), adjust the sticker center point, if needed.
Step # 8
Process a test photo and compare the result you got to the sample animation:
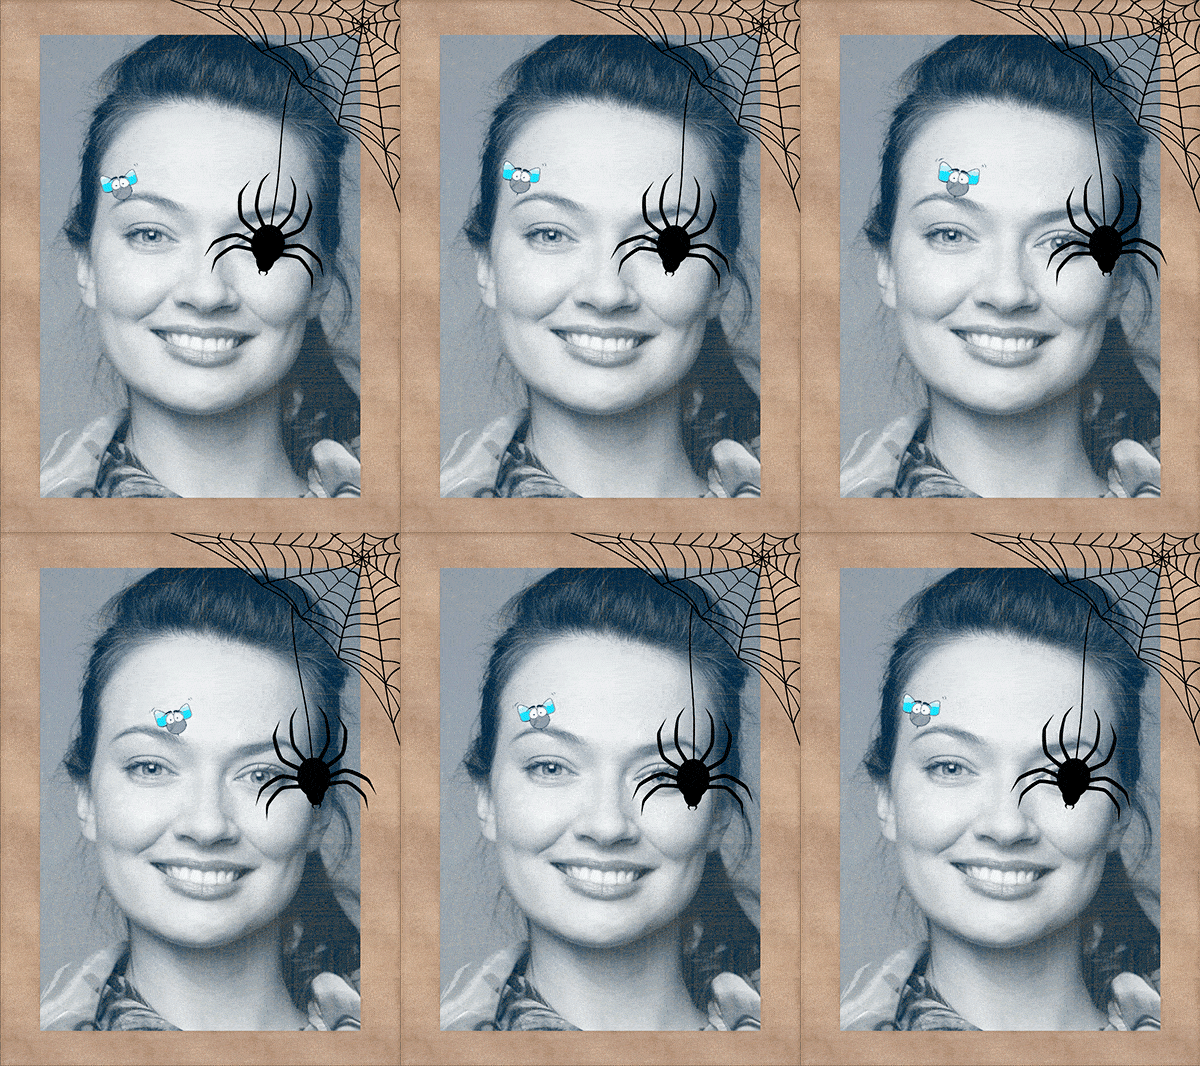
If the result is not satisfactory, go back to a particular frame and edit the Rasterization filter.
Creating an animated template with distortion mode for multiple user photos
Here is a step-by-step guide on how to create an animated template with a book (see sample below). Graphic files that you’ll need for this template can be downloaded here.

Step # 1
Create a project for a new template. Select File menu > Create Project.
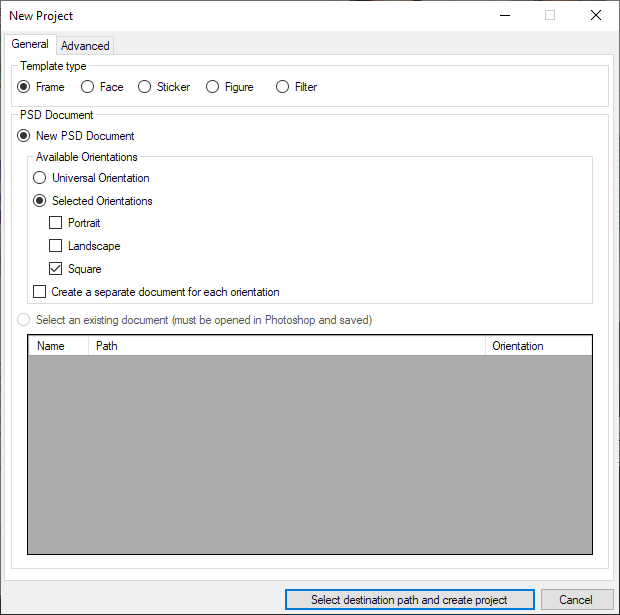
A New Project window will open. Select the Frame, template type and Square orientation. Check the Use Animation box in the Advanced tab.
Save the project.
Step # 2
The Template Creator has generated the initial template structure. Now we need to fine-tune it to get the desired result.
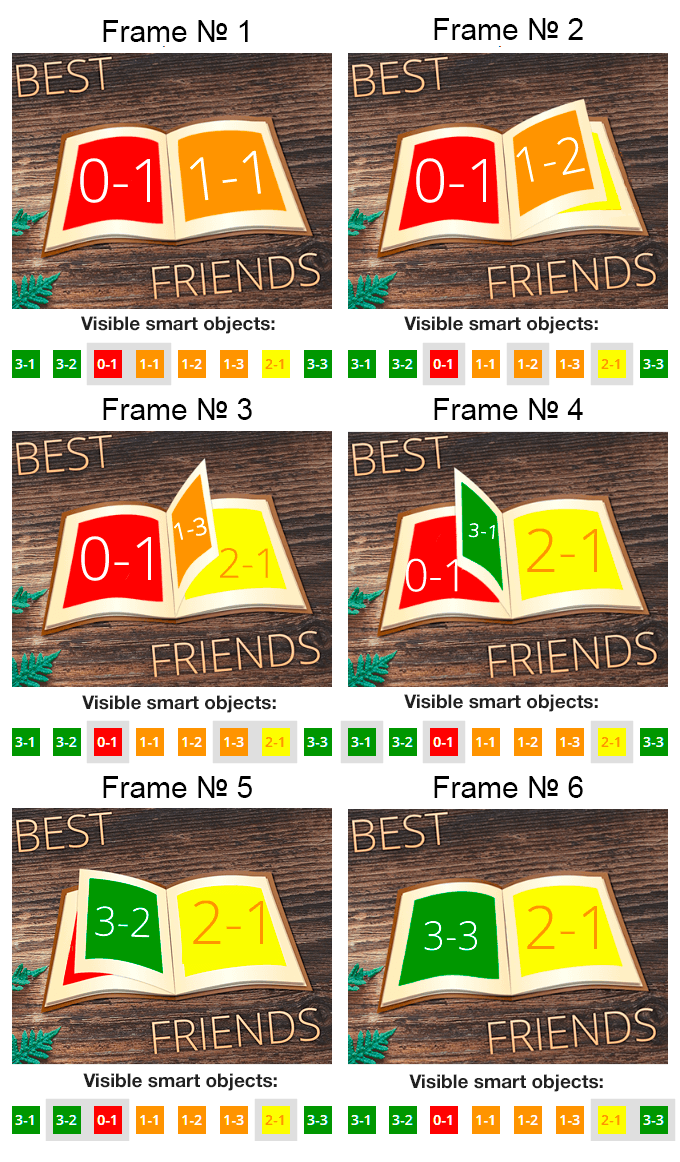
To build this template, we need 8 user photo regions* and 6 frames**. We need so many user photo regions in order to create an effect of turning over the pages which look a little bit arched. That is why we have to create several variants of one user photo region. Below is a storyboard with enumerated user photo regions.
As you can see, all user photo regions have numbers consisting of two digits. The first digit indicates the index of an inserted user photo, the second digit indicates the uniqueness of the current user photo region.
By way of example, let’s have a look at frame № 2, which contains a user photo region enumerated as 1-2. The first digit (1), as well as the orange color, indicates the user photo index. The second digit (2) indicates the uniqueness of this user photo region among other regions with the 1 index.
Rectangles with numbers below each frame (3-1, 3-2, 0-1, 1-1, 1-2, 1-3, 2-1, 3-3) indicate which user photo regions are displayed in this particular frame (these rectangles are shown in gray frames). If a rectangle has no gray frame around it, then this particular user photo region is hidden in this frame.
Since a user photo region that supposes using one particular user photo can be warped differently in different frames, we need to get around restrictions imposed by animation rules, hat’s why we’ll have to create independent copies of each user photo region with the same index.
NB: When the animation is looped symmetrically, a number of additional frames, that do not (and will not) exist in Photoshop, will be added to current frames.
As frame based animation supposes using independent settings for user photo regions in different frames, we are going to configure main settings for user photo regions which will be the same in different frames. Then we’ll copy the frames and configure each of them individually.
Step # 3
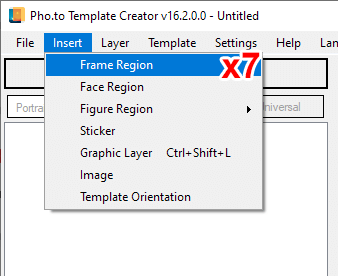
Now we need to add 7 more user photo regions (we need 8 of them in sum). In the Template Creator, select Insert > Frame Region. Repeat this action for 7 times..
The same procedure can be done in Photoshop by copying an existing smart object. To create independent copies of smart objects, right-click the smart object layer and select Create a smart object via copying from the context menu. In this particular case, there is no difference how you add additional user photo regions.
Step # 4
Go to Photoshop and place new user photo regions together with the one that already existed in the PSD document.
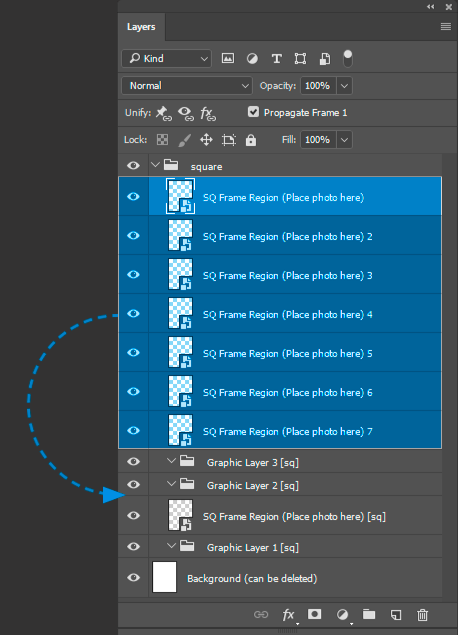
This has to be done because the Template Creator always adds new user photo regions to the top of the layers list in the PSD document which makes the template structure incorrect.
As we need only one subgroup with a graphic layer in the template (we will switch between graphic layers with different book pages inside this subgroup), delete the Graphic layer 2 [sq] subgroup.
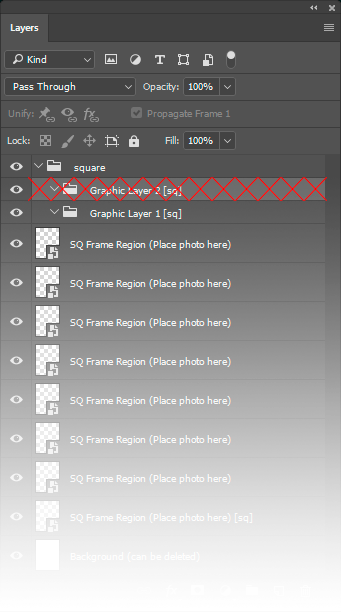
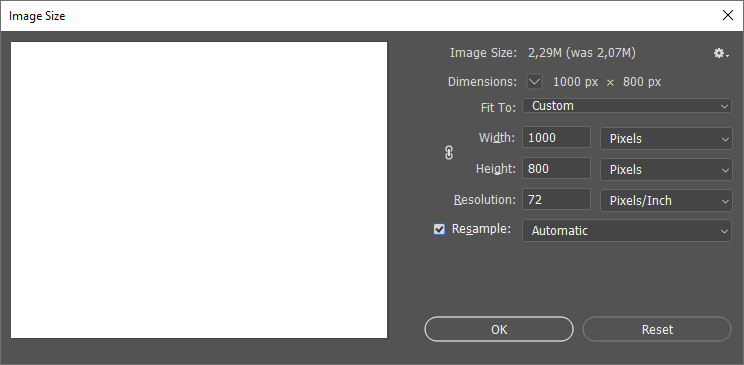
Along the way, let’s edit the image size in the PSD document. We need to adjust it to the size of prepared artworks - 1000 x 800 px.
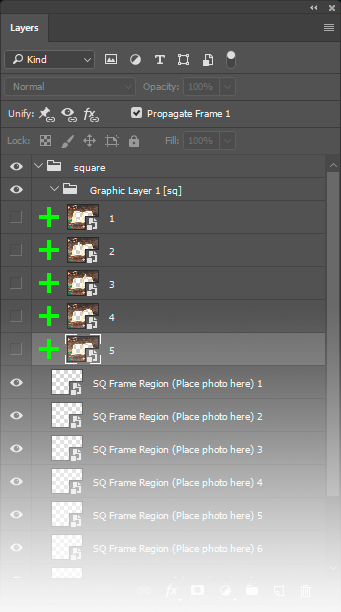
Add 5 graphic layers with holes for inserting user photos into the Graphic layer 1 [uv] subgroup.
You may wonder why we don’t place the graphic layers with books in the Background subgroup? The point is that when user photo regions have been distorted, some of them may be larger than frames on book pages.
That’s why it is wiser to place the graphic layer above user photo regions so that the edges of smart objects were most certainly hidden by the graphic layer with a hole.
Place the graphic layers from top to bottom, starting with the layer for the first frame. For convenience, disable all graphic layers for the time being.
Step # 5
Reparse the PSD document. This needs to be done in order to import the updated data from the PSD document to the Template Creator and configure the proper settings for all user photo region within one frame.
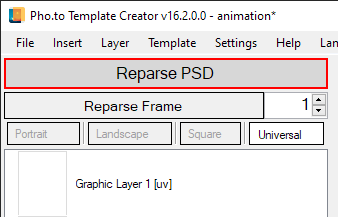
Step # 6
Enable Distortion mode for each user photo region in the list:
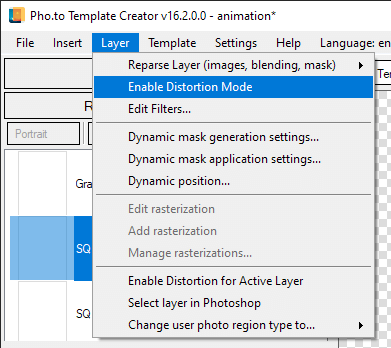
Step # 7
Go back to Photoshop. As you can see, the Template Creator has marked the user photo regions for which you have enabled Distortion mode: the DM prefix has been added to their names after the SQ_ prefix.
For clarity - to be able to tell easily which photo (or what image index) is used for which user photo region - enumerate each user photo region and paint them with different colors, using the order of the rainbow colors, where the red corresponds to the 0 index, and the green - to the 3 index, respectively.
Go from top to bottom and paint each user photo region as shown below.
You can also rename the smart objects of the user photo regions by adding corresponding indexes after the SQ_DM prefixes, e.g. ‘SQ_DM Index 1’, ‘SQ_DM Index 2’ etc.
To avoid conflicts in case user photo regions have the same names, add a numeric suffix to a smart object name, as shown in the example below.
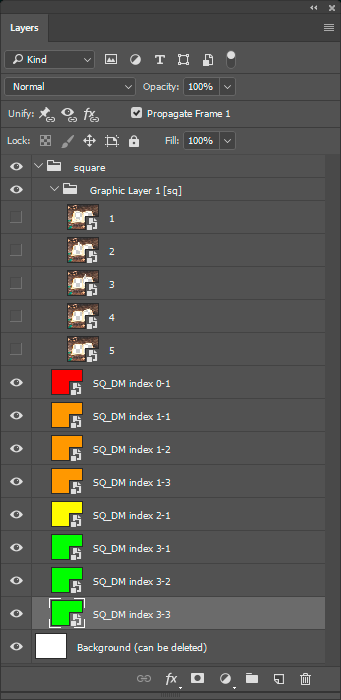
Step # 8
Now, when you can conveniently specify indexes for user photo regions, reparse the PSD document in the Template Creator.

Click the smart objects of the user photo regions and specify an image index for each smart object in the settings panel below the layers list (image indexes should be the same as the first digits in smart object numbers).
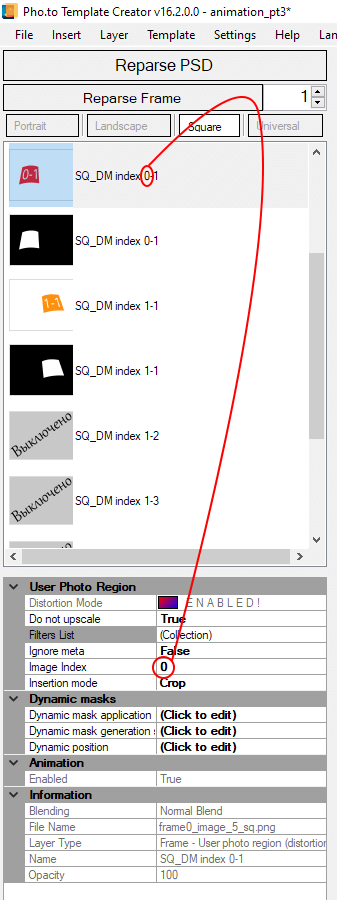
Step # 9
After you’ve created a semi-configured frame containing the layers data that is the same throughout the entire template, make 5 copies of the frame, so that there are 6 of them in total.
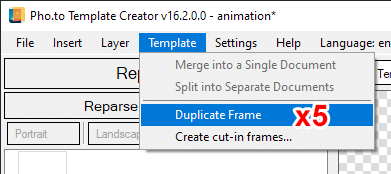
NB: when you copy frames using the Template Creator interface, all meta data specified for each frame will remain safe. p.pb-2.
| If you copy frames with the help of Photoshop, the information such as user photo regions filters, data about the dynamic masks of graphic layers, etc. will not be copied to the next frame. To avoid such situation,
Step # 10
Head back to Photoshop. As you can see, the PSD document now contains the frames that you’ve added in the Template Creator (you can see them in the Timeline panel).

Make sure that all new frames:
- have non-zero delay time;
- have ‘Dispose’ mode applied to them.
If your settings are different from those stated above, edit them.
Let us now start positioning, scaling and distorting the smart objects of the user photo regions for each frame. To be able to tell easily which user photo regions should used for which frame, stick to the scheme that we implemented above.
Enable or disable the visibility of user photo regions in frames in accordance with the ‘Visibility in frames’ column.
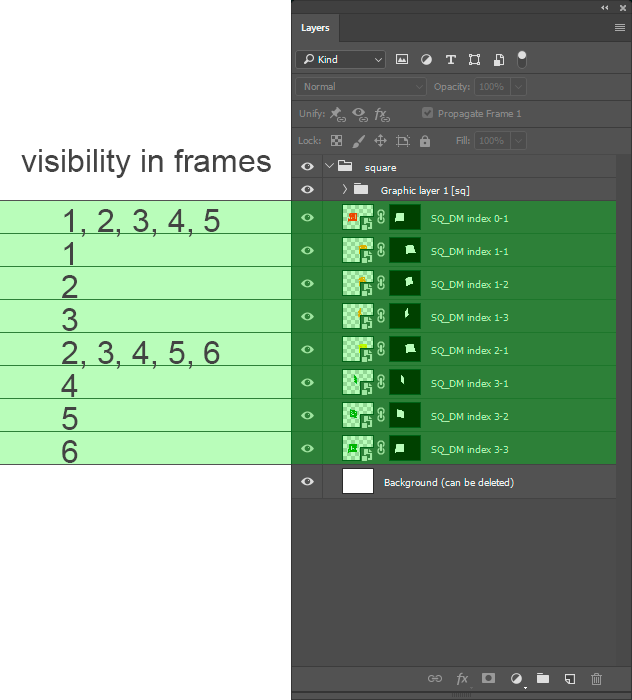
Remember that each particular frame should display only those user photo regions that should be there according to the template idea.
Another point is that you need to change the order of the user photo regions: place the two green smart objects of the user photo regions ( SQ_DM index 3-1 and SQ_DM index 3-2 ) on top of the list. Otherwise, when working with frames № 4 and 5, they will be сovered by the red smart object of the user photo region (the one with the 0 index).
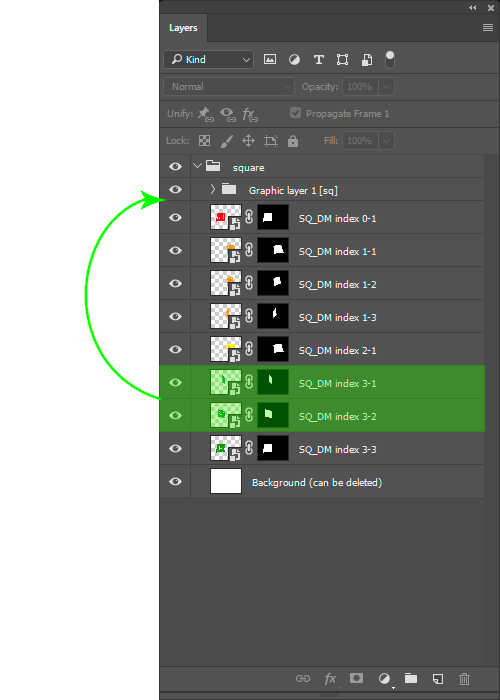
It may happen that you may fail to position, distort and hide/display the proper smart objects of the user photo regions correctly on the first try. Use the frame-based navigation in the Timeline panel to switch between the frames and correct possible mistakes in your template step by step.
Step # 11
Before you head to the Template Creator to check your template using test photos, you should mask the edges of all distorted smart objects to avoid the appearance of artifacts that are typical of distorted user photo regions.
Regardless of the current frame:
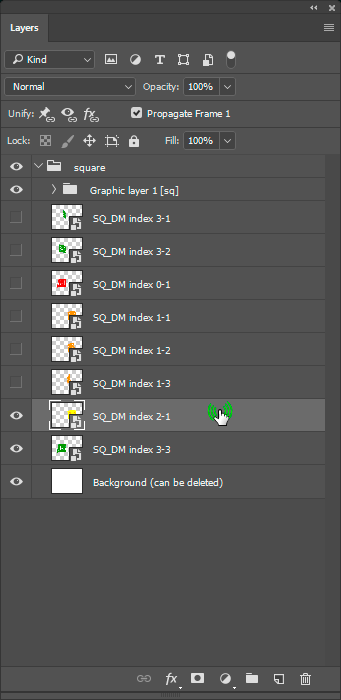
- Click a smart object of the user photo region to select it (see picture 1 below);
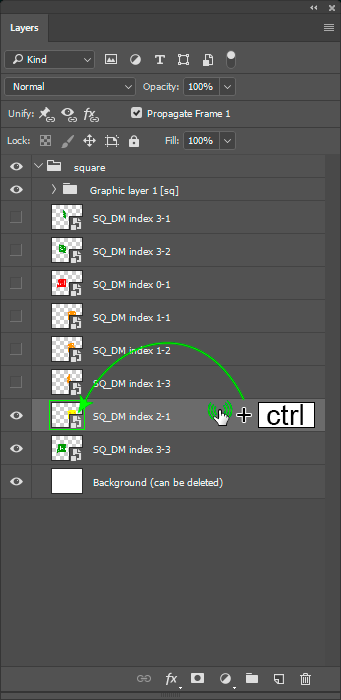
- Press the CTRL key and click the smart object thumbnail to outline its edges (see picture 2 below);
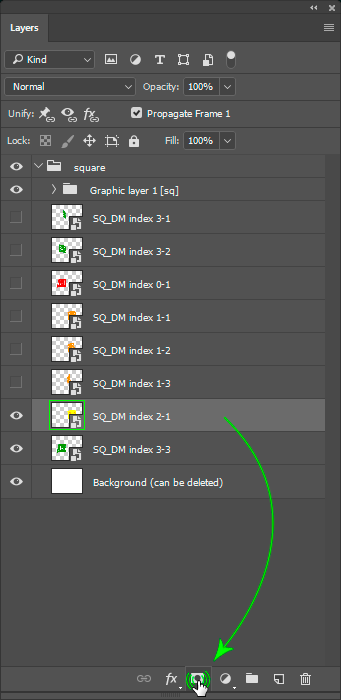
- Click the mask icon at the bottom of the layers panel to mask the edges of the current smart object (see picture 3 below).
|
1 |
2 |
3 |
|---|---|---|
Step # 12
After you have masked the edges of all smart objects, go to the Template Creator and reparse the PSD document.
Before you start processing test photos, note that you can see disabled smart objects of the user photo region for each particular frame. This lets you avoid a mess when working with frames in the Template Creator.
You might have noticed that the animation looks unfinished when you view it in Photoshop. To avoid the animation breakdown, go to the Template Creator (File) menu and select Edit roject, then check the Loop animation box in the Advanced tab.

Step # 13
Choose 4 different photos and process them with the template. There are two ways to open the multiple photos processing dialog:
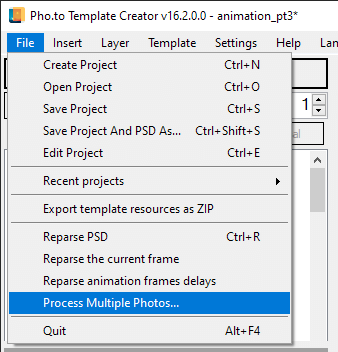
- Open File menu -> Process Multiple Photos...
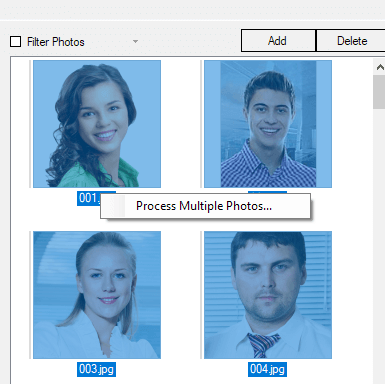
- Select 4 test photos in the panel on the right (you need to filter photos by orientation before that), right-click one of them to open the context menu and select Process Multiple Photos.
|
1 |
2 |
|---|---|
The Multiple Photos Processing window will open. It lets you add or remove selected test photos, as well as add random photos.
Here is the result of processing test photos with the template:

If for some reasons your result is different from the one shown above, download the sample template to compare it with yours and analyze what went wrong.
Now, when you understand how to create templates of this kind, you may want to add more frames with page turning animation. If you do, you are welcome to do so without assistance. :)
