The Template Creator makes it possible to create projects with several different user photos inside one template.
The procedure of creating a template with several user photos is pretty much the same for all template types, except for sticker templates.
Sticker templates can have only one user photo region and, as a result, only one user photo.
Here is a step-by-step guide on how to create a template with several user photos:
- Create several smart objects of the user photo region in your PSD document.
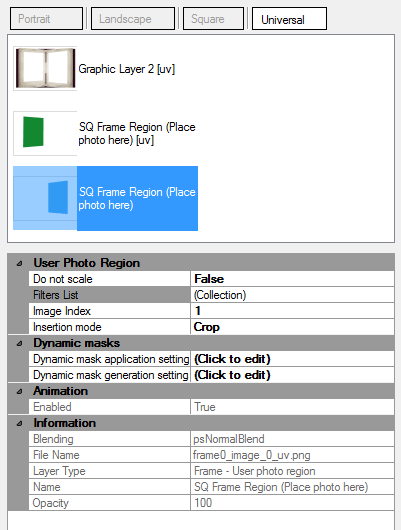
- Specify an image index for each user photo region in the Template Creator.
An image index is a sequence number of a photo uploaded by a user.
It is assumed that all photos uploaded by a user are indexed from 0 to N-1, where N — is the total number of photos. An image index assigned to a user photo region, means that a photo with a corresponding sequence number will be inserted into this user photo region.
Thus, if a template has 3 user photo regions, each of them for a different user photo, then the user photo regions should be indexed as 0, 1, 2, (enumeration should have no gaps and start with 0).
Besides, several user photo regions may have an image index belonging to one photo.
For instance, there may be a template with 7 user photo regions designed for 3 user photos. In this case the user photo regions may have the following image indexes: 0, 1, 1, 2, 0, 1, 2.
There are some rules for assigning image indexes:
- enumeration should start with 0;
- an image index cannot be more than M-1, where M is the total number of user photo regions.
- there should be no gaps in the sequence of image indexes. That is, if the maximum image index you use is 5, then all numbers from 0 to 5 must be used in the sequence (e.g. you cannot omit 4;
- the quantity of unique image indexes used in different template orientations should be the same.
You can test a template with multiple user photos in the same way as a regular template, using the panel with test photos (in the right part of the window) and the buttons. In this case the same photo will be inserted into all user photo regions.
For a more detailed testing with different test photos, open the multiple user photo dialog. This can be done in two ways:
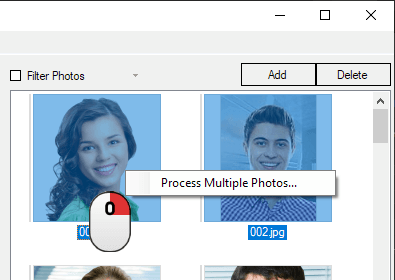
- Select several test photos in the panel on the right, then right-click and click :
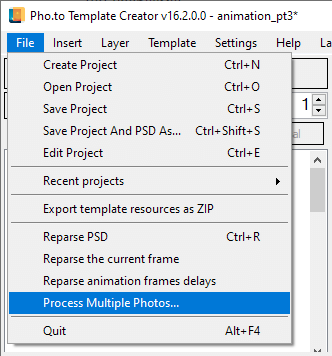
- Or select in the menu
You will see a dialog for testing a template using several test photos. Before processing a test photo, the Template Creator performs a validity check of index numbers. Сommon errors found at this stage and their solutions are described here.
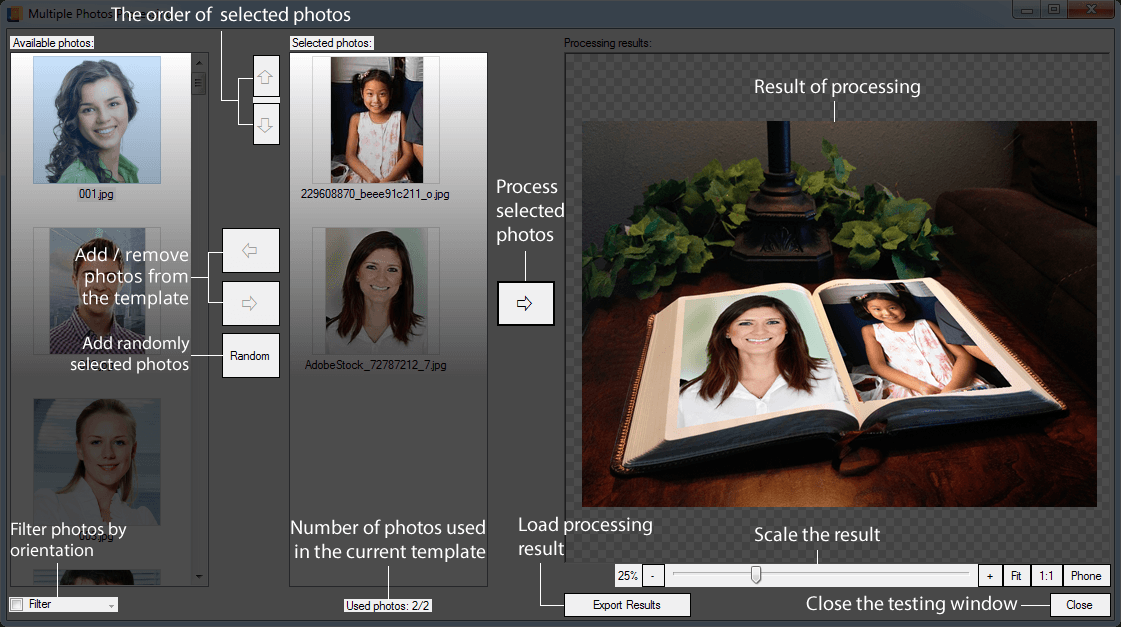
Add a few photos for testing your template. In the example above, 2 test photos for 2 user photo regions have been added. The right and left arrows allow to add or remove test photos from the list. The up and down arrows let you shuffle the photos. A click on the “Random” button creates a list of randomly selected test photos.
If you click the unpaired button with the right arrow, the template will process the selected test photos. To save the result, click the Export results button.
Before processing a test photo, the Template Creator performs a validity check of image indexes. The following errors can be detected:
Found an image index larger than the number of user photo regions.
If your template has M user photo regions for each orientation, none of the index numbers can be more than M-1. Check all orientations to make sure they don’t contain invalid index numbers (exceeding M-1) and correct them.
Missing image index.
Make sure that you have used all index numbers in the sequence including 0. That is, if the maximum index number in the template is 5, then all numbers from 0 to 5 must be used in the sequence (e.g. you cannot omit 4).
A zero-indexed user photo region is missing.
No user photo regions with the 0 image index have been found in the template. Enumeration of photos starts with zero, so the first photo should have the 0 index number. Assign the zero index to one of the user photo regions.
Each template orientation must contain the same number of unique image indexes.
The quantity of unique image indexes (that is, the number of unique user photos) should be the same for all template orientations. Compare your indexes in all orientations and create the same index number set for all orientations.
If there are several user photos in a template, you need to specify one photo whose size will be used for resizing. To do so, choose a user photo region with a desired image index, then set the value of the Do not scale parameter to “true”.
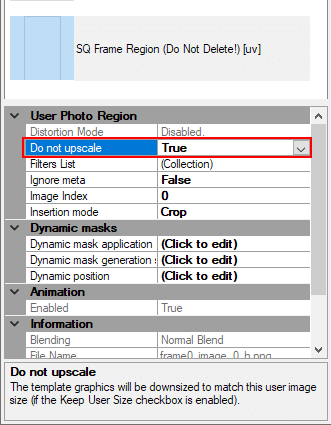
The photo with a specified index number will be used as a sample, and all other graphics will be resized to match its size.