False — the hue value of each pixel will be changed in the following way: the value set by the Color tone parameter will be added to the current pixel hue value.
True — the hue value of each pixel is determined by the Color tone parameter. The original hue value is ignored.
This filter also offers an opacity adjustment using the Blended filter.
Set Luminosity / set_luminosity
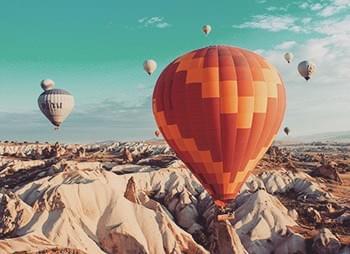
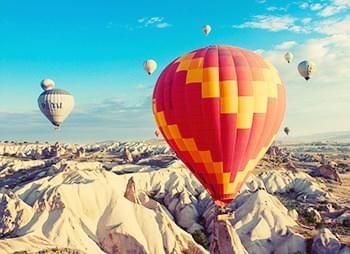
before
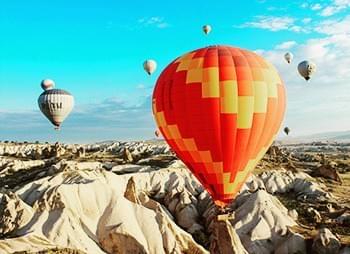
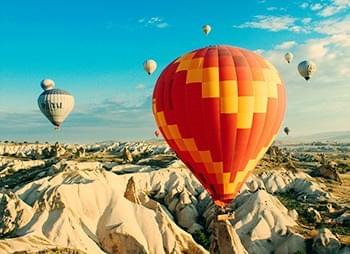
after
Example parameters: use_hsv=false, value=50
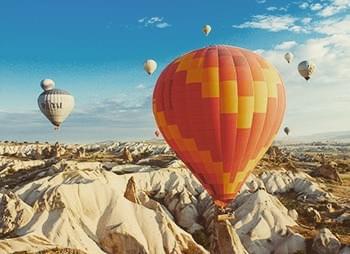
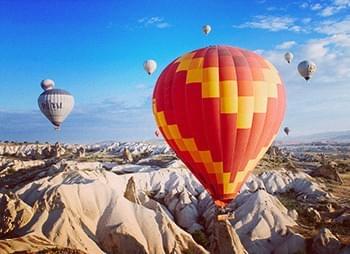
before
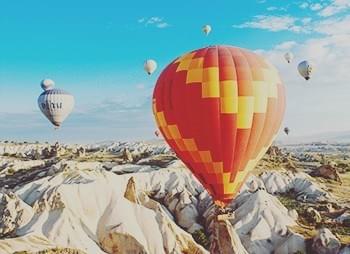
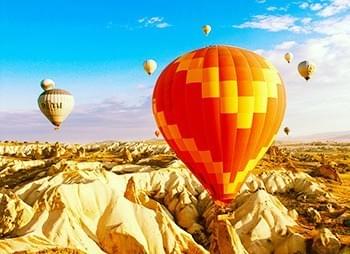
after
Example parameters: use_hsv=true, value=50
The chromaticity of each pixel of the picture in percent.
Parameter
Default value
Min value
Max value
Description
Luminosity, %
value
50
-100
100
Luminosity value in percentage
HSV Color Model
use_hsv
False
-
-
If the value is (true), HSV color will be used.
If the value is (false), HSL color model will be used.
This filter also offers an opacity adjustment using the Blended filter.
Blur / blur
before
after
Example parameters: default
Blur — the image is smoothed by the Barletta window.
Parameter
Default value
Default value
Max value
Description
Radius
radius
5
0.001
100
Blur kernel radius
Use percentage
use_percent_values
false
-
-
If true, the value is set as a percentage of the larger side of the image.Otherwise - in pixels.
This filter also offers an opacity adjustment using the Blended filter.
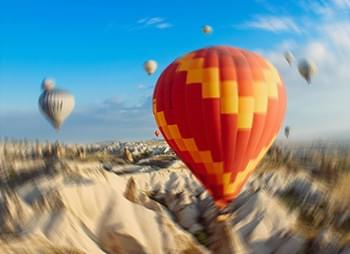
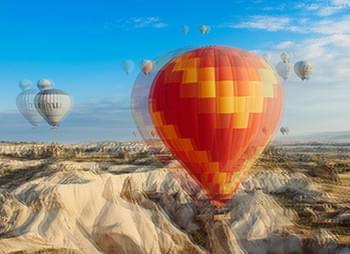
Blur advanced / blur_advanced
before
after
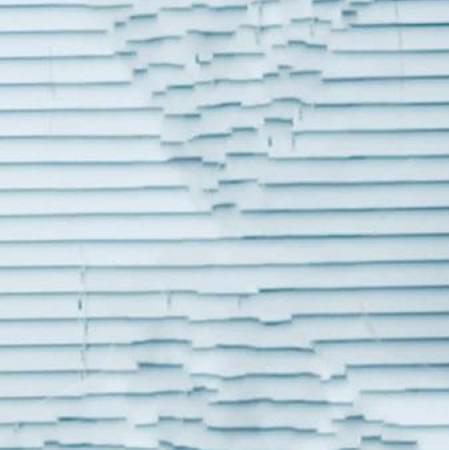
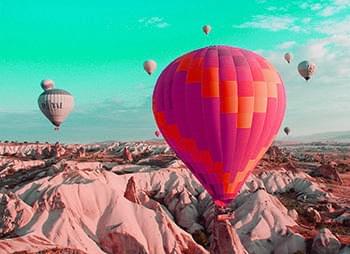
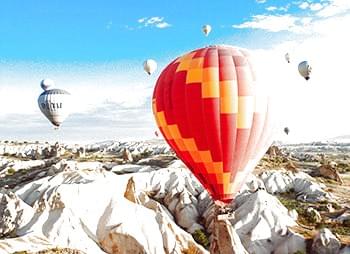
Example parameters: method = blur_motion; intensity = 25
before
after
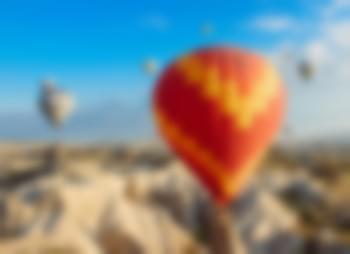
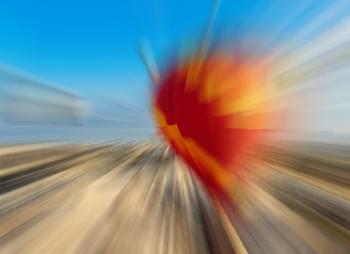
Example parameters: method = blur_zoom; intensity = 8
before
after
Example parameters: method = blur_spin; intensity = 8
before
after
Example parameters: method = blur_offset; intensity = 8
Blur filter with the option to adjust the direction and intensity of the blur.
Parameter
Default value
Min value
Max value
Description
Blur type
method
Motion blur (horizontal)
-
-
Blur type:
Motion blur (blur_motion);
Zoom blur (blur_zoom);
Spin blur (blur_spin);
Horizontal image "stratification" (blur_offset).
Intensity
intensity
5
0
300
Adjusts Blur intensity.
Motion blur angle
angle
0
-360
360
Sets the angle of the direction of motion blur.
Shadow highlight / shadow_highlight
before
after
Example parameters: highlight_factor=6; highlight_range=0.6; shadow_range=0
Shadow/Highlight correction filter (similar to the Photoshop tool of the same name).
The High Pass filter, almost similar to the one in Photoshop.
Parameter
Default value
Min value
Max value
Description
Smooth Method
smooth_method
Box
-
-
Border smooth method: simple box or gaussan blur.
Smooth Radius
smooth_radius
0.2
0.1
100
Dedermines how much to blur the mask edges after binarization
Sizes in percentage
use_percent_values
true
-
-
If True, border parameters are interpreted as percents, in relation to the whole image. If False, border parameters are interpreted as pixels.
This filter also offers an opacity adjustment using the Blended filter.
Clean Shadow on Mask / clean_shadows_on_masks
before
after
Example parameters: default
A filter that lightens the dark areas of the photo (increases the gamma to a medium brightness value).
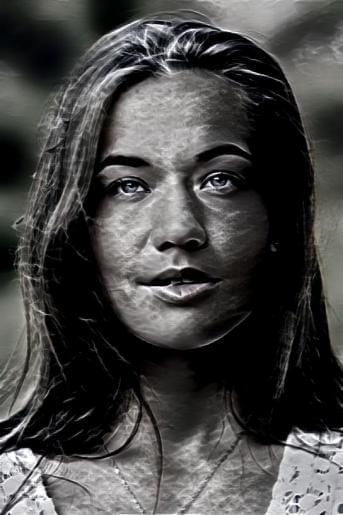
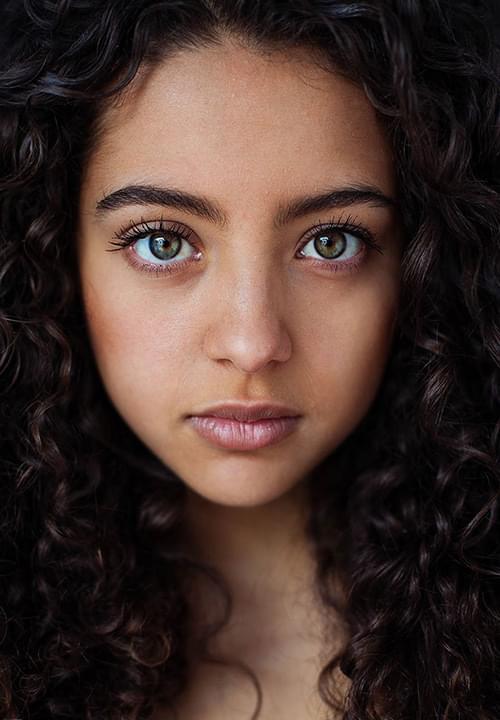
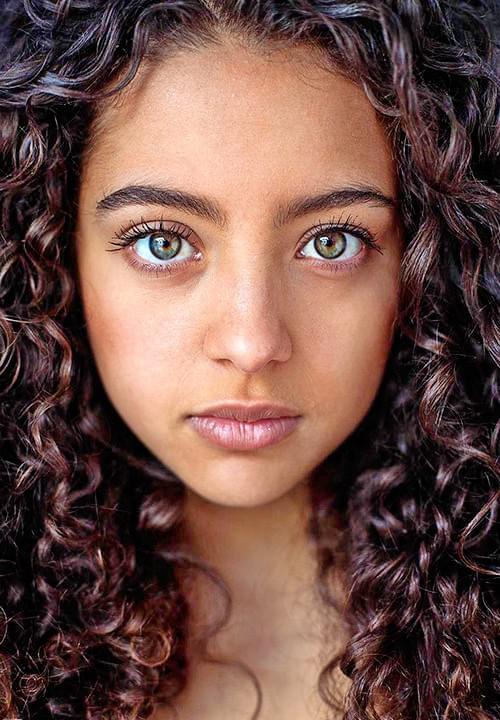
Desaturation / desaturation
before
after
Example parameters: default
A filter that transfers a photo into the B&W mode.
This filter also offers an opacity adjustment using the Blended filter.
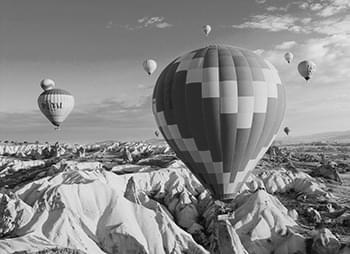
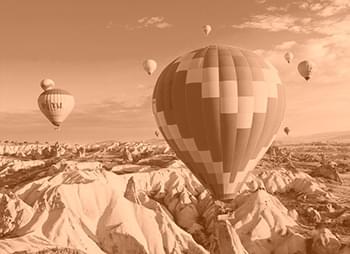
Sepia / sepia
before
after
Example parameters: default
A filter that processes a photo with the sepia effect.
This filter also offers an opacity adjustment using the Blended filter.
Color Dominance / color_dominance
before
after
Example parameters: hue_in_degree=80; fixed_saturation=0.6
A filter that colors the photo in shades of one given color.
Parameter
Default value
Min value
Max value
Description
Hue
hue
4.18879
0
6.283185307
A hue that is used to tint a photo. The value lies in the range of 0 to 2*PI
. The default value means blue, the value of 0 is red, the value of 3.14 is cyan.
Hue Value in Degrees
hue_in_degree
-
0
359
This parameter is the same as the previous one (hue), but is indicated in degrees. If this parameter is used, then the "hue" parameter will be ignored(to be more exact, it will be recalculated with the following formula: hue = hue_in_degree * π / 180°)
Fixed Saturation
fixed_saturation
0
0
1
If fixed_saturation=0
, saturation of the source image will remain intact (black and white images will remain black and white; color images will be tinted with a selected color.) If 0 < fixed_saturation <= 1
, the saturation value of the source image will be multiplied by the fixed_saturation value (the more is this value, the more saturated the result will be). If fixed_saturation=1
, both color and black and white images will be tinted with a selected color to the maximum extent possible
This filter also offers an opacity adjustment using the Blended filter.
Eyedropper By Mask / colors_generate
before
after
Example parameters: default
A filter that finds a color from a given area of the user photo and fills the entire frame region with that color.
The area of the user photo by which the color will be computed is defined by a mask.
This filter in combination with dynamic masks can be used for repainting individual elements of the template, such as stickers.
Parameter
Default value
Min value
Max value
Description
Mask
-
Skin Mask
-
-
The mask, specifying the area to calculate color. Available masks:
Face Mask
Clothes Mask
Iris Mask
Figure Mask
Hair Mask
Head Mask
Lips Mask
Skin Mask
Sky Mask
Face Segments Mask
Color Measurement Method
-
median
-
-
Color Measurement Method:
average
harmonic mean
geometric mean
median
the most common color (peak of the histogram)
This filter also offers an opacity adjustment using the Blended filter.
Split toning / split_toning
before
after
Example parameters: balance=70; shadow_saturation=80
Split toning effect (an effect that tints the highlights in an image with one color and the shadows with a different color).
Parameter
Default value
Min value
Max value
Description
Desaturate
desaturate
False
-
-
If the value is true, the image will be desaturated before toning.
If the value is false, the image will not be desaturated.
Balance
balance
50
0
100
Balance between shadows and highlights (dark and light areas). The plurality of pixels, whose brightness level is lower than this value, are considered "shadows". Pixels, whose brightness level is higher than this value, are considered "highlights".
Shadow Hue
shadow_hue
0
0
360
Desired hue for shadows. The value is given in degrees between 0 and 360 (each degree corresponds to a hue in a color wheel). 0 degrees is red
Highlight Hue
highlight_hue
0
0
360
Desired hue for highlights. The value is given in degrees between 0 and 360 (each degree corresponds to a hue in a color wheel). 0 degrees is red
Shadow Saturation
shadow_saturation
0
0
100
Saturation of a hue that is used for shadows toning. The less is the value, the more neutral (desaturated) the hue is. The more is the value, the more saturated is the hue set by the shadow_hue parameter.
Highlight Saturation
highlight_saturation
0
0
100
Saturation of a hue that is used for highlights toning. The less is the value, the more neutral (desaturated) the hue is. The more is the value, the more saturated is the hue set by the highlight_hue parameter.
This filter also offers an opacity adjustment using the Blended filter.
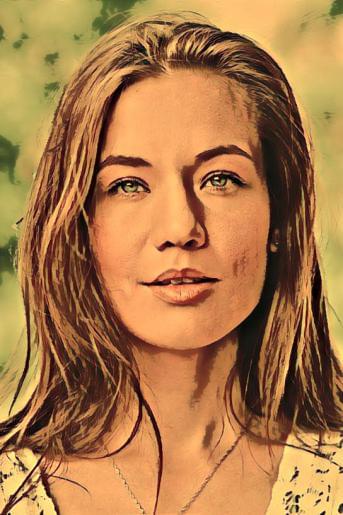
Vintage / vintage
before
after
Example parameters: all
The filter mimics the effect of a vintage (aged) photograph. The effect works only with the colors of the photo.
Parameter
Default value
Min value
Max value
Description
Palette Type
palette_type
BRONZE_SEPIA
BRONZE_SEPIA
DARK_YELLOW_RED
BRONZE_SEPIA — colors become warmer and a bit darker. Green and bronze tones prevail. Some vignetting is added.
— automatic — automatic color temperature correction;
— preset — correction to a preset temperature value (the Temperature parameter is used);
— manual — manual correction (Temperature and Tint parameters (for manual correction type) are used).
Temperature (for the "preset" correction type)
temperature
5200
1000
-
The light source temperature value in Kelvin degrees used as a preset temperature for editing an image. The higher is the temperature of the light source, the "colder" is the light, and the bluer are the colors of the image. The lower is the temperature of the light source, the more red is the light, and the more red are the colors of the image.
Temperature (for the "manual" correction type)
temp_value
0
-1
1
Image temperature will be adjusted to this temperature value. This parameter is similar to the temperature parameter. The coldest temperature value is -1, the warmest temperature value is 1.
Tint (for the "manual" correction type)
tint_value
0
-1
1
This parameter regulates the tint of the light source color from green (the value is -1) to purple (the value is 1). The parameter is similar to the Tint parameter found in the Basic tab in the Camera Raw module in Adobe Photoshop.
powbase
powbase
2
2
-
Strength of the correction. The more is the value, the more noticeable is the correction
This filter also offers an opacity adjustment using the Blended filter.
Warm / warm
before
after
Example parameters: default
This filter makes an image 'warmer' or 'colder', depending on the parameter value.
Parameter
Default value
Min value
Max value
Description
Strength
strength
automatic
2
0
5
The parameter sets the intensity of the blue and red components. The value of 1 corresponds to the original image. If the value is less than 1, the image gets bluer. If the value is more than 1, the image is made warmer.
This filter also offers an opacity adjustment using the Blended filter.
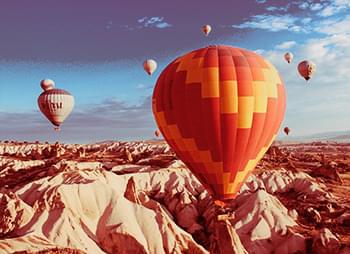
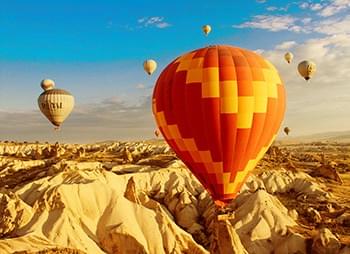
Gradient map / gradient_map
before
after
Example parameters: default
A "gradient map" links the equivalent range of grayscale images to the colors of a certain gradient fill.
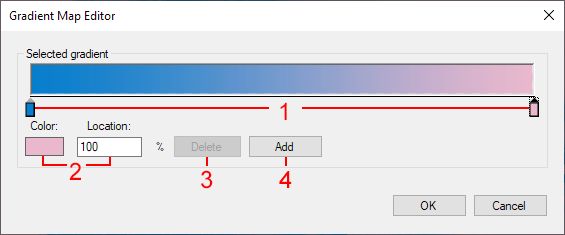
ColorPoint Collection Editor dialog box
Example parameters: default
Active color control points
Parameters of the selected control point:
Position, %: (range 0-100) set a position of the selected control point
Color: Define an RGB color of the selected control point
Delete the selected control point
Add new control point
Red On Grey / red_on_grey
before
after
Example parameters: default
This filter finds red areas in an image and increases saturation in these areas. All other areas in the image are converted to grayscale.
This filter also offers an opacity adjustment using the Blended filter.
Color Correction / color_correction
before
after
Example parameters: default
This filter performs color correction of an image by a combined application of 'Color Temperature' and 'Shadow/Highlight Correction' methods.
If an original image does not need much color correction, applying this filter will result in only slightly noticeable changes.
This filter also offers an opacity adjustment using the Blended filter.
High Dynamic Range / hdr
before
after
Example parameters: default
This filter imitates the HDR (High Dynamic Range) effect.
This filter also offers an opacity adjustment using the Blended filter.
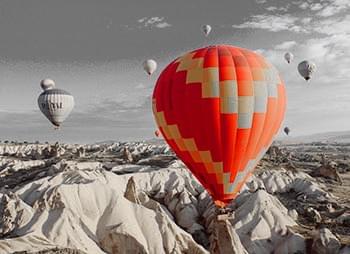
Color Isolation / colors_isolation
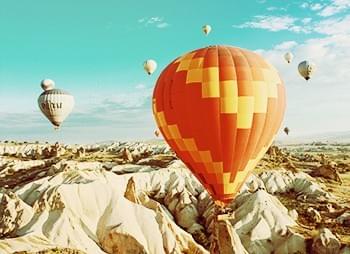
before
after
Example parameters: default
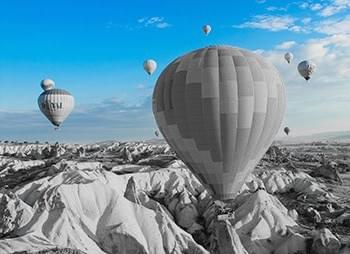
before
after
Example parameters: use_geometry=false, max_saturation=true, use_blur=false, hsl_filters=default
The filter changes the saturation of certain areas in a photo, depending on specified color range.
Parameter
Default value
Min value
Max value
Description
Use geometry
use_geometry
false
-
-
Try to erase small "holes" in the color map when applying the filter.
Maximize saturation
max_saturation
false
-
-
If the parameter value is false, then the color range specified in the "Color filter" parameter is left unchanged. For other colors, the saturation value = 0.
If the parameter value is true, then the saturation of colors from the color range specified in the "Color filter" parameter will be set to 100. For other colors, saturation = 0.
Smooth chroma map
use_blur
false
-
-
Smooth (blur out) the color map when applying the filter.
Color filter
hsl_filters
-
-
-
A set of color ranges in HSL space. The guidelines on how to work with this parameter can be found below.
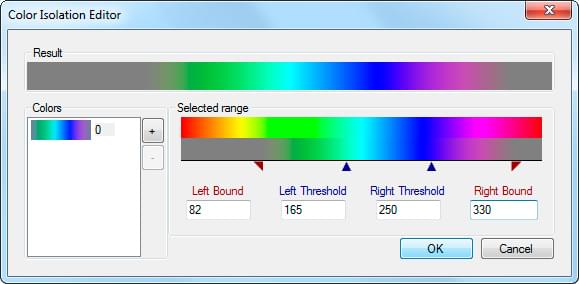
The Color filter parameter can be configured via the Color Isolation Editor dialog.
The editor lets you specify one or several color ranges with the given tone and isolate them.
You can add or delete color ranges in the Colors panel, keeping in mind that they cannot overlap. Border and threshold values can be set in terms of numbers,
by entering the desired values in the corresponding fields, as well as with the help of the mouse (to do so, just move the pointers on the scale).
Bound and Threshold lues on the left and on the right serve to create transitions of saturation from 100 to 0 (on the left) and from 0 to 100 (on the right) in the color range, as follows:
to the left of the left bound saturation=0
between the left bound and the left threshold saturation is increasing slowly
between the left threshold and the right threshold saturation is either left unchanged (if Maximize saturation = 0), or maximized (if Maximize saturation = 1);
between the right threshold and the right bound saturation is gradually decreasing to zero
to the right of the right bound saturation=0.
This filter also offers an opacity adjustment using the Blended filter.
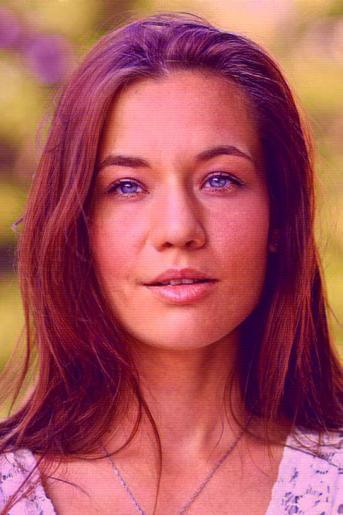
Automatic Enhancement / auto_enhancement
before
after
Example parameters: default
A filter that performs automatic image enhancement. It includes options for shadow/highlight correction,
color temperature correction, image sharpening, noise reduction, automatic saturation adjustment, as well as portrait filters.
Parameter
Default value
Min value
Max value
Description
Automatic saturation adjustment
use_saturation
True
-
-
Enables the use of the automatic saturation correction algorithm
Shadow/Highlight correction
use_shadow_highlight
True
-
-
Enables the use of the Shadow/Highlight correction algorithm
Color temperature correction
use_color_temperature
True
-
-
Enables the use of the automatic color temperature correction algorithm
Image sharpening
use_deblurring
False
-
-
Enables the use of the image sharpening algorithm
Portrait mode
portrait
False
-
-
Enables a special mode for processing portrait images (adjusts noise reduction, color correction, corrects overexposed areas)
Noise reduction
use_denoising
False
-
-
Enables the use of a noise reduction algorithm
This filter also offers an opacity adjustment using the Blended filter.
Automatic Saturation / auto_saturation
before
after
Example parameters: default
Automatic saturation adjustment.
If an original image does not need saturation adjustment, applying this filter will result in only slightly noticeable changes.
Parameter
Default value
Min value
Max value
Description
Adjustment strength, %
strength
50%
0%
100%
Saturation correction strength
This filter also offers an opacity adjustment using the Blended filter.
HSL Adjustment / hsl_adjust
before
after
Example parameters: red=100; orange=-40; yellow=-60; green=-100; aqua=-100; blue=-100; purple=-100; magenta=50
The filter detects the specified color components in an image and increases saturation in these areas.
All other color components in the image are converted to grayscale.
Parameter
Default value
Min value
Max value
Description
Red
red
30
-100
100
Saturation of the red component. If the value is 0, saturation of the red component is not changed. If the value is positive, saturation is increased. If the value is negative, saturation is decreased.
Orange
orange
0
-100
100
Works in the same way as the red component.
Yellow
yellow
-100
-100
100
Works in the same way as the red component.
Green
green
-100
-100
100
Works in the same way as the red component.
Aqua
aqua
-100
-100
100
Works in the same way as the red component.
Blue
blue
-100
-100
100
Works in the same way as the red component.
Purple
purple
-100
-100
100
Works in the same way as the red component.
Magenta
magenta
-100
-100
100
Works in the same way as the red component.
This filter also offers an opacity adjustment using the Blended filter.
Deblurring / deblurring
before
after
Example parameters: default
Image sharpening.
Parameter
Default value
Min value
Max value
Description
Adaptive sharpening
adaptive
true
-
-
Adaptive (edge) sharpening
Strength
strength
0.25
0
1
Sharpening strength. 0 - minimum intensity, 1 - maximum intensity.
Suppress halos
suppress_halos
false
-
-
Halo suppression. Increases computation time significantly.
Advanced
advanced
false
-
-
If the value is true , then the Hanning filter will be used.
Radius
radius
5
1
100
Hann convolution radius
This filter also offers an opacity adjustment using the Blended filter.
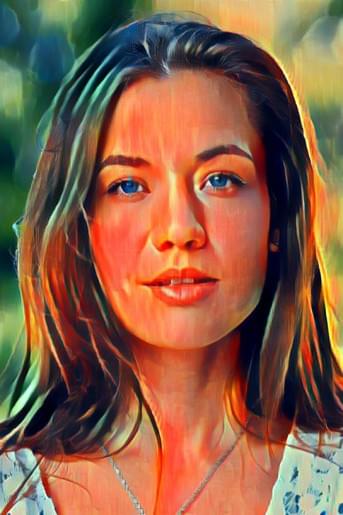
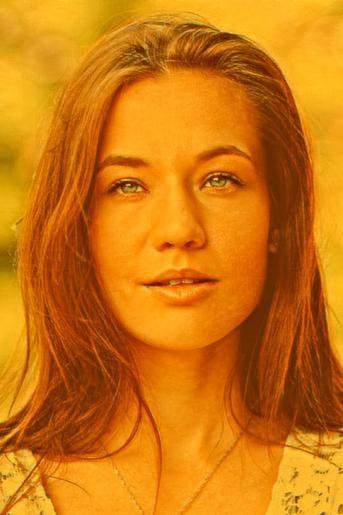
Sunlight Effect / sunny_colors
before
after
Example parameters: default
This filter increases contrast in an image and makes the colors warmer.
This filter also offers an opacity adjustment using the Blended filter.
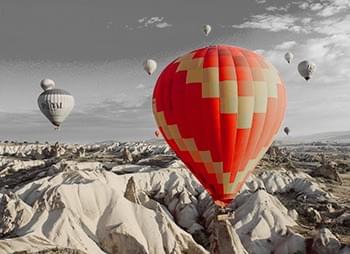
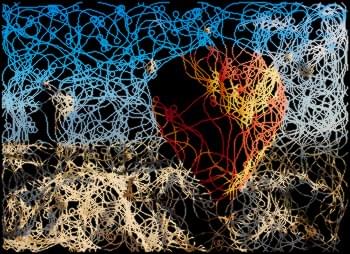
Scribble / scribble
before
after
Example parameters: default
A filter creating the effect of a picture drawn by hand in a messy line.
Parameter
Default value
Min value
Max value
Description
Automatic scaling
autosize
true
-
-
If the value is true, the scale of scribbles will be pretty much the same for all sizes of input photos.
This filter also offers an opacity adjustment using the Blended filter.
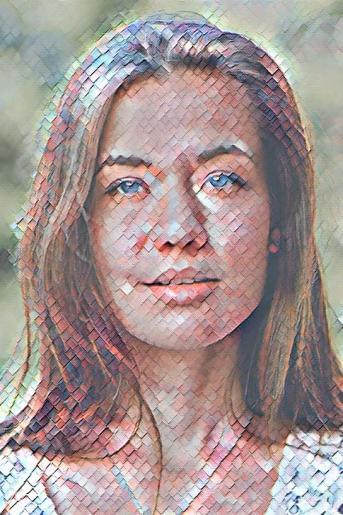
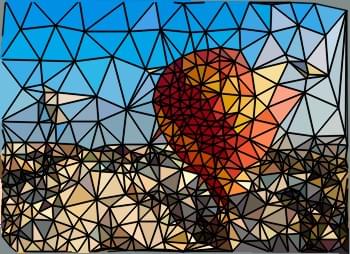
Triangulate / triangulate
before
after
Example parameters: default
A filter that turns a photo into an artwork consisting of colored triangles.
Parameter
Default value
Min value
Max value
Description
Automatic scaling
autosize
true
-
-
If the value is true, the scale of triangles will be pretty much the same for all sizes of input photos.
Draw borders
draw_borders
true
-
-
If the value is true, the triangles will have black borders.
This filter also offers an opacity adjustment using the Blended filter.
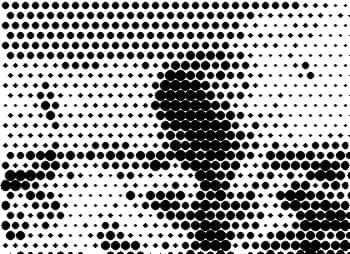
Dots / dots
before
after
Example parameters: default
This filter fills a photo with black dots of different sizes on a white background.
Parameter
Default value
Min value
Max value
Description
Maximum radius
max_radius
0,6
0,01
20
The maximum radius of dots in percentage of the longer side of an image.
Step
step
0,8
0,01
20
The distance between adjacent points in percentage of the longer side of an image.
This filter also offers an opacity adjustment using the Blended filter.
Invert Colors / invert
before
after
Example parameters: by default
The filter inverts the colors of the photo (creates a negative of the photo).
This filter also offers an opacity adjustment using the Blended filter.
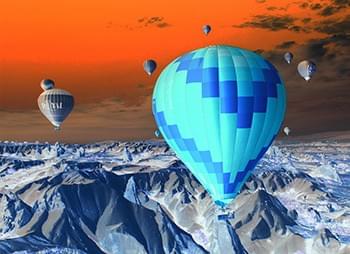
Blended filter / blended_filter
Source photoDesaturation filter
Setting the transparency
of the desaturation filter,
the value of the opacity parameter: 204
This filter blends the original image and the image obtained as a result of processing with a specified filter, with the
opacity coefficient.
In the example above the opacity filter is applied together with the Desaturation filter, with
opacity : 204.
The series of examples makes it clear that the selected filter is applied to the original image first, and then opacity is
added to the resulting image. That allows you to blend the result with the source image with the opacity set by the
'opacity' factor.
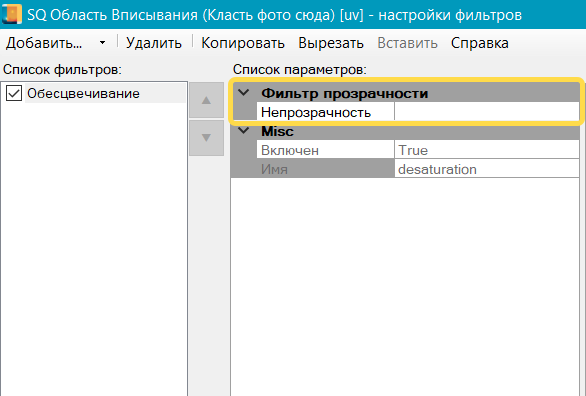
This filter works together with several filters. In the list of their parameters, there is an additional section containing the opacity filter (see the screenshot below).
To disable the filter, you need to delete the opacity value.
The minimum value of the opacity filter is 1, the maximum value is 255.
With the minimum value (1) of the opacity coefficient the applied effect will be almost invisible.
With the maximum value (255), only the 'parent' effect (in this case — 'Desaturation') will be visible.
Filter Opacity
Desaturation,
the 'opacity' value parameter: 1
Filter Opacity
Desaturation,
the 'opacity' value parameter: 255
Parameter
Min value
Max value
Description
Opacity
opacity
1
255
Opacity factor
Opacity can be adjusted for the following filters:
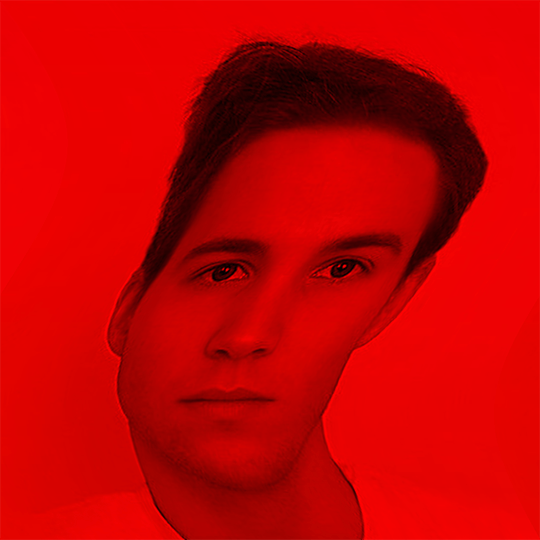
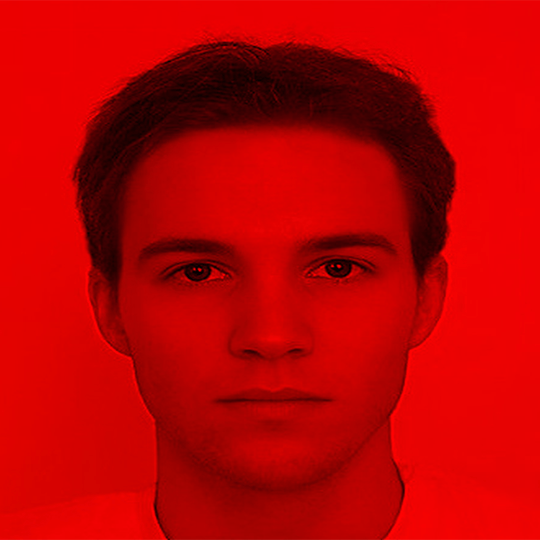
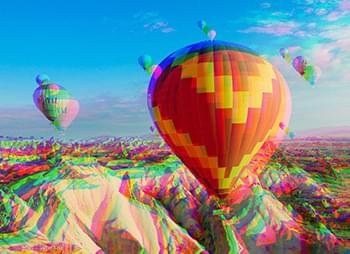
Example parameters: horizontal_offset=5; vertical_offset=-5
The filter performs a shift of the color channels relatively to each other.
Parameter
Default value
Min value
Max value
Description
Horizontal Offset
horizontal_offset
2
-
-
Desired horizontal offset (in pixels or percents). The red channel shifts to the right by the specified number of pixels or percents. The green channel shifts to the left by the same number of pixels or percents. The blue channel is not shifted.
If you want to shift the red and green channels to the opposite sides, this value should be negative. When using percents, the allowed values are from -99% to 99%.
-99%
99%
Vertical Offset
vertical_offset
2
-
-
Desired vertical offset (in pixels or percents). The red channel shifts upwards by the specified number of pixels or percents.
The green channel shifts downwards by the same number of pixels or percents.
The blue channel is not shifted.
If you want to shift the red and green channels to the opposite sides, this value should be negative.
When using percents, the allowed values are from -99% to 99%.
-99%
99%
Use percentage
use_percent_values
FALSE
-
-
Use offsets in percentage instead of pixels
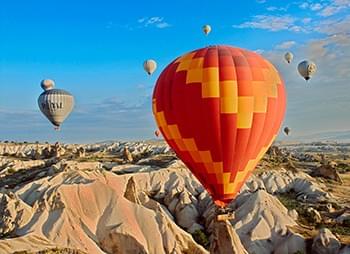
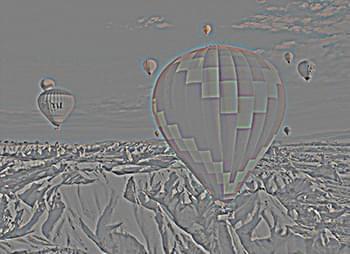
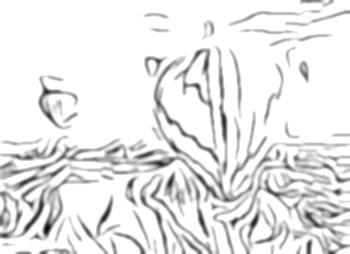
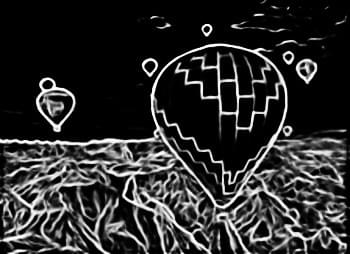
Edge detection / edge_detection
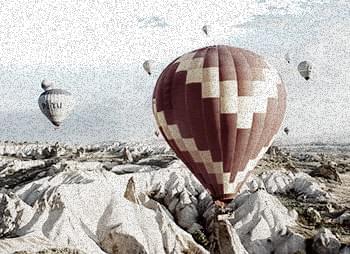
before
after
Example parameters: default
A filter that seeks the borders of objects in the image and draws them (black on a white background).
Parameter
Default value
Min value
Max value
Description
Strength
strength
1
1
20
Edge strength. The higher the value, the thicker the border.
Width
width
1
1
5
Edge width in pixels
Eroded Edges
eroding
1
0
10
Edge eroding width in pixels
Blur
use_blur
True
-
-
Blur edges before eroding them (this parameter is valid only if eroding is enabled)
This filter also offers an opacity adjustment using the Blended filter.
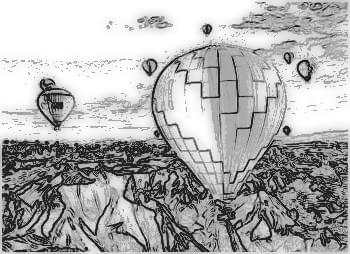
Neuro-based Edge Detection / edge_detection_gpu
before
after
Example parameters: default
This filter is similar to 'Edge Detection'.
It differs from the previous filter in the list of available parameters and the result of processing.
Being used together with a user photo mask, this filter gives interesting results (the example uses default parameters):
User photo region without filters
A user photo region with the same image index
size and position, but with the
"Neuro-based Edge Detection" filter applied.
It will be used as a mask for the graphic layer.
A graphic layer with a user photo mask
built based on the user photo region
with the "Edge Detection GPU" filter applied
The result of processing a user photo
with the template.
Parameter
Default value
Min value
Max value
Description
Detail
exponent
2
0
5
Specifies the level of detail in the resulting image, where 5 is low level of detail, 0 is high level of detail.
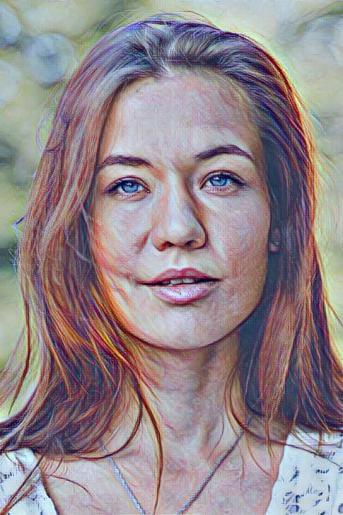
Dave Hill / dave_hill
before
after
Example parameters: radius1=3; radius3=10; alpha=30
The filter imitates the style used by the famous photographer Dave Hill.
Produces interesting results when used with a mask based on the user's photo (default parameters in the example):
Parameter
Default value
Min value
Max value
Description
Radius 1
radius1
4
1
20
Blur radius used to calculate high-pass filter. The larger the value of this parameter, the more pronounced the result of the filter.
Radius 2
radius2
7
1
20
Blur radius to calculate big high pass filter.
Radius 3
radius3
5
1
20
Blur radius used to calculate resulting high-pass filter.The larger the value of this parameter, the more pronounced the result of the filter.
Alpha Blending
alpha
40
0
100
Alpha-blending coefficient (a photo edited with the Dave Hill filter is blended with a black and white variant of the same photo. 0 corresponds to a photo edited with the
Dave Hill filter; 100 corresponds to a black and white image; values between 0 and 100
correspond to in between results)
Pixelation / pixelation
before
after
Example parameters: palette_size=32, cell_width=8, cell_height=8, use_percent_values=false
Pixelation effect.
Parameter
Default value
Min value
Max value
Description
Cell width
cell_width
4
1
-
Horizontal size of a cell
Cell height
cell_height
4
1
-
Vertical size of a cell
Palette size
palette_size
0
0
-
Сolor palette size (the maximum number of colors in a resulting image). If this value is 0, color quantization is not performed, thus the number of colors is not limited.
Use percentage
use_percent_values
false
-
-
If the value is set to true - the height and width values are set in percent.If the value is set to false - the values are set in pixels.
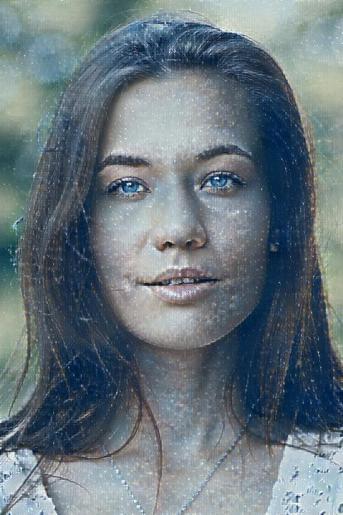
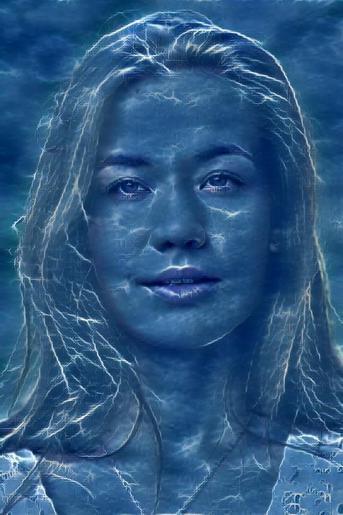
Infrared / infrared
before
after
Example parameters: default
This filter imitates infrared camera effect.
This filter also offers an opacity adjustment using the Blended filter.
Chalk and Charcoal / chalk_charcoal
before
after
Example parameters: default
The filter simulates the effect of chalk and charcoal drawing.
Parameter
Default value
Min value
Max value
Description
Draw background
draw_background
true
-
-
If the value is true, the image will have a uniform background
Chalk coverage area
chalk_area
6
2
20
Defines the area covered with chalk. The larger the value, the larger area of the image is drawn in chalk.
Charcoal coverage area
charcoal_area
6
2
20
Defines the area covered with charcoal. The larger the value, the larger the area of the image is drawn in charcoal.
Draw sketch
draw_sketch
NO
-
-
If the value is YES, the outlines are traced with a pencil. If the value is NO, the outlines are not traced.
This filter also offers an opacity adjustment using the Blended filter.
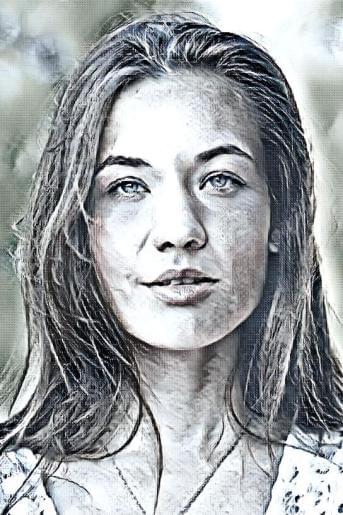
Pencil Sketch / sketch
before
after
Example parameters: default
The filter simulates the effect of drawing with a pencil on paper.
Parameter
Default value
Min value
Max value
Description
Pencil strokes flexibility
patch_detail_level
10
1
99
This value is valid only for the pencil type STROKES (type=1).
Strokes flexibility. The higher is this value, the more flexible strokes are (therefore, edges look smoother).
Pencil pressure
strength
0,8
0,1
1
This value is valid only for the pencil type SOLID (type=0)
Pencil pressure.
Pencil strokes angle
patch_max_rand_angle
0
0
45
This value is valid only for the pencil type STROKES (type=1).
Rotation (clockwise or counter-clockwise) of an each stroke to a random angle. The angle varies from 0 to N degrees (where N = patch_max_rand_angle).
Pencil type
type
SOLID
-
-
The value determines drawing type.
If the value is SOLID (type=0) — the pencil traces the outline with a continuous line.
If the value is STROKES (type=1) — the result image looks as if drawn with pencil strokes.
Pencil sketch type
patch_type
BLACK_STROKES_WHITE_BACKGROUND
-
-
This value is valid only for the pencil type STROKES (type=1).
Pencil sketch type.
BLACK_STROKES_WHITE_BACKGROUND — Black strokes on a white background.
BLACK_STROKES_BLURRED_BACKGROUND — Black strokes on a blurred black and white version of the source photo.
COLORED_STROKES_BLURRED_COLORED_BACKGROUND — Colored strokes on a blurred source photo.
BLACK_STROKES_BLURRED_COLORED_BACKGROUND — Black strokes on a blurred source photo.
Detalization level
details
0,8
0,1
1
This value is valid only for the pencil type SOLID (type=0).
Drawing detalization level. The higher the value, the more pencil lines the sketch will have.
Pencil color
color
Black
-
-
This value is valid only for pencil type STROKES (type=1).
Pencil RGB color.
This filter also offers an opacity adjustment using the Blended filter.
Light Artist / light_artist
before
after
Example parameters: default
The filter that lets you create different lighting effects in a photo. This effect is achieved by
adding various types of light sources with adjustable parameters.
Parameter
Default value
Min value
Max value
Description
Ratio of diffuse and specular reflection
reflect_diffuse_to_mirror_ratio
50
0
100
Ratio between diffuse and specular reflection (0 is only specular reflection, 100 is only diffuse reflection). Valid if there is at least one light source.
Reflection bitmap
reflect_bitmap
-
-
-
This parameter allows to select an image based on which a mask for light reflection will be built.You can add an image by selecting Insert > Image from the menu.
Landscape texture bitmap
landscape_bitmap
-
-
-
This parameter allows to select an image that will be used for building texture mask. You can add an image by selecting
Insert > Image from the menu bar in the main window.
Lights
lights
-
-
-
Opens an editor window letting you add/remove light sources and adjust their lighting, reflection and texture settings.
Landscape
landscape
50
0
100
The "depth" of image texture (embossing height).
Ambient light
ambient_intensity
50
0
100
Intensity of ambient light. A value of 50 preserves the original light intensity in a photo. Values above 50 make a photo brighter, while values below 50 make a photo darker.
If the value is 0, a photo becomes totally black, if 100 - totally white.
Ambient color
ambient_color
white
-
-
Color of ambient light (the white color with the value of the ambient light intensity equal to 50 preserves the original colors of a photo).
This filter also offers an opacity adjustment using the Blended filter.
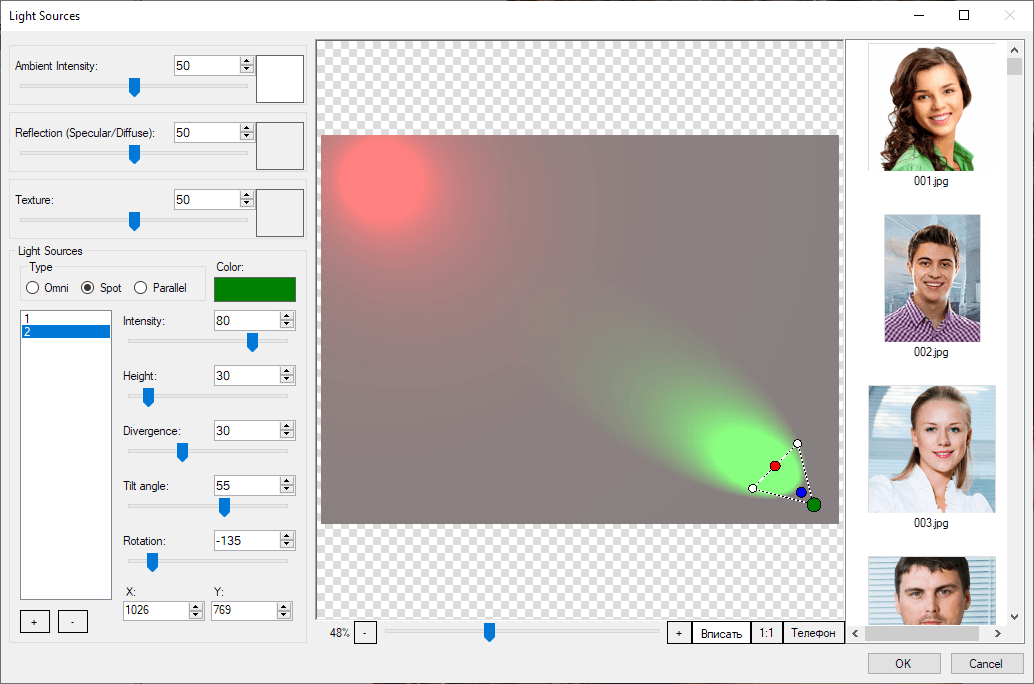
Below you can see the light sources editor window. It lets you add / remove light sources and adjust their
| parameters. Changing a parameter in this editor also changes it in the filter settings dialog and vice versa.
Ambient light — ranges from 0 to 100. Allows you to choose the color and intensity of ambient light. The white color with the intensity of 50 keeps the original colors of a photo unchanged.
Reflection (Specular/Diffuse) — ranges from 0 to 100. This box allows you to adjust the mixture between specular and diffuse reflection as well as select an image to be used as a reflection mask.
Texture — ranges from 0 to 100. Allows you to adjust the depth of texturing based on the mask from a selected image.
Light Sources — this panel lets you configure the parameters of light sources, add new sources or remove existing ones.
Type — Allows you to select the type of light source. Each source type has its own configurable parameters.
Omni — creates a diffused light source.
Intensity: affects the amount of focused light emitted by the source and ranges from 0 to 100.Can be configured only in the parameters edit panel.
Height: moves the light source vertically relative to the image plane and ranges from 0 to 300.Can be configured both in the edit panel and by moving the control points.
X / Y: specifies coordinates of the light source center (in pixels).Coordinates can be adjusted both in the edit panel and by moving the control points.
Spot — creates a spot light source.
Intensity: affects the amount of focused light emitted by the source and ranges from 0 to 100.It can be configured only in the parameters edit panel.
Height: moves the light source vertically relative to the image plane and ranges from 0 to 300.It can be configured only in the parameters edit panel.
Divergence: determines the maximum light cutoff angle and ranges from 0 to 89. The value of thisparameter is half the angle at the apex of the cone-shaped light flux generated by the source,
The parameter can be configured both in the edit panel and by moving the control points.
Tilt angle: determines the degree of deviation of the light source from the vertical axis and ranges from 0 to 89.You can configure this parameter both in the edit panel and by moving the control points.
Rotation: rotates the light source around its center point on a certain angle.
X / Y: specifies coordinates of the light source center (in pixels). You can adjust coordinates both in the edit panel and by moving the control points.
Parallel — creates a light source emanating from the edge of the image (parallel to the image edge).
Intensity: affects the amount of focused light emitted by the source and ranges from 0 to 100.
Tilt angle: determines the degree of deviation of the light source from the vertical axis and ranges from 0 to 89.You can configure this parameter both in the edit panel and by moving the control points.
Rotation: rotates the light source around a central point at a given angle.
X / Y: rotates the light source around its center point on a certain angle.
In fact, coordinate parameters don't affect anything in this type of light source, as the light
comes only from the image edge. The only things that matter are the direction of the ray of
light ( (Rotation) and the distance between the two control points
(Tilt Angle). The less is the distance, the more light is emitted.
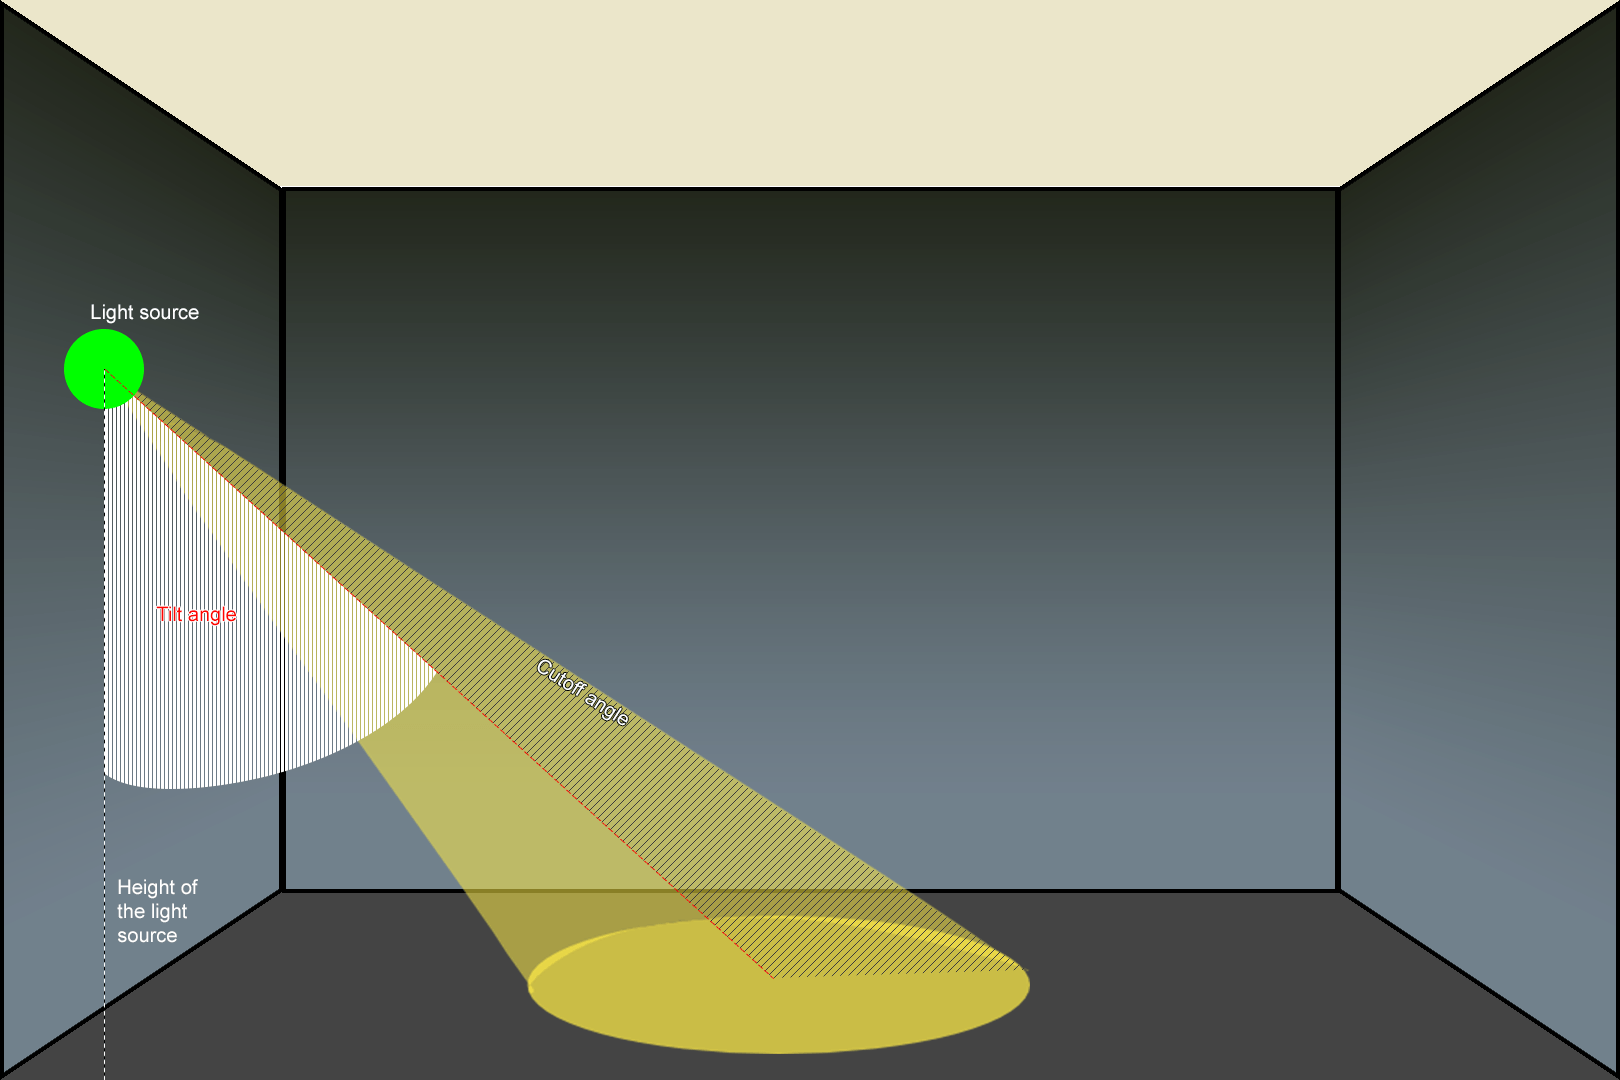
3D visualization of the main parameters of a light source using the example of a spotlightList of light sources
Displays all available light sources and allows you to select a specific light source and configure its settings.
+ / - buttons
Add or remove light sources.
Preview area. The preview area displays all available light sources with the specified parameters.Each light source, depending on its type, has control points that allow you to visually adjust
and position a specific light source in a user photo region.
Green dot
The green dot defines the center of a light source. Moving the center point of a light source in a user photo region will change other parameters in accordance with its new position.
Red dot
Defines the tilt angle of a light source and the direction of the light flux relative to its center.
Blue dot
Determines the light cutoff angle. The closer this dot is to the center of the light source, the wider the cutoff angle. The dot changes its position only when the white dots (peaks)
are moved perpendicular to the direction of the light flux
To move the light source "as is", without changing its parameters, hold down the Shift key while dragging it.
Facial Treatment
This section describes filters that were created exclusively for facial templates. Additional info on how to insert faces can be found
in this section.
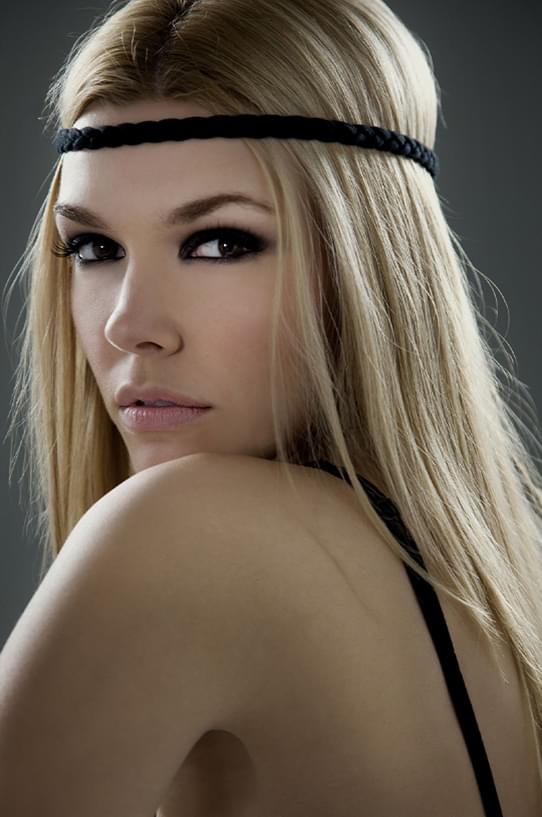
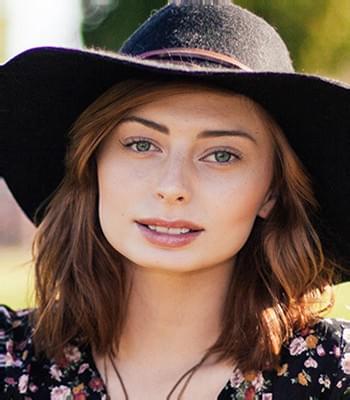
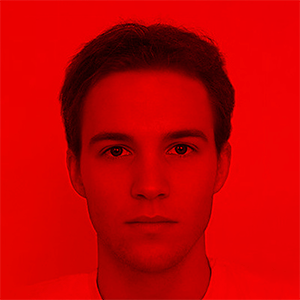
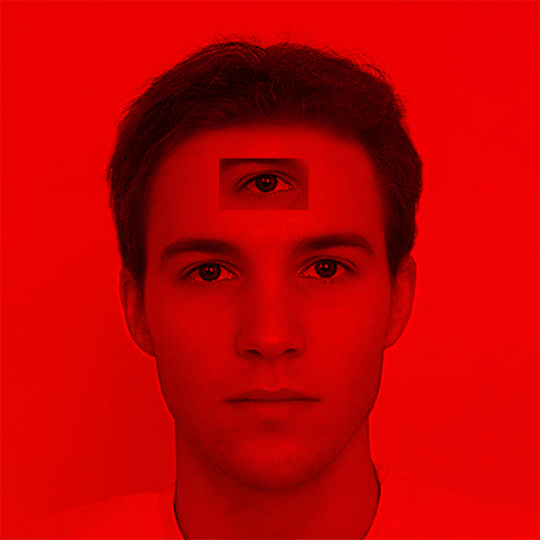
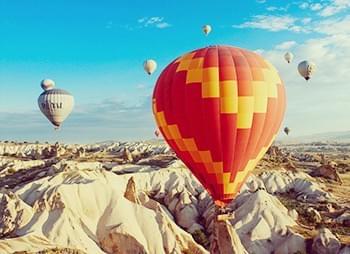
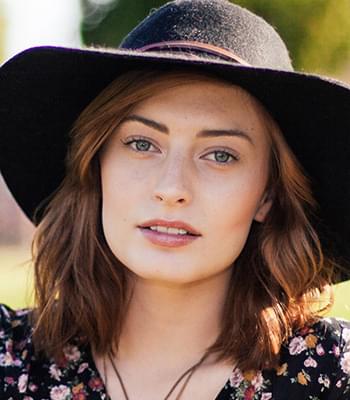
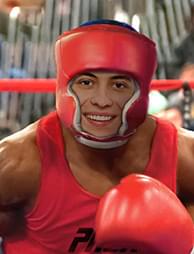
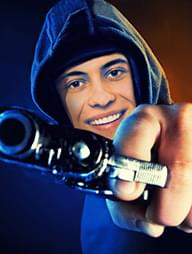
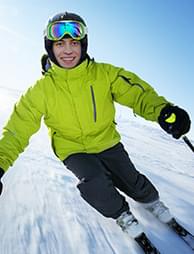
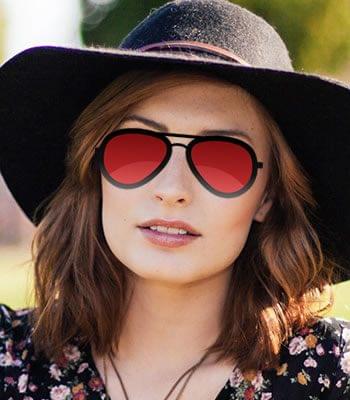
Face insertion / position_by_face_points
This filter allows to insert a face into a given image.
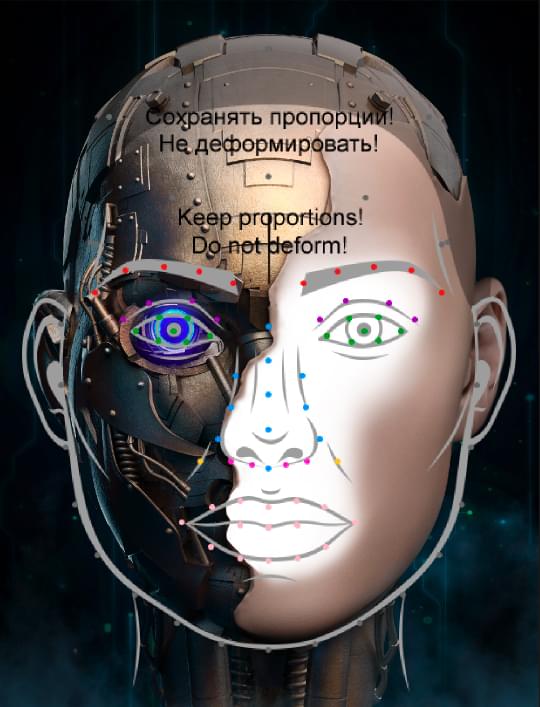
To insert a face in the template, the Template Creator uses the points located in the smart object Face Region.
A user photo is "attracted" to these points. By default, the Template Creator uses 4 points to insert a face: eye center and lip corners,
but the designer can choose any combination of the available 94 facial points.
As seen in the examples above, you can specify any facial color, any location, size and facial angle in a template.
Parameter
Default value
Min value
Max value
Description
Face Mask
-
none
-
-
This parameter determines whether to crop the face using the face mask:
- none (no mask, the input photo will be positioned without cropping);
- Figure mask;
- Face mask;
- Skin mask;
- Hair mask;
- Lips mask;
- Eyes mask;
Position
-
-
-
-
Opens the face position editor to specify a more accurate face attraction relative to the Face Region.
To learn how to insert a face from a custom photo into a template, click here.
To read about the parameters that affect the creation of a face mask, click here.
Rasterization / sticker
before
after
Example parameters:
Rasterization is not a filter in a traditional meaning. In contrast to other filters that somehow change the image to which they were applied, Rasterization
allows you to apply stickers to facial pictures and customize their parameters. More information about templates with stickers can be found
here.
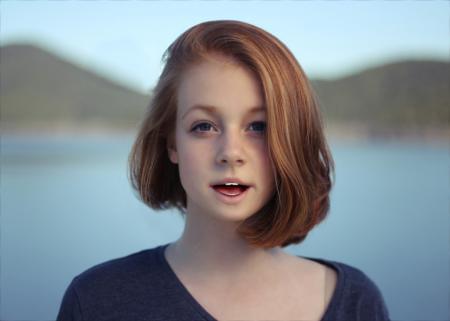
Emotions Transfer / emotions
before
after
Example parameters: asf
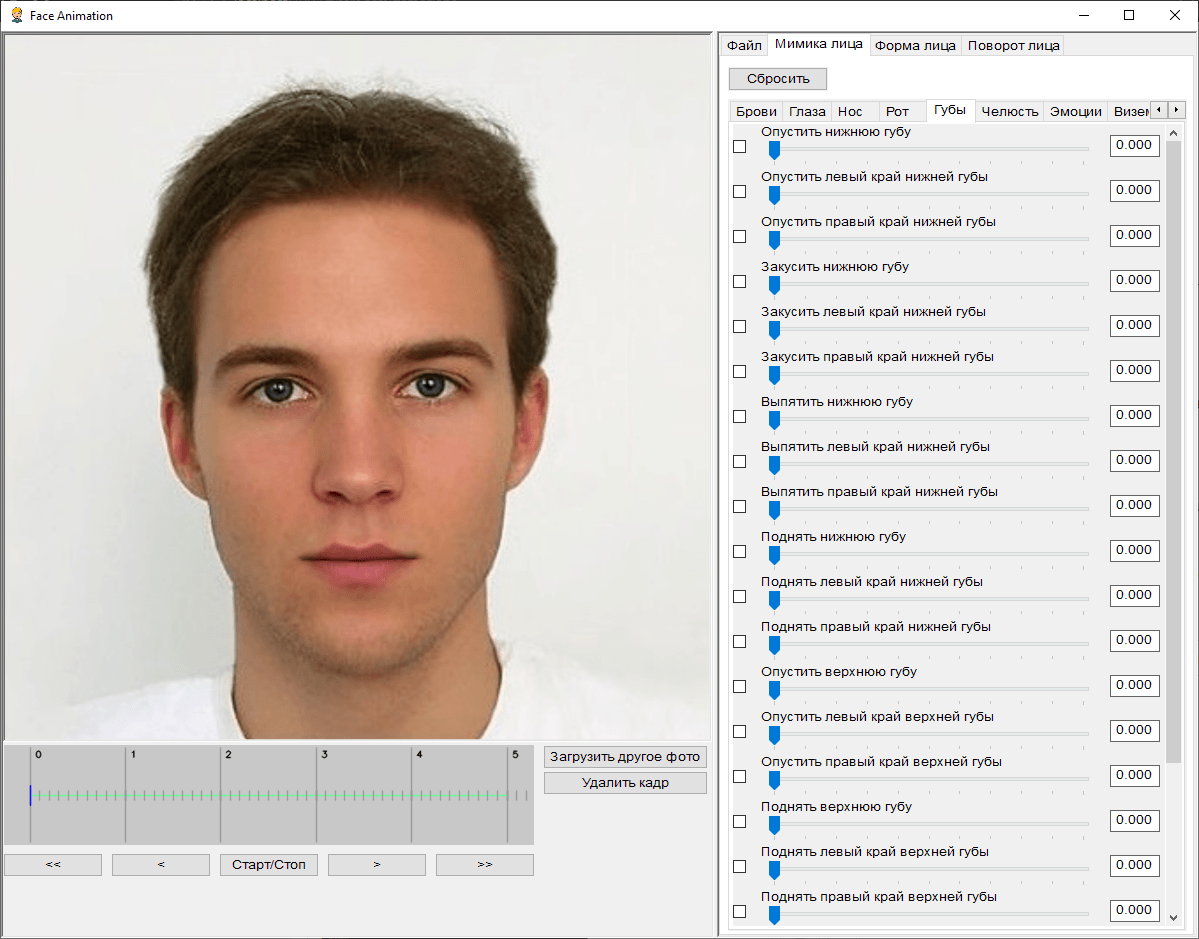
The filter that allows you to change facial expressions on faces recognized from a user photo.
To work with this filter you will need a Visual Emotion Editor (FaceTool), which is provided upon request by your team lead
The visual emotion editor contains an extensive list of options for changing facial expressions. Each of the parameters in the list is responsible
for the manifestation of a separate mimic element.
documentation for the Visual Emotion Editor can be found in the directory where it is installed, in the manual folder.
Important! The path to the folder where the Visual Emotion Editor is installed must consist only of latin symbols.
If the path contains any non-latin symbols (cyrillic, hieroglyphs, latin symbols with diacritic marks, etc), or if the path
is too long, the tool will not work.
To transfer the emotion data to the Template Creator you need to:
Export it as a .txt file using the menu File — Save project as.
In the list of parameters of the Emotions Transfer filter, click on the button that appears when the EditableParams property is selected.
In the opened window of the Emotion Settings Editor click on the Load button.
In the opened window, go to the directory with the required .txt file and double click to open it;
Confirm the changes by clicking the OK button in the Emotion Settings Editor.
Items 3 and 4 can be oommited by simply dragging and dropping the required .txt file into the Emotion Settings Editor window.
To make changes in the Emotions Transfer filter in an already prepared template:
Use the Save file button to upload the .txt file with current parameters.
Load the file with parameters into the Visual Emotions Editor via the File — Open Project.
Make your changes.
Save the new .txt file and load it back into the Emotions Transfer filter according to the previous instruction.
In this way, creating, editing, exporting and importing .txt files between these tools can be performed in both directions.
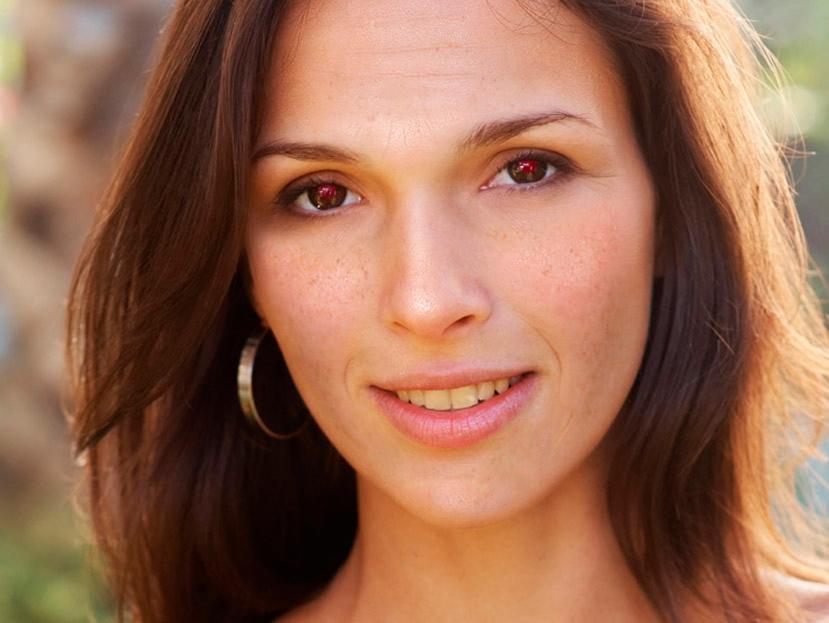
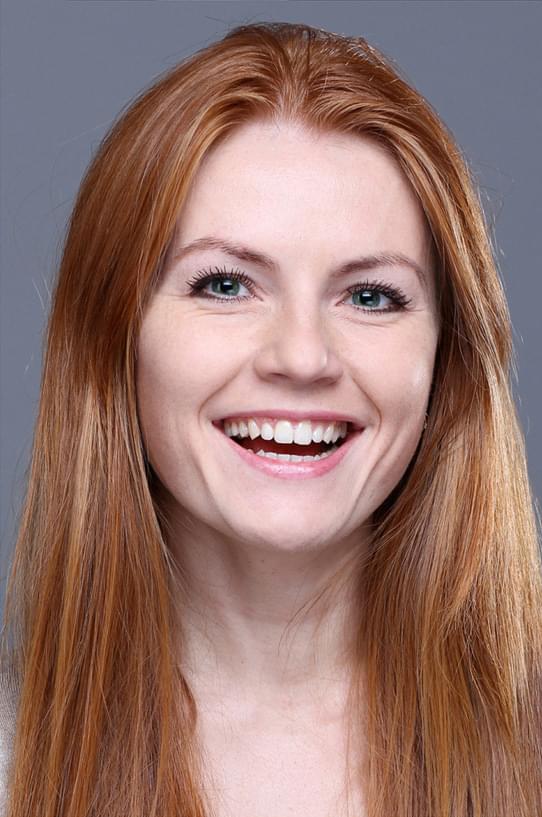
Eyes Healing / eyes_healing
before
after
Example parameters: Perform eyes whitening = true, Face Count = 1, Red eye correction strength = 0.5, Eyes whitening strength = 0.25, Perform red eyes correction = True
Parameter
Default value
Min value
Max value
Description
Perform eyes whitening
do_eyes_whitening
False
-
-
Whitening of the eye whites:
true - enable whitening,
false - disable whitening.
Face count
face_to_find_count
1
1
5
The number of faces the eyes_healing filter will be applied to.The minimum threshold is one face.
Red eye correction strength
correction_re_value
0.5
0.0
1.0
Strength of red eye correction (pupils darkening) in the range from 0 to 1 (fractional values are supported).
Eyes whitening strength
correction_whitening_value
0.25
0.0
1.0
Strength of eye whites whitening, in the range from 0 to 1 (fractional values are supported).
Perform red eye correction
do_red_eyes_correction
true
-
-
Red eye correction. If the value is:
true — the correction algorithm is enabled. If the value is
false — it is disabled.
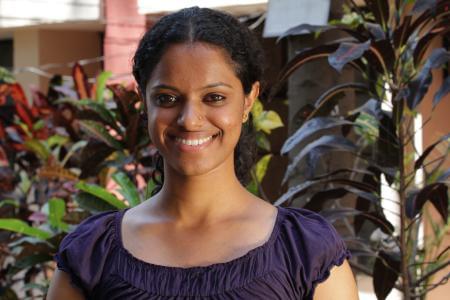
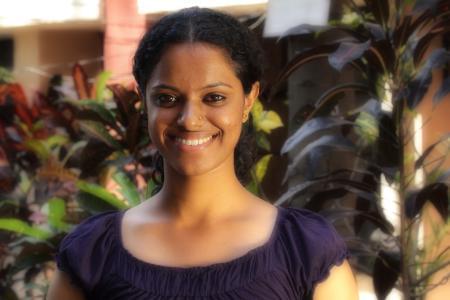
Portrait Filter / portrait_filters
before
after
Example parameters: defocus_strength = 0.5, diffusion_strength=0.55, glamour_strength=0.55
Using portrait filters
Parameter
Default value
Min value
Max value
Description
Defocus strength
defocus_strength
0,5
0
1
Intensity of blurring the background (in fact, depth of field in respect to a face or any other set area)
Diffusion strength
diffusion_strength
0,4
0
1
Diffusion strength
Color correction strength
glamour_strength
0,2
0
1
Color correction strength
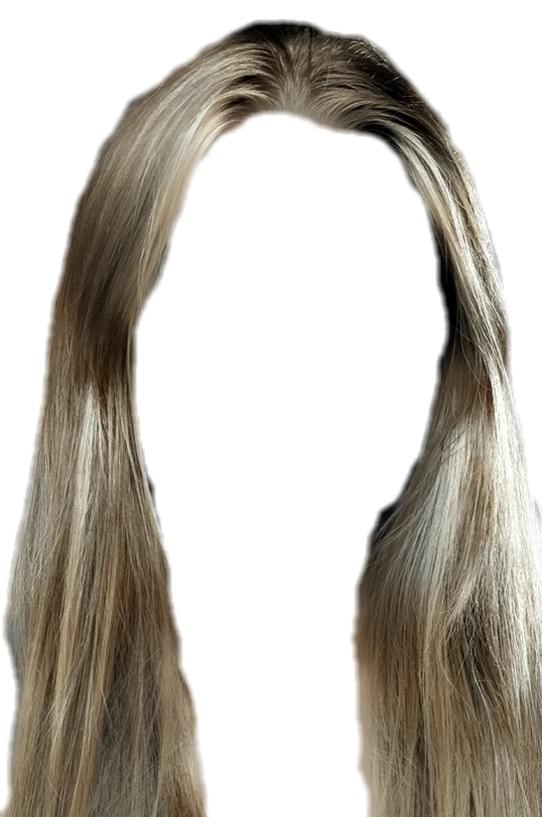
Color Transfer / color_transfer
before
after
Example parameters: defocus_strength = 0.5, diffusion_strength=0.55, glamour_strength=0.55
A filter that allows you to transfer the color and texture of hair and skin from a sample photo to a user photo.
The sample photo is set in the PSD file as a layer of Image type.
The filter supports masks based on the following:
hair
skin
figure
Important requirements regarding using the filter:
A sample photo should contain skin or hair (depending on which object the filter is used for). So, you can only transfer color/texture from hair to hair and from skin to skin. It is not possible to transfer custom
texture/pattern/fill.
A sample photo in the PSD should not contain transparent areas or margins. If the size or proportions of the photo do not match those of the PSD canvas, you should position and crop the photo in such a way so that it
occupies the entire canvas or add a non-transparent base layer filled with a color close to the colors of the
photo. You can also use the Content-Aware Fill workspace in Photoshop to fill in empty areas.
The presence of transparent areas significantly reduces the quality of the filter performance.
The filter transfers color to the entire photo, while an expected result is obtained only within the specified mask (hair or skin). Outside the mask area, color and texture can be transferred with some artifacts. Thus, it
makes sense to apply this filter together with dynamic masks and cut out only the necessary fragments of the result.
Original photoSample photo
Result of processing
with default settings
Hair mask
Hair mask positioned on top
of the original photo
This filter also offers an opacity adjustment using the Blended filter.
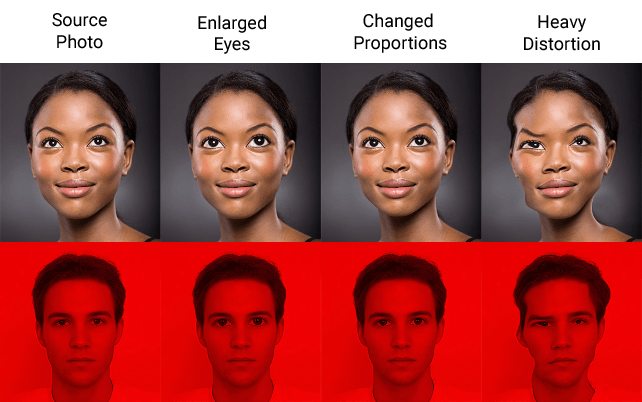
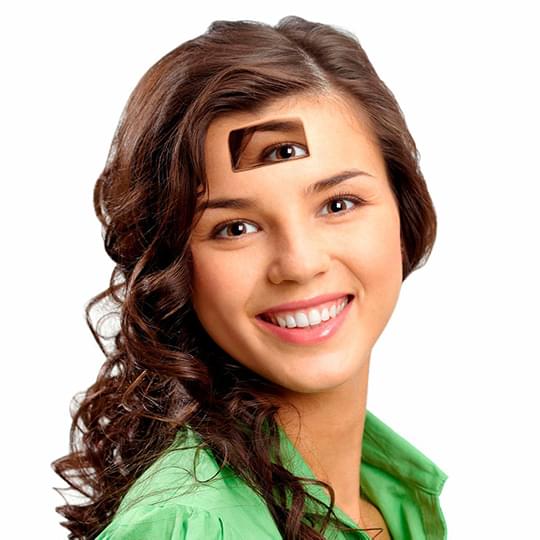
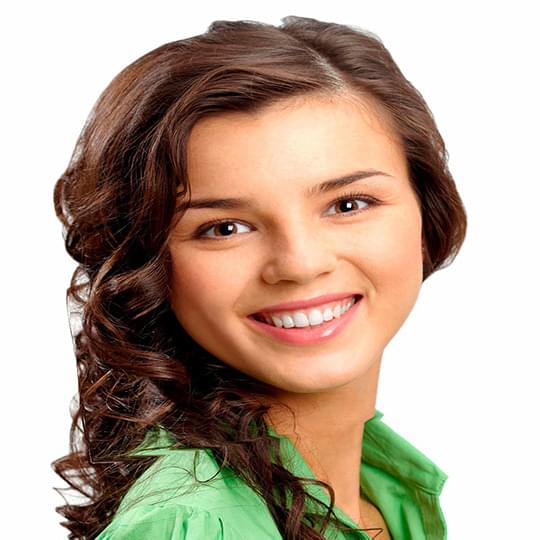
Face Warp / face_warp
before
after
Example parameters:
The Face Warp filter lets you deform any face from a user photo. Unlike the Emotions Transfer
filter, it lets you make fine adjustments of facial features that look more natural. Besides, it helps avoid the error with
automatic closing of the mouth when changing proportions.
In order to add this filter, you must first add a Face Warp Mesh to your template orientation via the menu
Insert and then reparse PSD.
If you try to add the Face Warp before adding the Face Warp Mesh layer, you will get the following error:
This will create a new smart object in Photoshop named by default as FWM Face Warp Mesh with the following image:
When the reparsing is done, add the Face Warp. The Face Warp mesh
will already be selected in the parameters tab.
You can have several Face Warp Meshes with different settings in a single project, however the Face Warp
filter can use only one mesh at a time to process an image. In order for the filter to use a certain mesh for processing,
select the required mesh in the filter settings and save the changes.
If you develop several orientations, it makes sense to add only one FWM smart object via the insert menu for any orientation
and then duplicate it to other orientations in Photoshop by choosing Layer - New - Layer Via Copy. In this case the content of the smart objects
will be synchronized and in order to to change the content in all orientations, it will be enough to edit only one of them.
It is important to remember that choosing the New Smart Object Via Copy line in the context menu will create an
independent copy of the smart object that isn't linked to the original. If you choose this method, you will have to change every FWM smart object
in every orientation individually.
In order to start working with deformation you have to open this smart object without assigning it a color profile. You must leave it as is.
Inside the FWM Face Warp Mesh smart object there is a layer with another smart object initial.png,
which is the mesh for face morphing.
What can you do with the initial.png layer:
bend/stretch (for example, using the Liquify filter, including the Face-Aware Liquify);
use distortion filters;
use other types of warping and distortion.
What you cannot do with the initial.png layer:
change canvas size;
change color and bit width of the image;
draw anything on the image;
change opacity.
What is allowed but not recommended due to unpredictable result:
allow the image to go outside the canvas bounds;
cut pieces of the image and copy / move to another place on the canvas;
Each cut and copied part should be saved as a smart object. To do it right and not to break anything, you need to:
copy the original smart object initial;
warp the smart object if necessary;
use a mask to hide unnecessary parts;
place the result in the desired location.
If the smart object is rasterized, there is an increased risk that the mesh will break because of incorrect color conversion when performing a particular operation.
warp the image too much.
These actions may cause different unwanted effects on the resulting image which will spoil the result.
Copying parts of the image
Heavy distortion within the canvas borders
The image went beyond the canvas borders
After you've done all the necessary steps with the Face Warp mesh in Photoshop, you should reparse the PSD so that the Template creator could see all the changes.
When reparsing the PSD in different versions of Photoshop, the resulting FWM meshes may differ slightly. This difference is not visible to the eye,
however, it will be noticeable if you compare the meshes pixel by pixel.
When working with the Face Warp filter you should bear in mind the fact, that beside the warp itself the face warp will add a 1px image shift
This fact is barely noticed in static templates (except when pixel precision is required), but is critical for animated templates, where this pixel shift is evident.
This problem is caused by Photoshop which after saving the mesh adds the mentioned shift and breaks the position.
To solve this problem you should add an empty Face Farp mesh to those frames, where morphing is not needed. This will add the same,
pixel shift and will compensate the difference. But you should remember that additional filters will increase the time required for
image processing.
Instagram filters
This section describes filters that are very similar to Instagram filters with the same names.
Instagram Amaro / amaro
before
after
Example parameters: default
An effect similar to Amaro filter on Instagram.
This filter also offers an opacity adjustment using the Blended filter.
Instagram Clarendon / clarendon
before
after
Example parameters: default
An effect similar to Clarendon filter on Instagram.
This filter also offers an opacity adjustment using the Blended filter.
Instagram Cube / cube
before
after
Example parameters: table_name = Aden
before
after
Example parameters: table_name = Juno
before
after
Example parameters: table_name = Lark
before
after
Example parameters: table_name = Ludwig
before
after
Example parameters: table_name = Slumber
Depending on specified parameters, this effect imitates the following Instagram filters: Aden, Juno, Lark, Ludwig, Slumber.
This filter also offers an opacity adjustment using the Blended filter.
Parameter
Default value
Min value
Max value
Description
Effect type
table_name
Aden
-
-
The filter looks different depending on what value is selected for this parameter. The parameter can take the following values:
Aden
Juno
Lark
Ludwig
Slumber
Instagram Gingham / gingham
before
after
Example parameters: default
An effect similar to Gingham filter on Instagram.
This filter also offers an opacity adjustment using the Blended filter.
Instagram Ginza / ginza
before
after
Example parameters: default
An effect similar to Ginza filter on Instagram.
This filter also offers an opacity adjustment using the Blended filter.
Instagram Helena / helena
before
after
Example parameters: default
An effect similar to Helena filter on Instagram.
This filter also offers an opacity adjustment using the Blended filter.
Instagram Hudson / hudson
before
after
Example parameters: default
An effect similar to Hudson filter on Instagram.
This filter also offers an opacity adjustment using the Blended filter.
Instagram Kelvin / kelvin
before
after
Example parameters: default
An effect similar to Kelvin filter on Instagram.
This filter also offers an opacity adjustment using the Blended filter.
Instagram Lofi / lofi
before
after
Example parameters: default
An effect similar to Lofi filter on Instagram.
This filter also offers an opacity adjustment using the Blended filter.
Instagram Maven / maven
before
after
Example parameters: default
An effect similar to Maven filter on Instagram.
This filter also offers an opacity adjustment using the Blended filter.
Instagram Moon / moon
before
after
Example parameters: default
An effect similar to Moon filter on Instagram.
This filter also offers an opacity adjustment using the Blended filter.
Instagram Nashville / nashville
before
after
Example parameters: default
An effect similar to Nashville filter on Instagram.
This filter also offers an opacity adjustment using the Blended filter.
Instagram Valencia / valencia
before
after
Example parameters: default
An effect similar to Valencia filter on Instagram.
This filter also offers an opacity adjustment using the Blended filter.
Other filters
This section describes filters that are too difficult to distribute to existing categories because of them solving non-standard tasks.
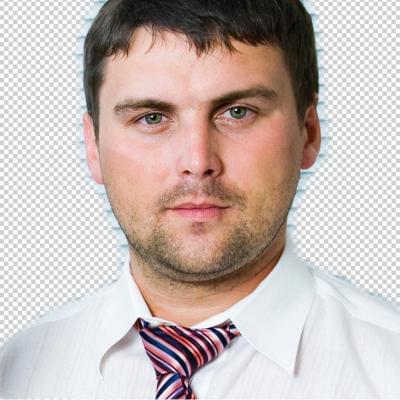
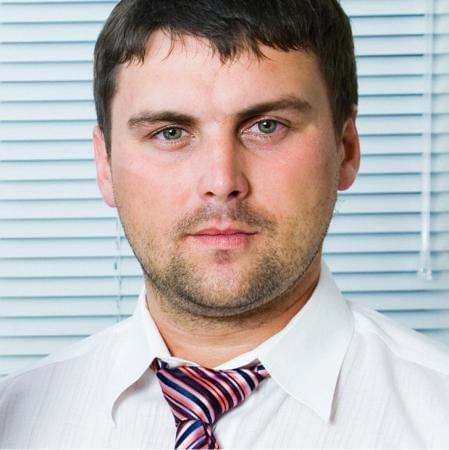
Body detection / body_detection
before
after
Example parameters: default
The filter is used together with the 'figure' user photo region (more information here).
It allows you to detect a human figure in a photo and make the background around it transparent.
Read more about the parameters that affect the selection of the figure
here.
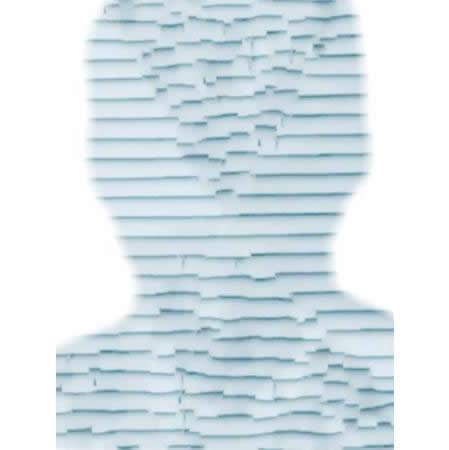
Figure Retouch / inpaint
before
after
Example parameters: the filter has been applied to the figure region
This filter allows to fill a detected figure with a generated background (based on the background around the figure). The filter only works with
Figure and Frame regions.
Figure Retouch applied to a Frame regionFigure Retouch applied to a Figure region
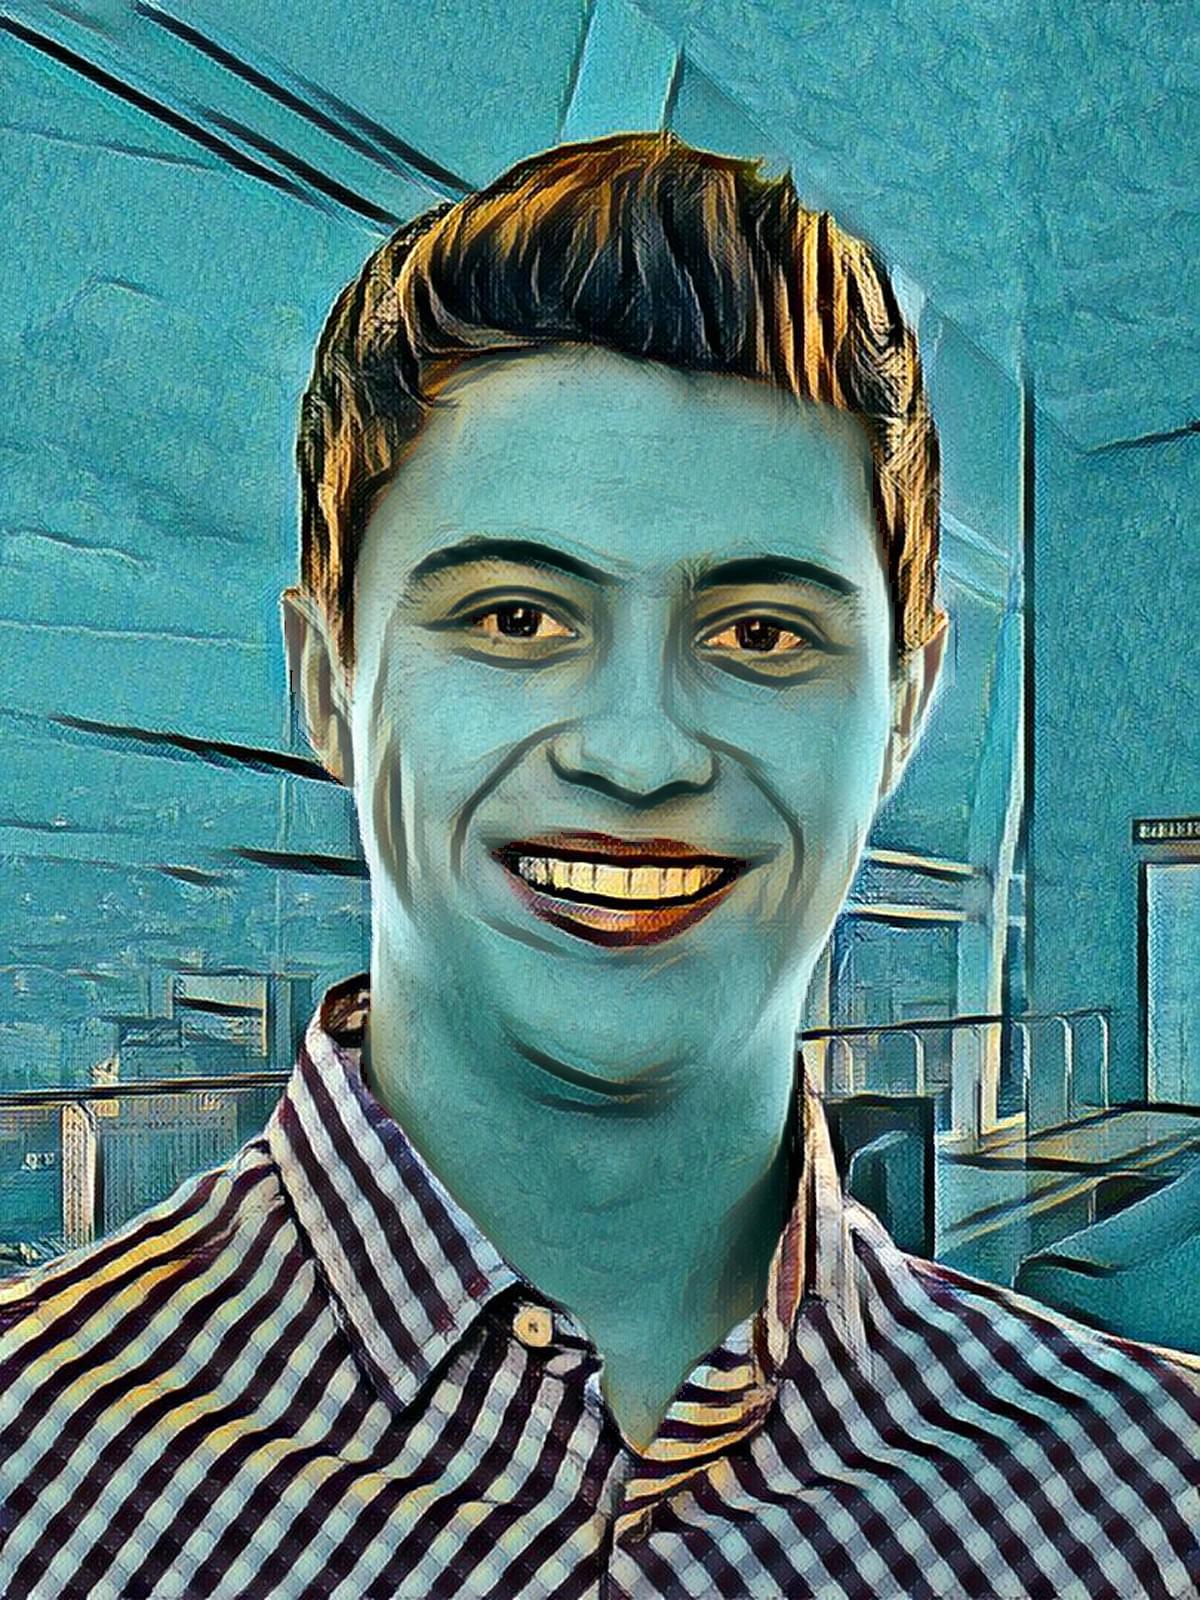
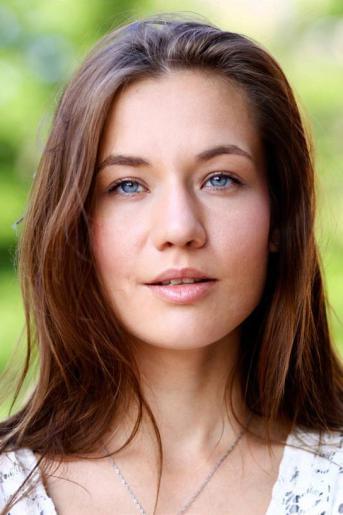
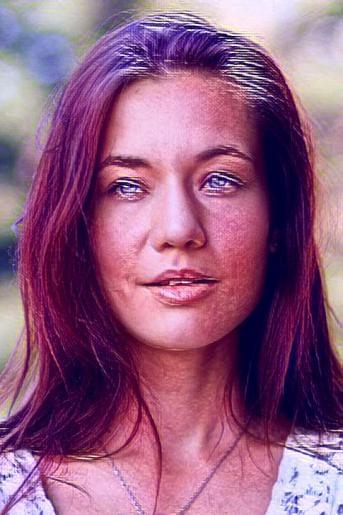
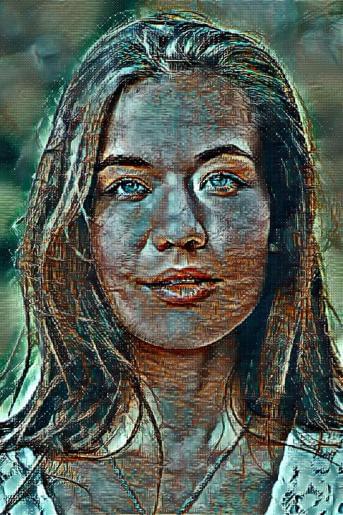
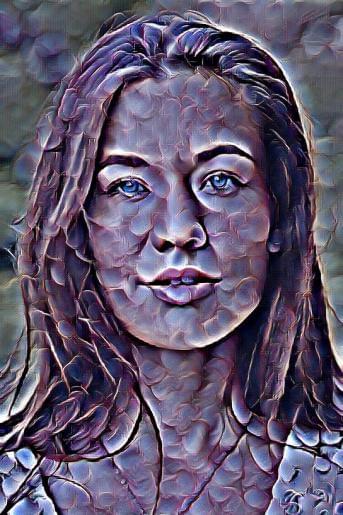
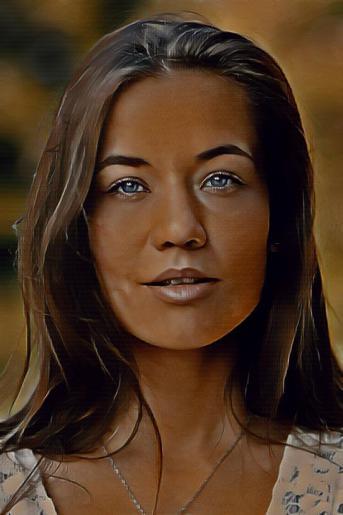
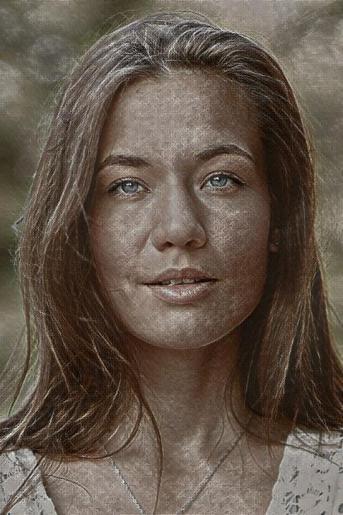
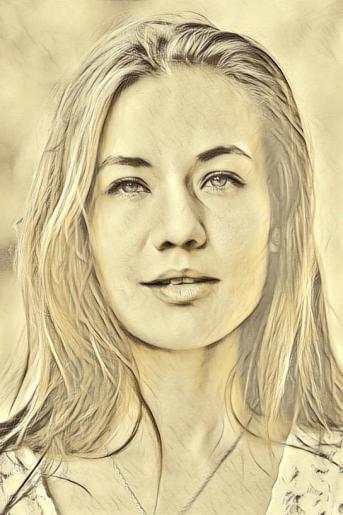
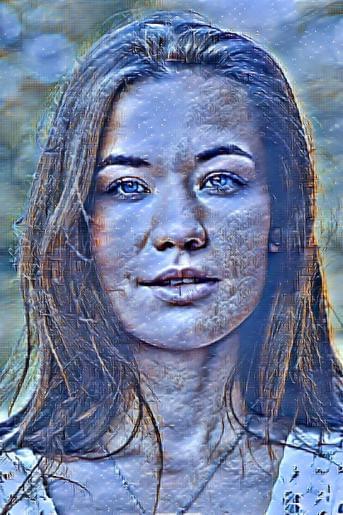
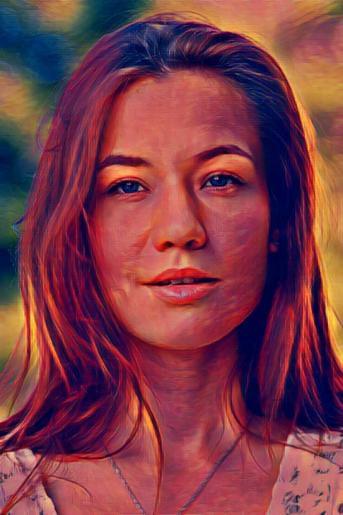
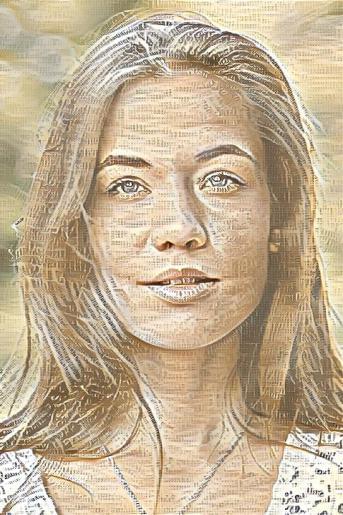
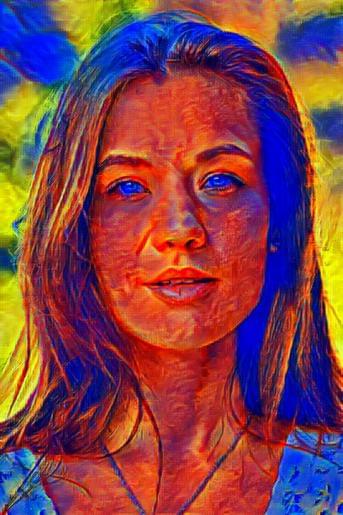
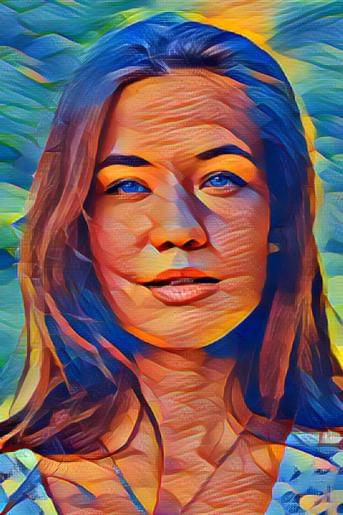
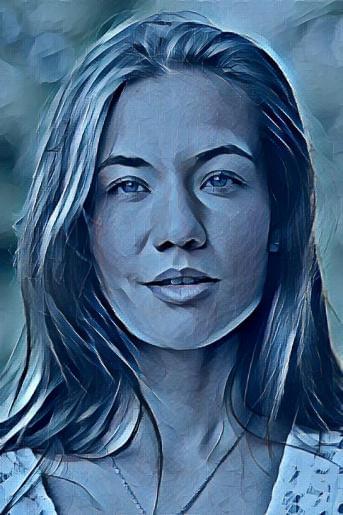
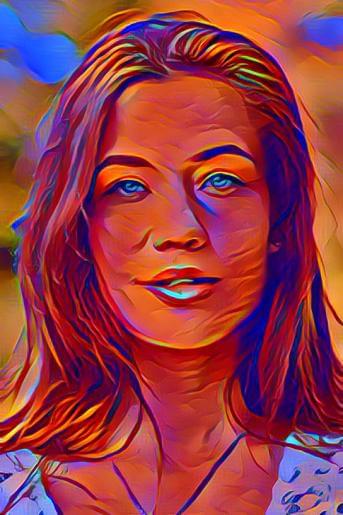
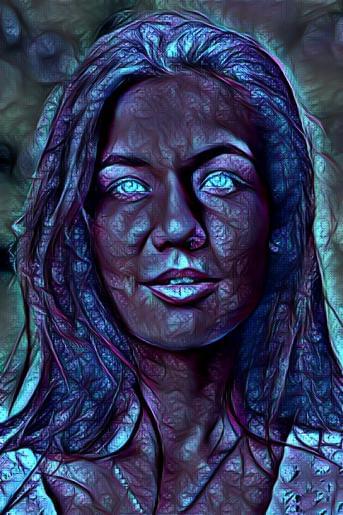
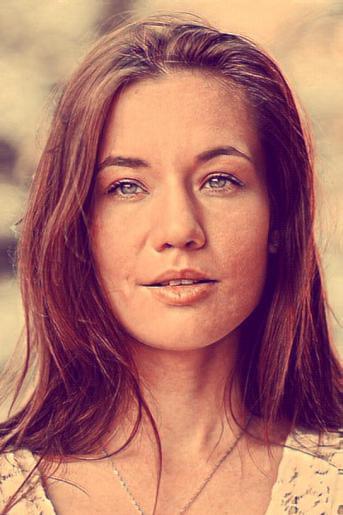
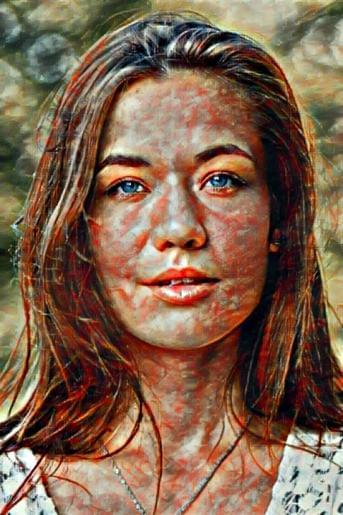
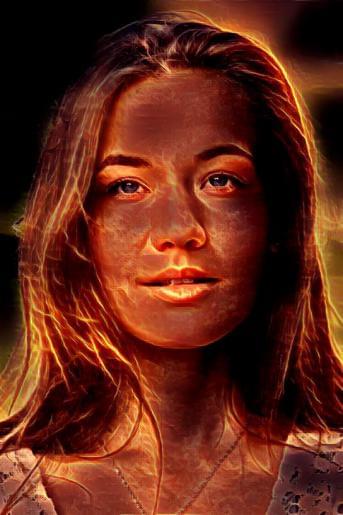
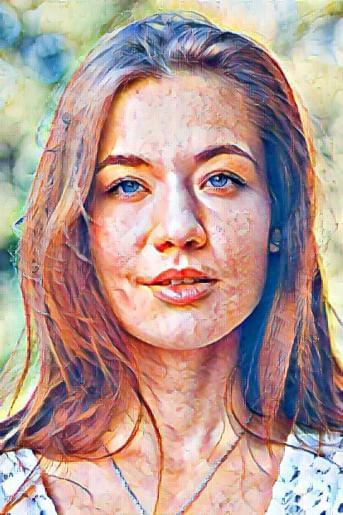
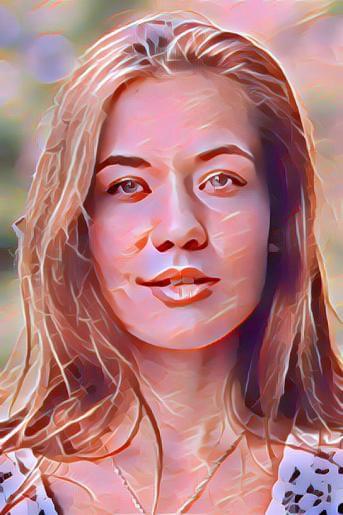
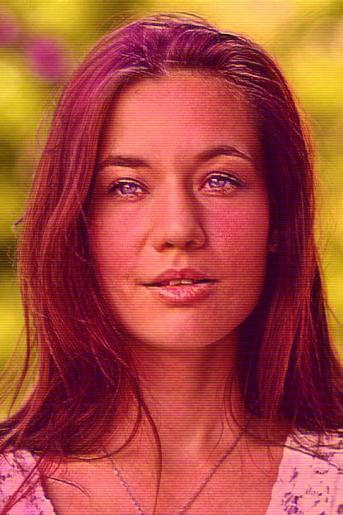
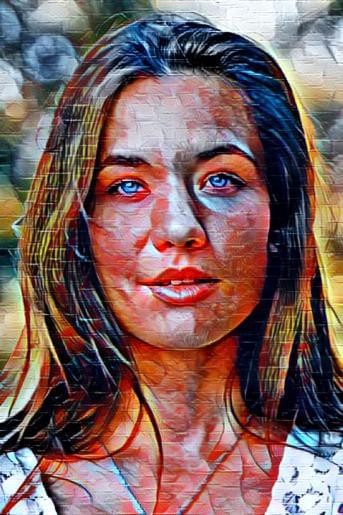
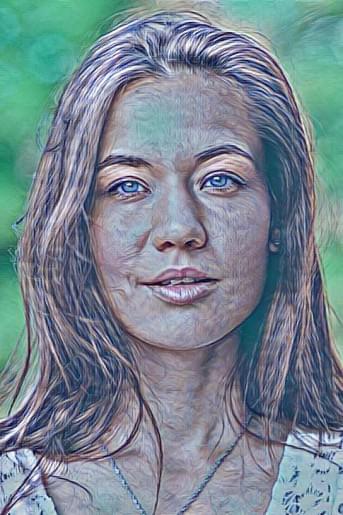
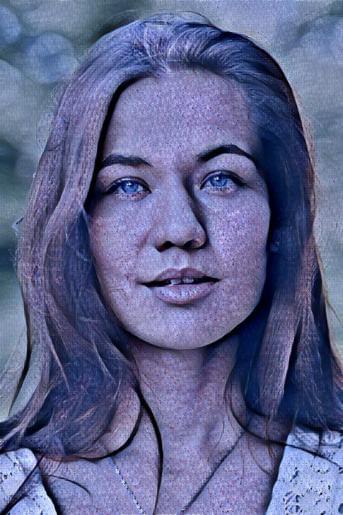
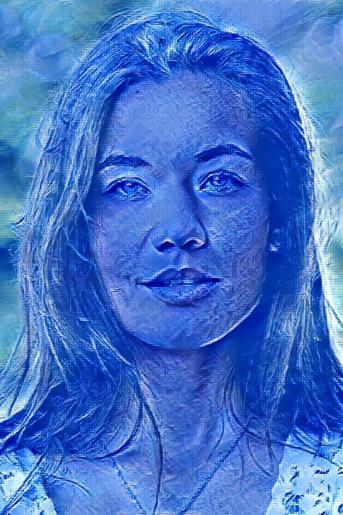
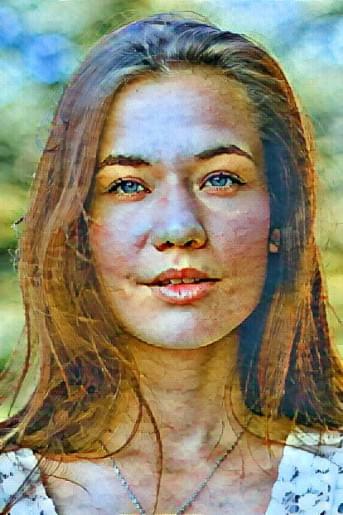
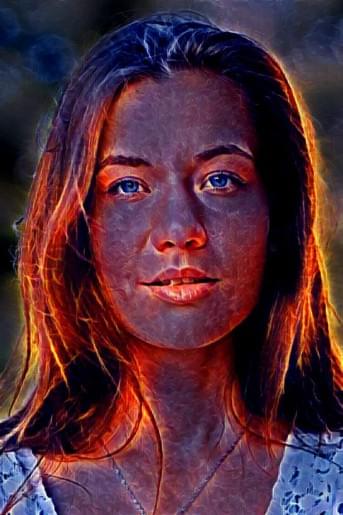
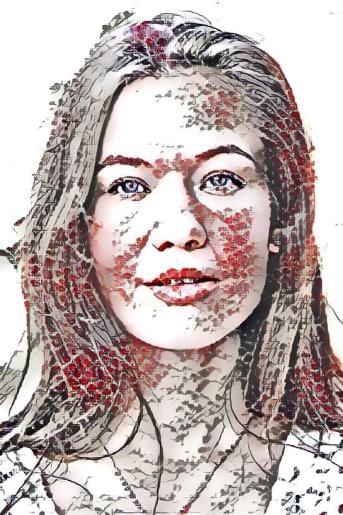
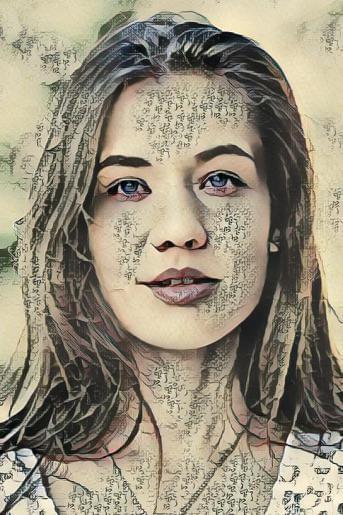
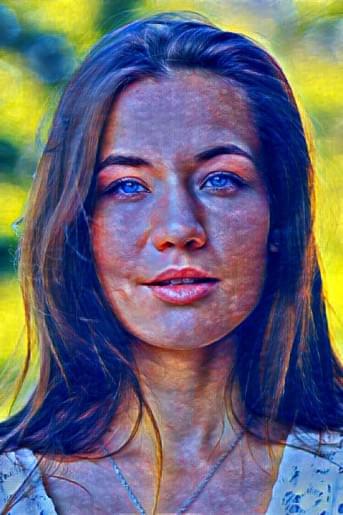
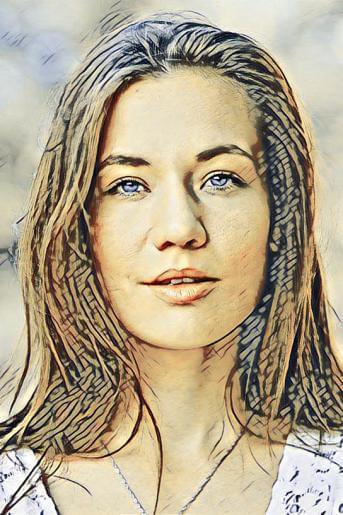
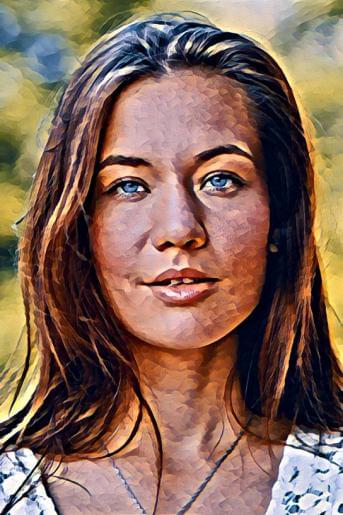
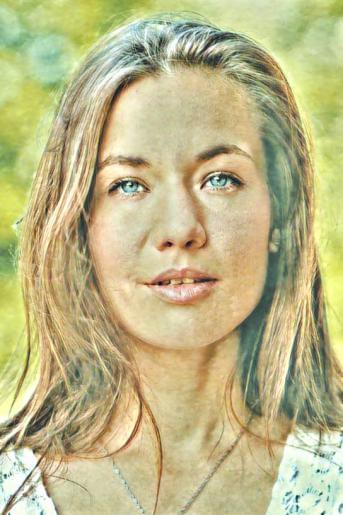
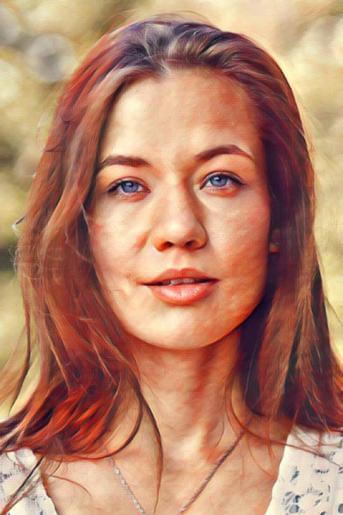
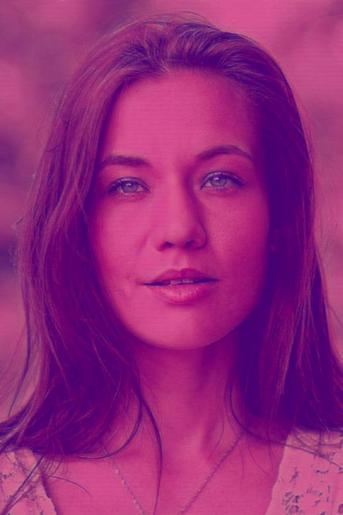
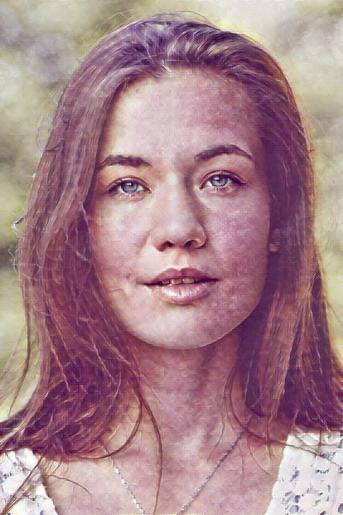
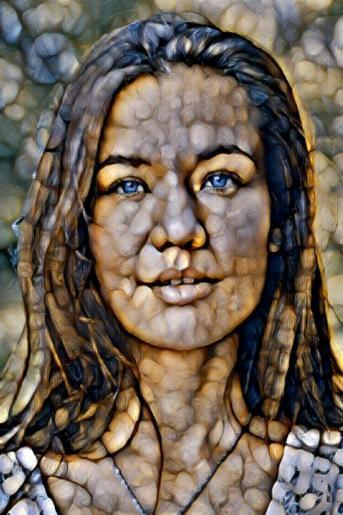
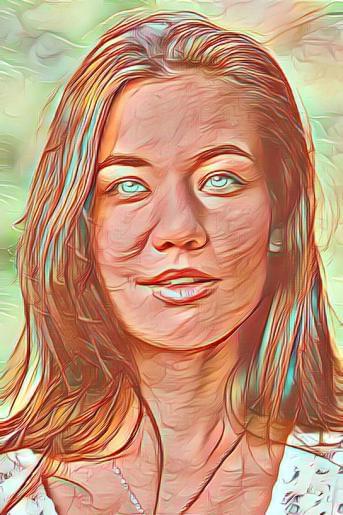
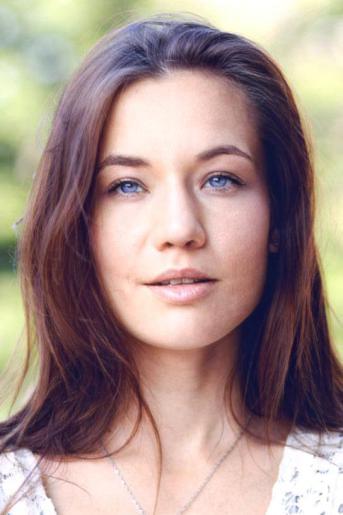
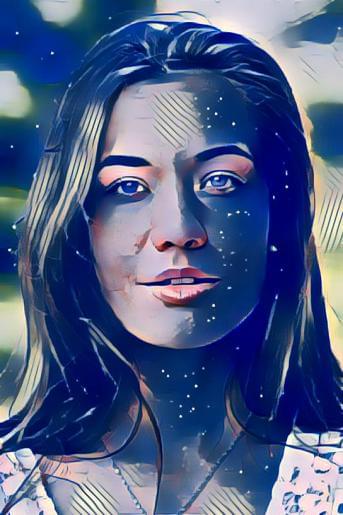
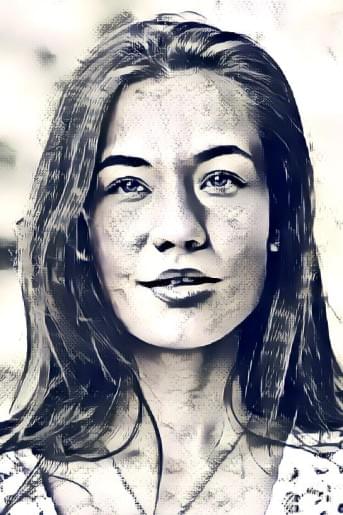
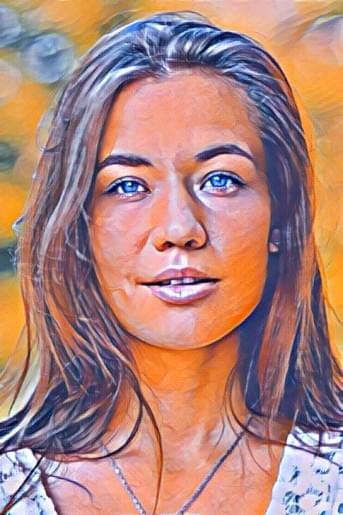
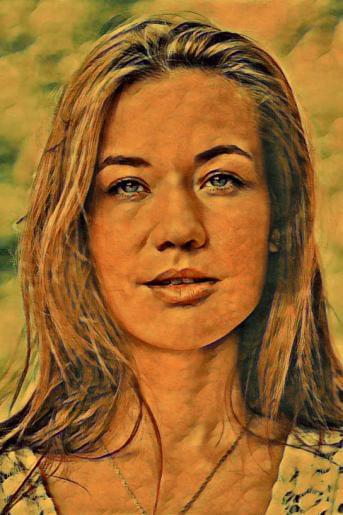
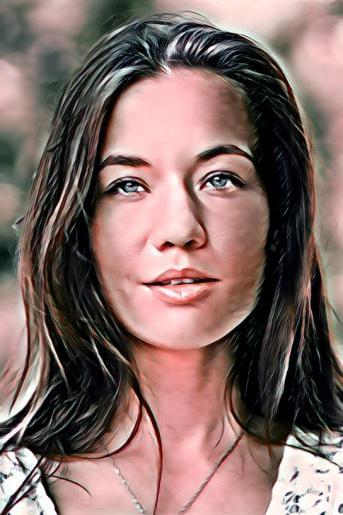
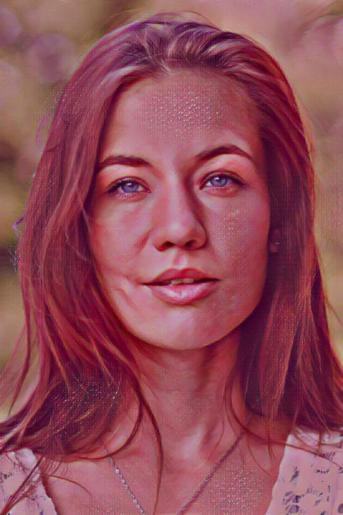
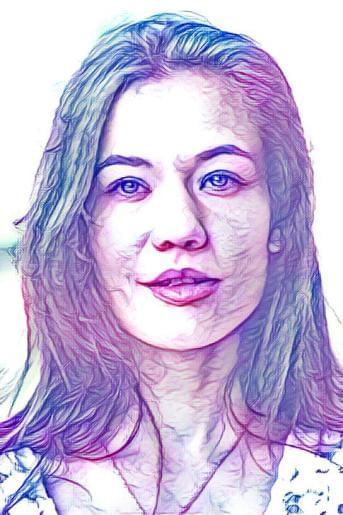
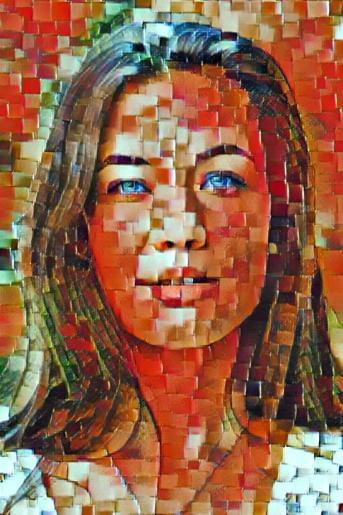
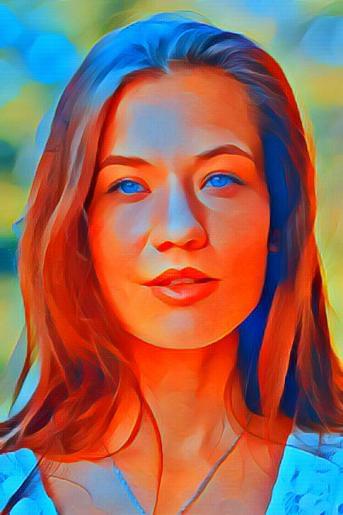
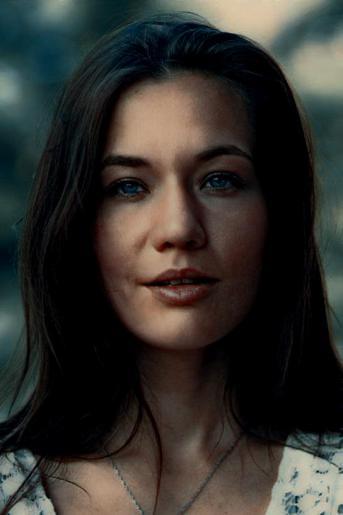
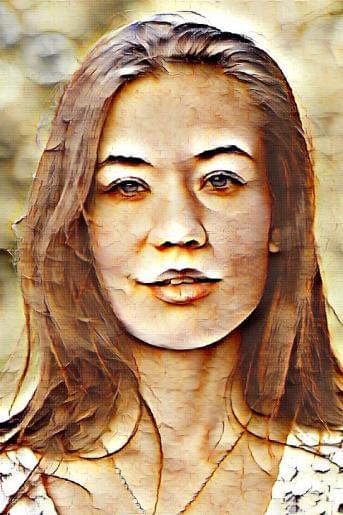
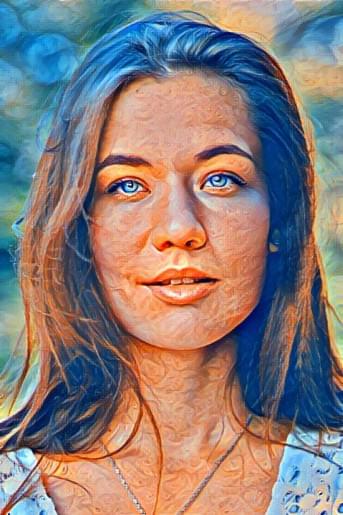
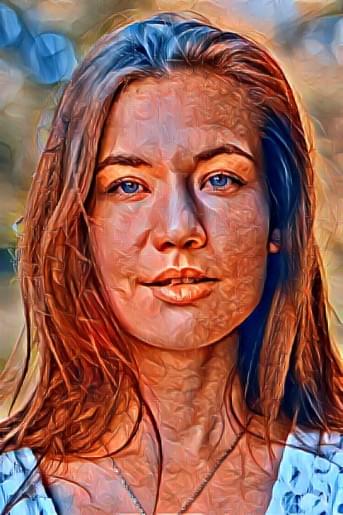
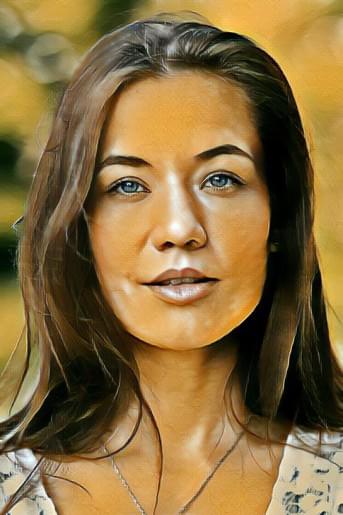
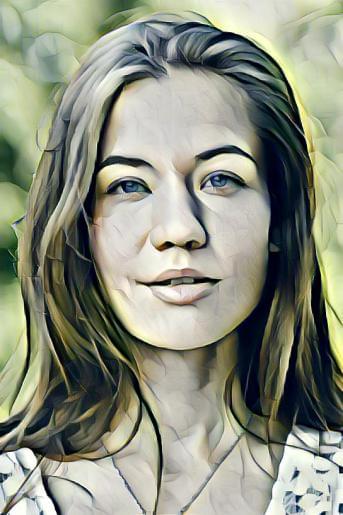
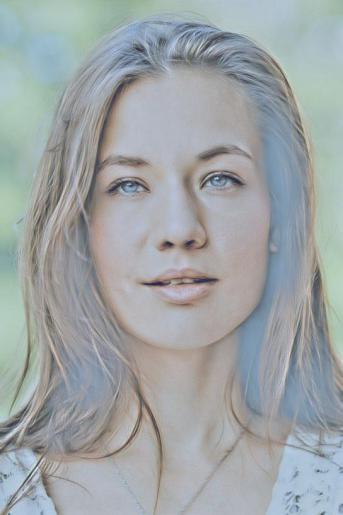
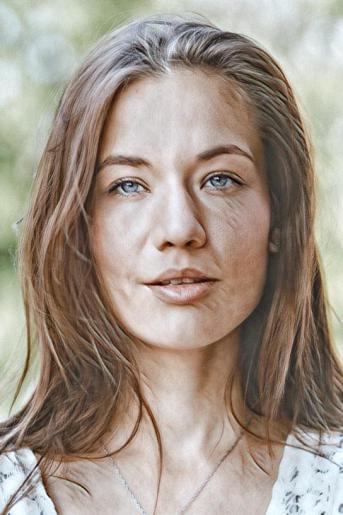
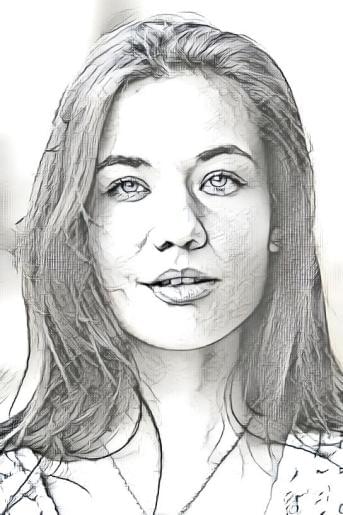
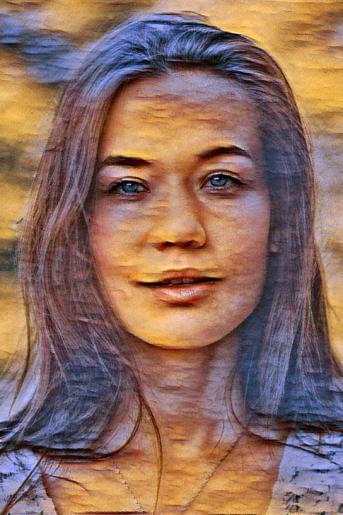
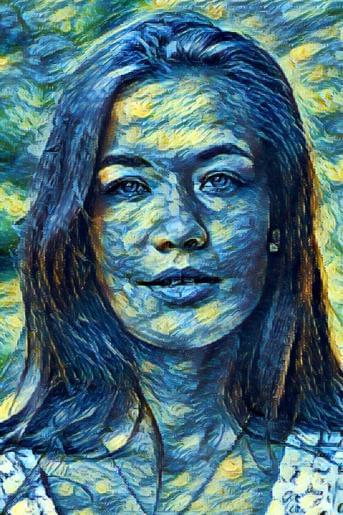
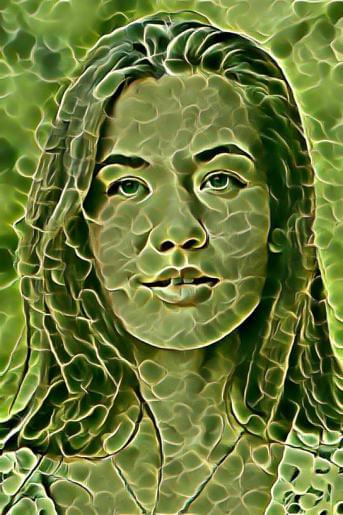
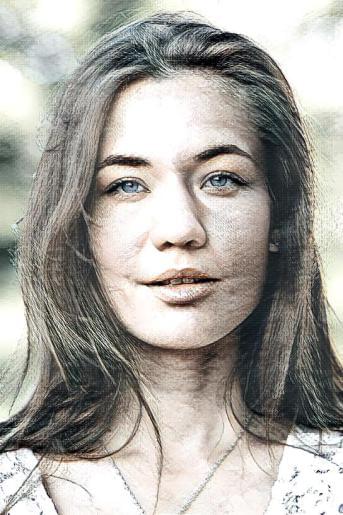
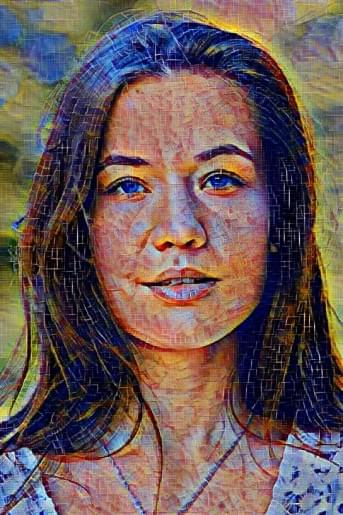
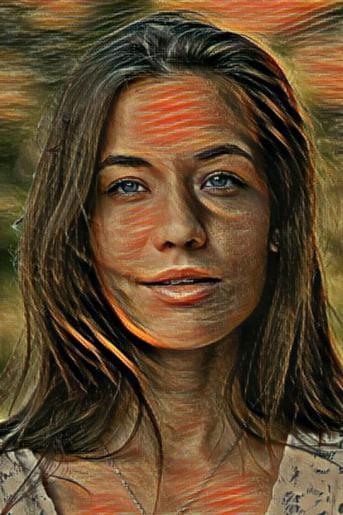
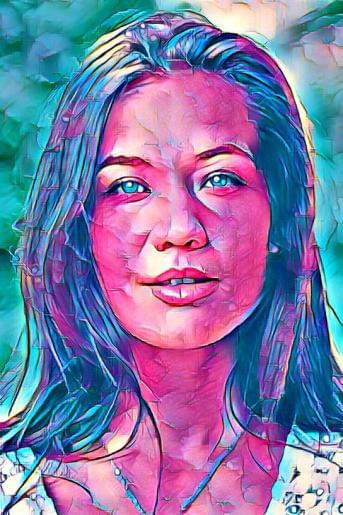
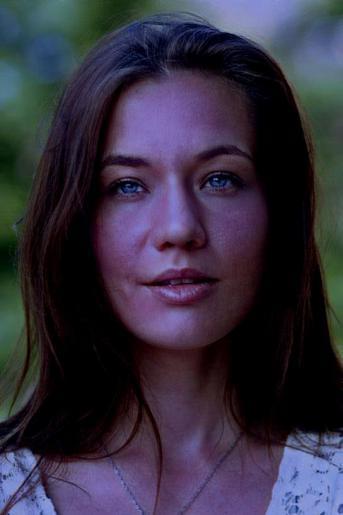
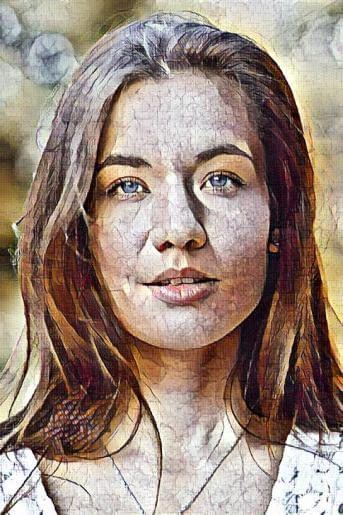
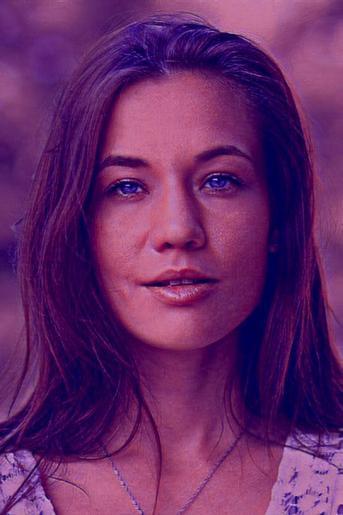
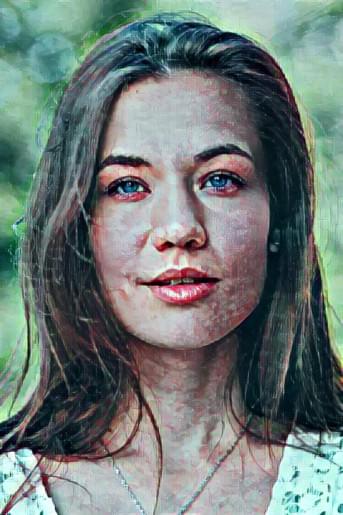
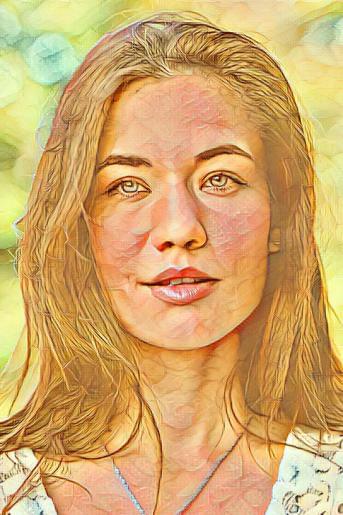
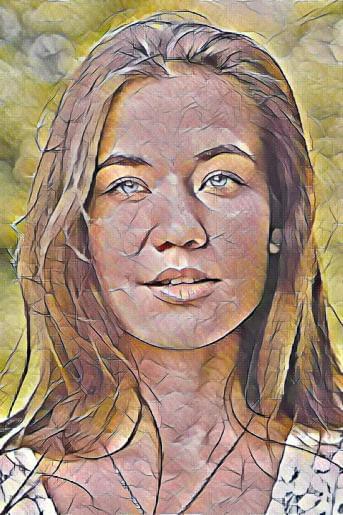
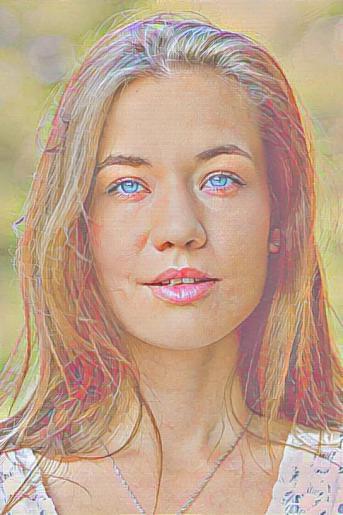
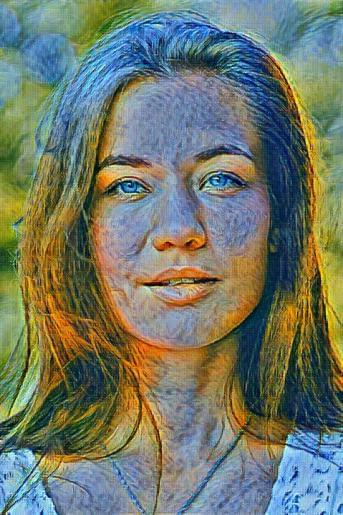
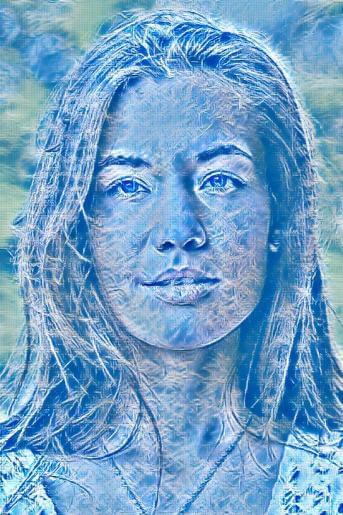
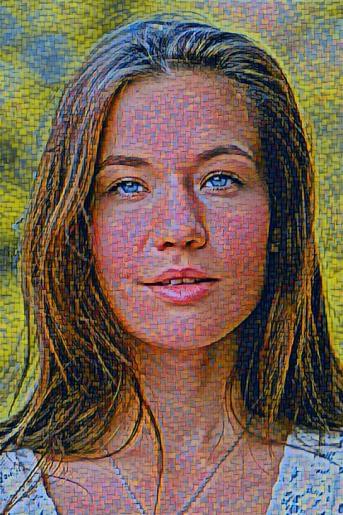
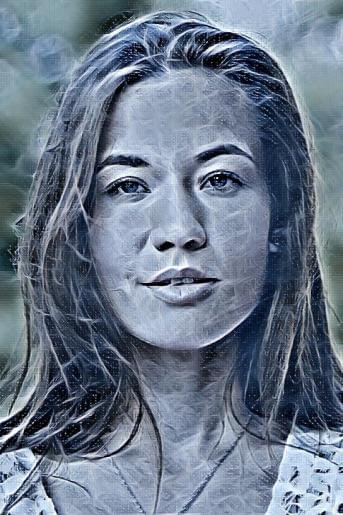
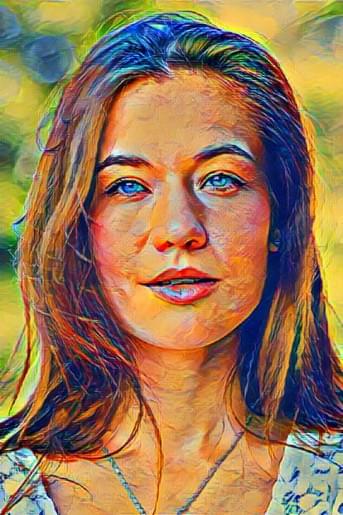
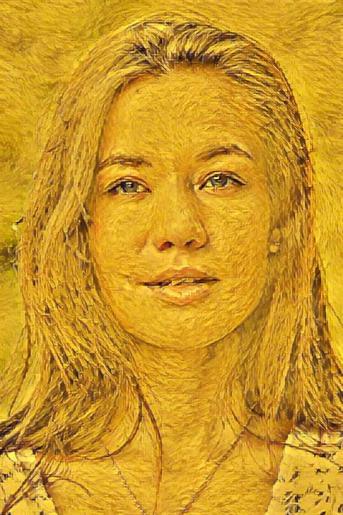
Neurofilters
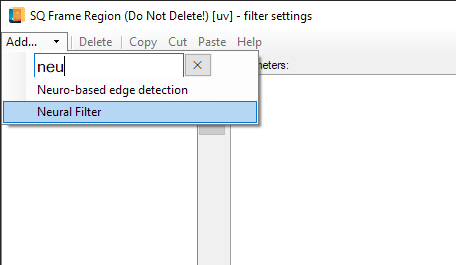
Neurofilter is a special effect applied to the photo region, designed to transform it and make stylistically similar to the subject of painting.
To apply the neurofilter to the selected photo region, you have to open the list of filters for the region and select the "Neural Filter" in it.
Parameter
Default value
Min value
Max value
Description
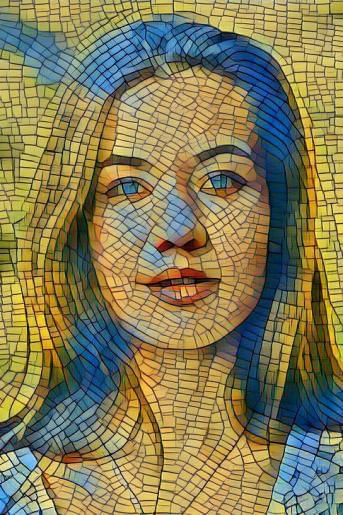
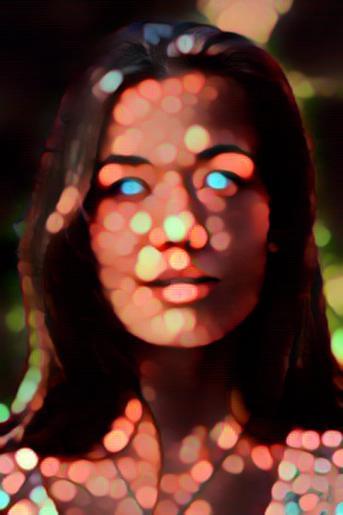
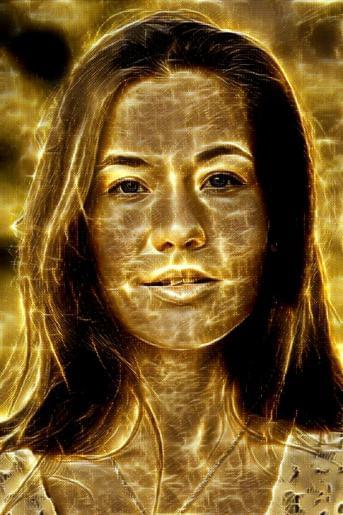
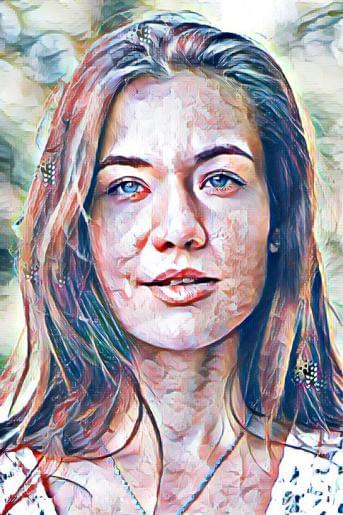
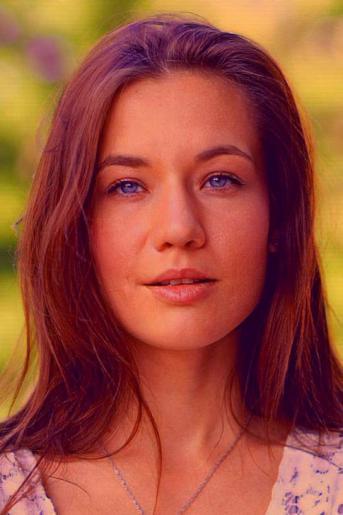
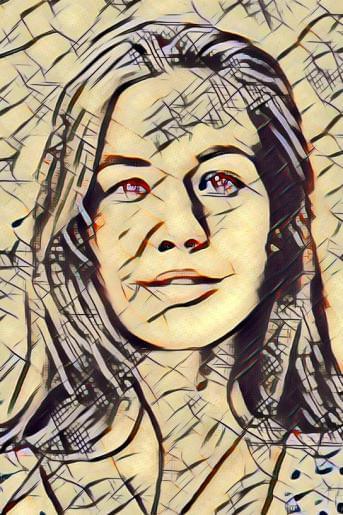
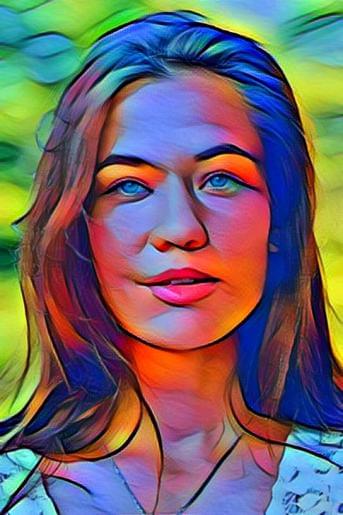
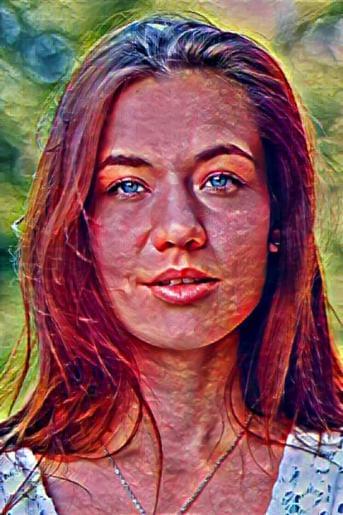
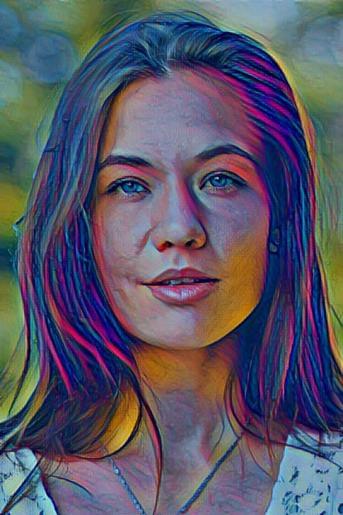
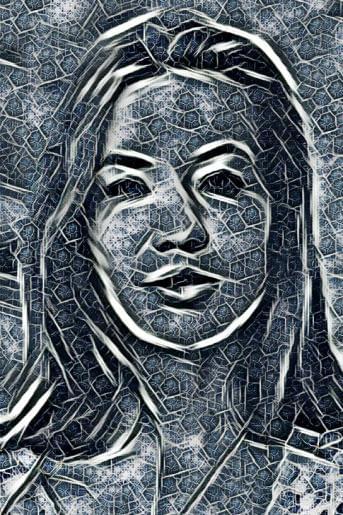
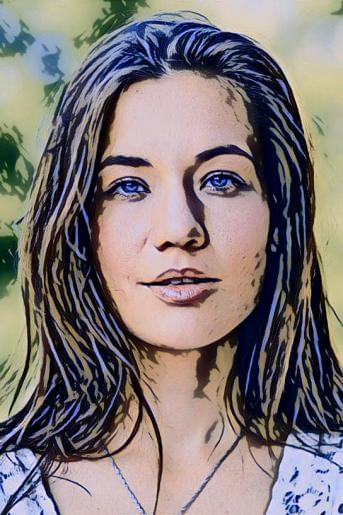
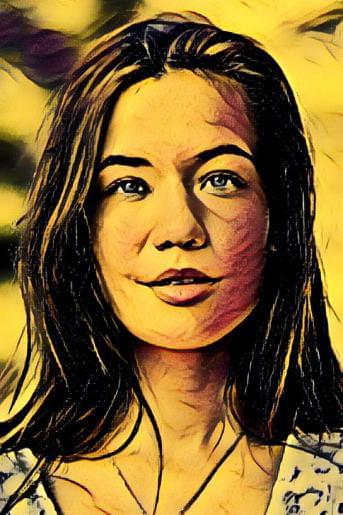
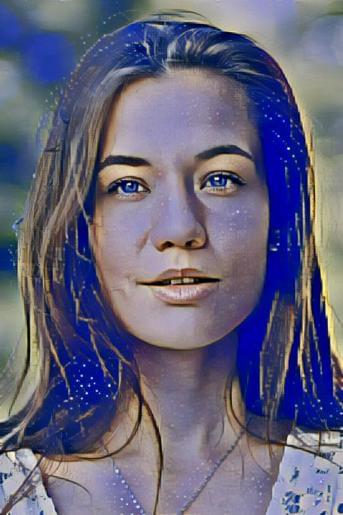
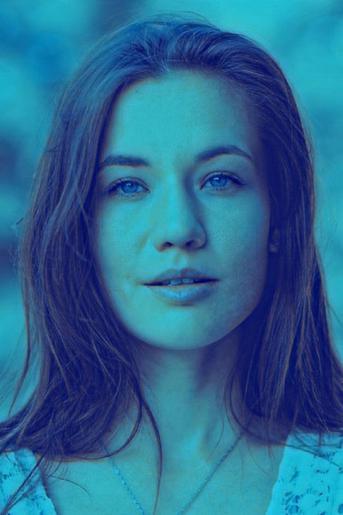
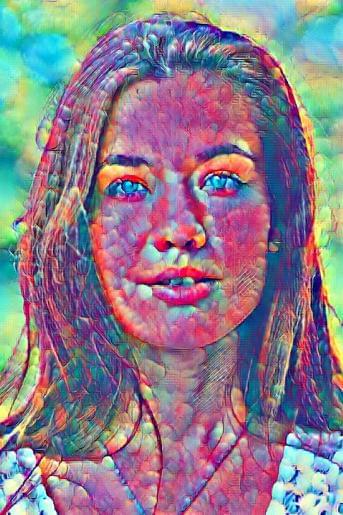
Neural filter name
-
Abstract Turquoise
-
-
Name of a specific neural filter that will be applied to a photo
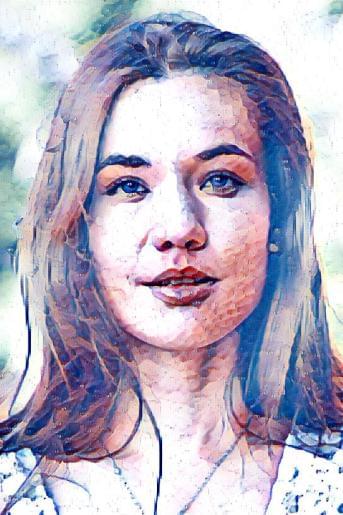
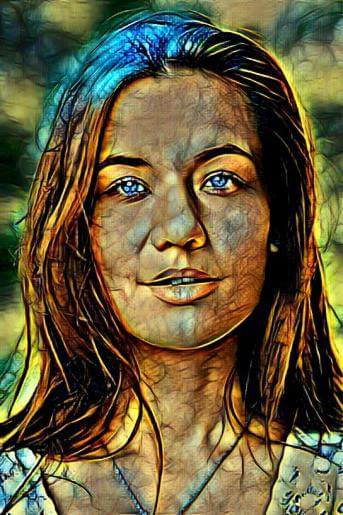
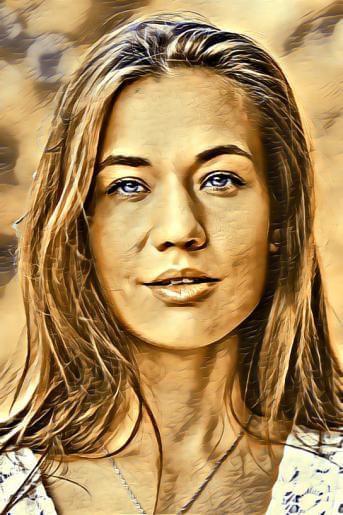
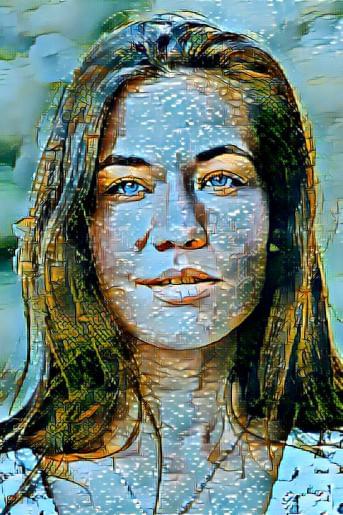
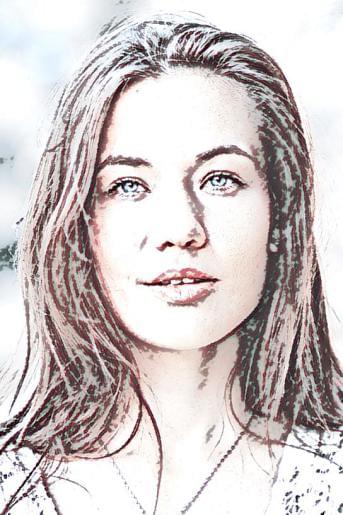
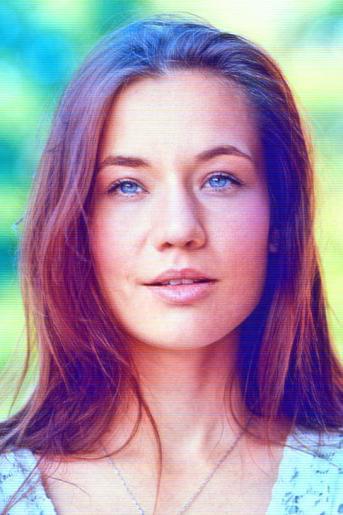
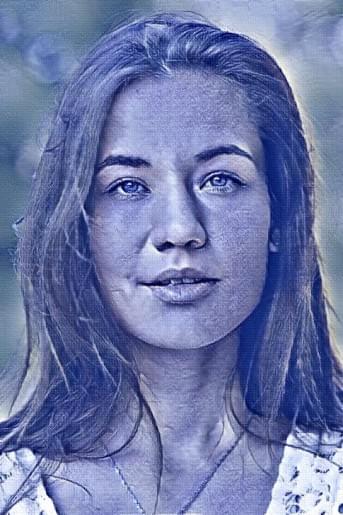
Skin enancement opacity
-
200
0
255
Opacity of the skin enhancement effect.
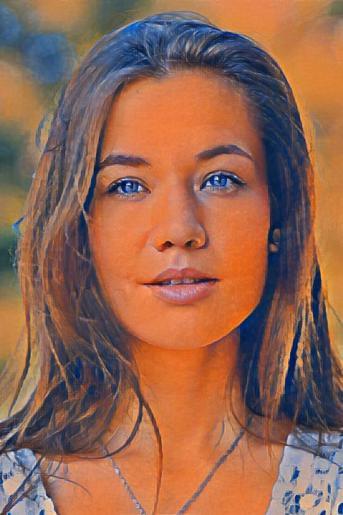
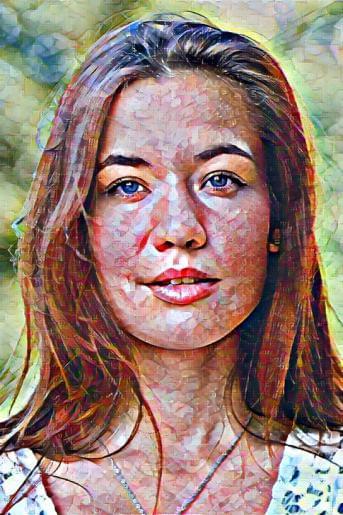
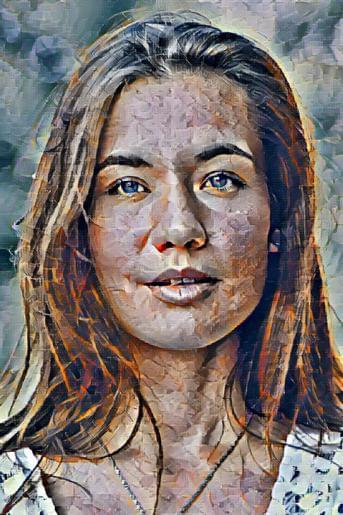
0 – no skin enhancement effect, only the original neural filter is visible
255 - in the skin area, the neural filter is completely replaced by the original color-corrected skin
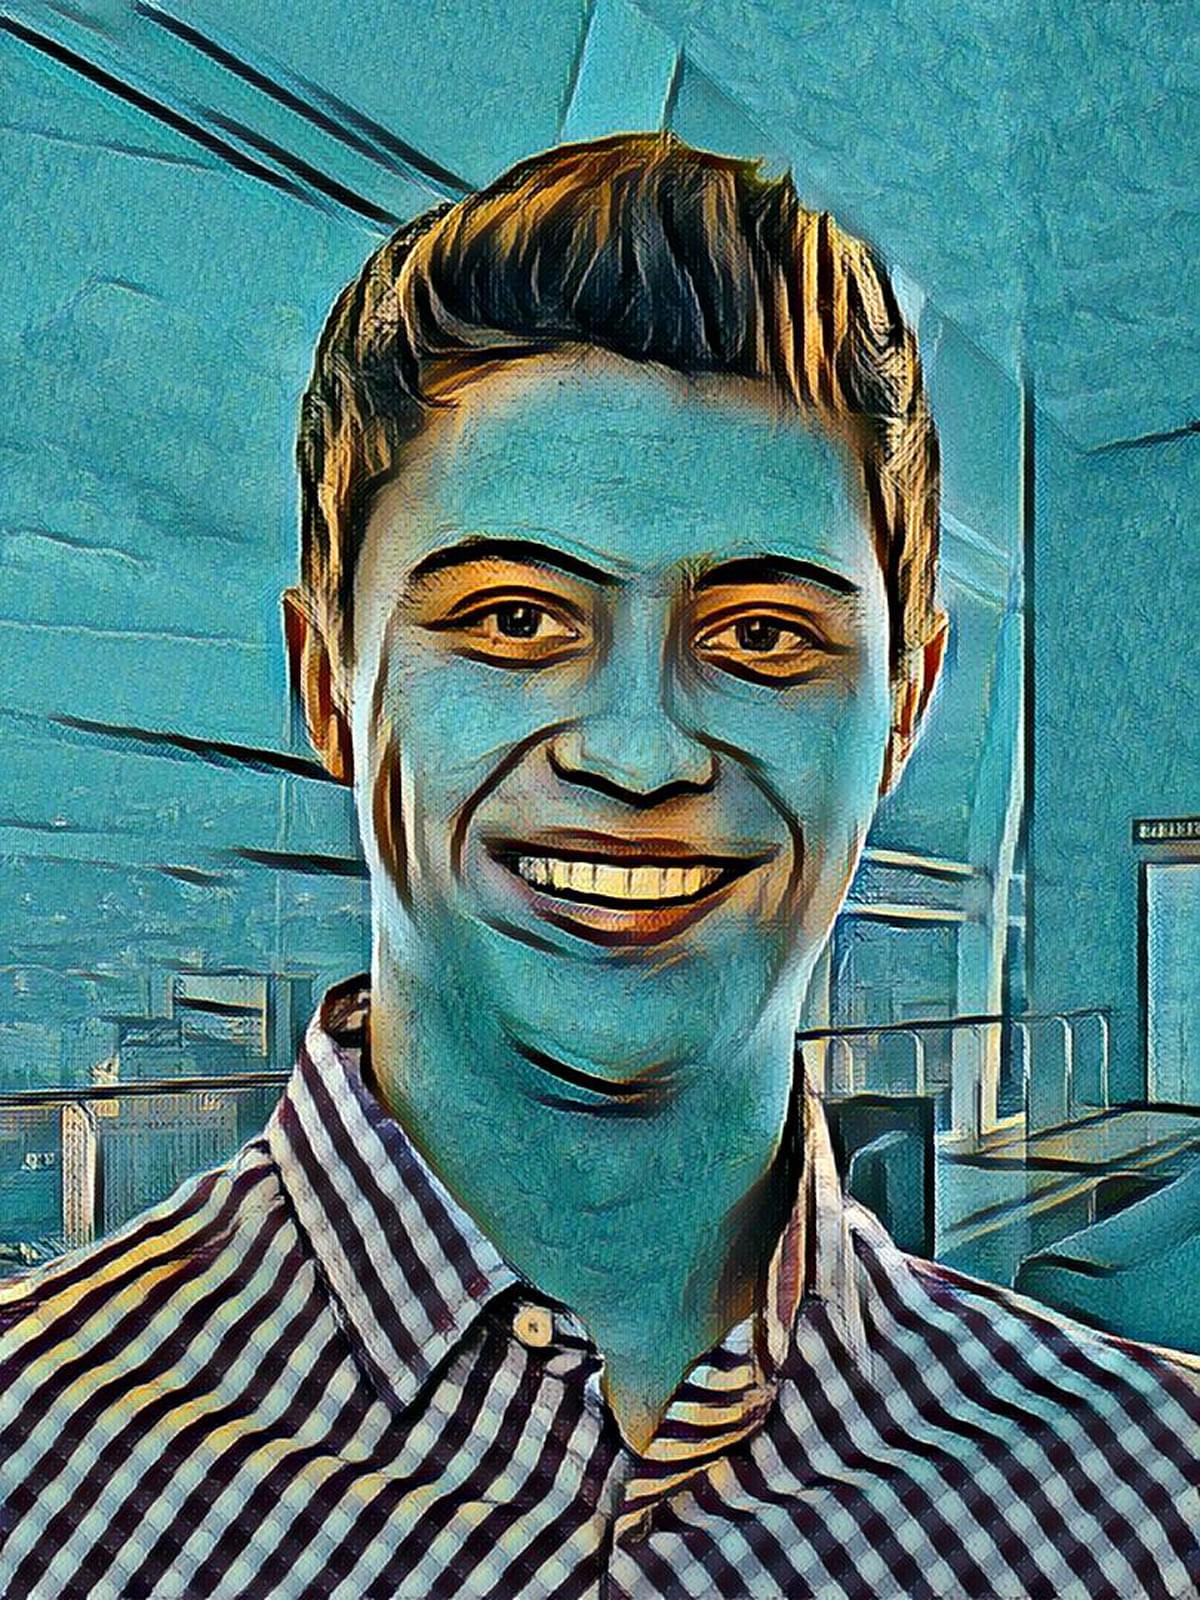
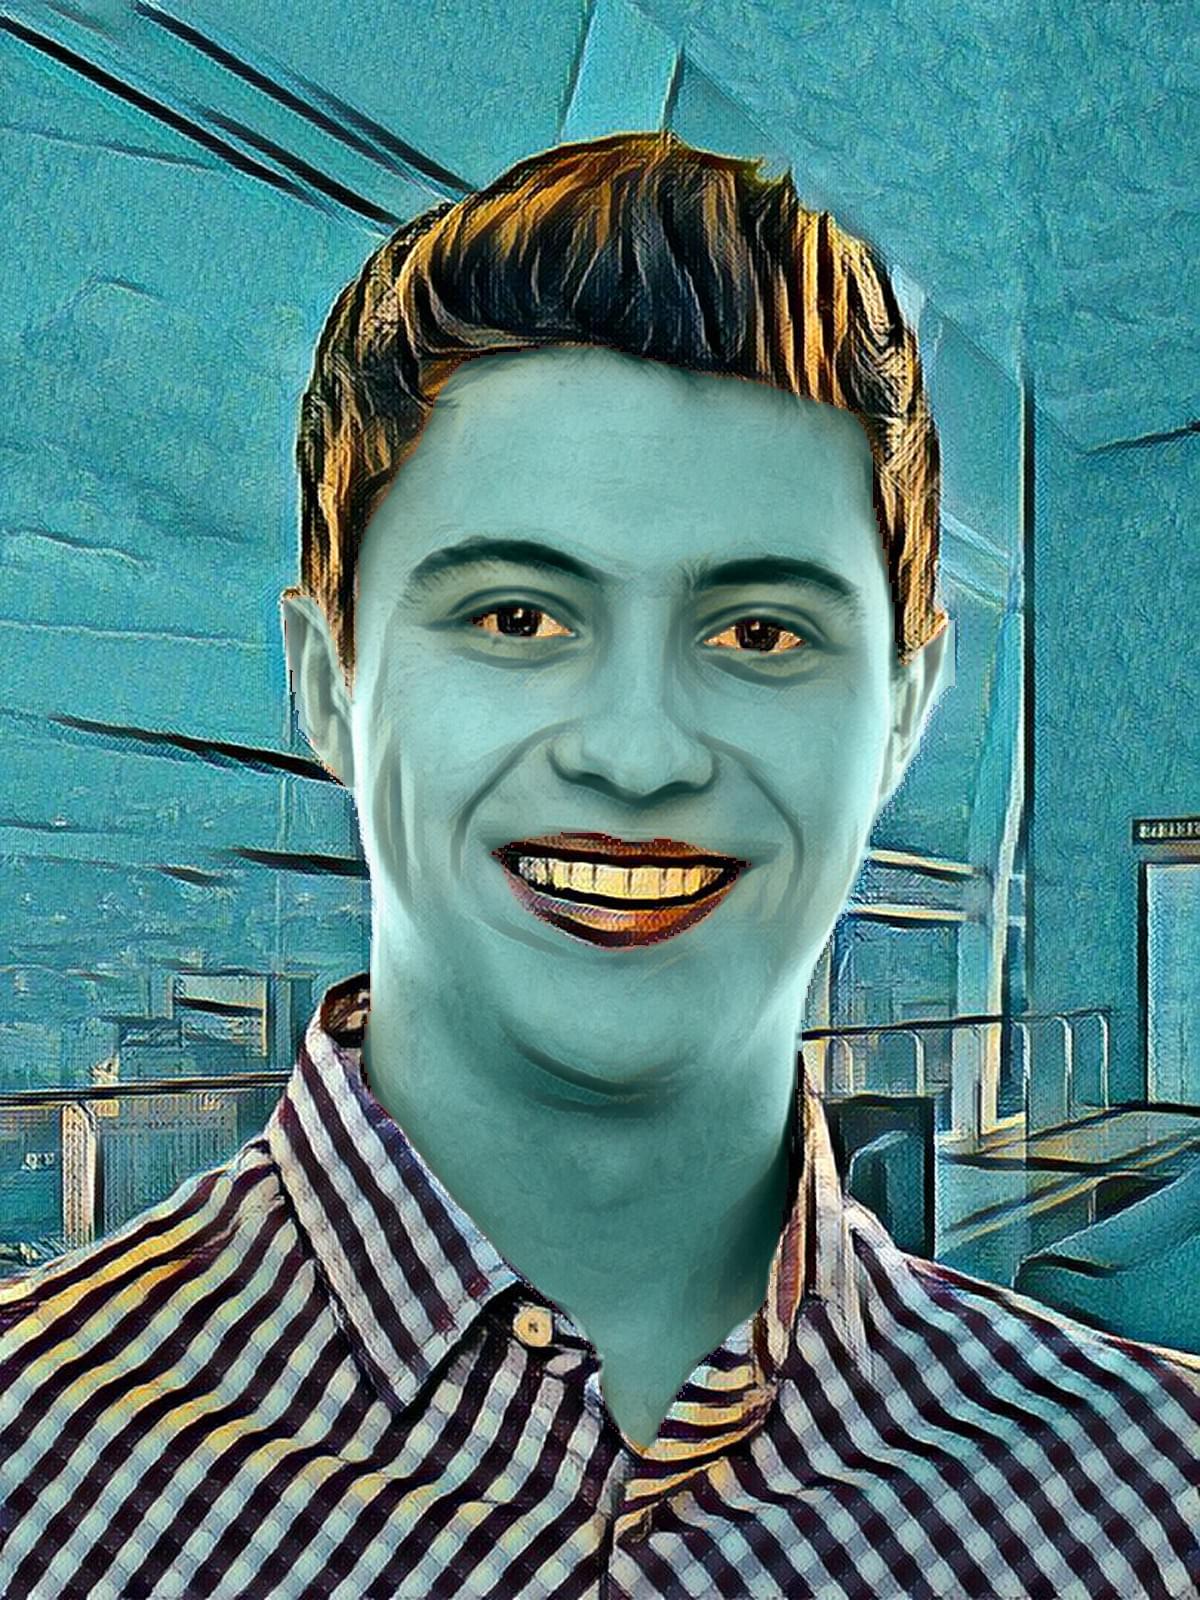
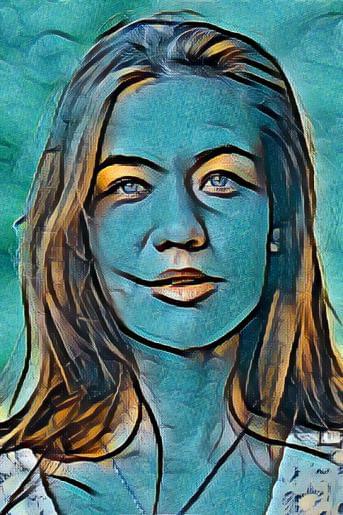
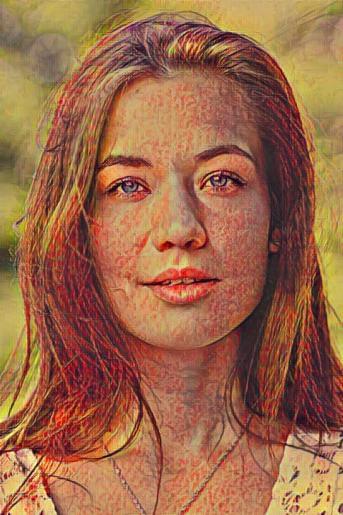
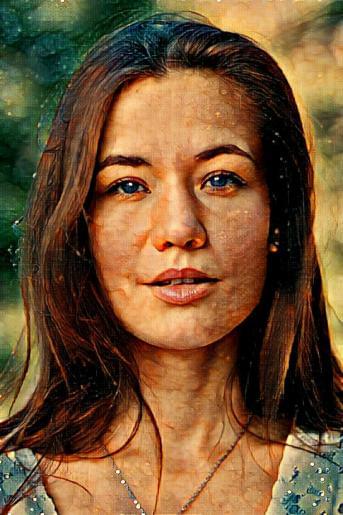
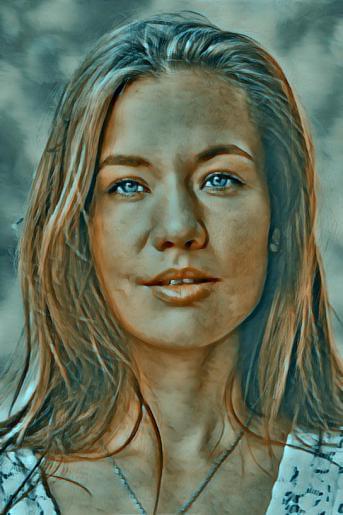
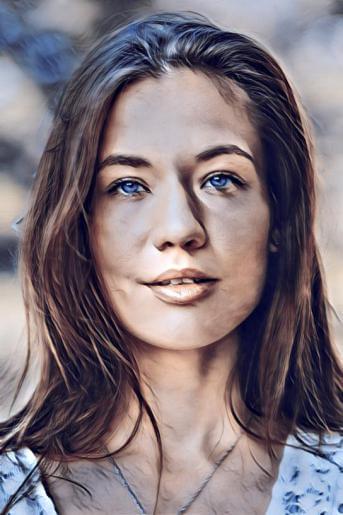
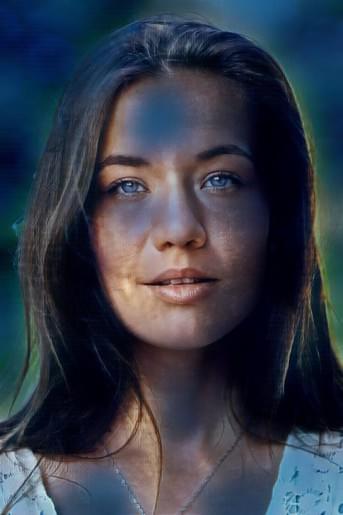
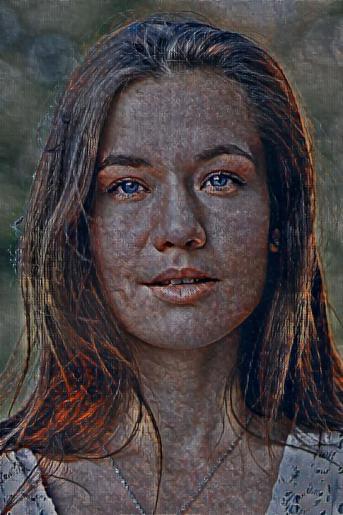
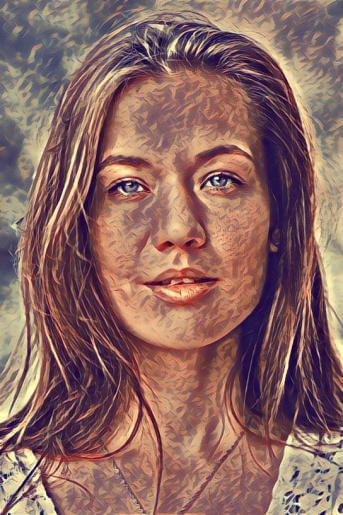
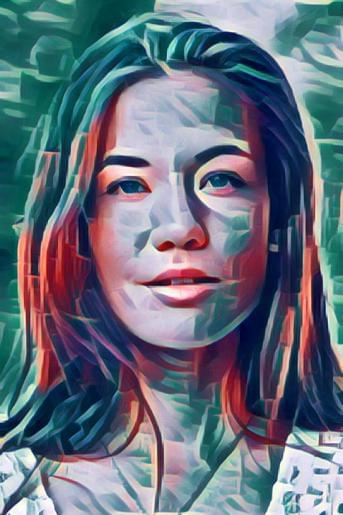
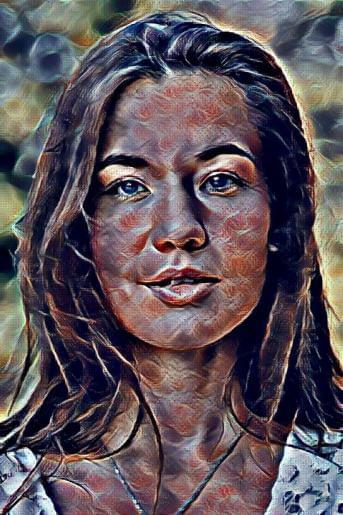
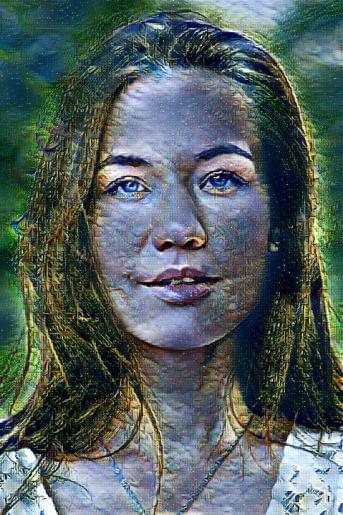
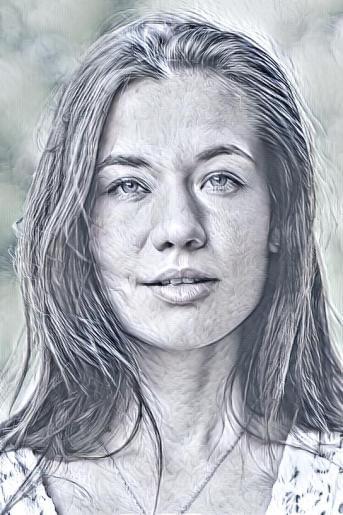
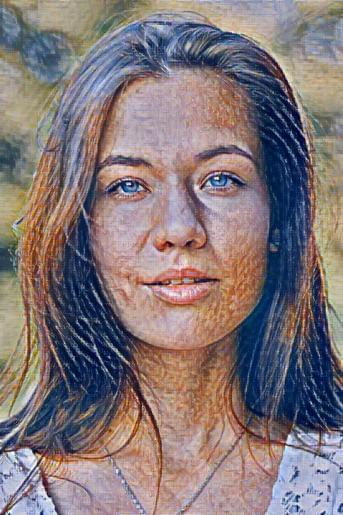
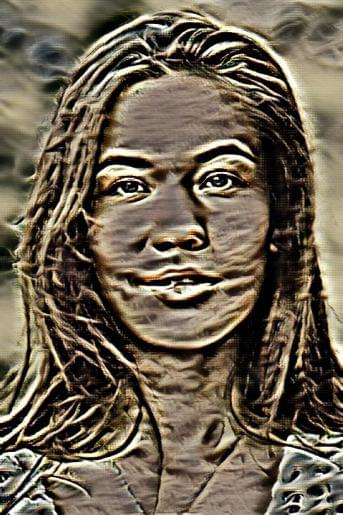
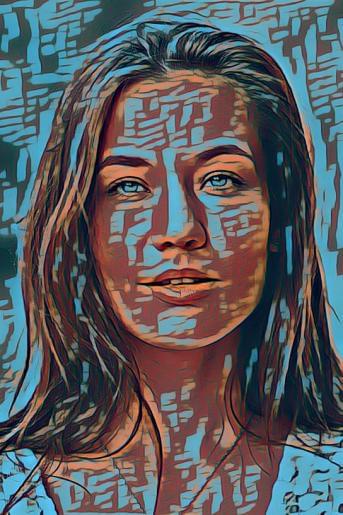
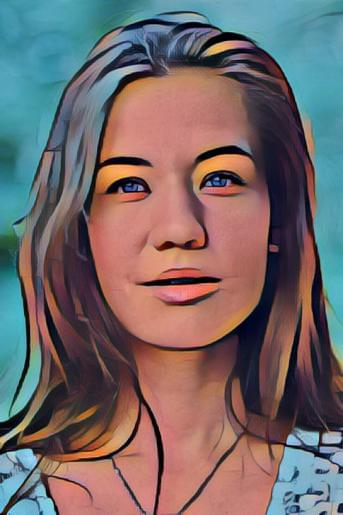
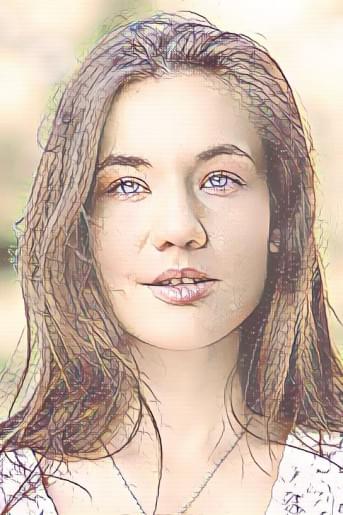
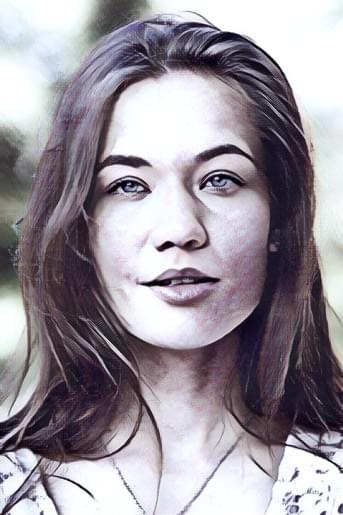
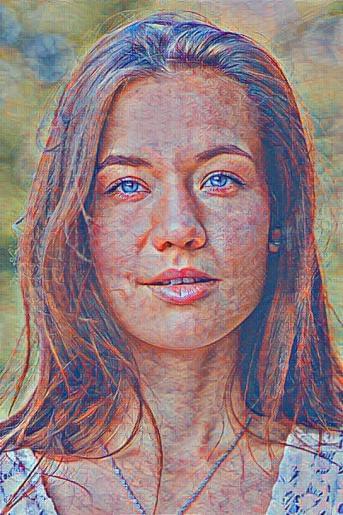
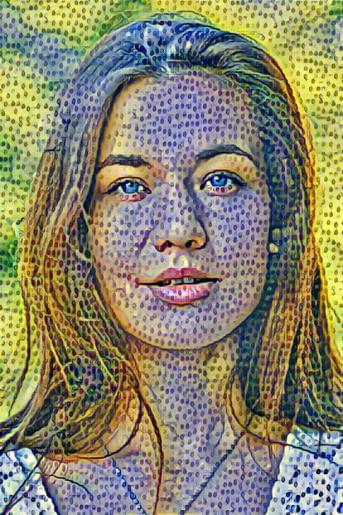
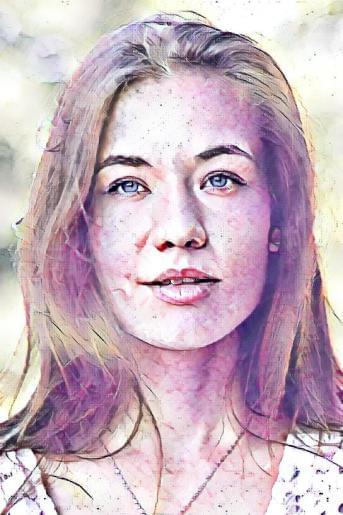
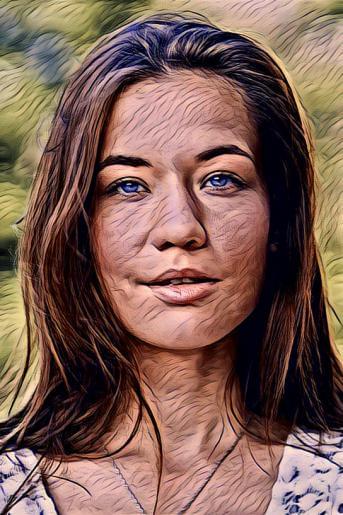
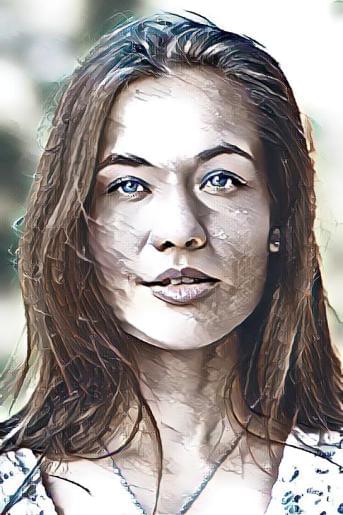
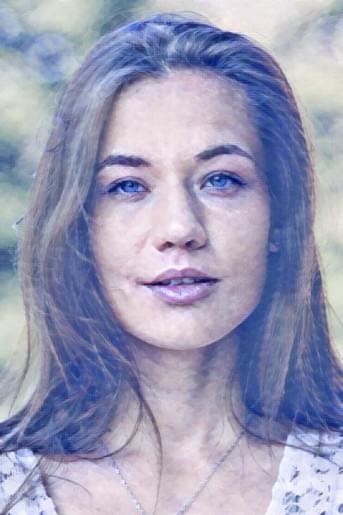
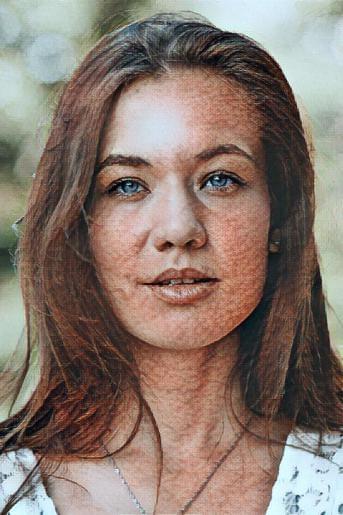
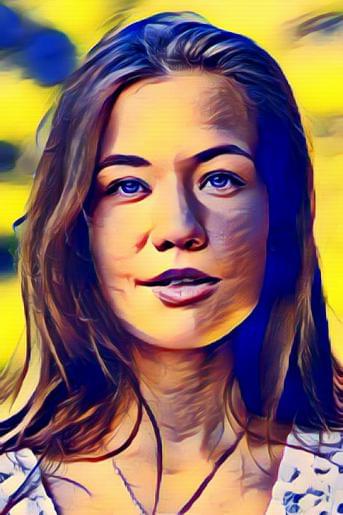
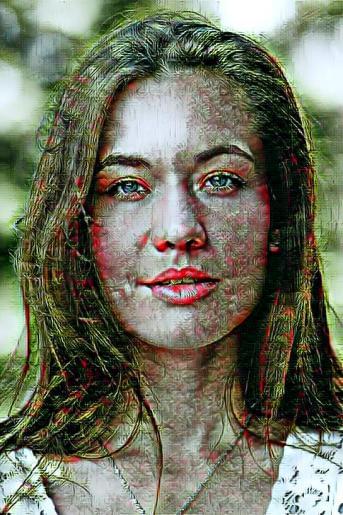
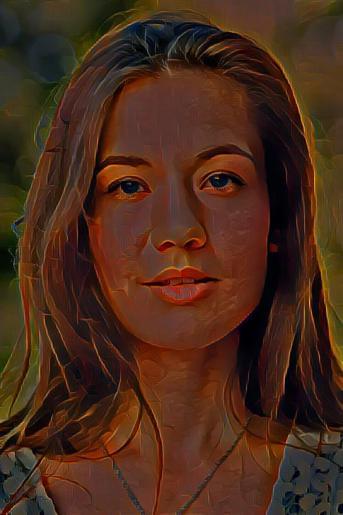
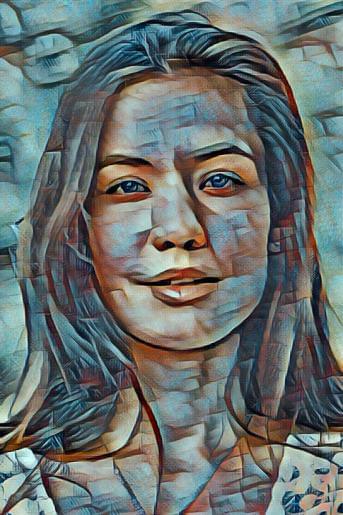
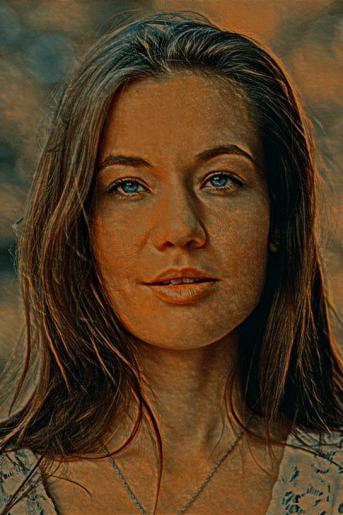
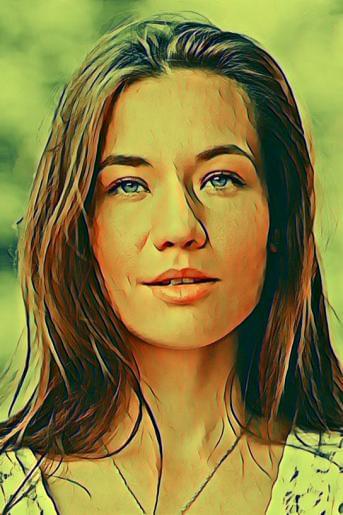
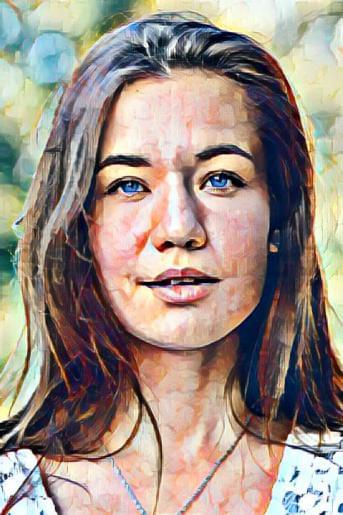
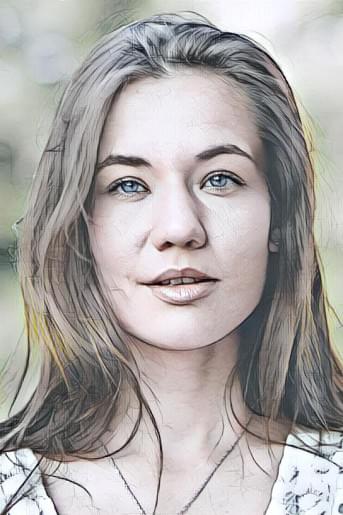
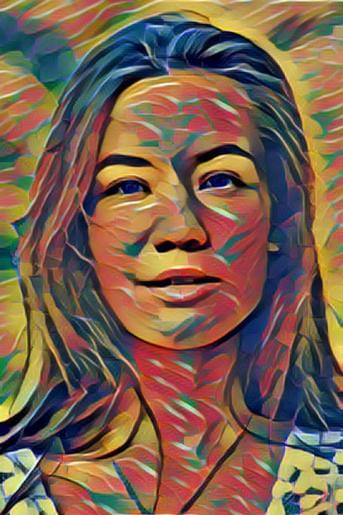
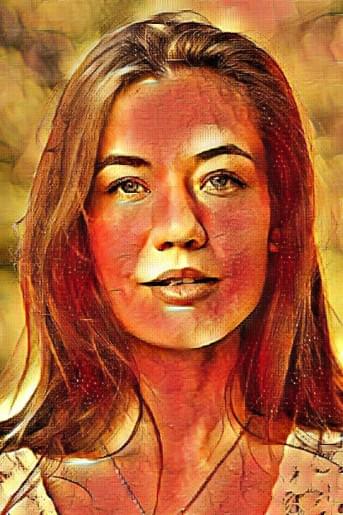
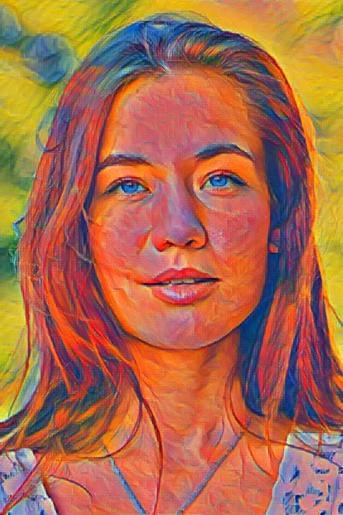
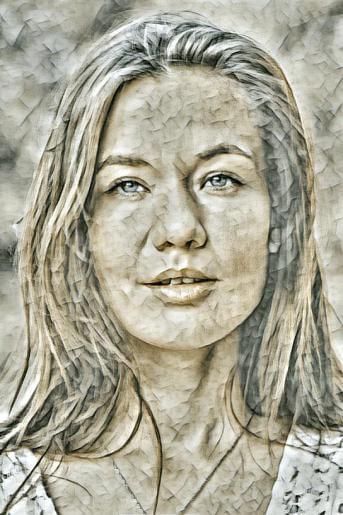
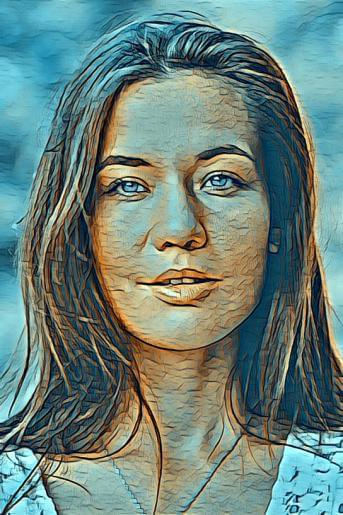
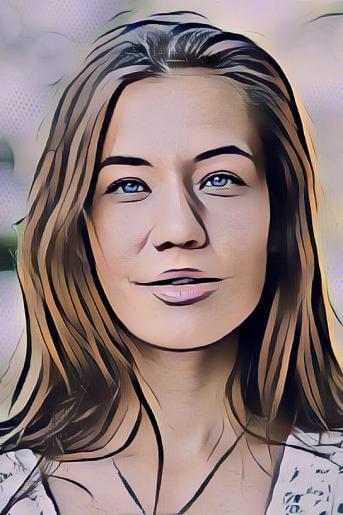
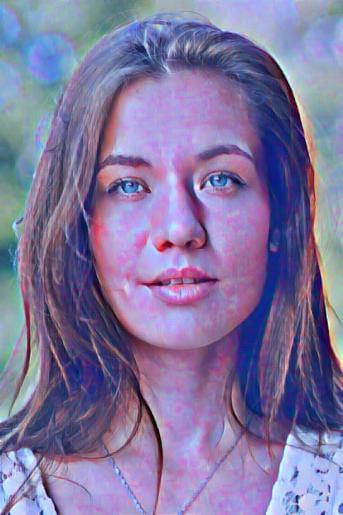
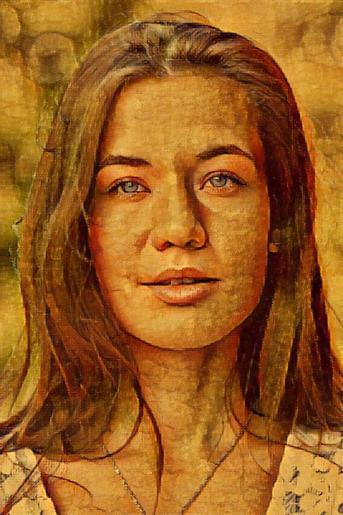
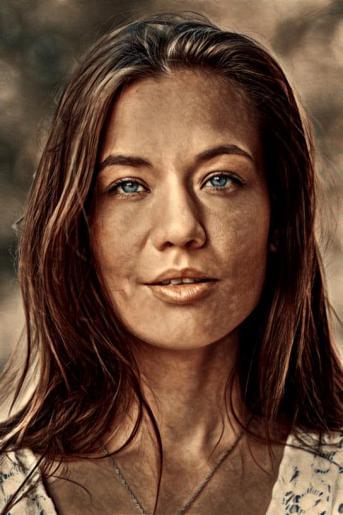
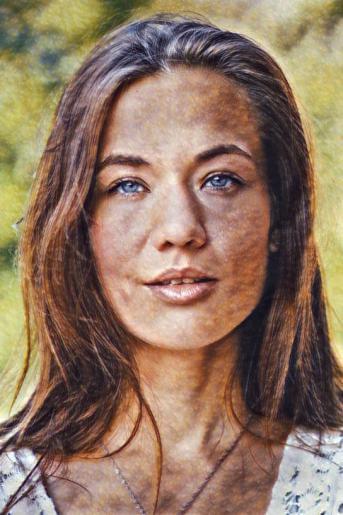
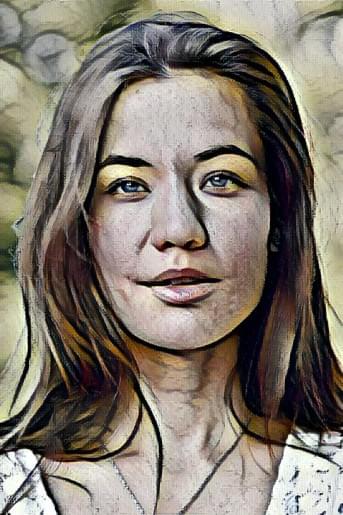
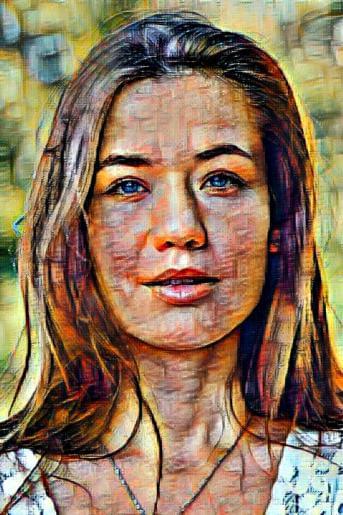
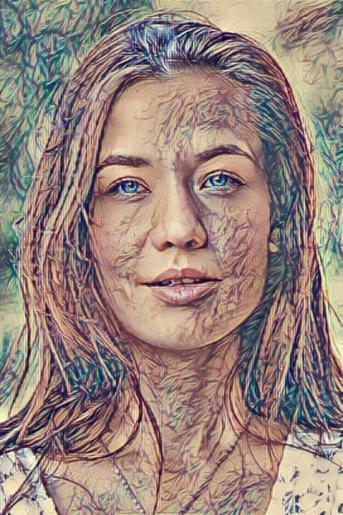
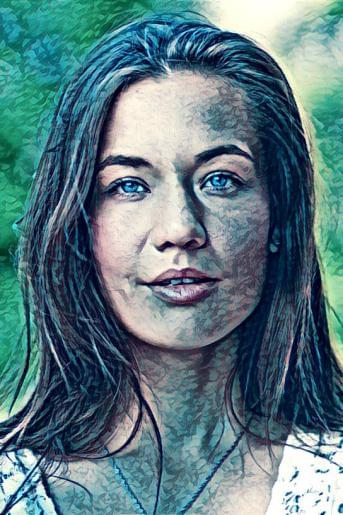
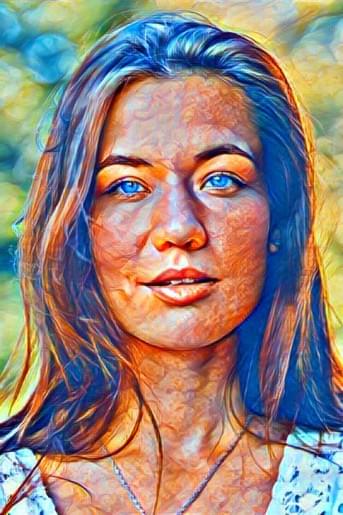
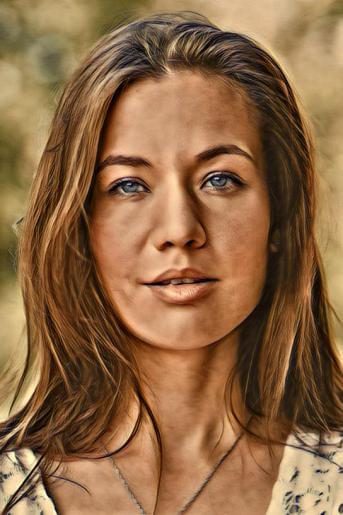
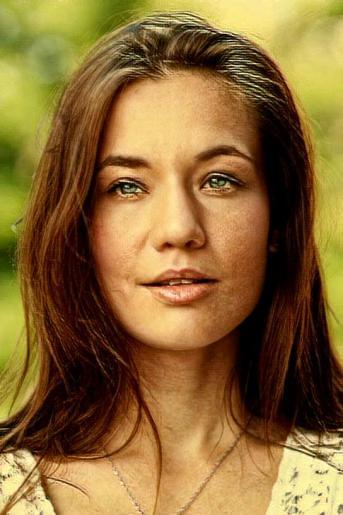
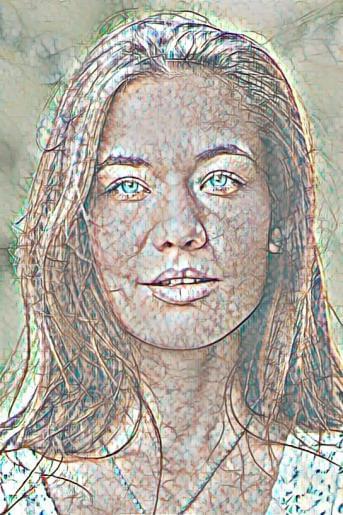
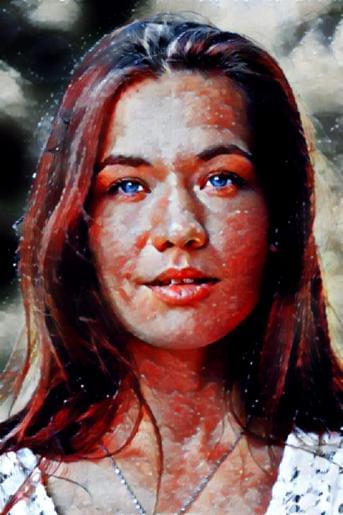
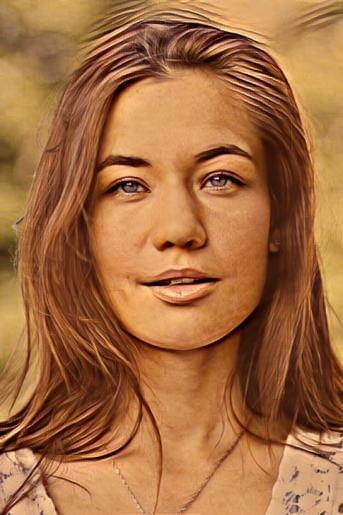
Skin enhancement
-
false
-
-
If enabled, the skin area will be additionally processed to remove the artifacts, produced by neural filter.
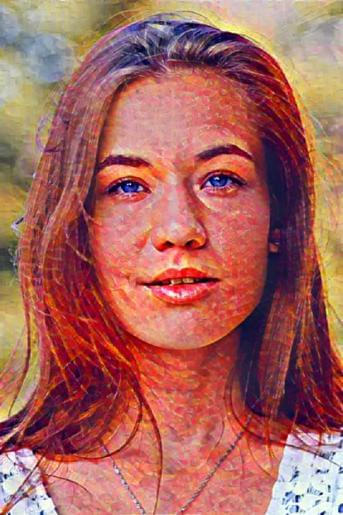
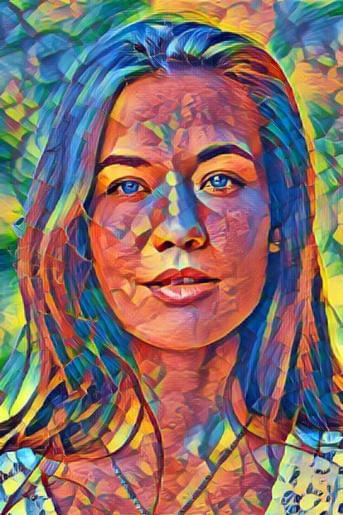
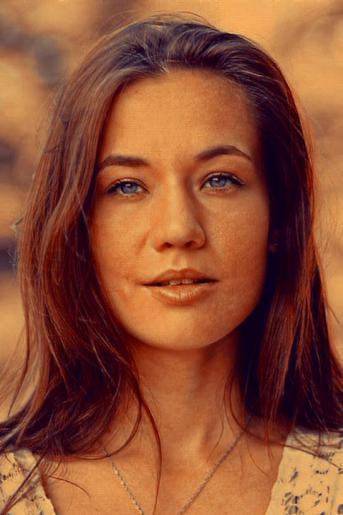
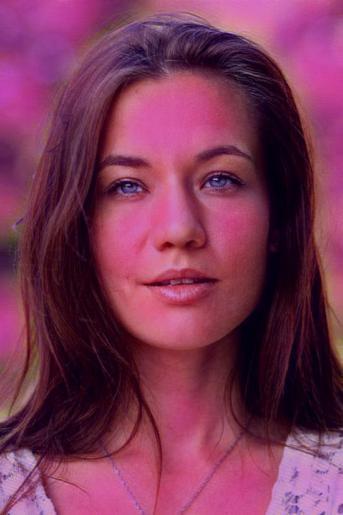
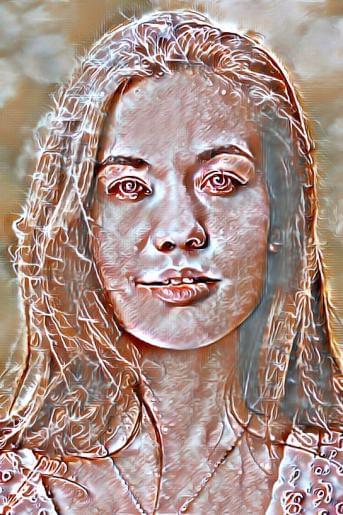
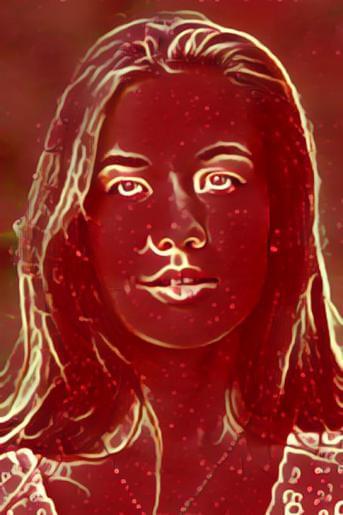
Image processed without skin enhancementImage processed using skin enhancement with default value (200)Image processed using skin enhancement with the value 128
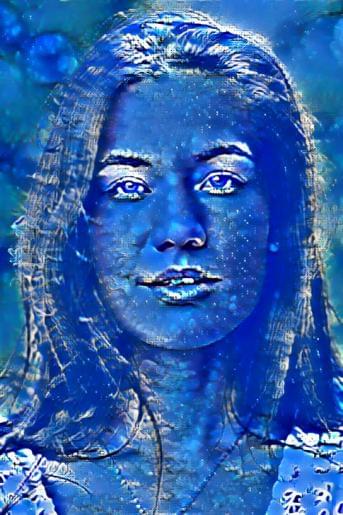
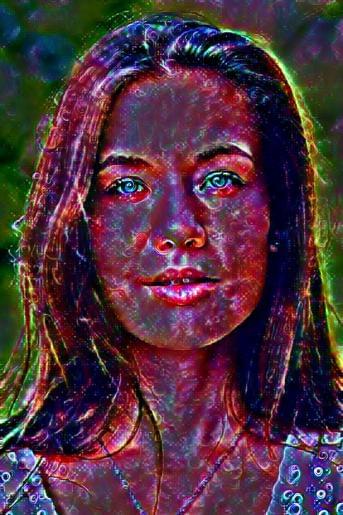
Neurofilters usage restrictions:
It is impossible to use neurofilters without Internet connection (even if local processing of test user photos is enabled in the Template Creator).
Using neurofilter can lead to resize of the original photo if its size exceeds1080x1080 pixels. If the original photo is larger, it will be reduced to a size of
1080 pixels on the larger side.
Thus we do not recommend to set the size of the photo regions with the applied neurofilter that exceeds 1080px on the larger side.
Otherwise, the userphoto may be enlarged automatically and become blurred.
This filter also offers an opacity adjustment using the Blended filter.


 that appears when the EditableParams property is selected.