Insertion Modes
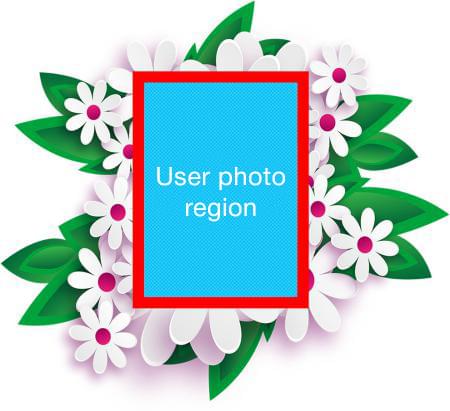
User photo ratios can be different from those of a user photo region in a template (even if a template and a user photo have the same orientation ). Consider the example below:
| A template (its schematic diagram) | A user photo |
|---|---|
 |
 |
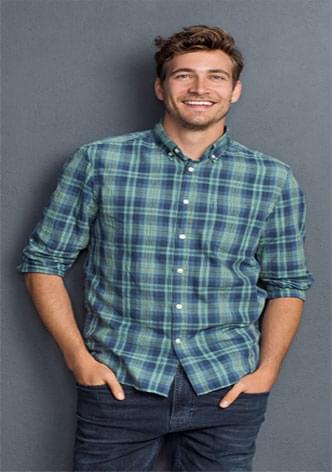
Suppose that the frame region size in this template is 330 x 470 pixels, while the user photo size is 450 x 800 pixels.
So, if we insert the user photo ‘as is’, we are going to get the following result:
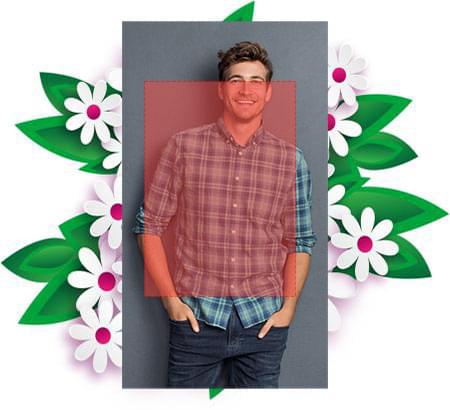
As you can see, the size and ratio of the user photo do not match those of the frame region. The Template Creator lets you choose from several photo insertion modes that make it possible to specify how exactly a user photo will be inserted into the template.
Settings Insertion Mode
You can select a desired Insertion Mode in the user photo region properties. To do so, select a particular user photo region to display the properties panel below the layers list.
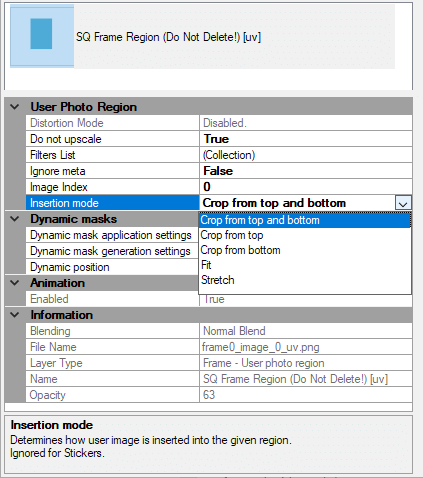
Then open the drop-down list to the right of the Insertion Mode parameter and select a desired insertion mode.
For Face Regions the "Insertion Mode" parameter is not applicable because its position is only determined using facial anchor points. Despite this parameter still presents in the property grid for the face region, changing its options will not affect anything.
Methods Insertion Mode
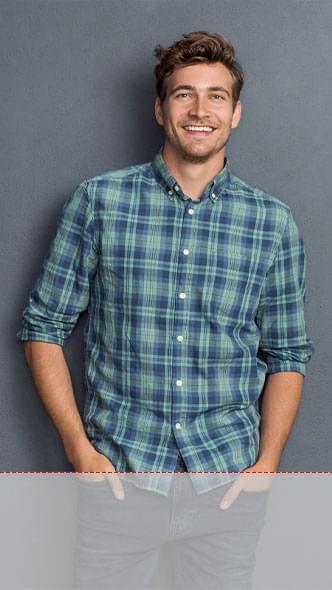
Crop from top and bottom
A user photo is resized (while its proportions are kept constant) so that its lesser side becomes the same size with the lesser side of the frame region.
Image is centered and those parts of a user photo that do not fit into the frame region get cropped.
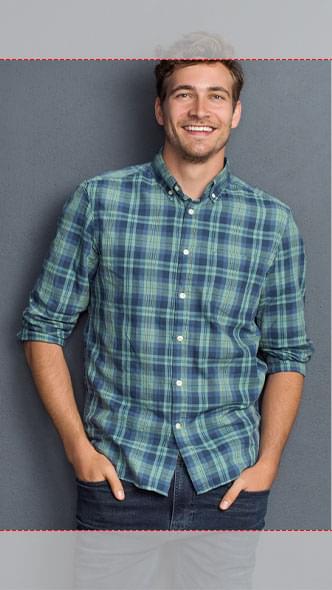
Crop from top:
A user photo is resized (while its proportions are kept constant) so that its lesser side becomes the same size with the lesser side of the frame region.
Top part of a user photo that do not fit into the frame region gets cropped.
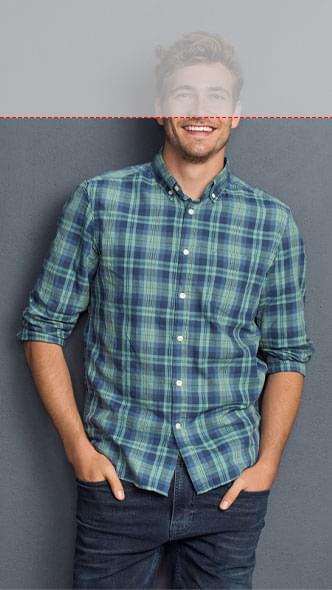
Crop from bottom
A user photo is resized (while its proportions are kept constant) so that its lesser side becomes the same size with the lesser side of the frame region.
Bottom part of a user photo that do not fit into the frame region gets cropped.
Fit
A user photo is resized (while its proportions are kept constant) so that its longer side becomes the same size with the longer side of the frame region.
If some empty space appears between the user photo and the borders of the frame region, it is filled with transparent margins (they are created automatically by the Template Creator).
Stretch
A user photo is resized to fit cleanly into the frame region. The proportions of the photo are not constrained, so it can look stretched or squeezed.