A step-by-step example of creating a frame template
Let’s make a simple template where a user photo will be placed on a book cover. We’ll consider this process in detail, step by step.
Step # 1
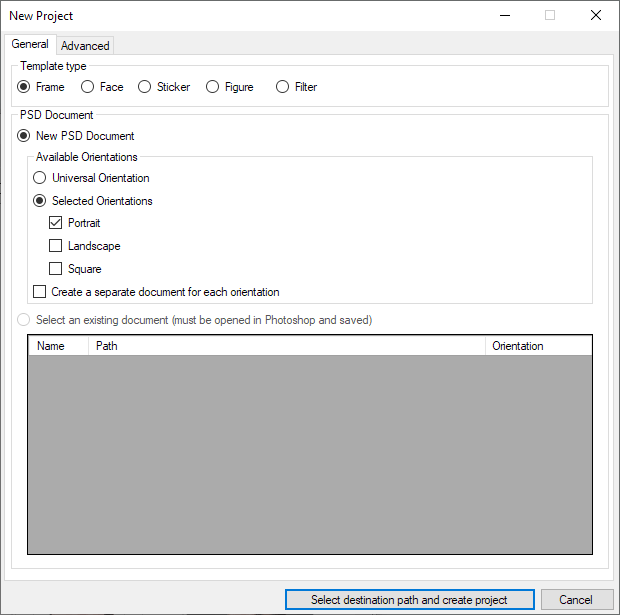
First, create a project in the Template Creator. To do this, select "Create Project" from the "File". menu. Then select the "Frame" template type and the "Portrait". orientation in the dialog window. Then set the path to your project and its name (i.e. "book").
Step # 2
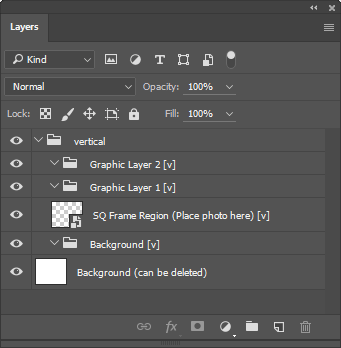
The Template Creator automatically creates a document with the following structure of groups and subgroups in Photoshop:
Step # 3
Take the cover image (we’ve already cut out the central area from it - a user’s photo will be inserted there).

Step # 4
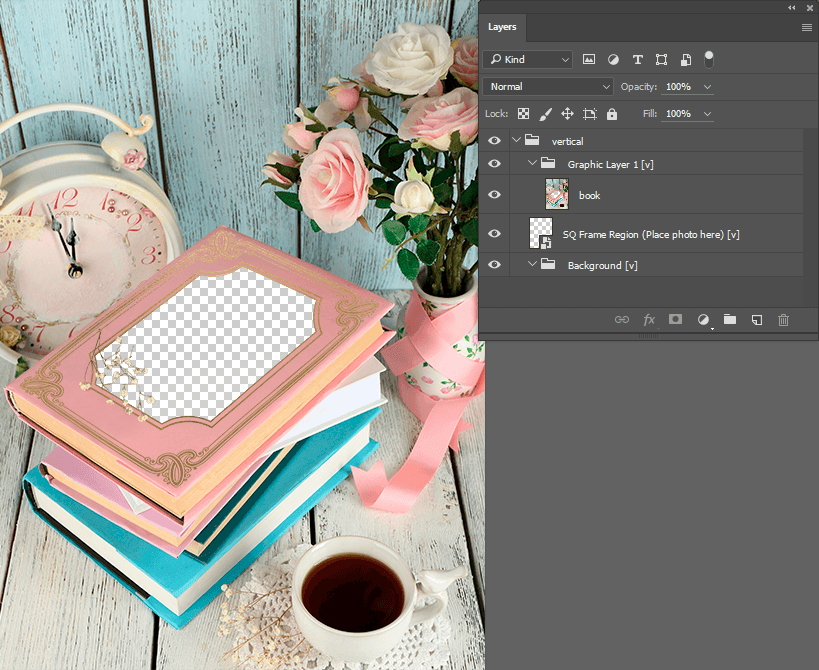
Place the layer with the books in the subgroup named Graphic Layer 1 [v]. Since our future template has only one graphic layer (the one with the books), Graphic Layer 2 [v] remains empty (better remove it at all). Place a new empty transparent layer into the Background [v] subgroup. Crop the canvas to the size of the image.
Step # 5
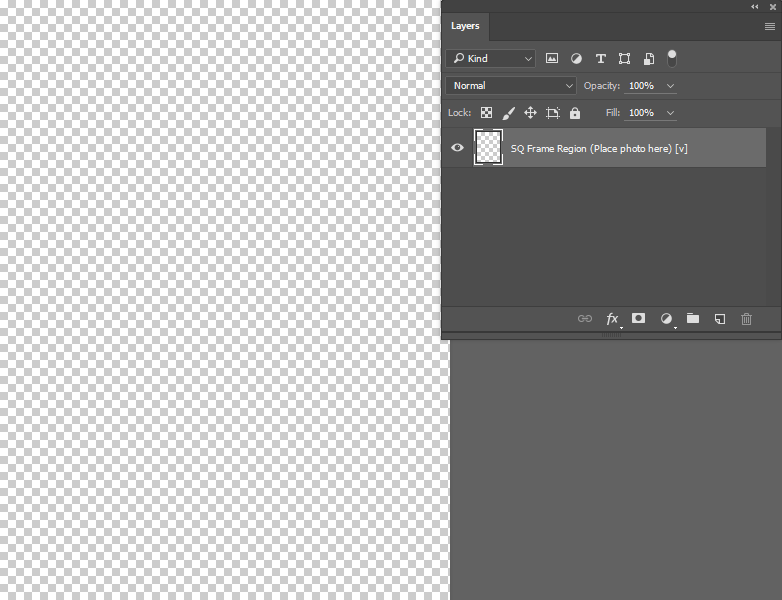
Double-click the smart object icon to open the SQ Frame Region. Crop the canvas to make it fit (approximately) the proportions of user photos that will be placed on the cover of the book.
Step # 6
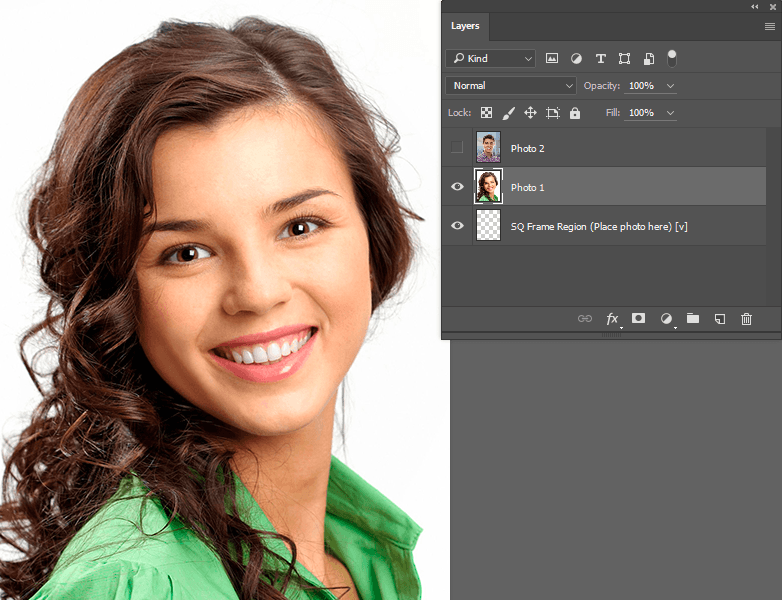
Copy test photos to new layers, then select one of them, save the smart object and return to the main document.
Step # 7
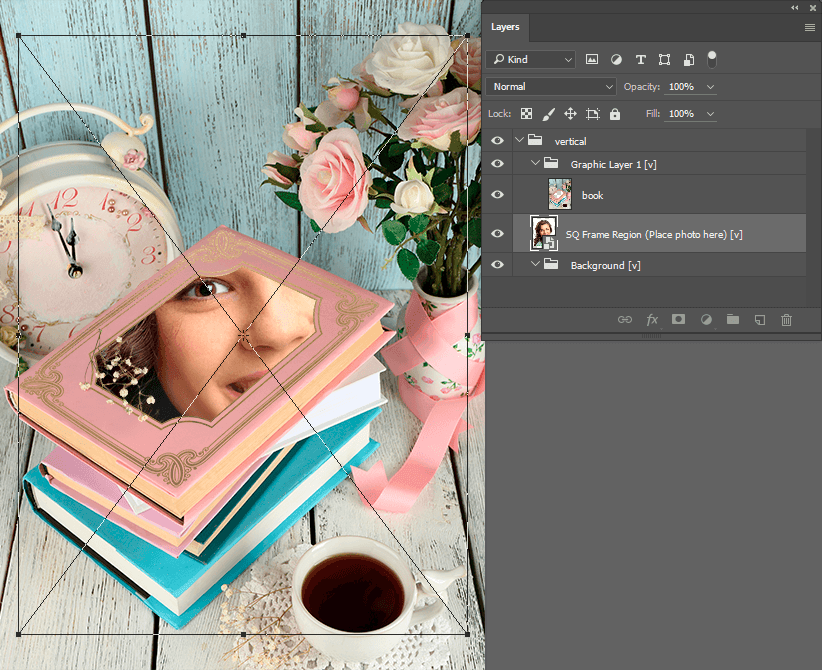
As we can see, the photo is not in the place where we want it to be. Therefore, we transform the smart object to make it fit the cover of the book. While doing that, make sure that the smart object remains strictly quadrangular, and all straight lines remain straight.
Step # 8
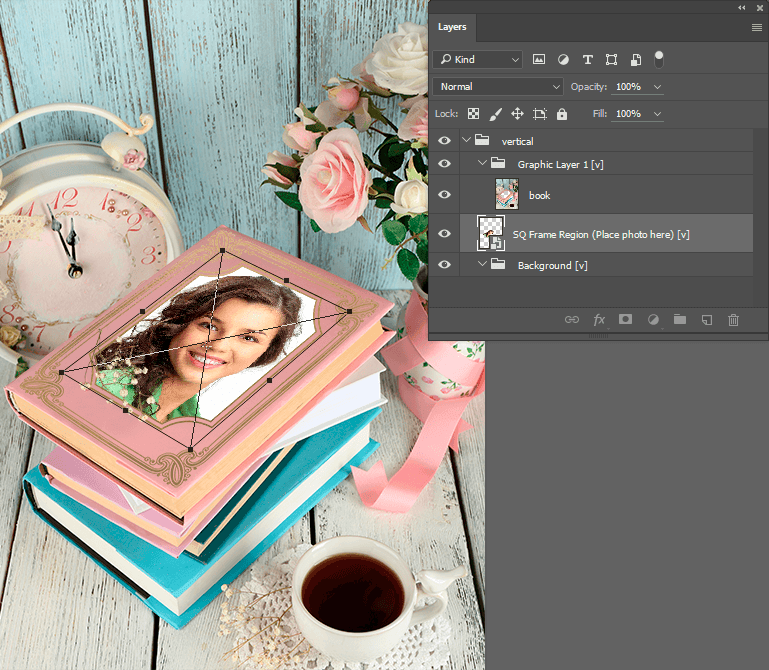
Now the photo is in the right place. You should adjust its size so that its borders go beyond the bounds of the hole, to ensure there is no gap between the top image with the book and the user photo.
Step # 9
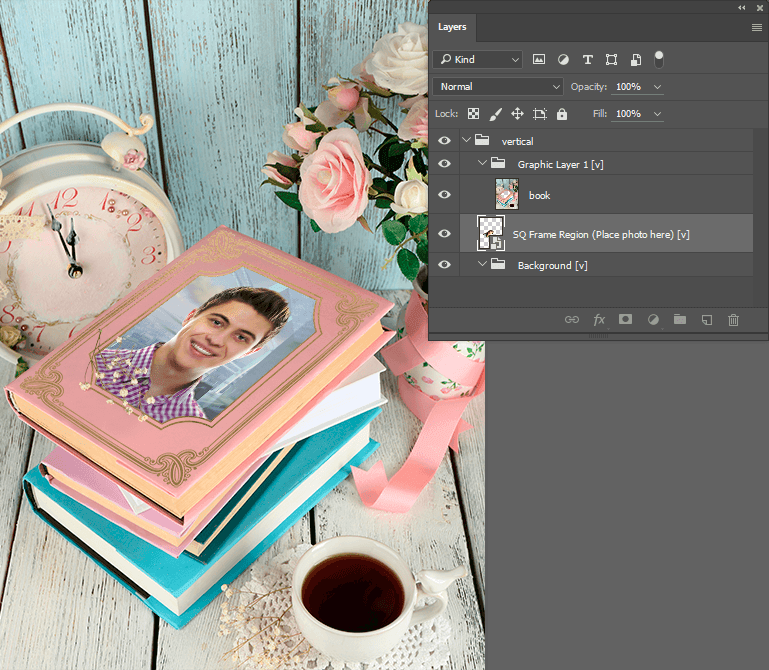
Now if you switch between photos in the smart object, they will be displayed in the main document with correct perspective distortion.
Step # 10
Now run the Template Creator and click the "Reparse PSD" button. Then just sit back and wait for the successful processing message.
You can see the results of processing in the central block, clicking on the extracted layers one by one. To check the template with one of the images, select a test photo from the right block and click the "Process Selected" button. To check the template with all test photos at once, click the "Process all"button. Click the "Show Result" button to switch between the result and a test photo.

Next, you can make additional edits to your PSD file, if needed, reparse it again and look at the changes.