Dynamic masks
A dynamic mask — is a mask that is built based on specific user photo regions. It can be applied both to a user photo region and a graphic layer.
All types of user photo regions can be used to create a dynamic mask based on them (figure regions, face regions or even quadrangular regions). The Template Creator can build a dynamic mask for a user photo basing it on:
- figure,
- face,
- skin,
- hair found in a user photo,
- lips,
- irises,
- stickers,
- user photo,
- sky,
- clothes,
- face segments,
- glasses.
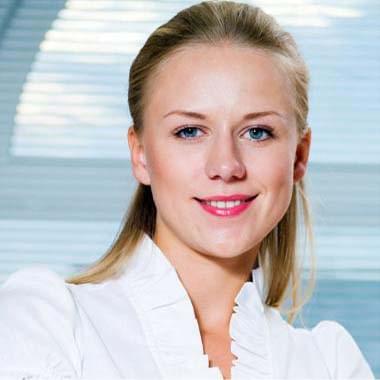
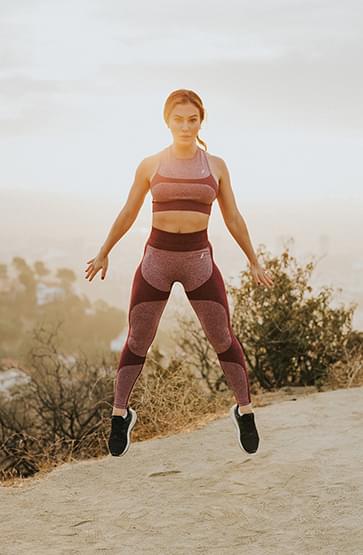
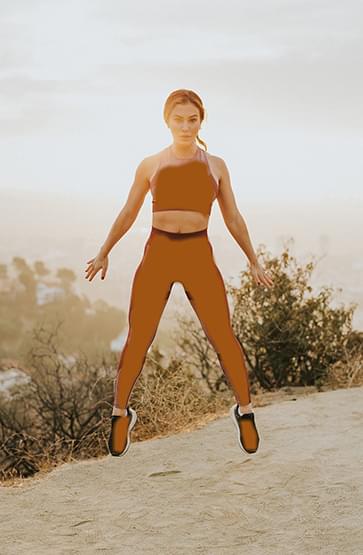
To understand the meaning of dynamic masks, have a look at a template that uses dynamic masks based on a figure.
| Original photo | Result of processing |
|---|---|
 |
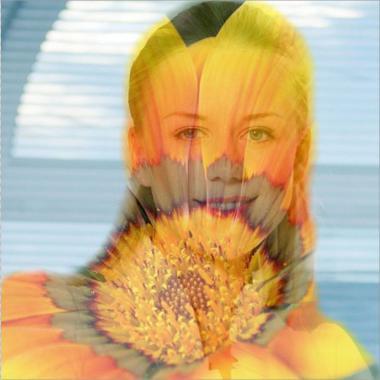 |
Note that the mask applied to the graphic layer accurately follows the figure outline. If we use the same template to process another user photo with a different figure, a dynamic mask will be based on a different figure outline.
The scheme below explains the basic idea of a template with a dynamic mask:
| Graphic layer | Dynamic mask based on a figure found in a user photo | Result of processing |
|---|---|---|
 |
 |
 |
A dynamic mask applied to a graphic layer does not limit the use of blending modes.
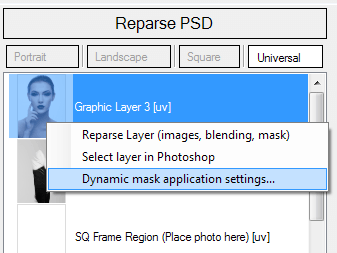
You can open a dialog that lets you add dynamic masks using one of the methods below:
-
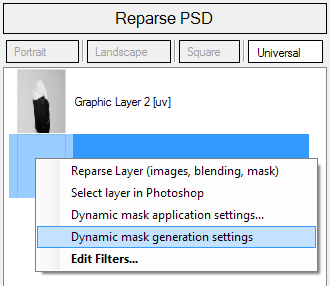
right-click a graphic layer / user photo region and select from the context menu,
-
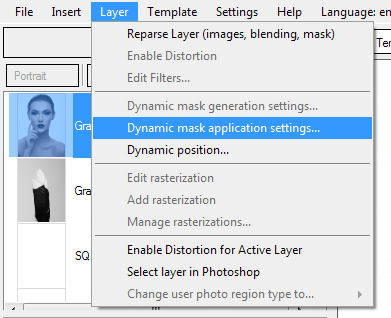
select a graphic layer / user photo region in the list, then go to the menu and choose ,
-
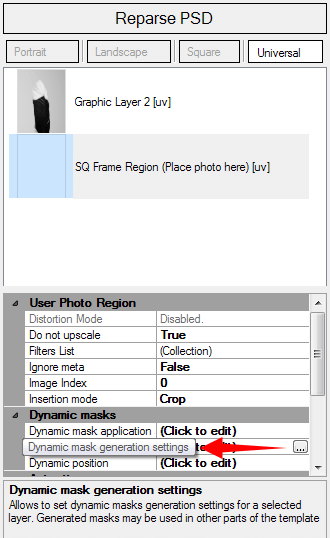
select a graphic layer / user photo region in the list, then go to property grid displayed below the layers list.

The Dynamic mask editor for a selected layer / user photo region displays the list of all user photo regions contained in the current orientation.
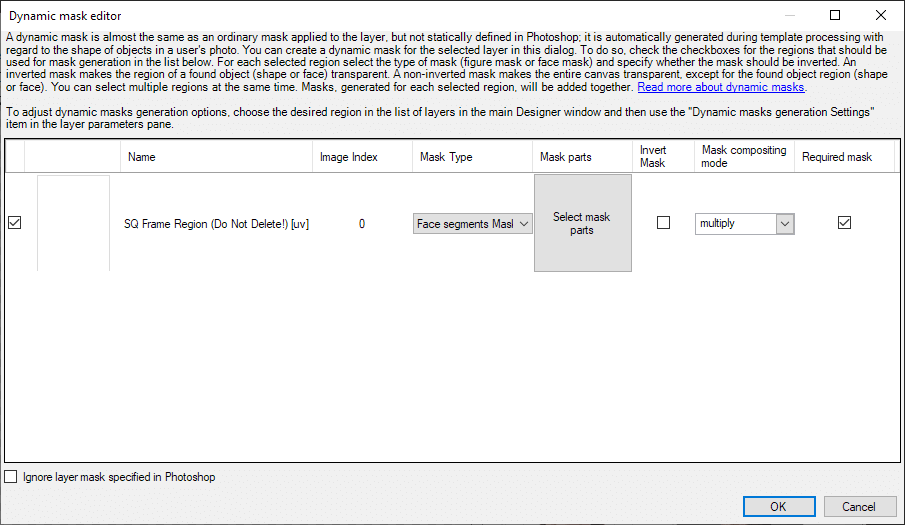
You may optionally disable a mask specified in the PSD file for a graphic layer / user photo region you are going to apply a dynamic mask to. To do so, check the box labeled . This will disable a test mask created in Photoshop to roughly estimate the result.
When building a mask for each selected user photo region you can select the :
- figure,
- face,
- head;
- skin,
- hair found in a user photo,
- lips,
- irises,
- stickers,
- user photo,
- sky,
- clothes,
- face segments,
- glasses.
A mask can be built using one or several user photo regions. In case a mask is built using several user photo regions, all resulting masks are composed into one. Masks can be composed in different modes. Masks can also be inverted.
The Template Creator supports the following mask blending modes:
-
— color value of each mask pixel is multiplied. The color value is based on the range [0;1] in grayscale.
-
— masks are summarized in each pixel. If the result of addition in each particular pixel exceeds 1, the value of the resulting mask will be 1.
-
— masks are subtracted in each pixel. If the result of subtraction in each particular pixel is negative (less than 0), the value of the resulting mask will be 0.
-
— the lesser value of the two masks are chosen in each pixel.
-
— the greater value of the two masks are chosen in each pixel.
The schemes below illustrate these blending modes for dynamic masks.
Dynamic mask generation settings
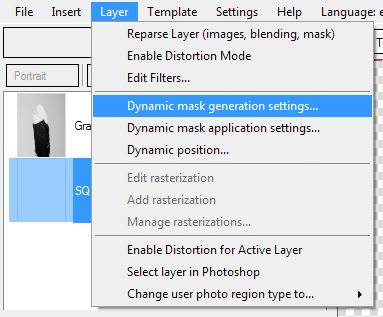
The Template Creator allows you to configure the parameters for creating a dynamic mask. To open the Dynamic mask generation settings dialog for a particular user photo region, use one of the methods below:
-
right-click a user photo region and select from the context menu,
-
select a user photo region in the list, then choose in the property grid below the layers list,
-
select a user photo region in the list, then go to the menu and choose .
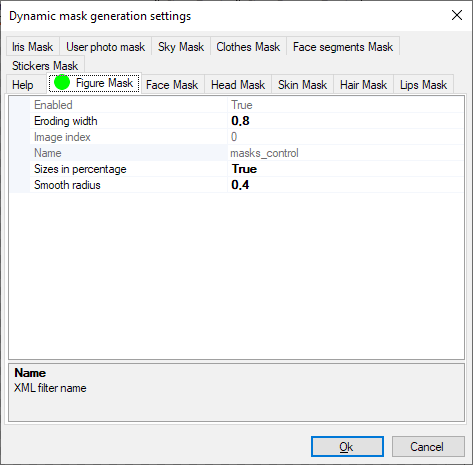
This dialog lets you switch between different types of masks by switching between the tabs and adjust their settings individually for each type.
Mask generation settings are specified in a user photo region and are used everywhere where masks built based on this user photo region are used. If you apply a figure mask built based on a user photo region to several graphic layers, and you want to change the mask eroding, you need to open the mask generation settings dialog in this particular user photo region. In this case eroding settings will be changed wherever the mask is used.
Important:
- mask settings are used for manipulations with faces only(such as cutting out a face when inserting it, building a dynamic face mask and using facial filters).
- mask settings function in the same way, but with regard to figure regions.
- Settingsfor other types of masks(skin masks and hair masks) are valid when such masks are created.
All types of masks have the same set of parameters:
-
— determines how close dynamic mask borders should be drawn up to the object outline (a figure, a face, skin areas etc., depending on mask type). If the value of this parameter is non-zero, the borders of the area get sharply defined thanks to thresholding. If the value of this parameter is too big, part of the object will be hidden by the dynamic mask. If you specify a negative value, you will get the opposite effect: the mask borders will be drawn away from the outlines of the object towards the background. See the difference in the examples below:
Source image Eroding width: 0 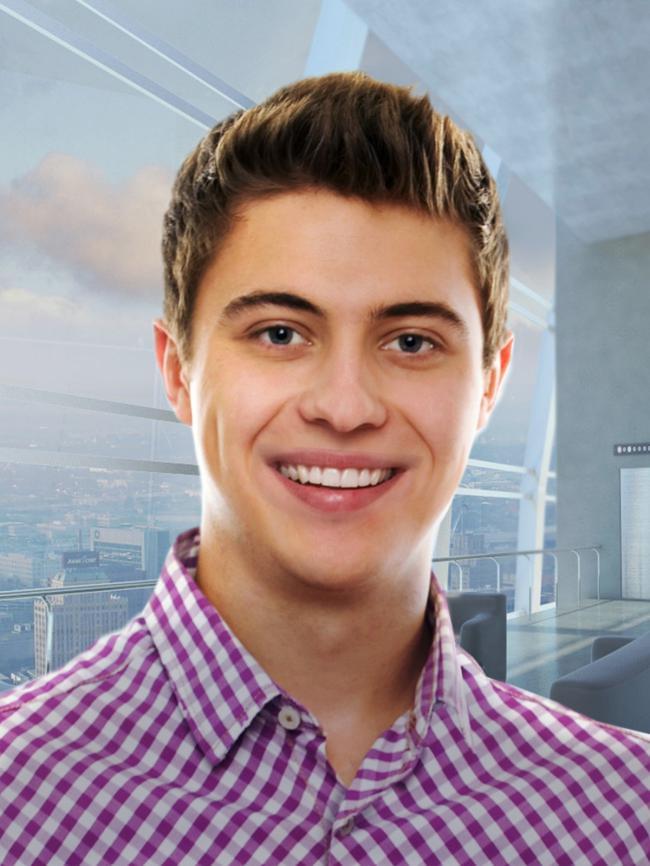
Eroding width: 10 Eroding width: -10 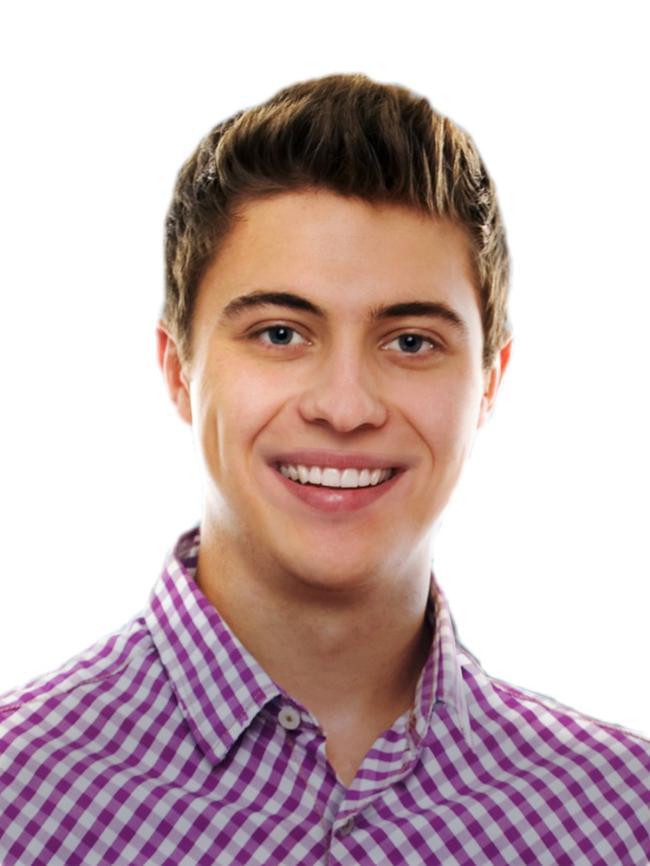
-
determines how smooth the mask borders will look after eroding has been done (see above). This parameter is valid only if the value of eroding width is non-zero.
-
toggles units of measurement for the Eroding width and Smooth radius parameters. If the parameter value is False, pixels are used; if the value is True, sizes are specified in percentage.
Please also note that If the values of eroding and smooth radius are too big, this will slow down template performance.
Parameters are not available for a sticker mask. It is used “as is”, exactly like it was drawn in Photoshop and in accordance with the position specified by the Rasterization filter.
Examples of dynamic masks
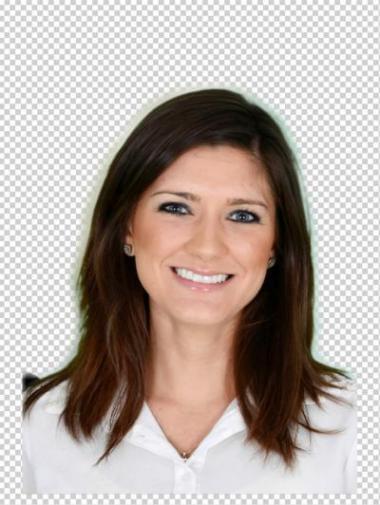
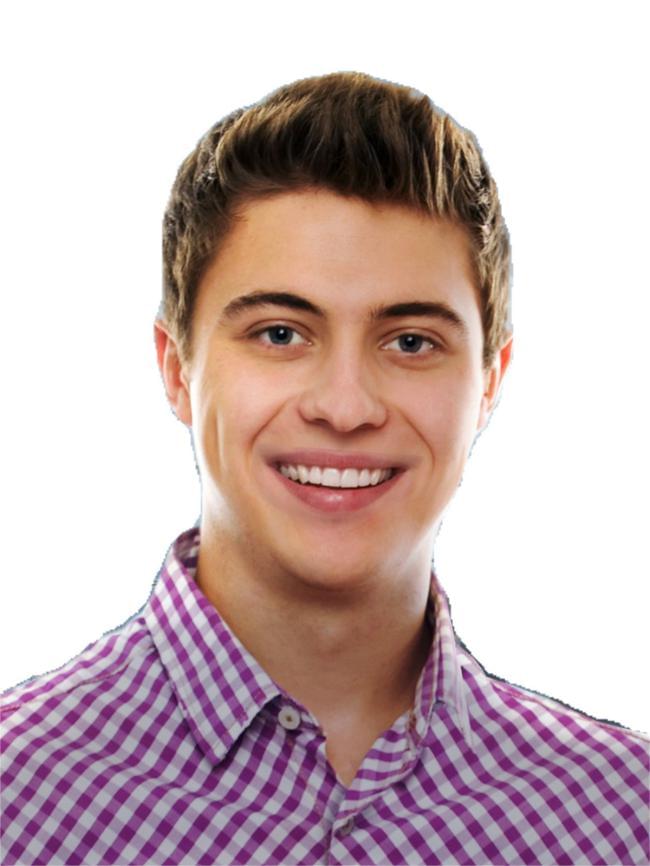
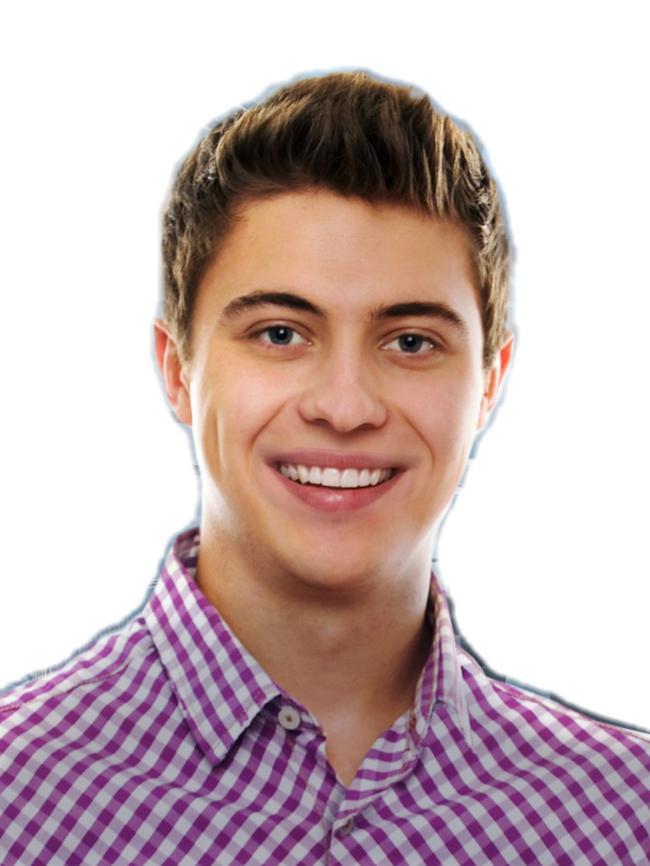
Let's consider standard ways of applying different types of dynamic masks, when applied both to a user photo region and built based on the same user photo region, and to a graphic layer. In this case, we applied a figure mask to a quadrangular user photo region (the found object remains, the rest is cut off).
| Original photo | Result |
|---|---|
 |
 |
The new version of Figure detector was added to the Template Creator. It can detect small details down to small hair locks. The mask returned by the new detector contains semitones, so it is not recommended to use nonzero eroding values, because it will destroy semitones and the quality of the mask will suffer critically.
The new version is enabled by default for new projets. If you want to switch to the new version of the detector in previously created projects you should choose it in the Detectors Versions tab in the menu File – Edit Project.
| Source Photo | Figure Detector v2 | Figure Detector v3 |
|---|---|---|
|
|
 |
|
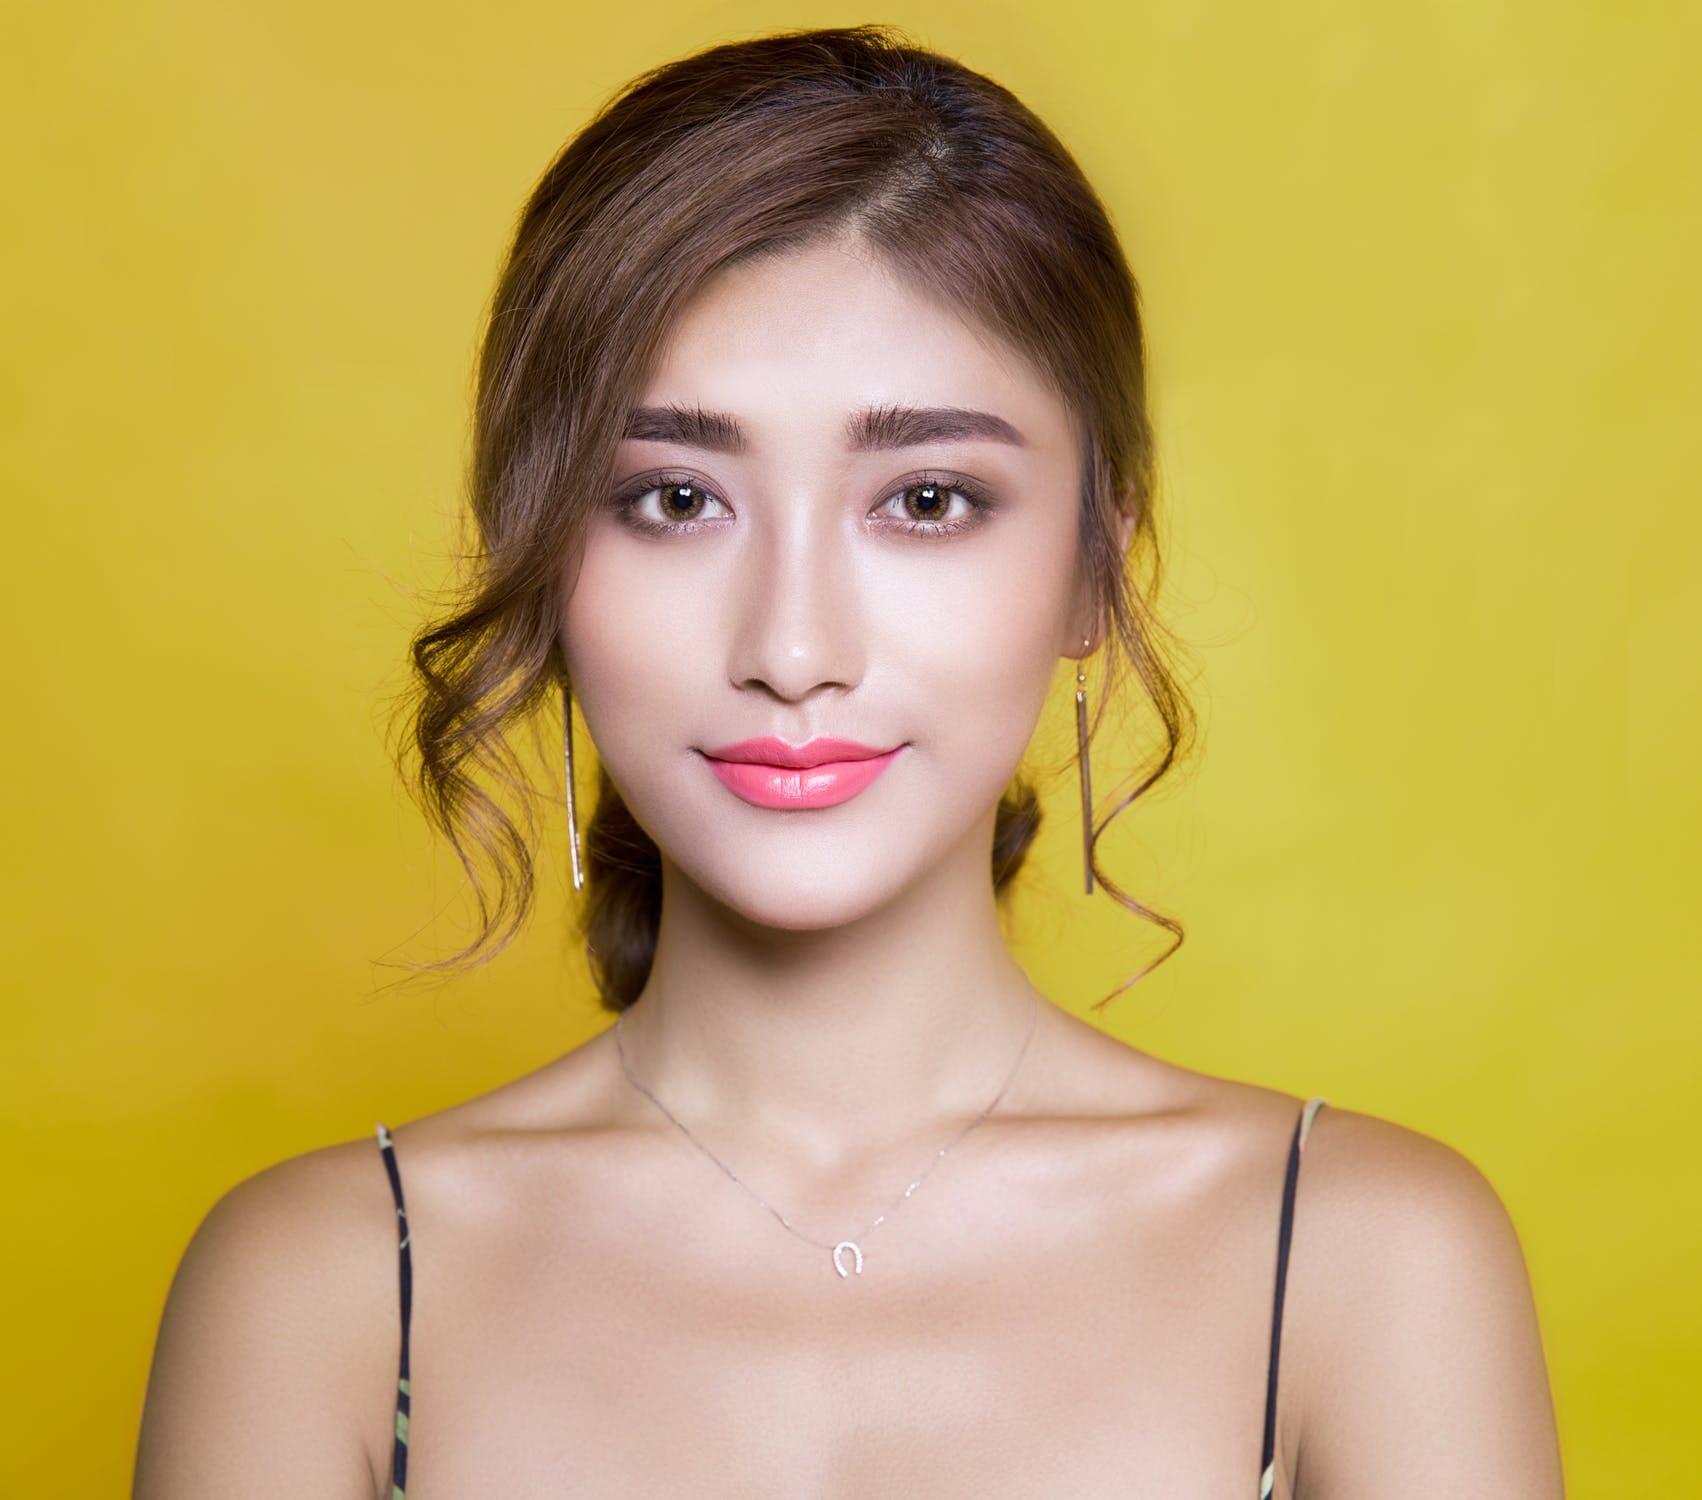
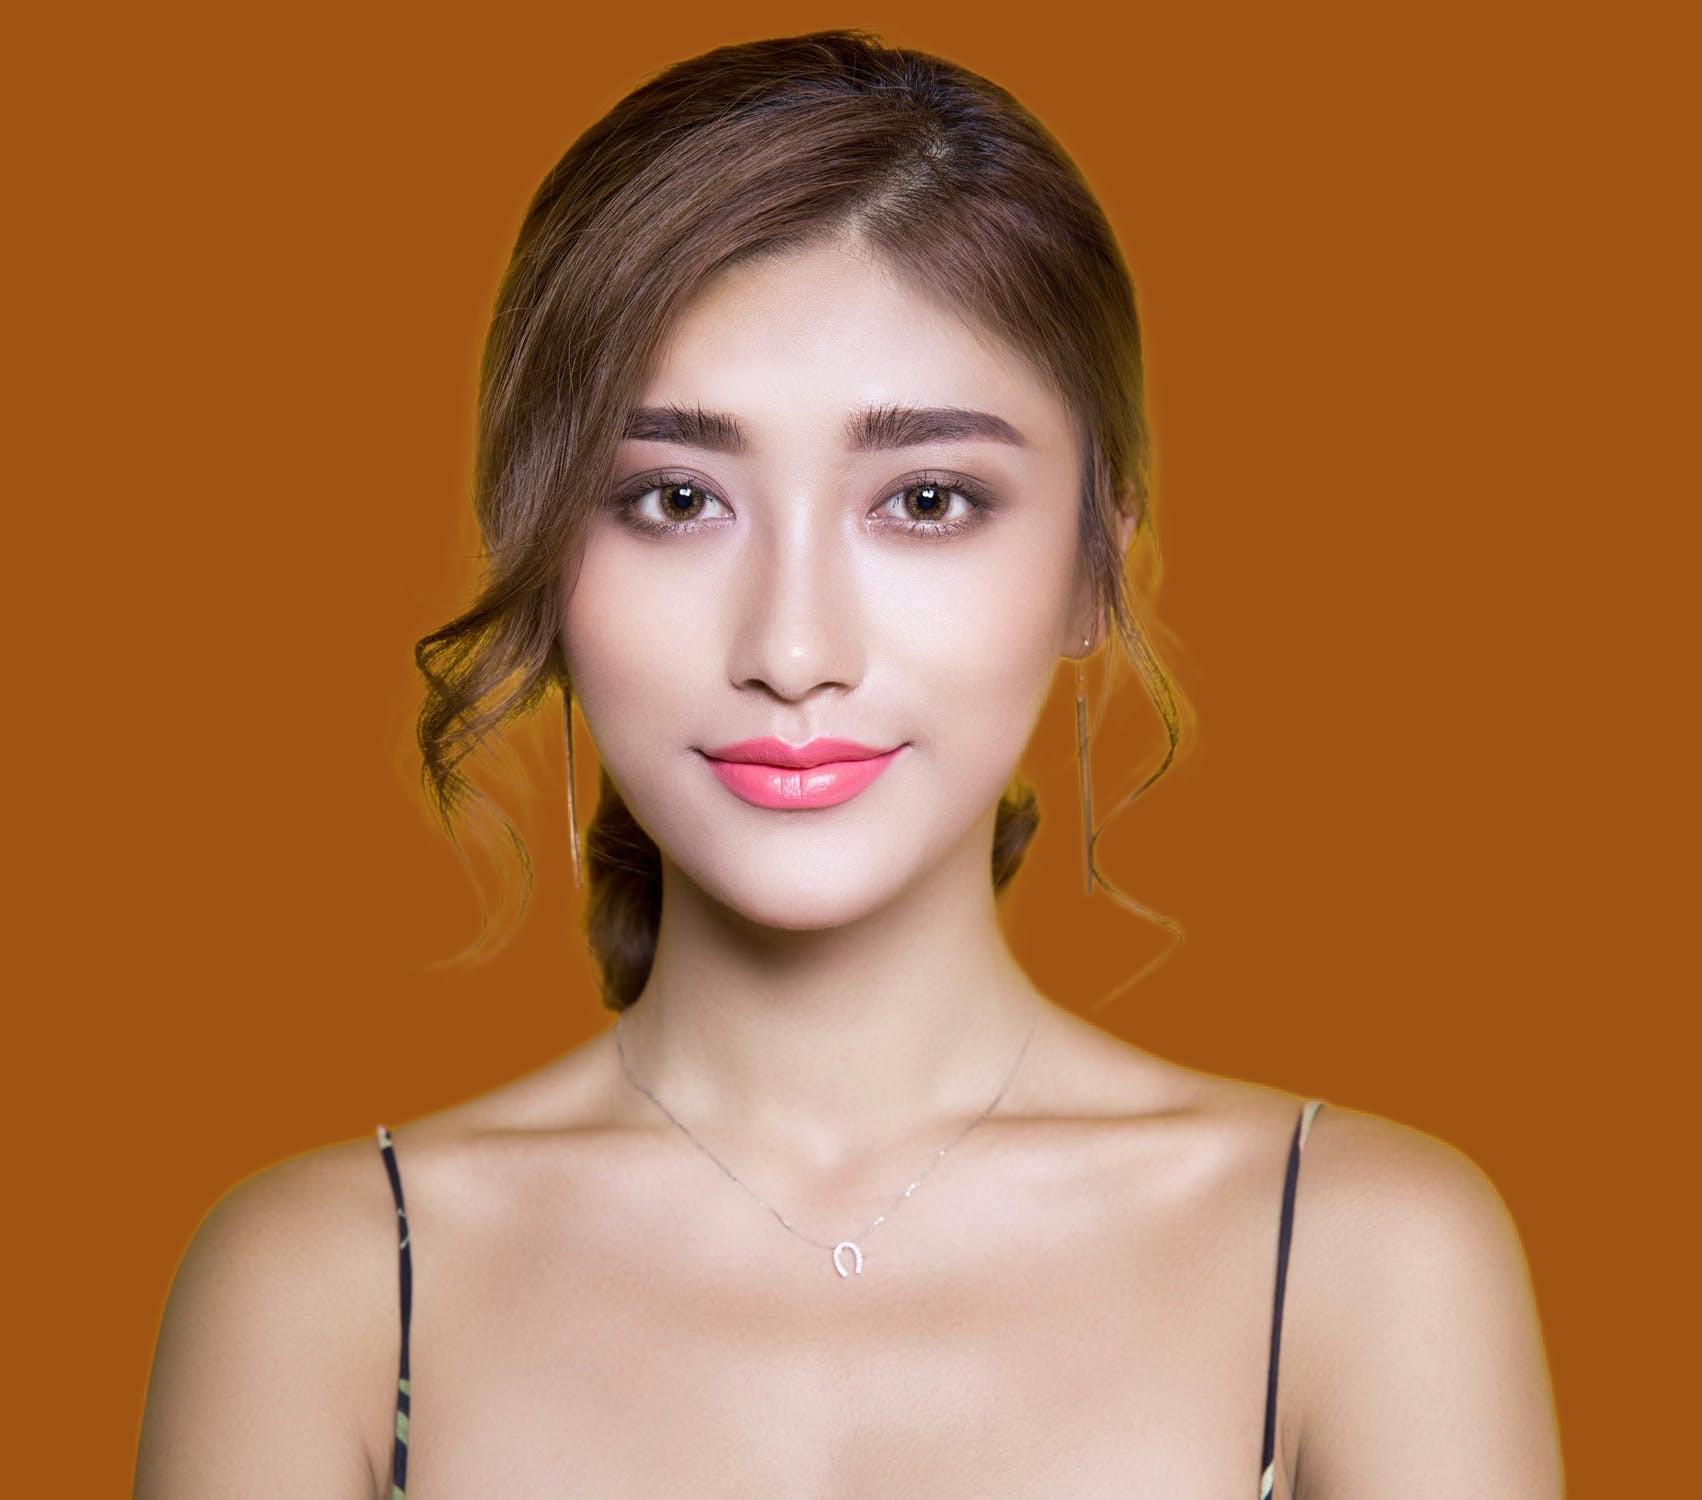
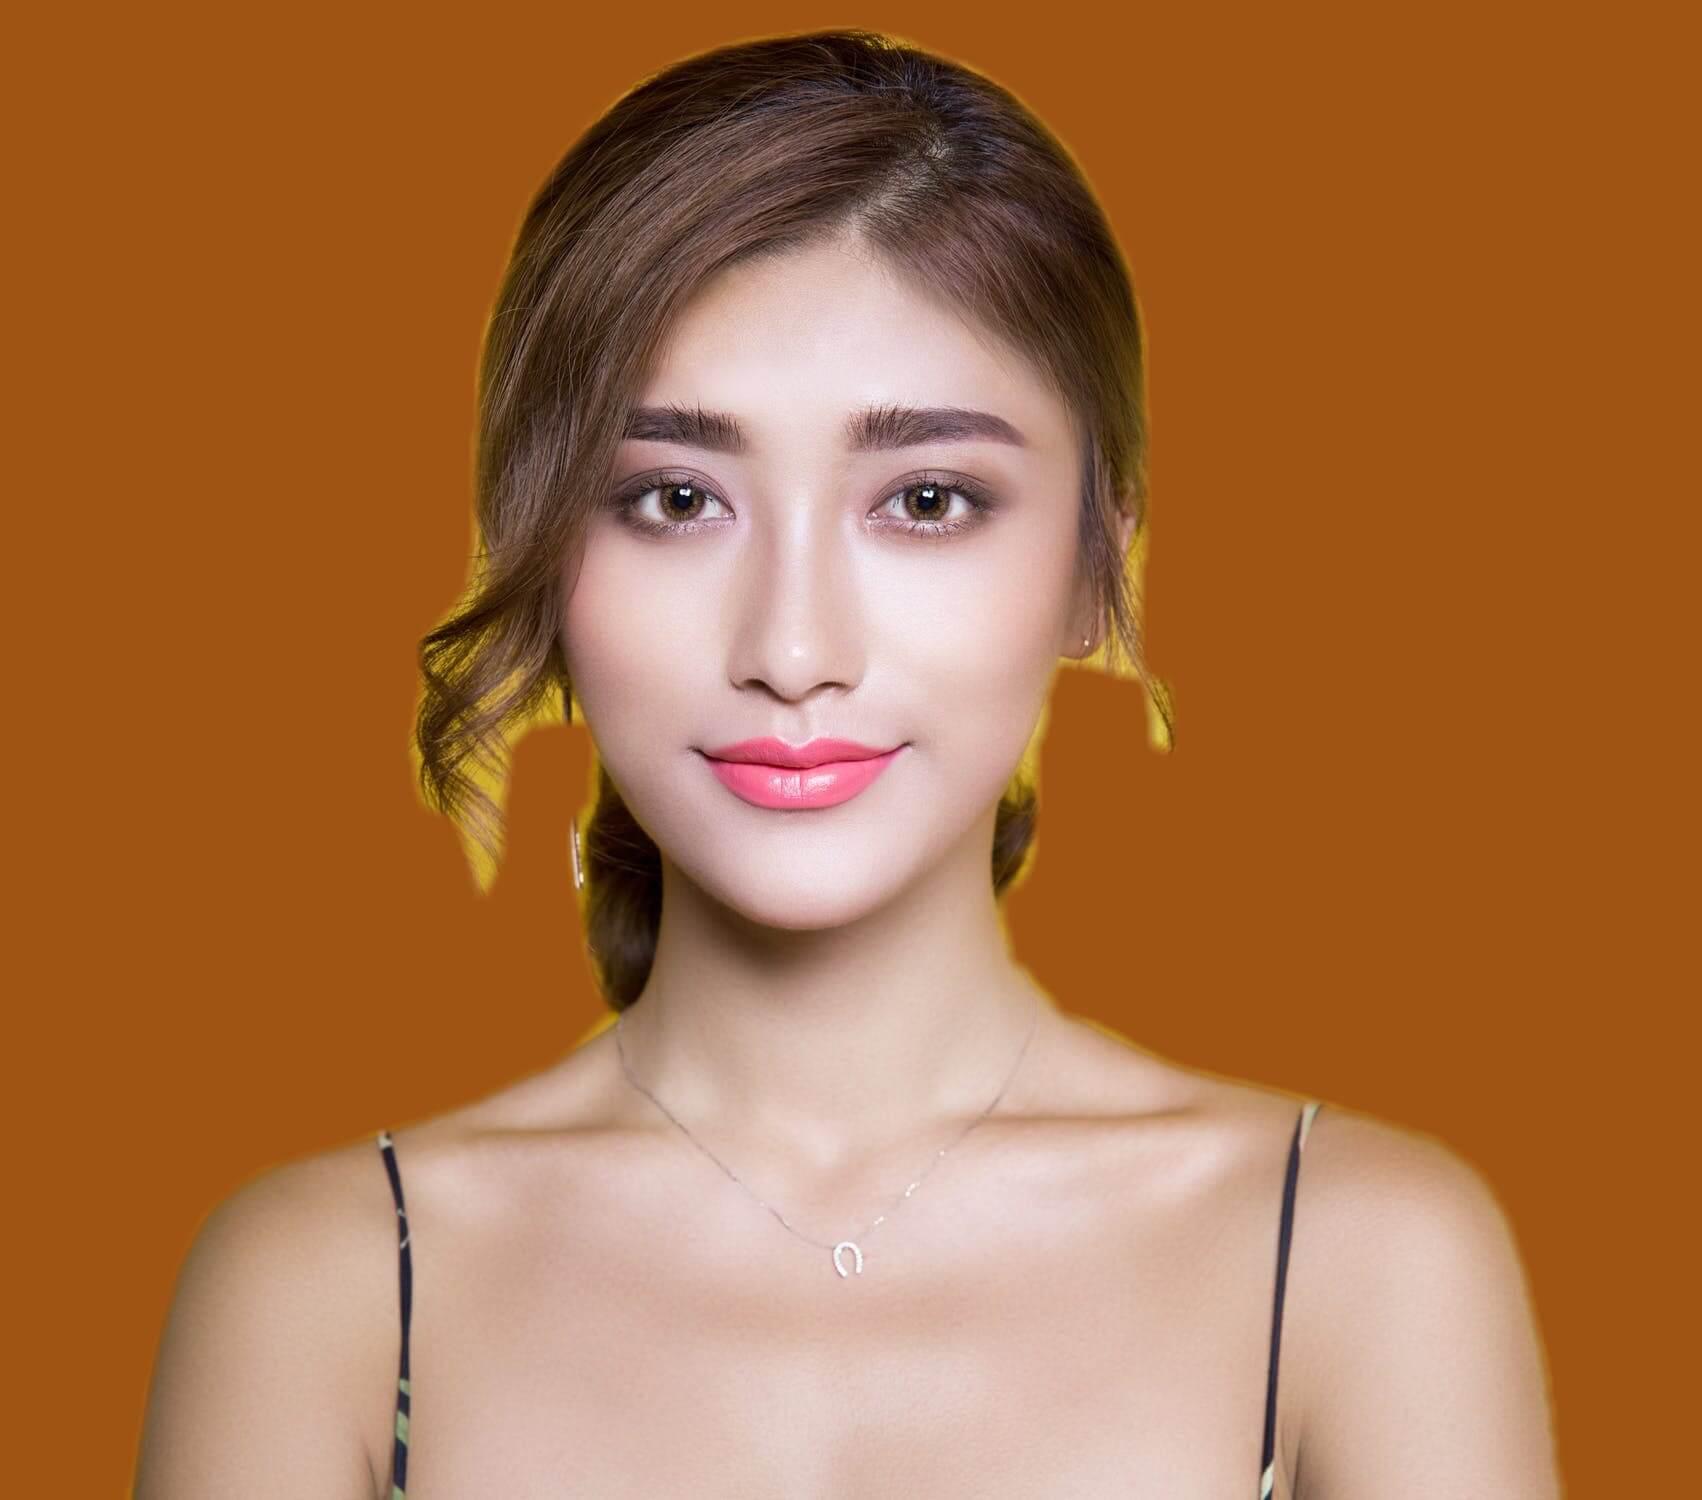
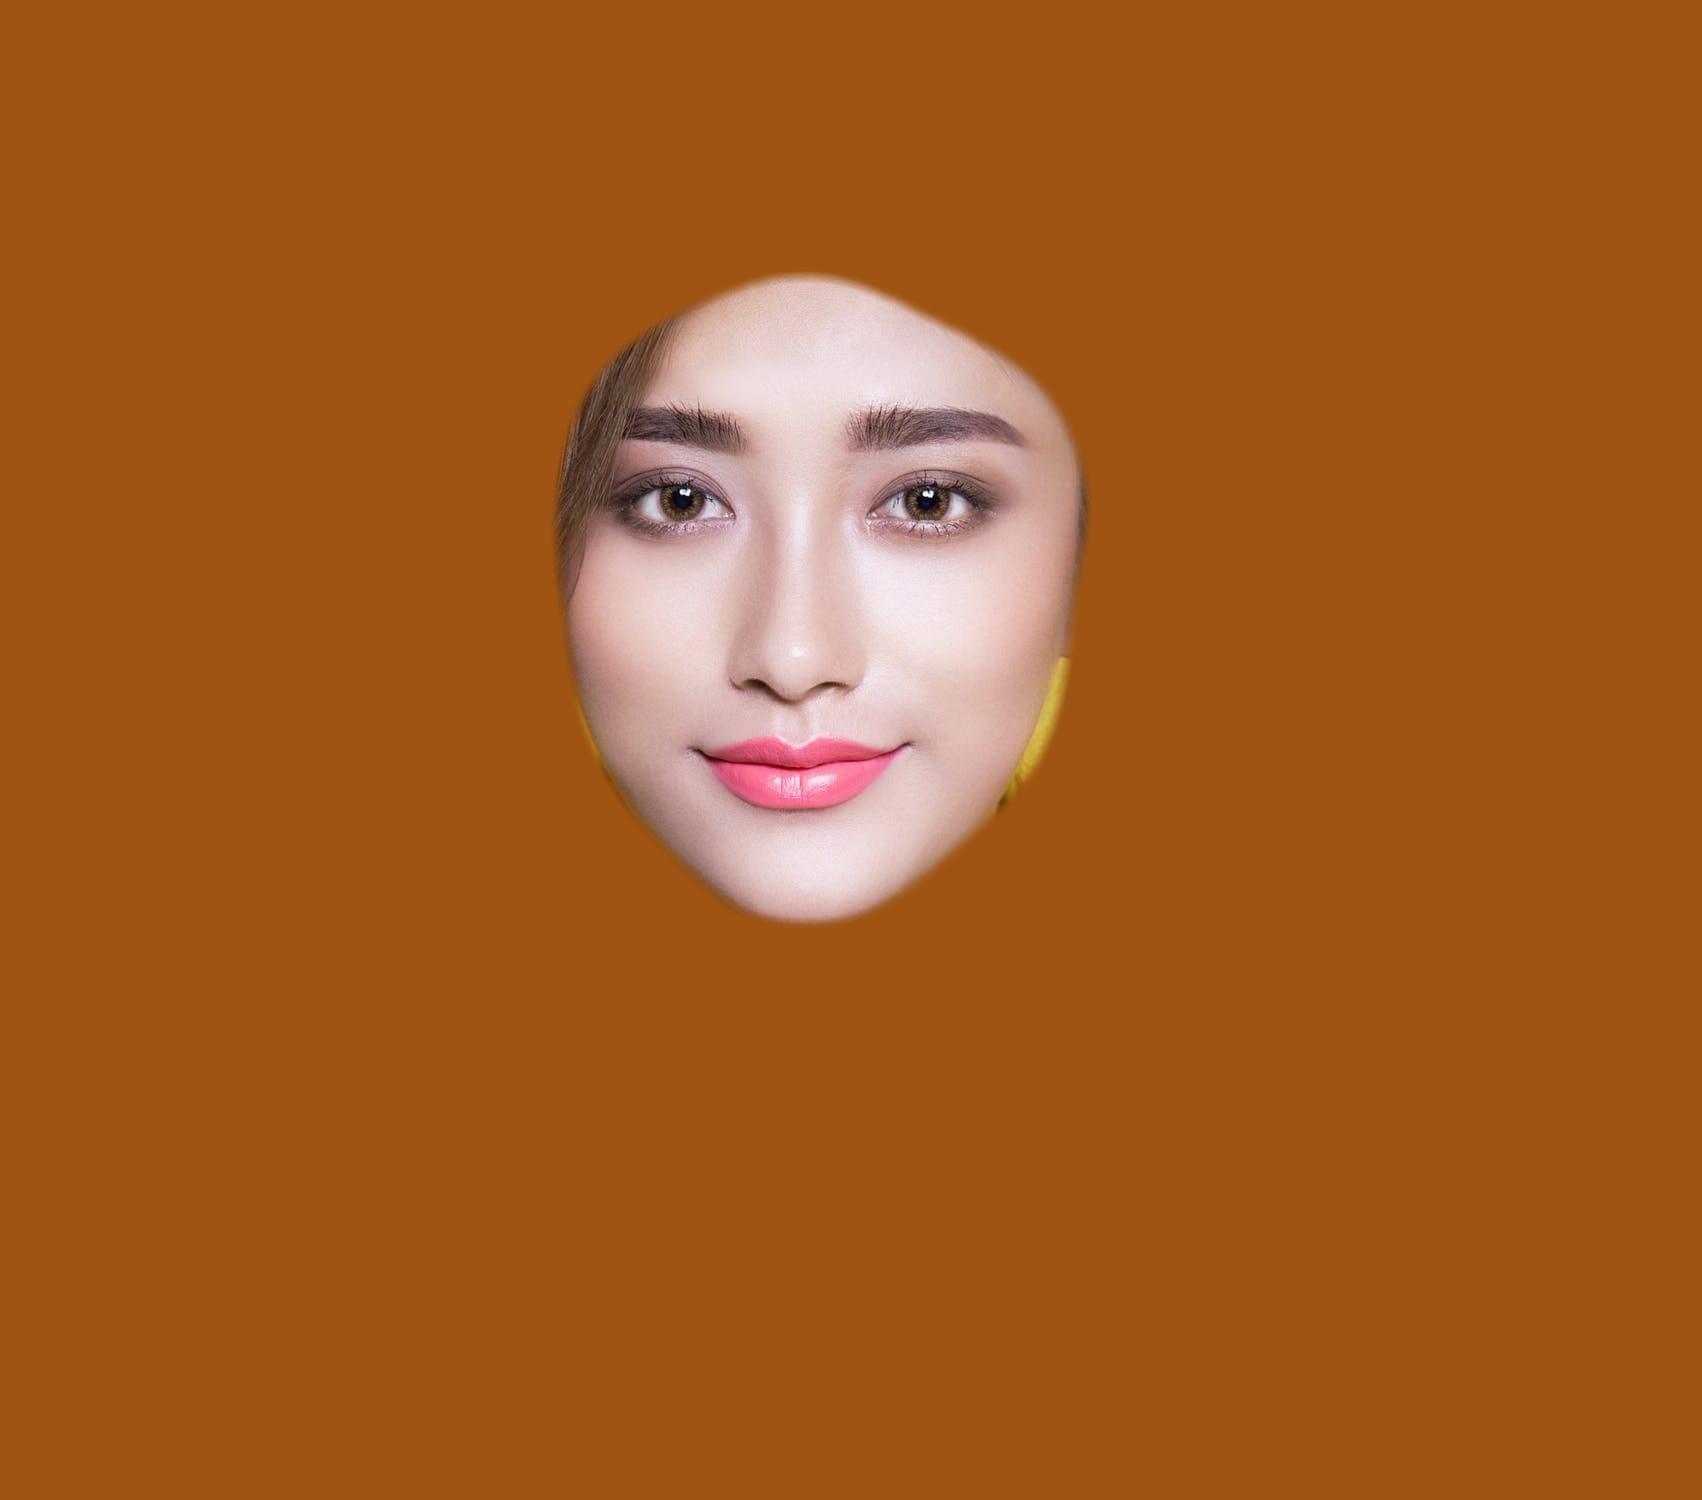
As we've said before, masks can be built based not only on a figure, but also on the oval of the face, as well as the contours of the head.
| Original photo | Face dynamic mask |
|---|---|
|
|
 |
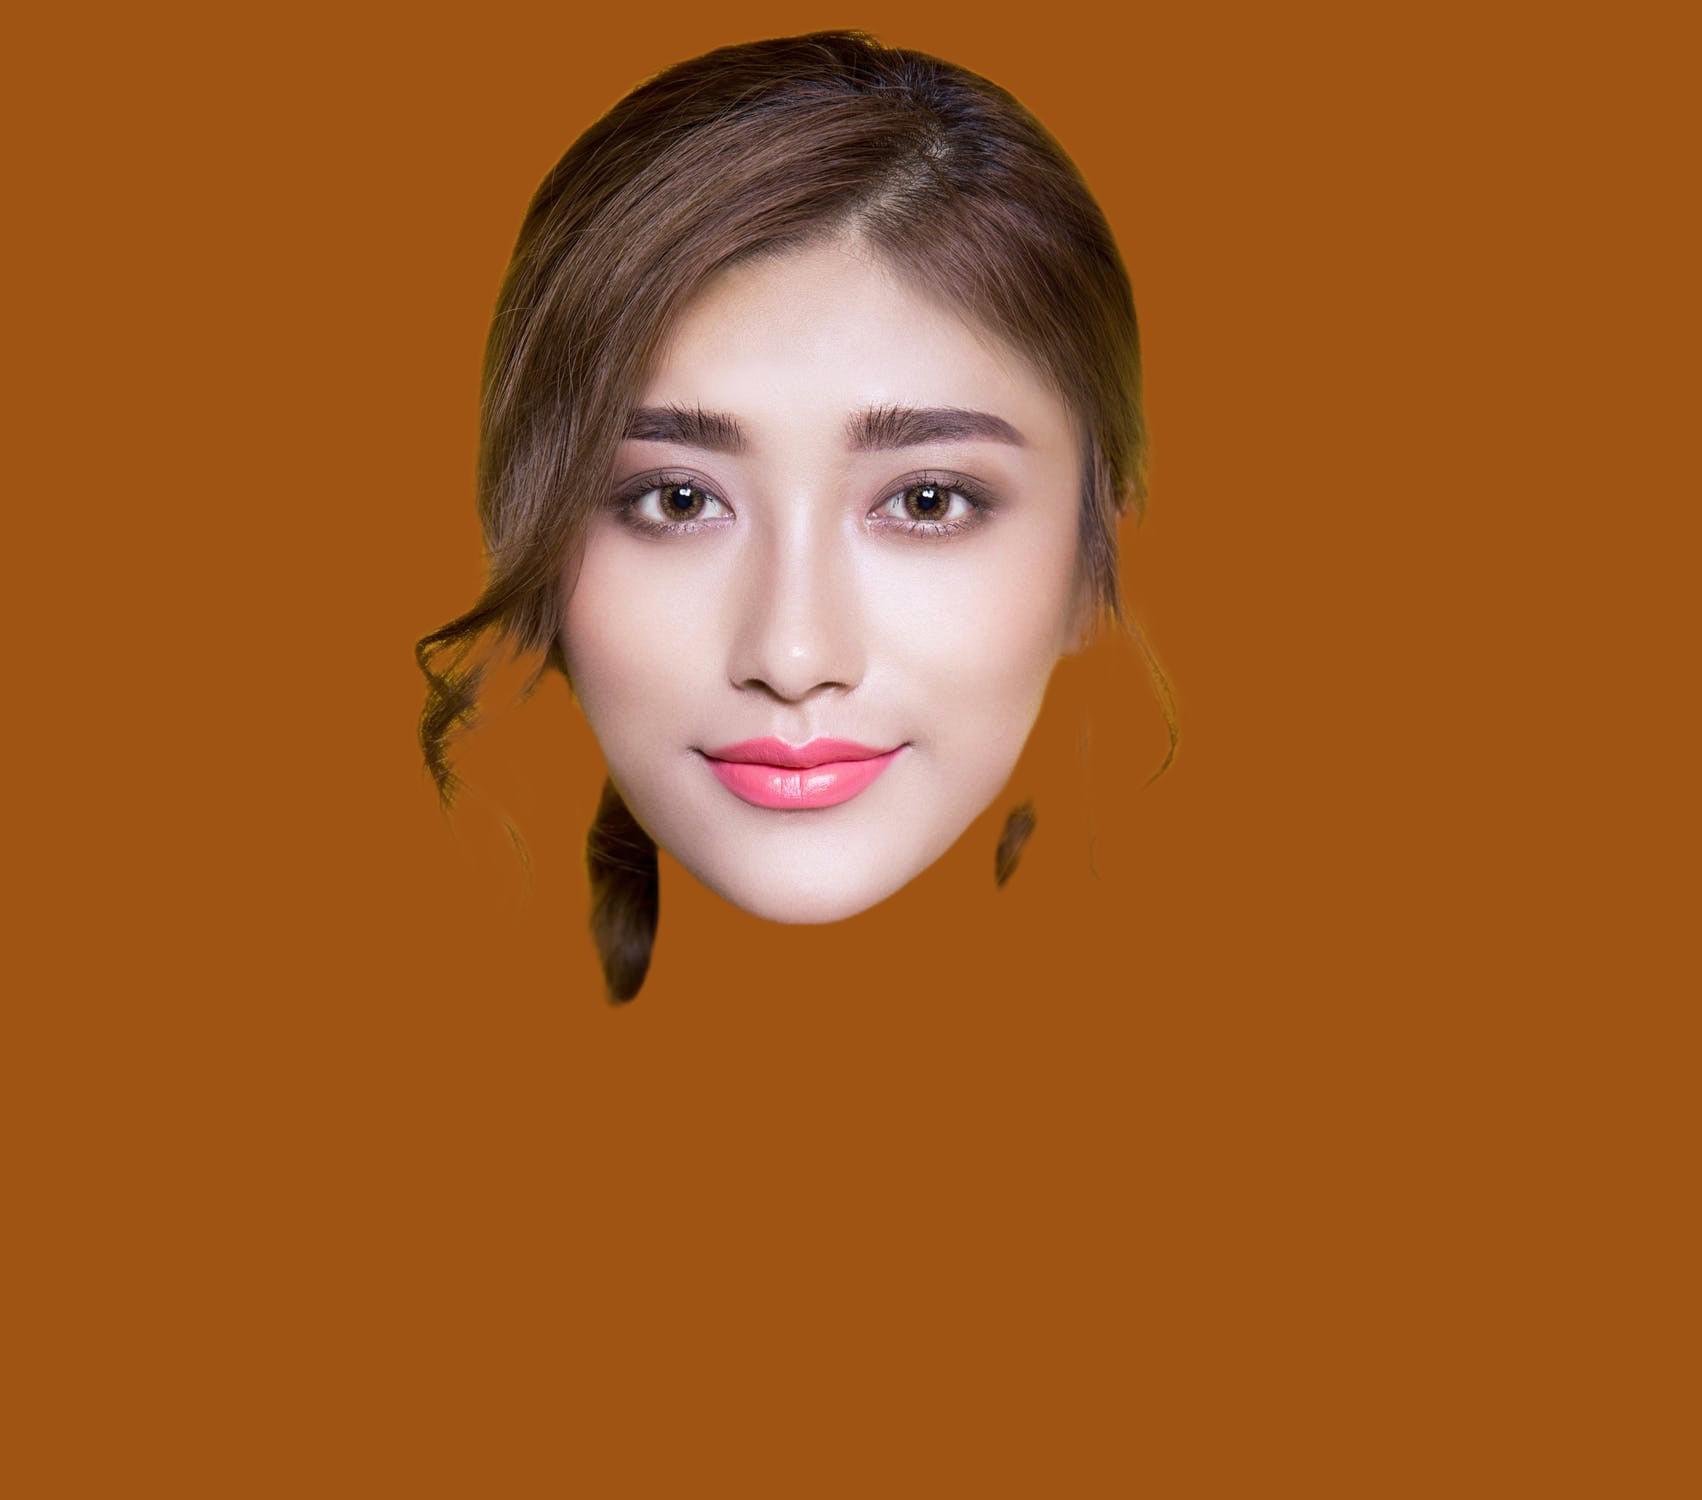
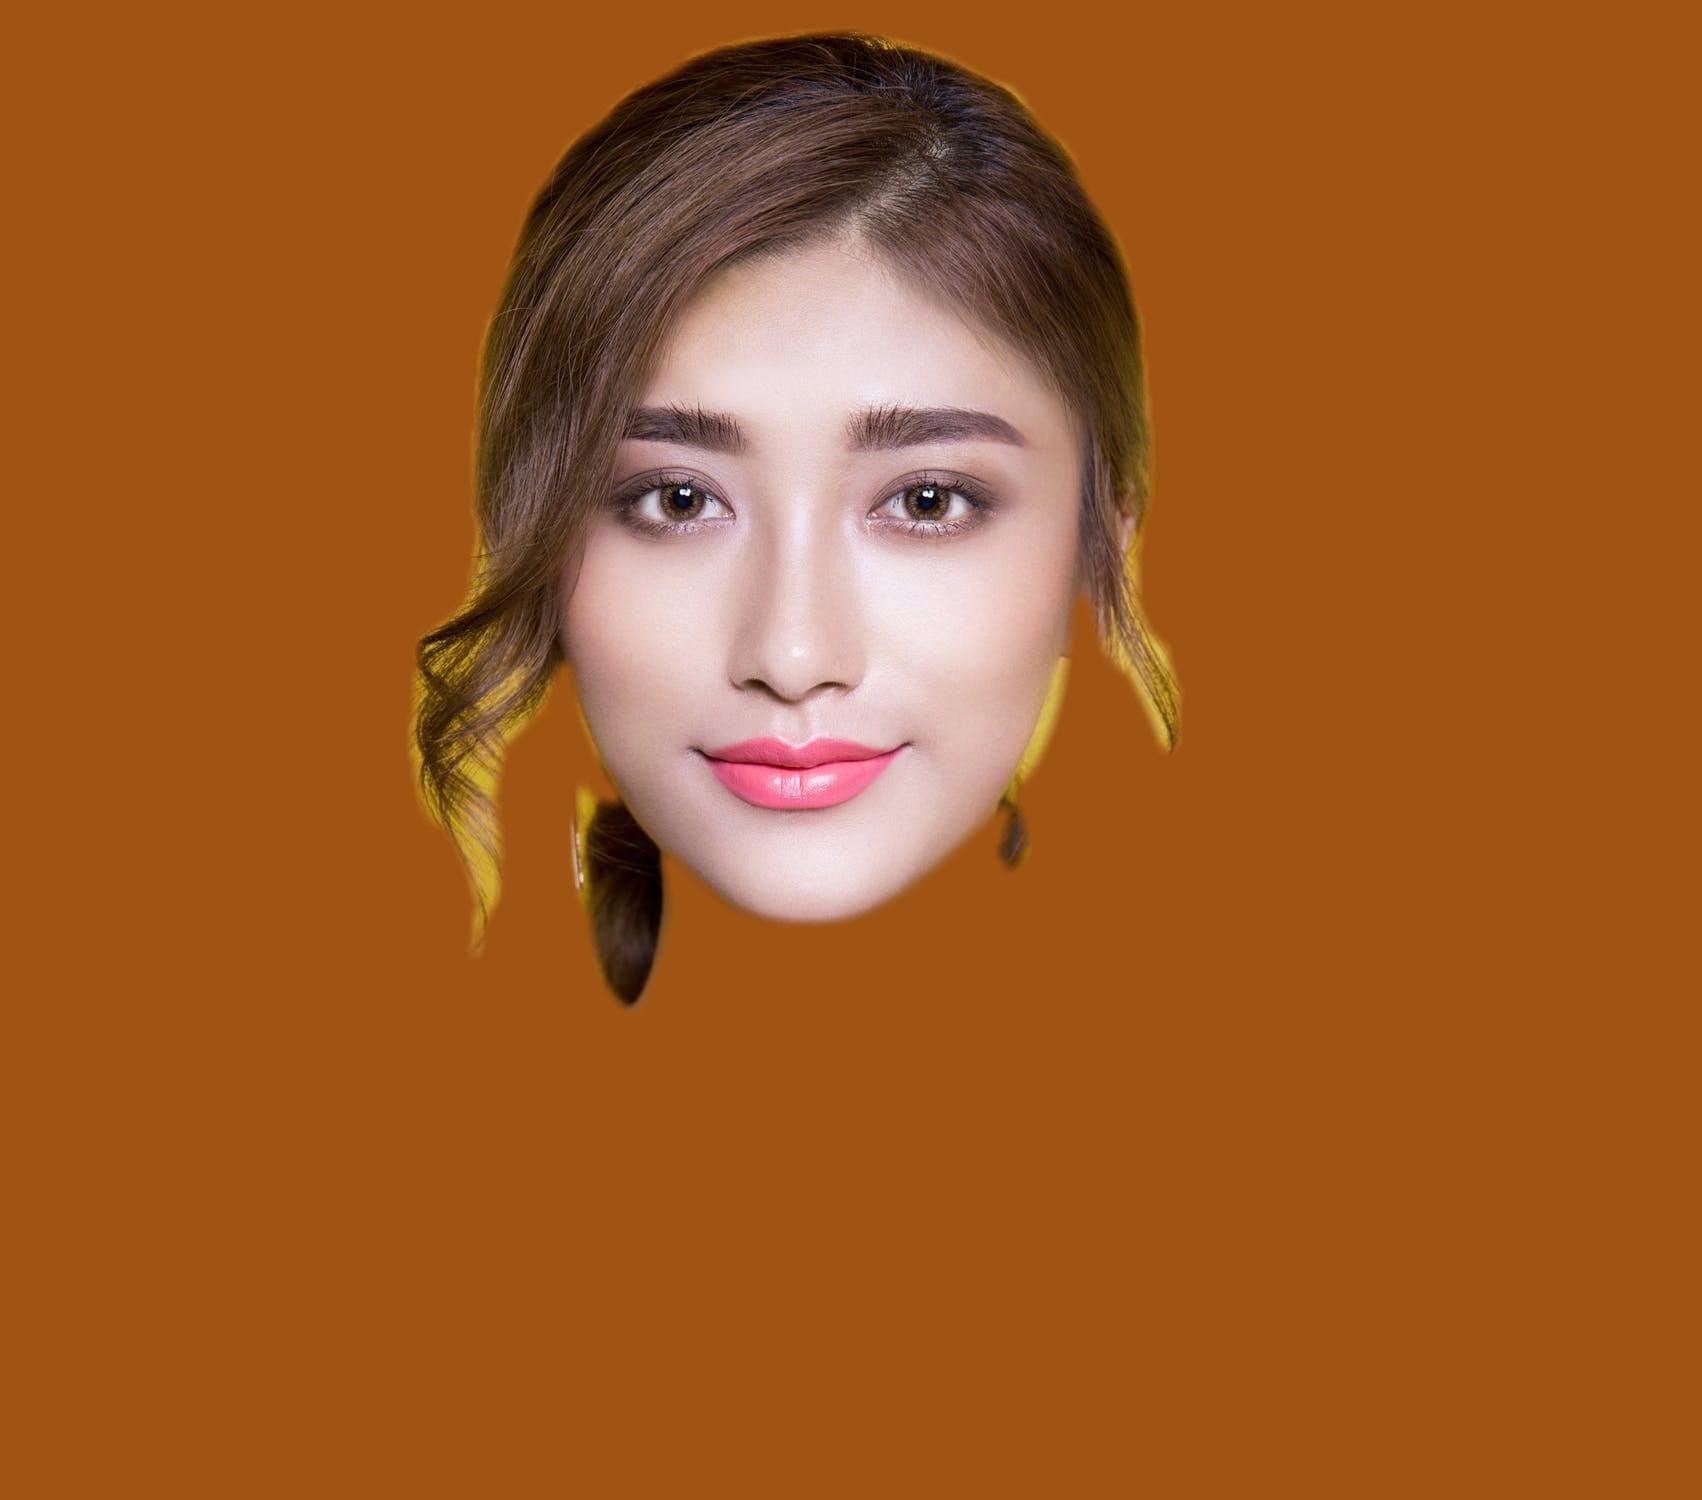
| Original photo | Head dynamic mask |
|---|---|
|
|
 |
The new version of Head Detector was added to the Template Creator. It can detect small details down to small hair locks. The mask returned by the new detector contains semitones, so it is not recommended to use nonzero eroding values, because it will destroy semitones and the quality of the mask will suffer critically..
The new version is enabled by default for new projets. If you want to switch to the new version of the detector in previously created projects you should choose it in the Detectors Versions tab in the menu File – Edit Project.
| Source Photo | Head Detector v1 | Head Detector v2 |
|---|---|---|
|
|
 |
|
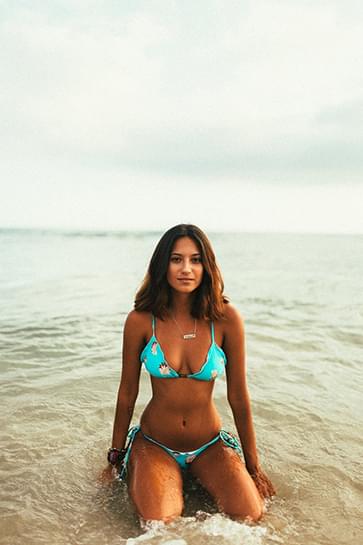
A mask can also be built based on skin and hair areas found in a user photo. If you apply a mask to a graphic layer with a blend mode, you can get the following results:
| Original photo | Skin dynamic mask |
|---|---|
 |
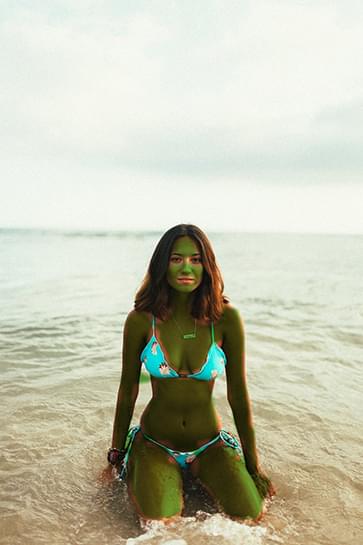 |
Please note that a skin dynamic mask excludes the eyes and the lips.
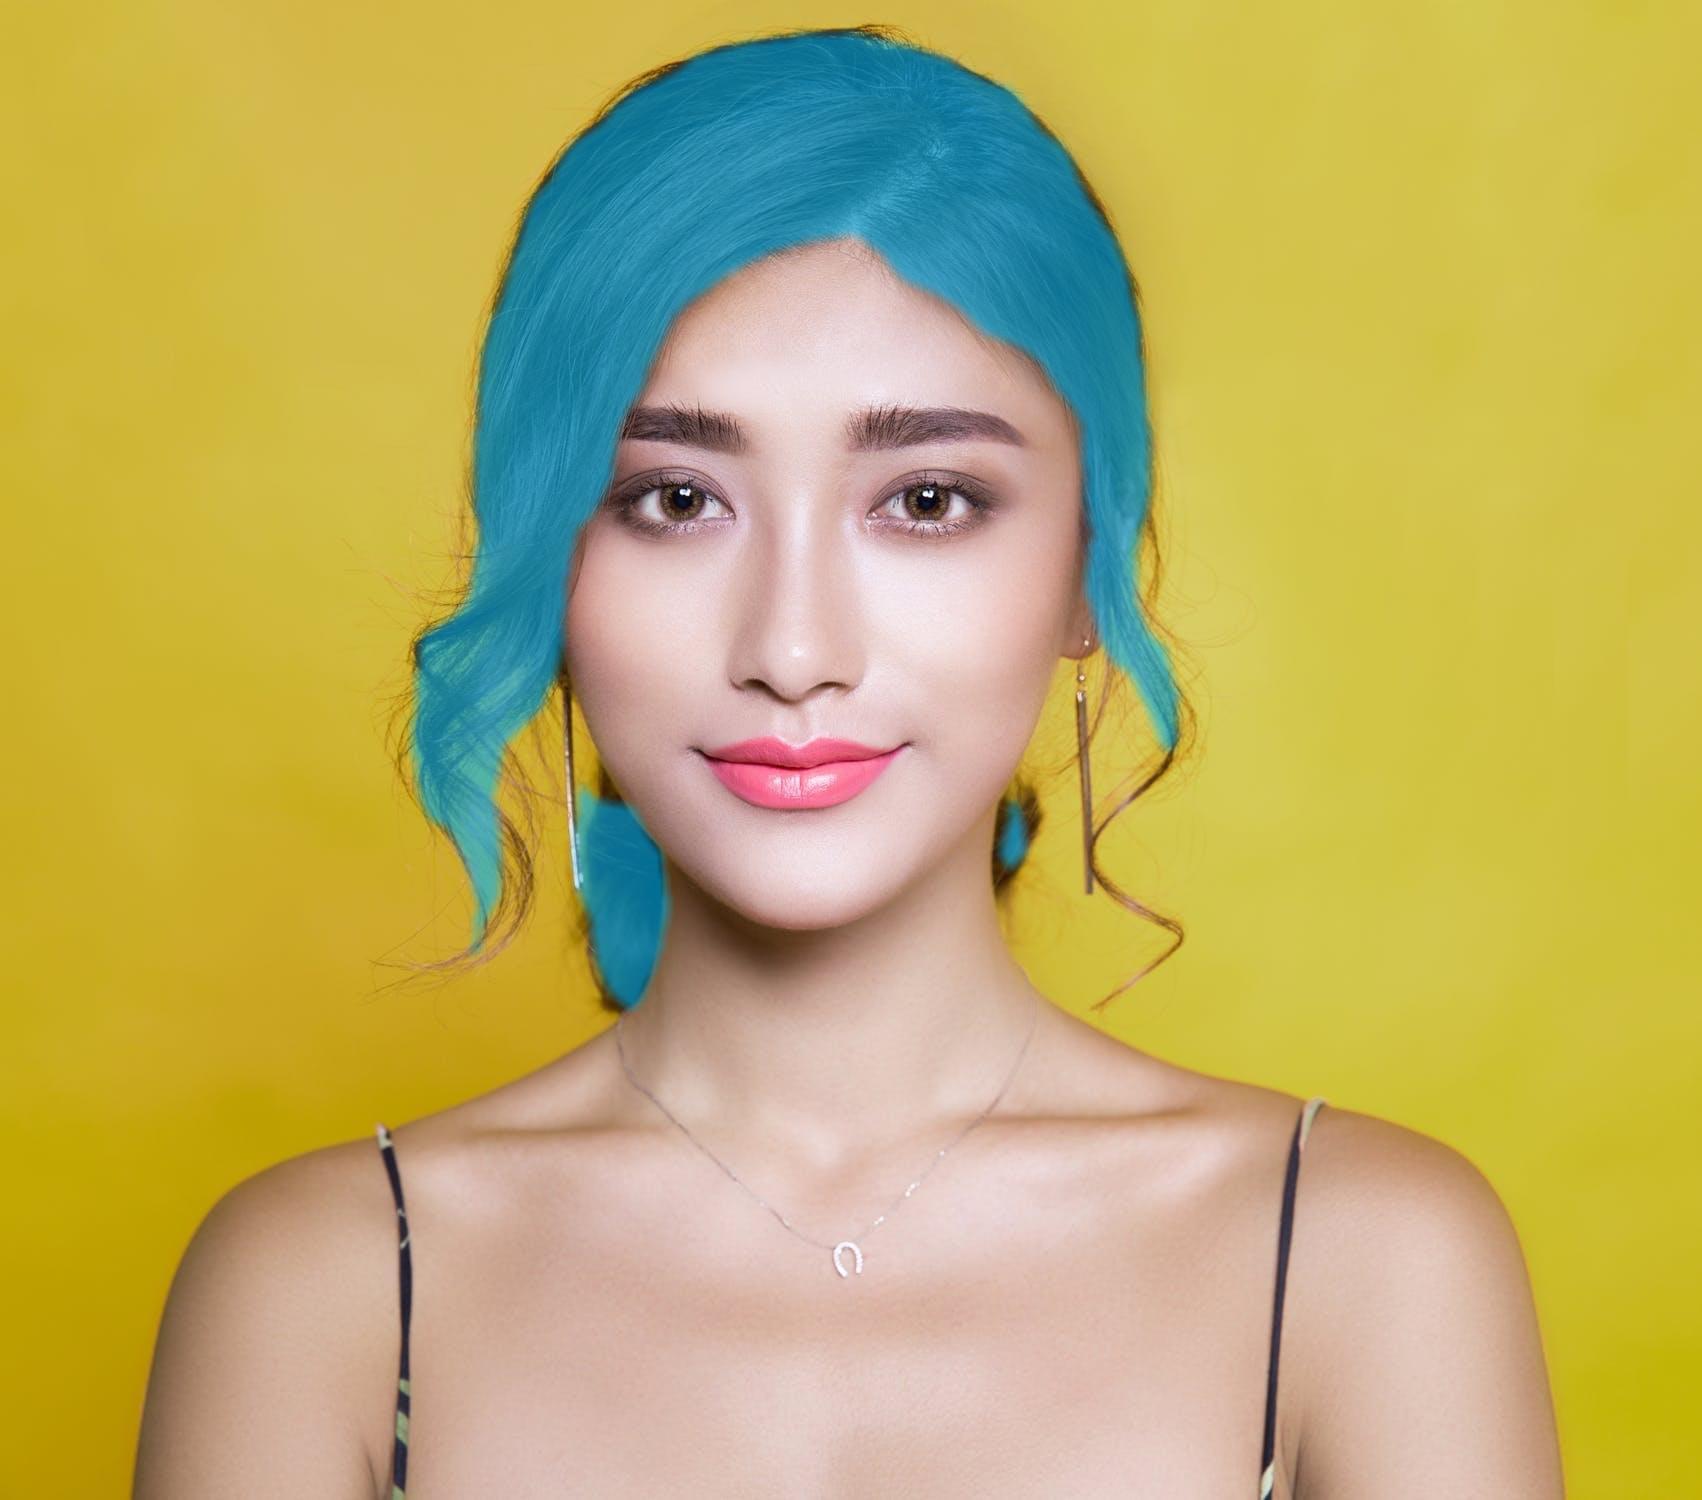
| Original photo | Hair dynamic mask |
|---|---|
|
|
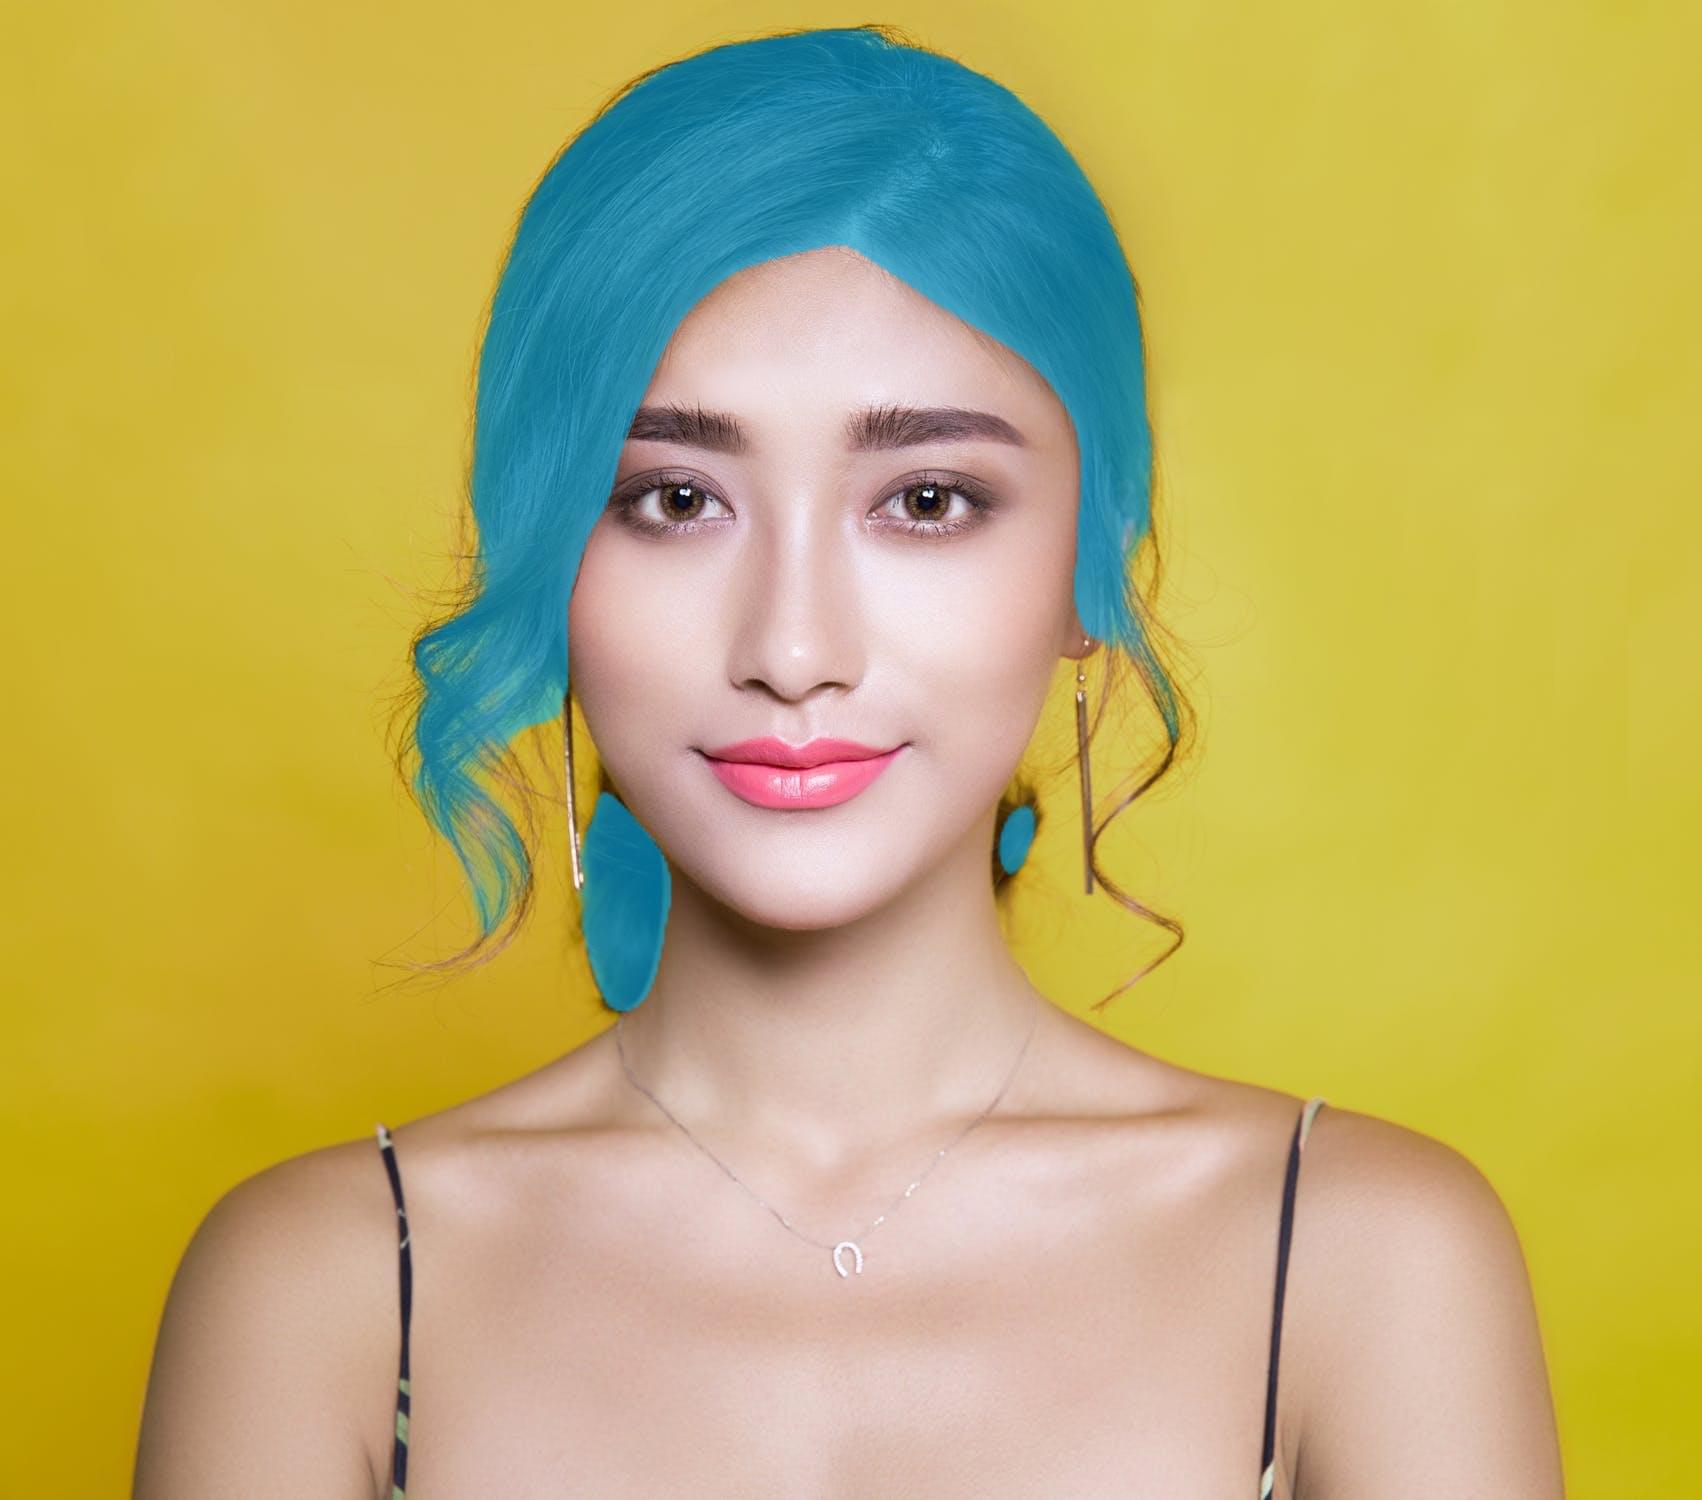 |
The new version of Hair Detector was added to the Template Creator. It can detect small details down to small hair locks. The mask returned by the new detector contains semitones, so it is not recommended to use nonzero eroding values, because it will destroy semitones and the quality of the mask will suffer critically.
The new version is enabled by default for new projects. If you want to switch to the new version of the detector in previously created projects you should choose it in the Detectors Versions tab in the menu File – Edit Project.
| Source Photo | Hair Detector v1 | Hair Detector v2 |
|---|---|---|
|
|
 |
|
| Original photo | Irises dynamic mask |
|---|---|
 |
 |
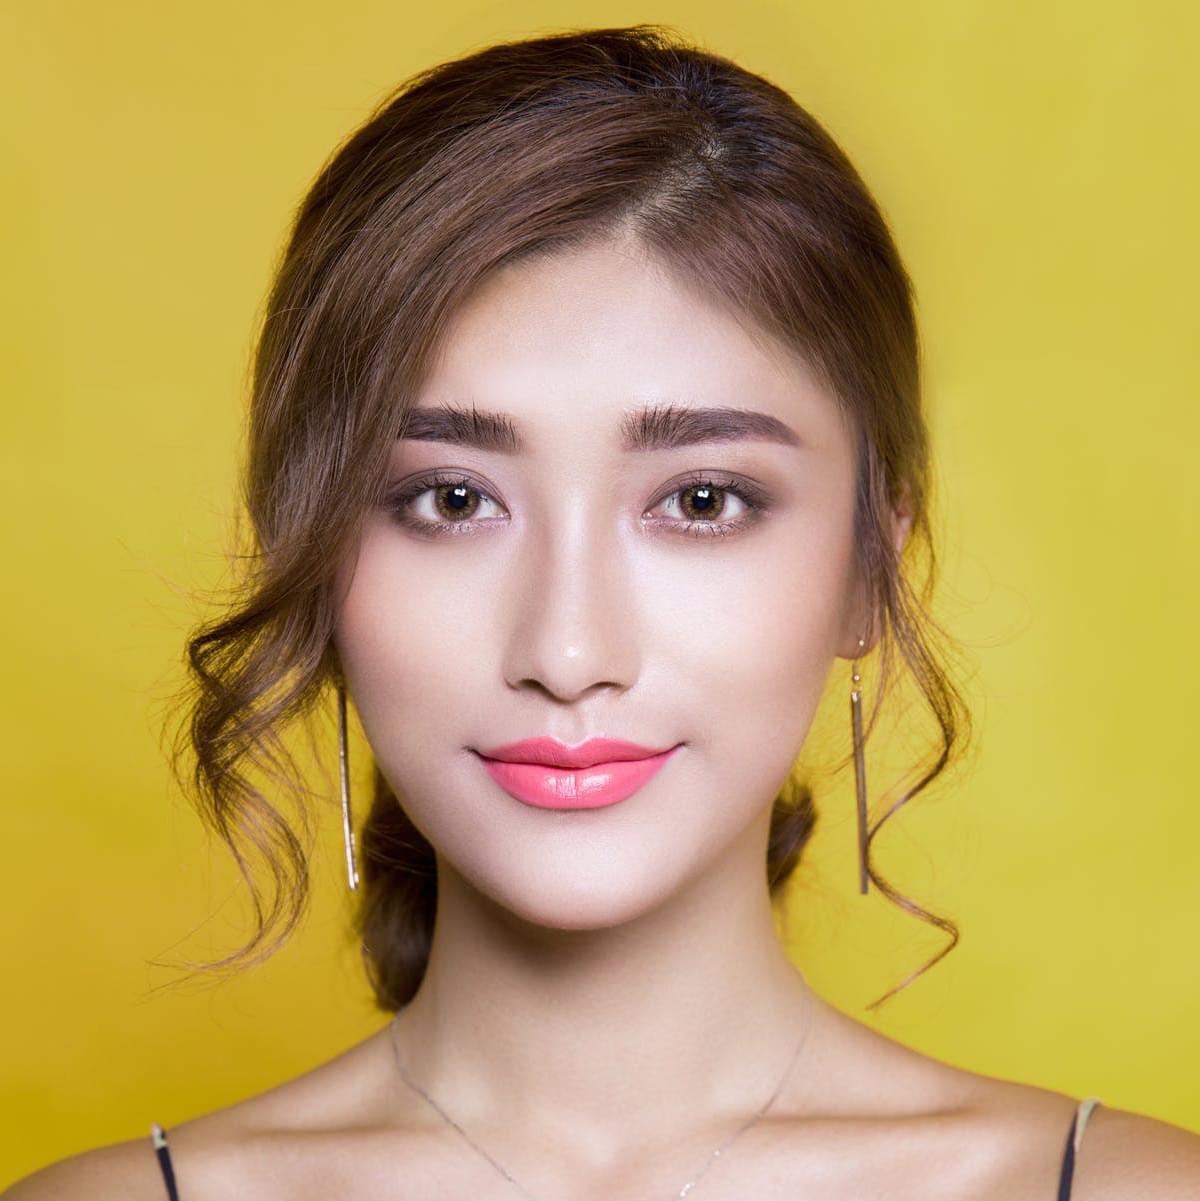
| Original photo | Lips dynamic mask |
|---|---|
|
|
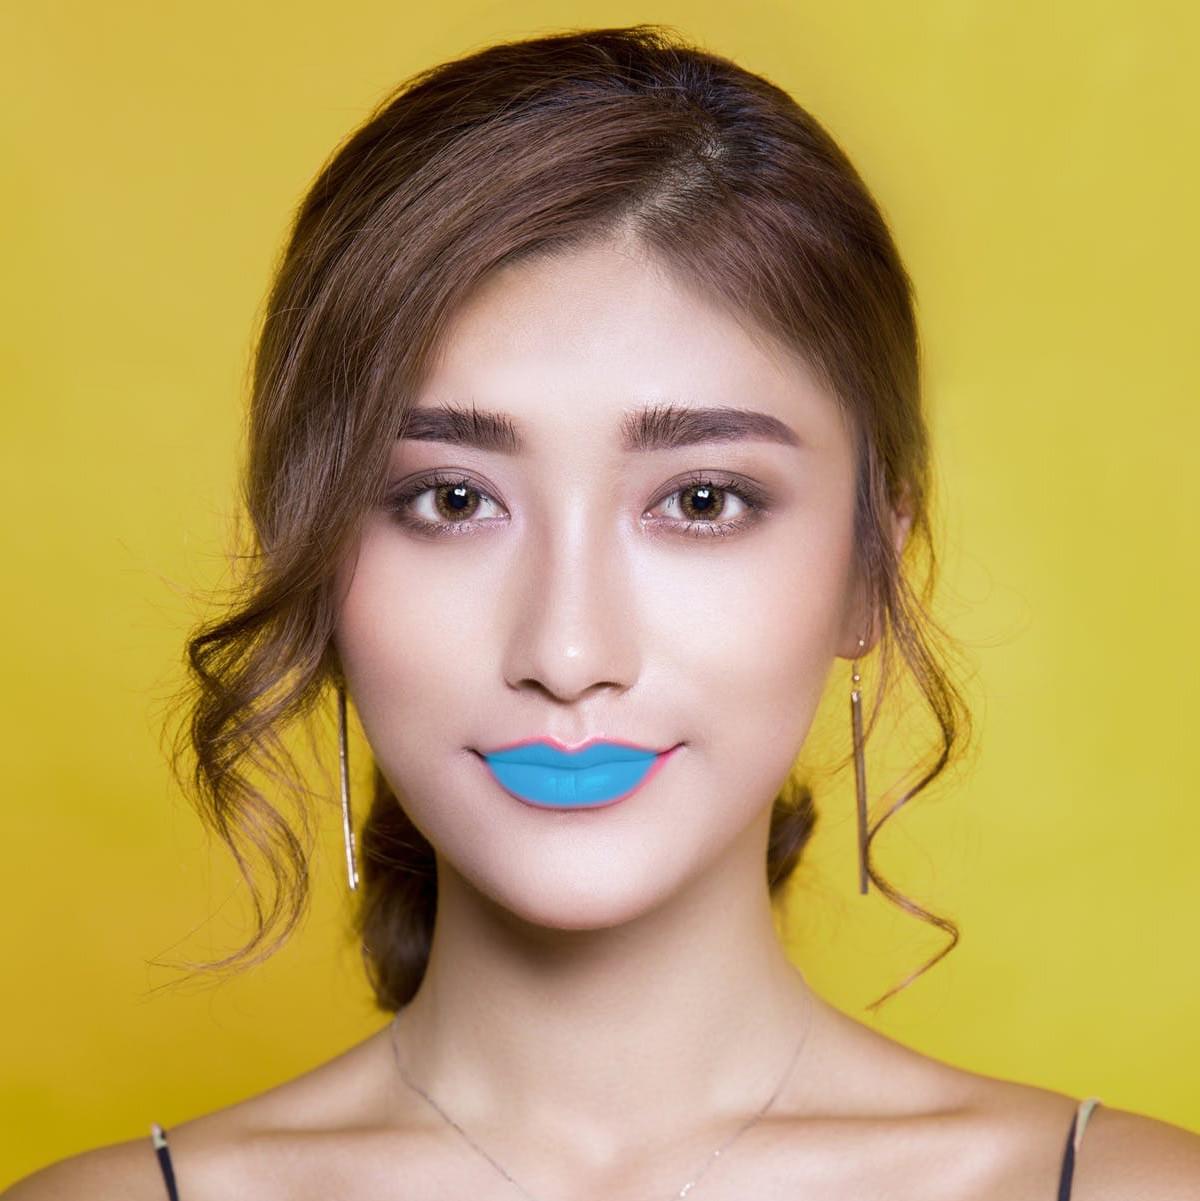 |
A sky dynamic mask selects sky areas in a user photo.
| Original photo | Result |
|---|---|
 |
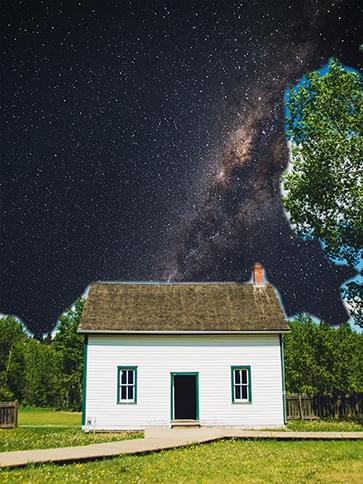 |
Clothes dynamic mask selects all clothes found in a user photo.
| Original photo | Result |
|---|---|
 |
 |
Depending on the clothing items found in a user photo, a mask can consist of either one or several items.
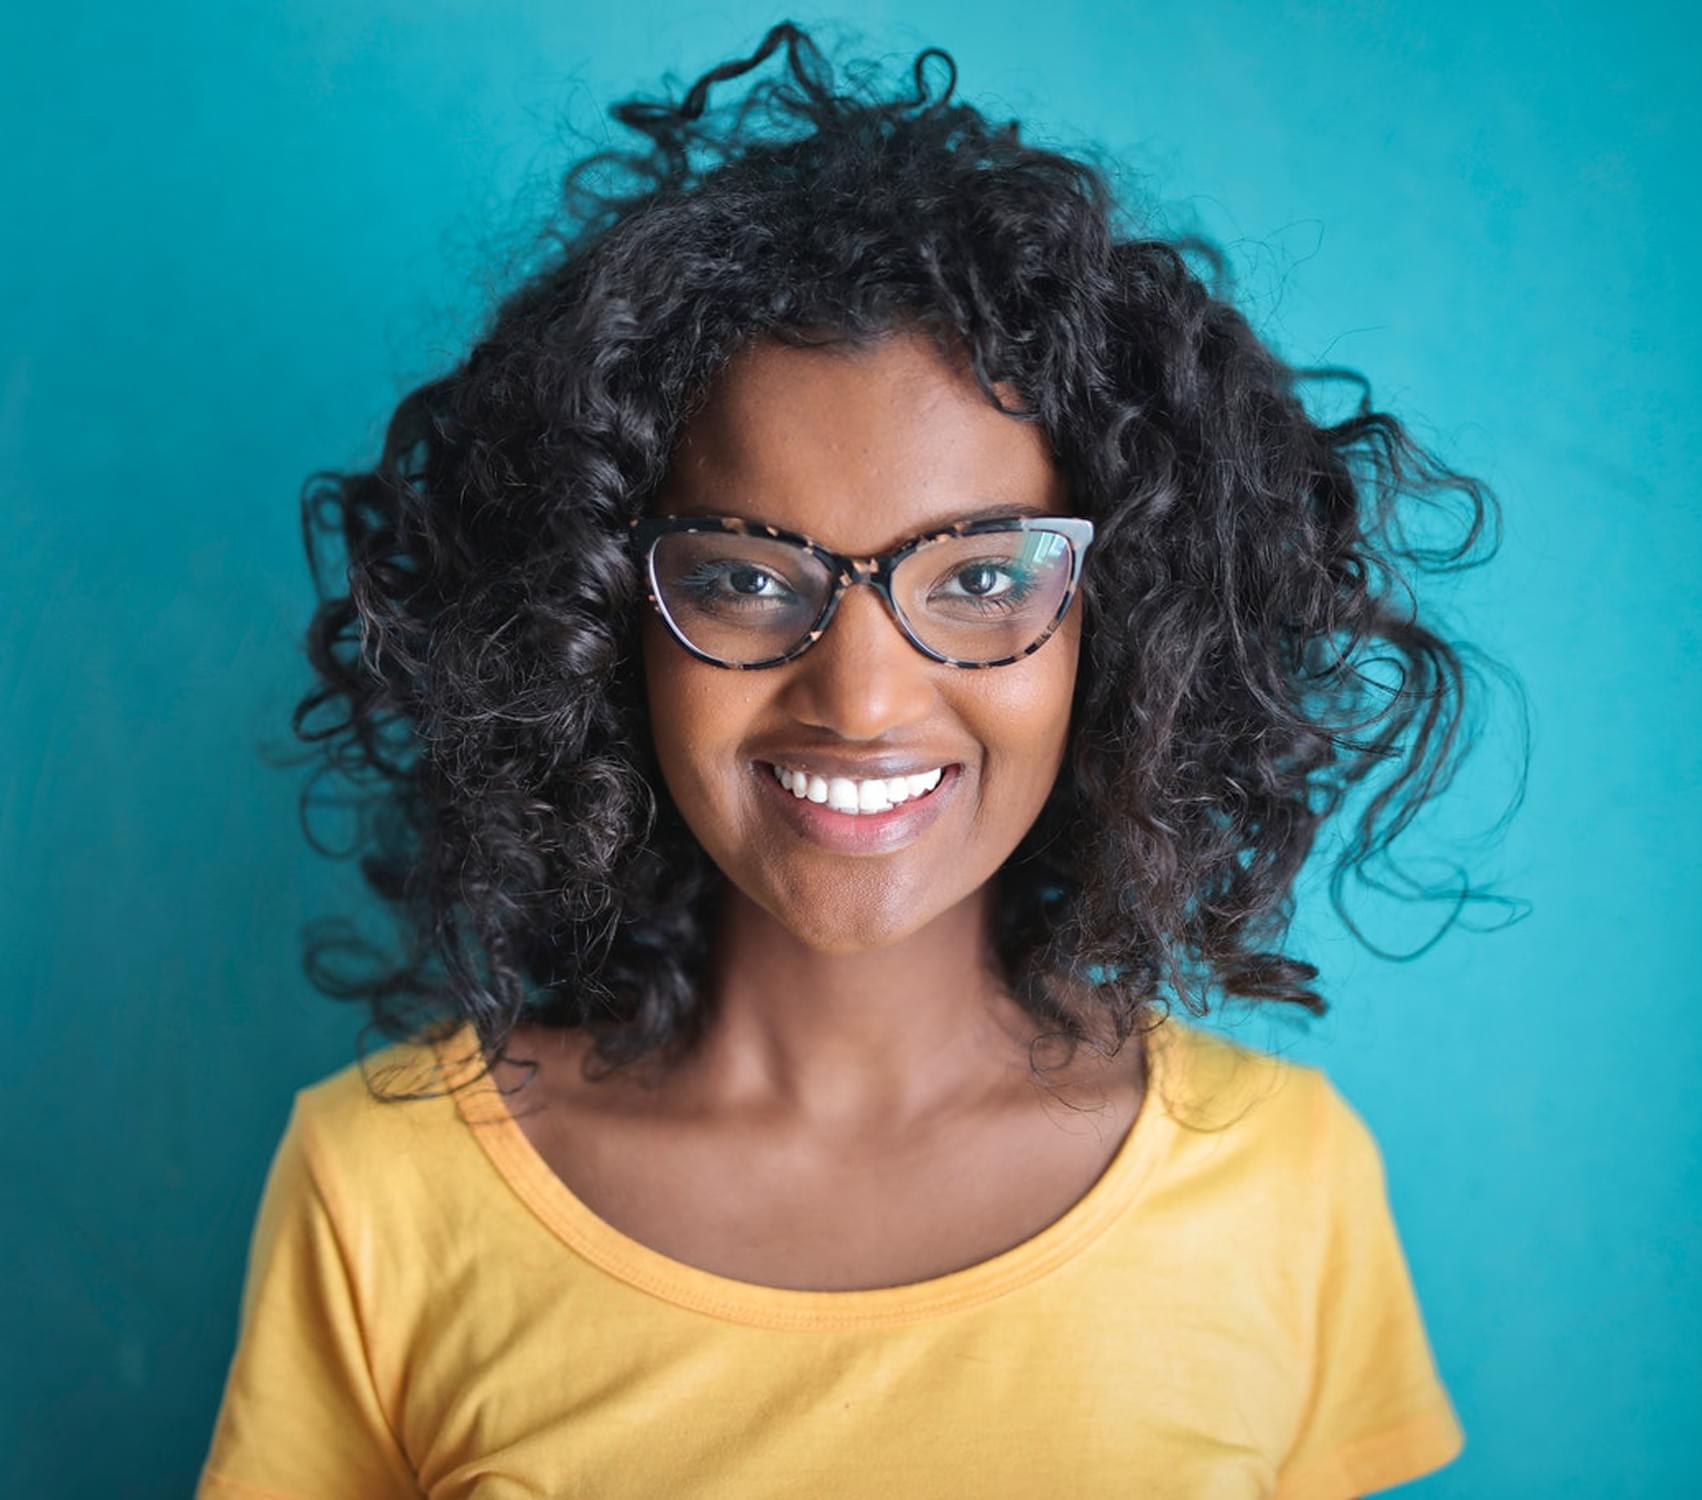
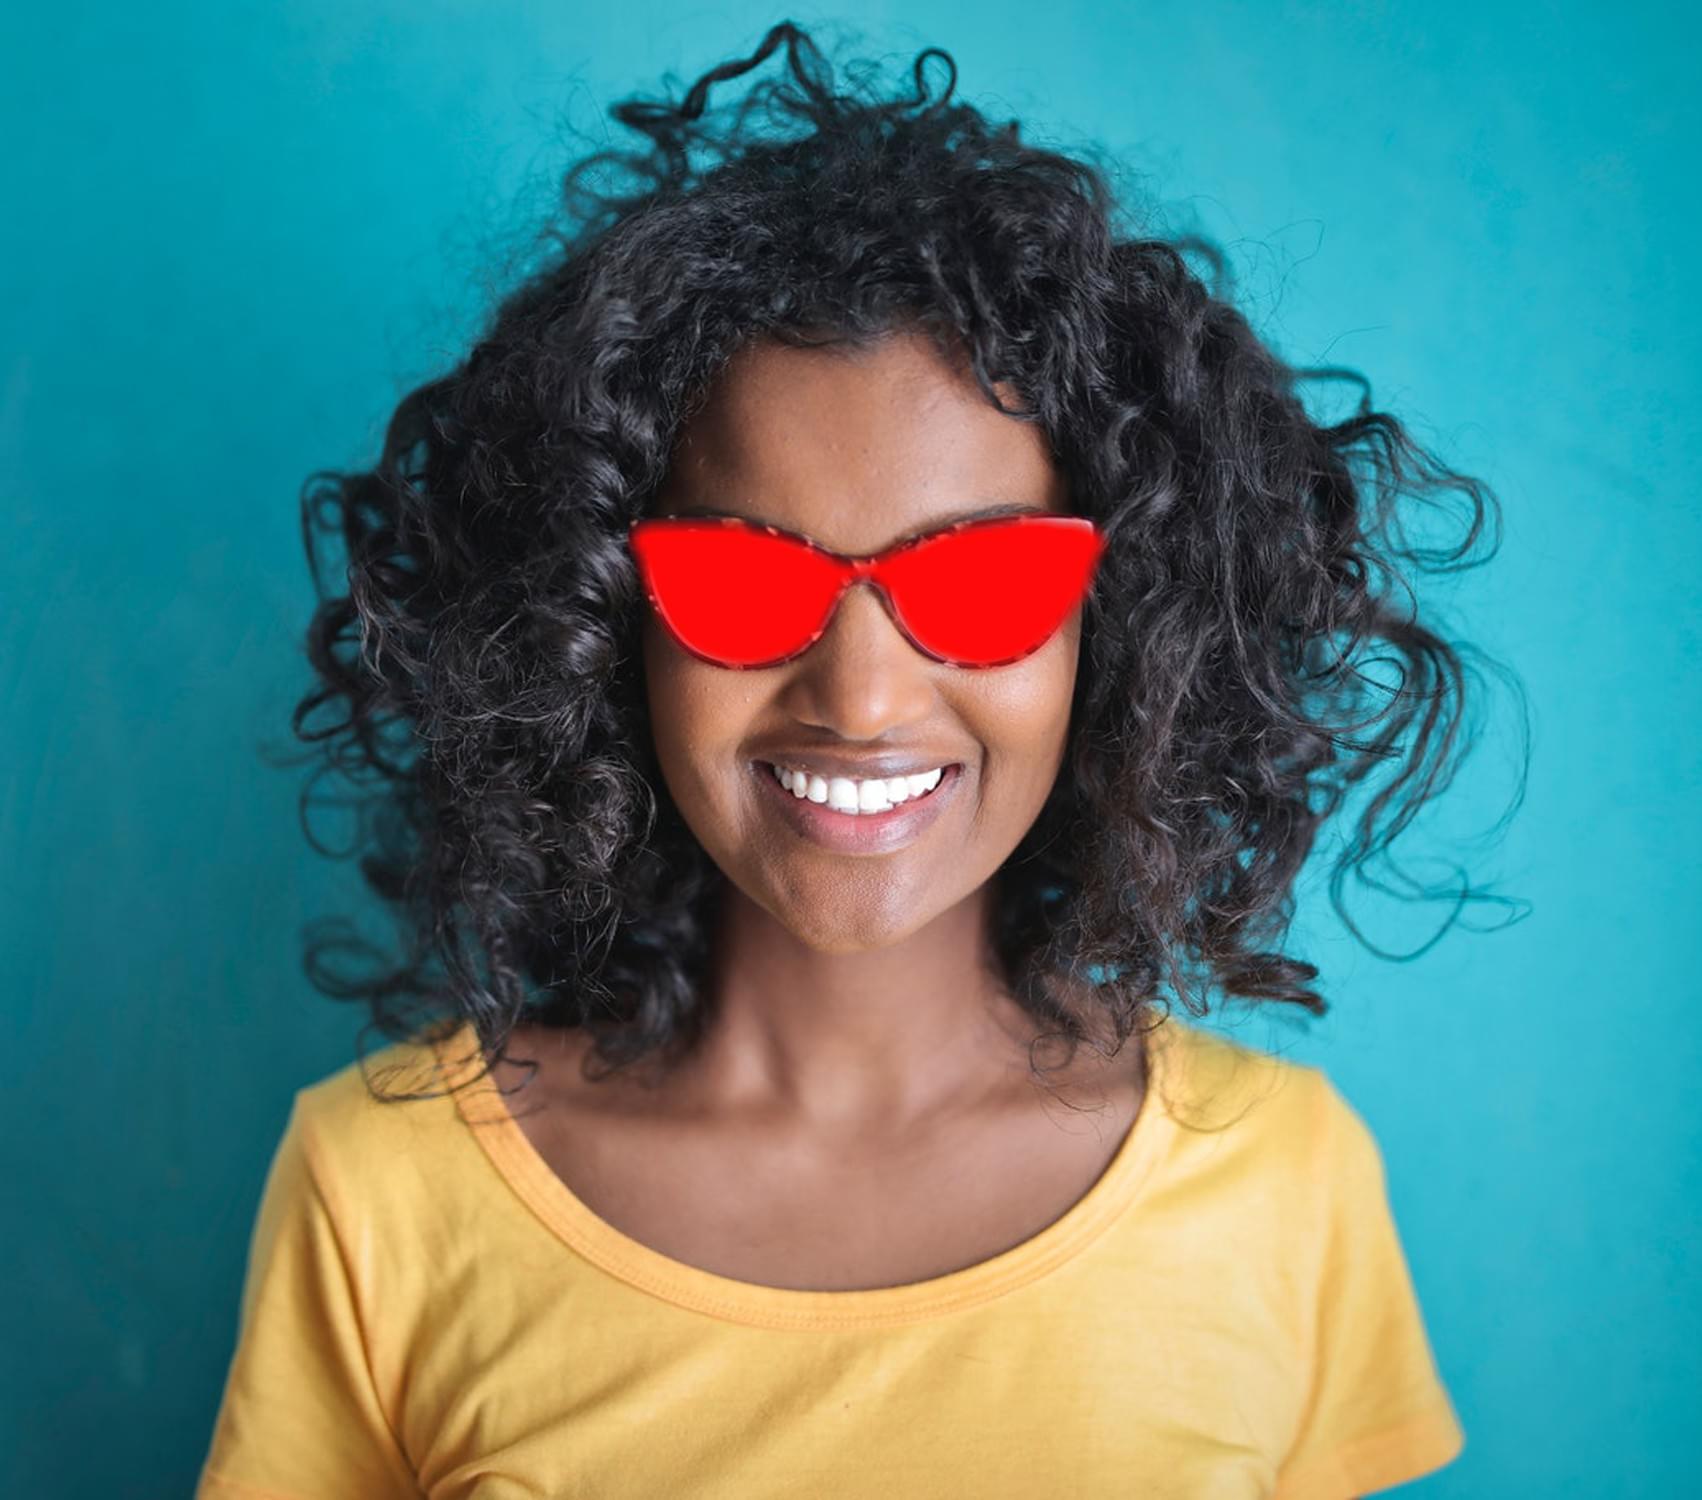
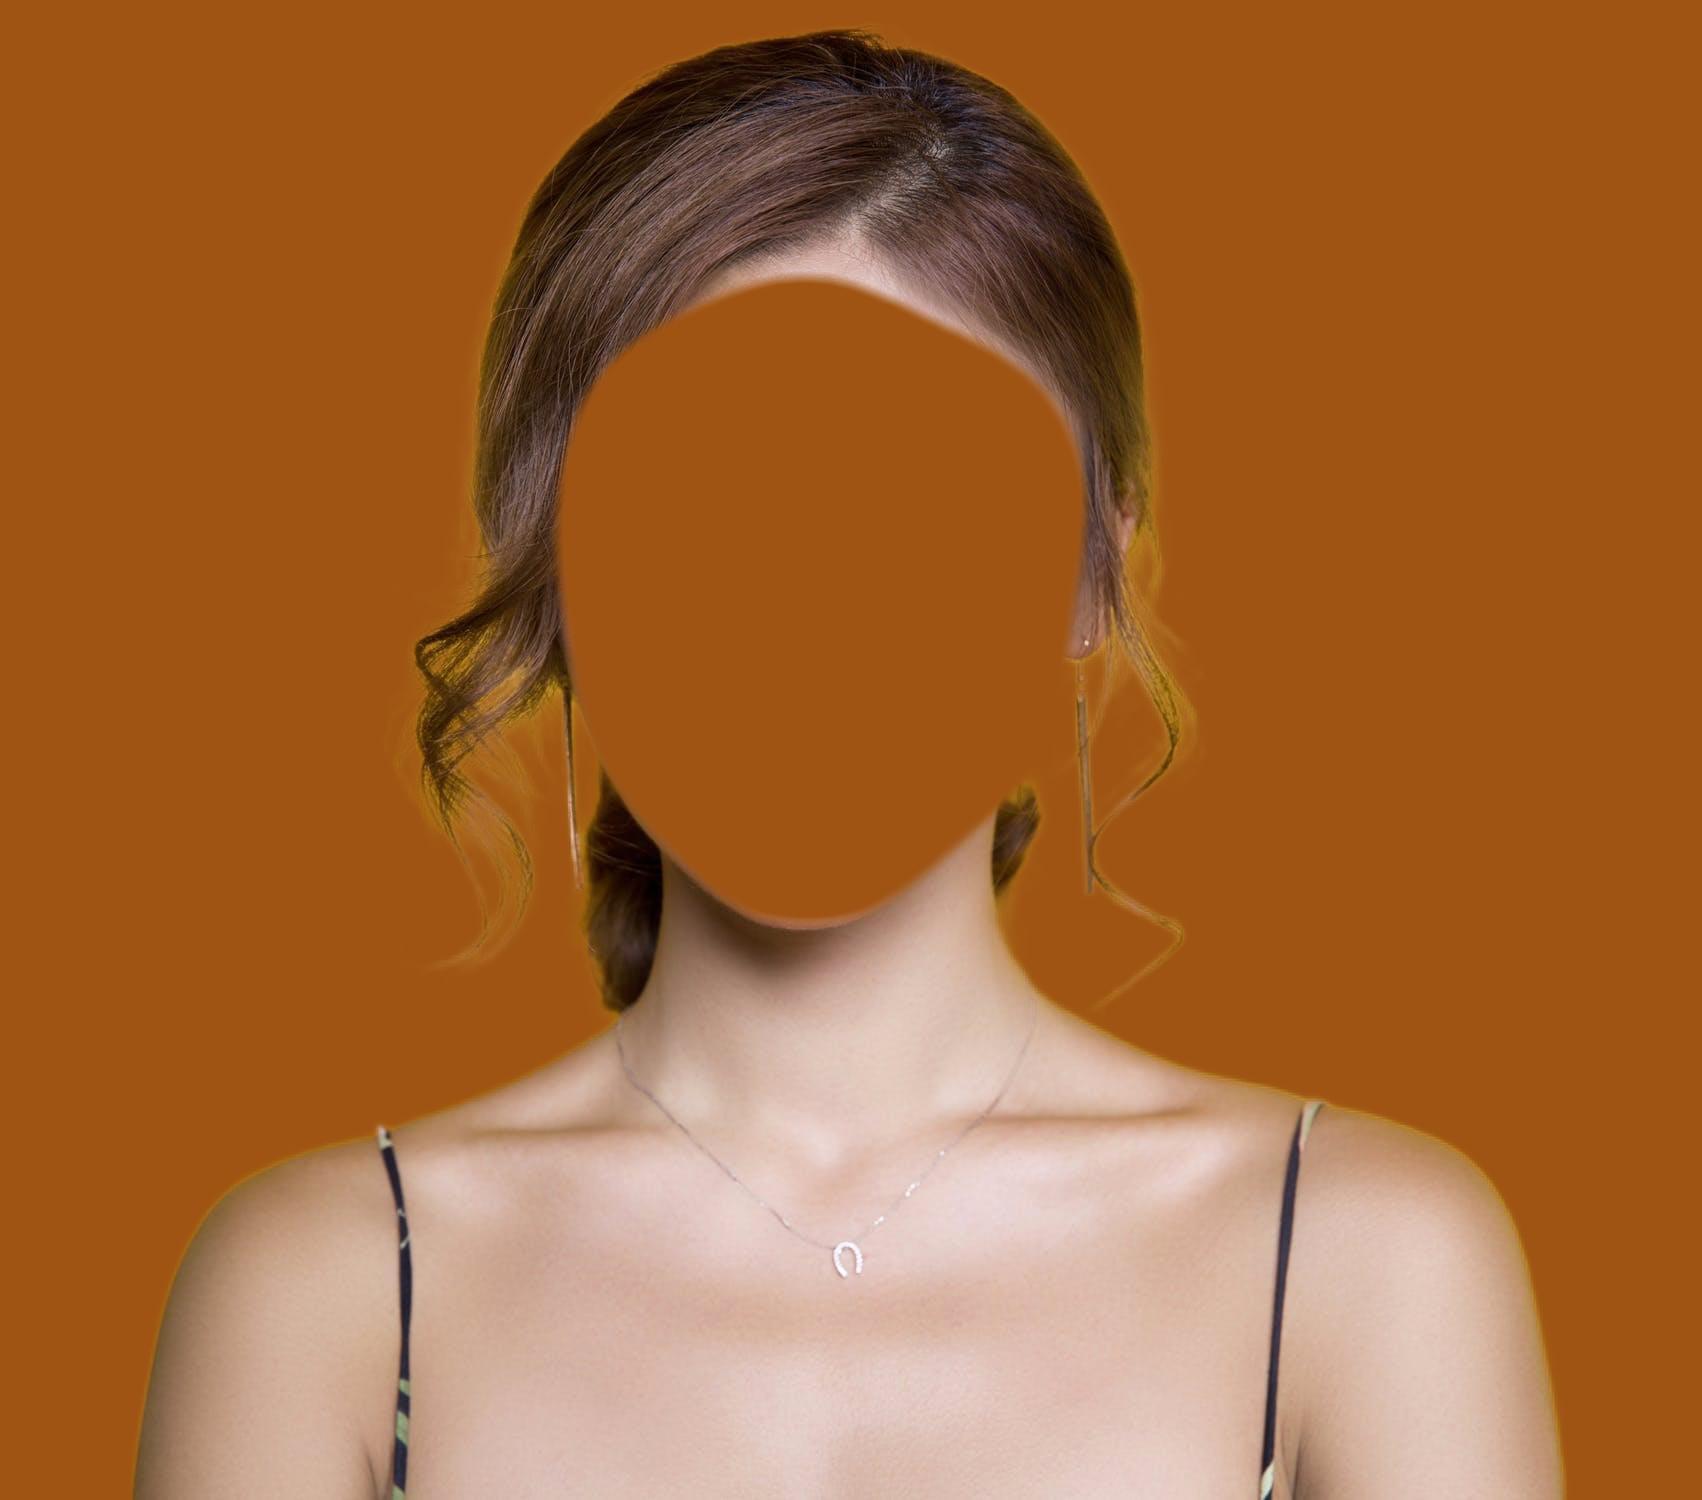
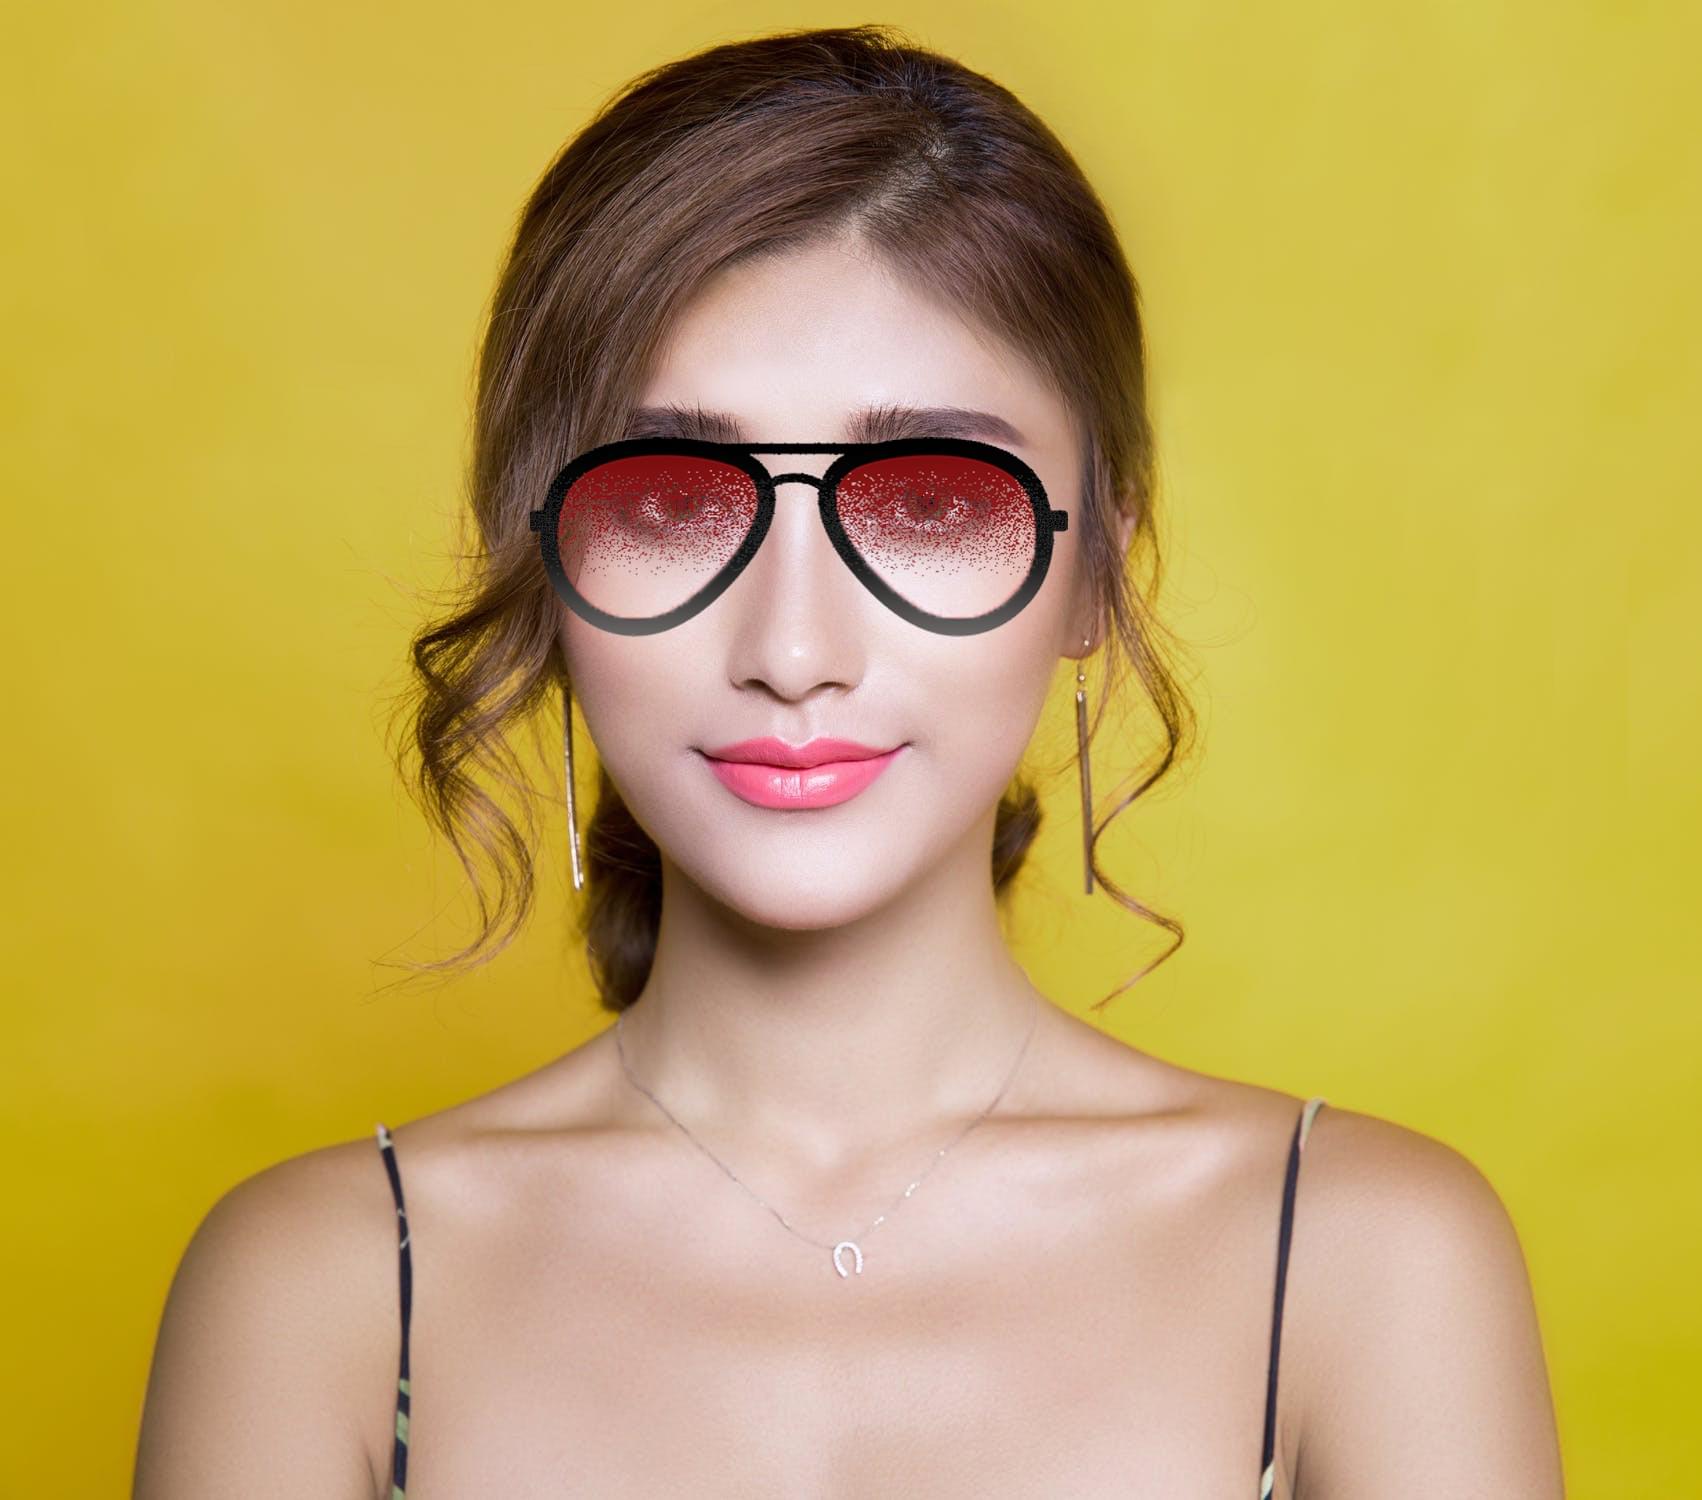
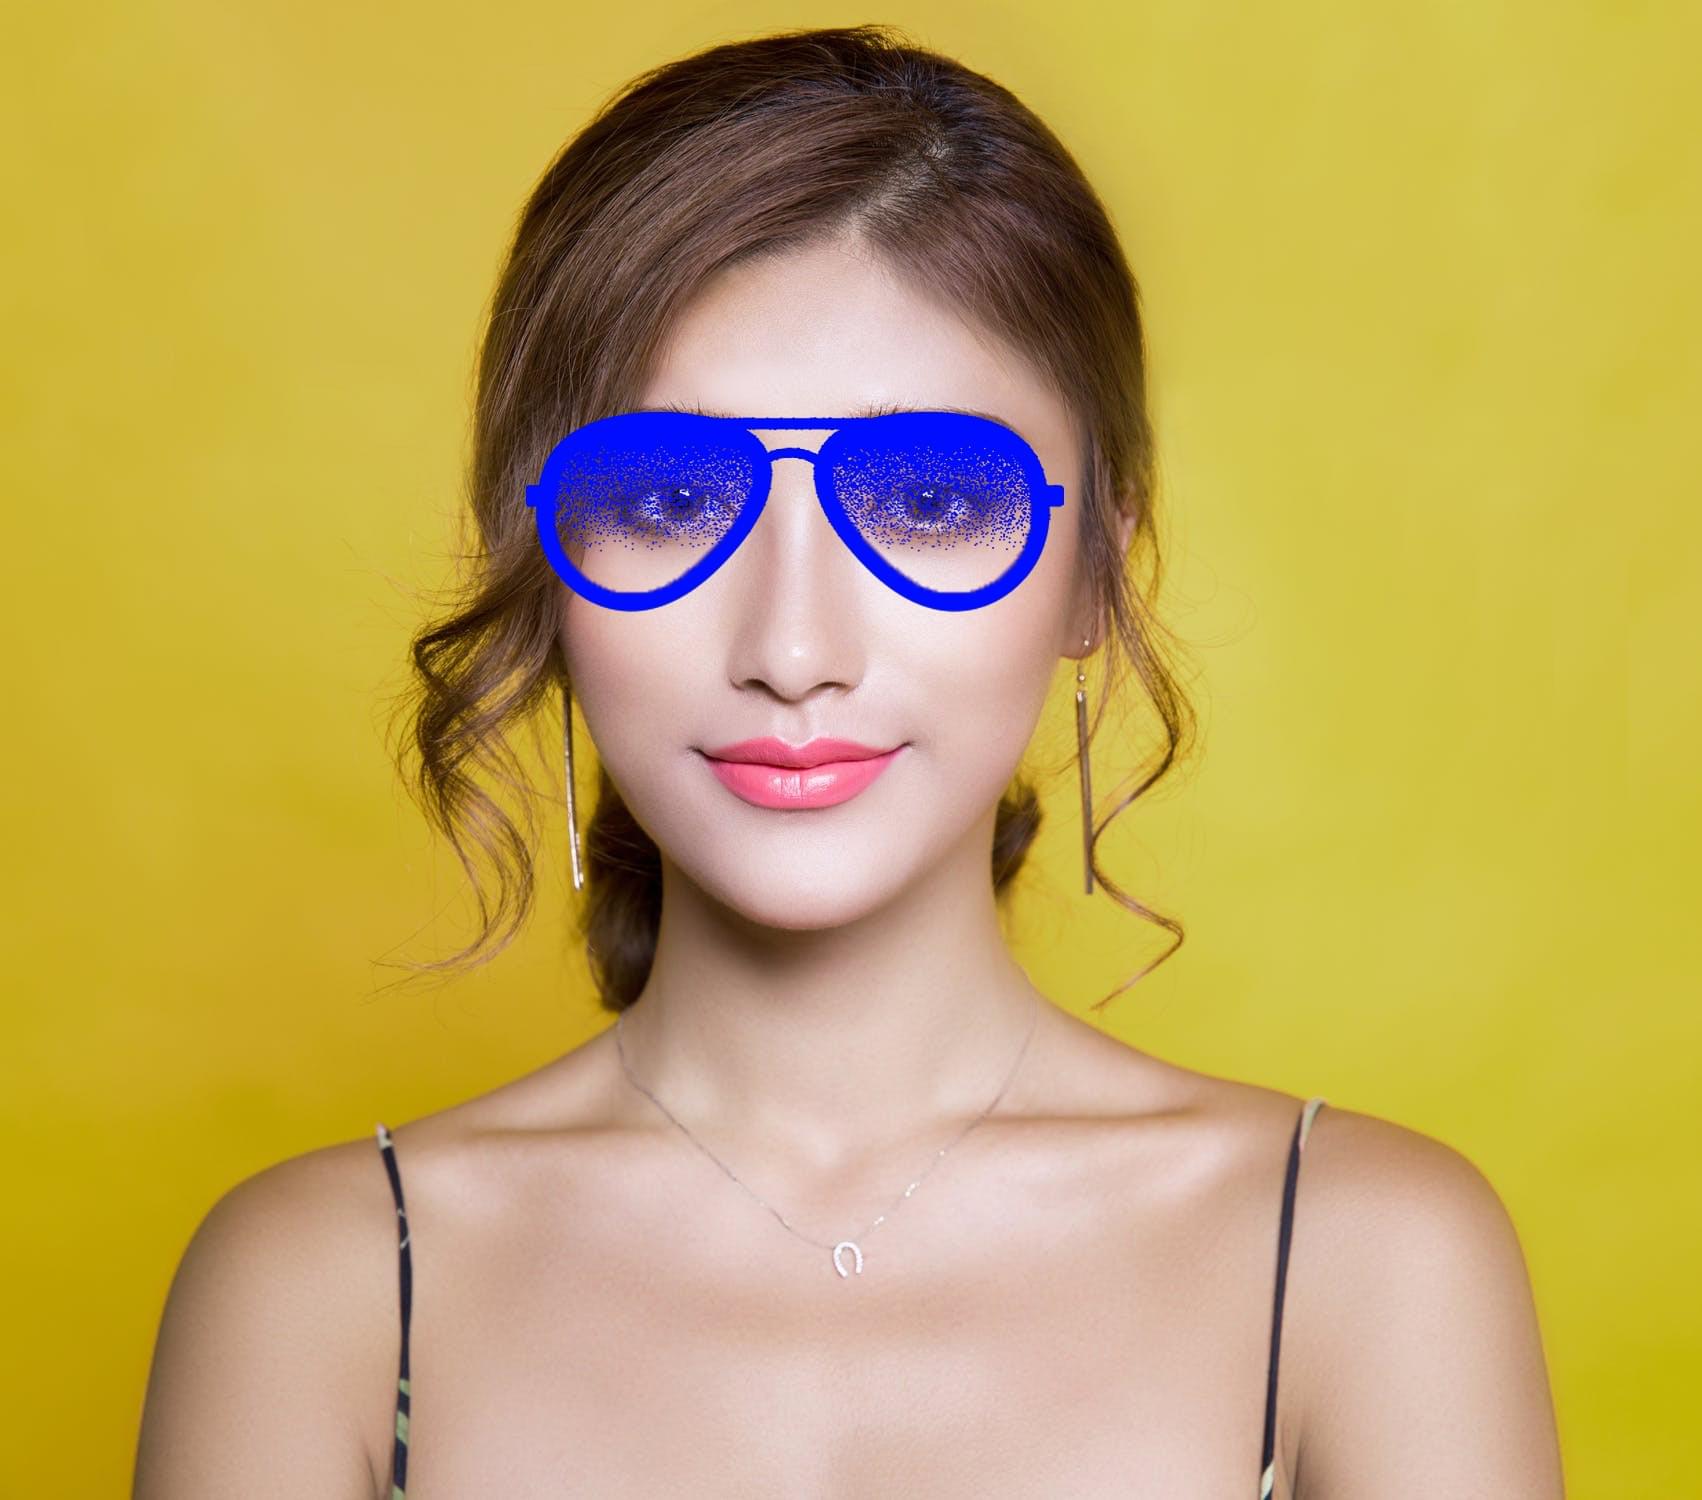
Dynamic mask by glasses selects all glasses in a user photo.
| Original photo | Result |
|---|---|
 |
 |
Returning to the results obtained above, let’s apply an inverted figure mask to the user photo region. This will let us achieve the effect of a 'missing figure' in the image.
| Original photo | Result |
|---|---|
|
|
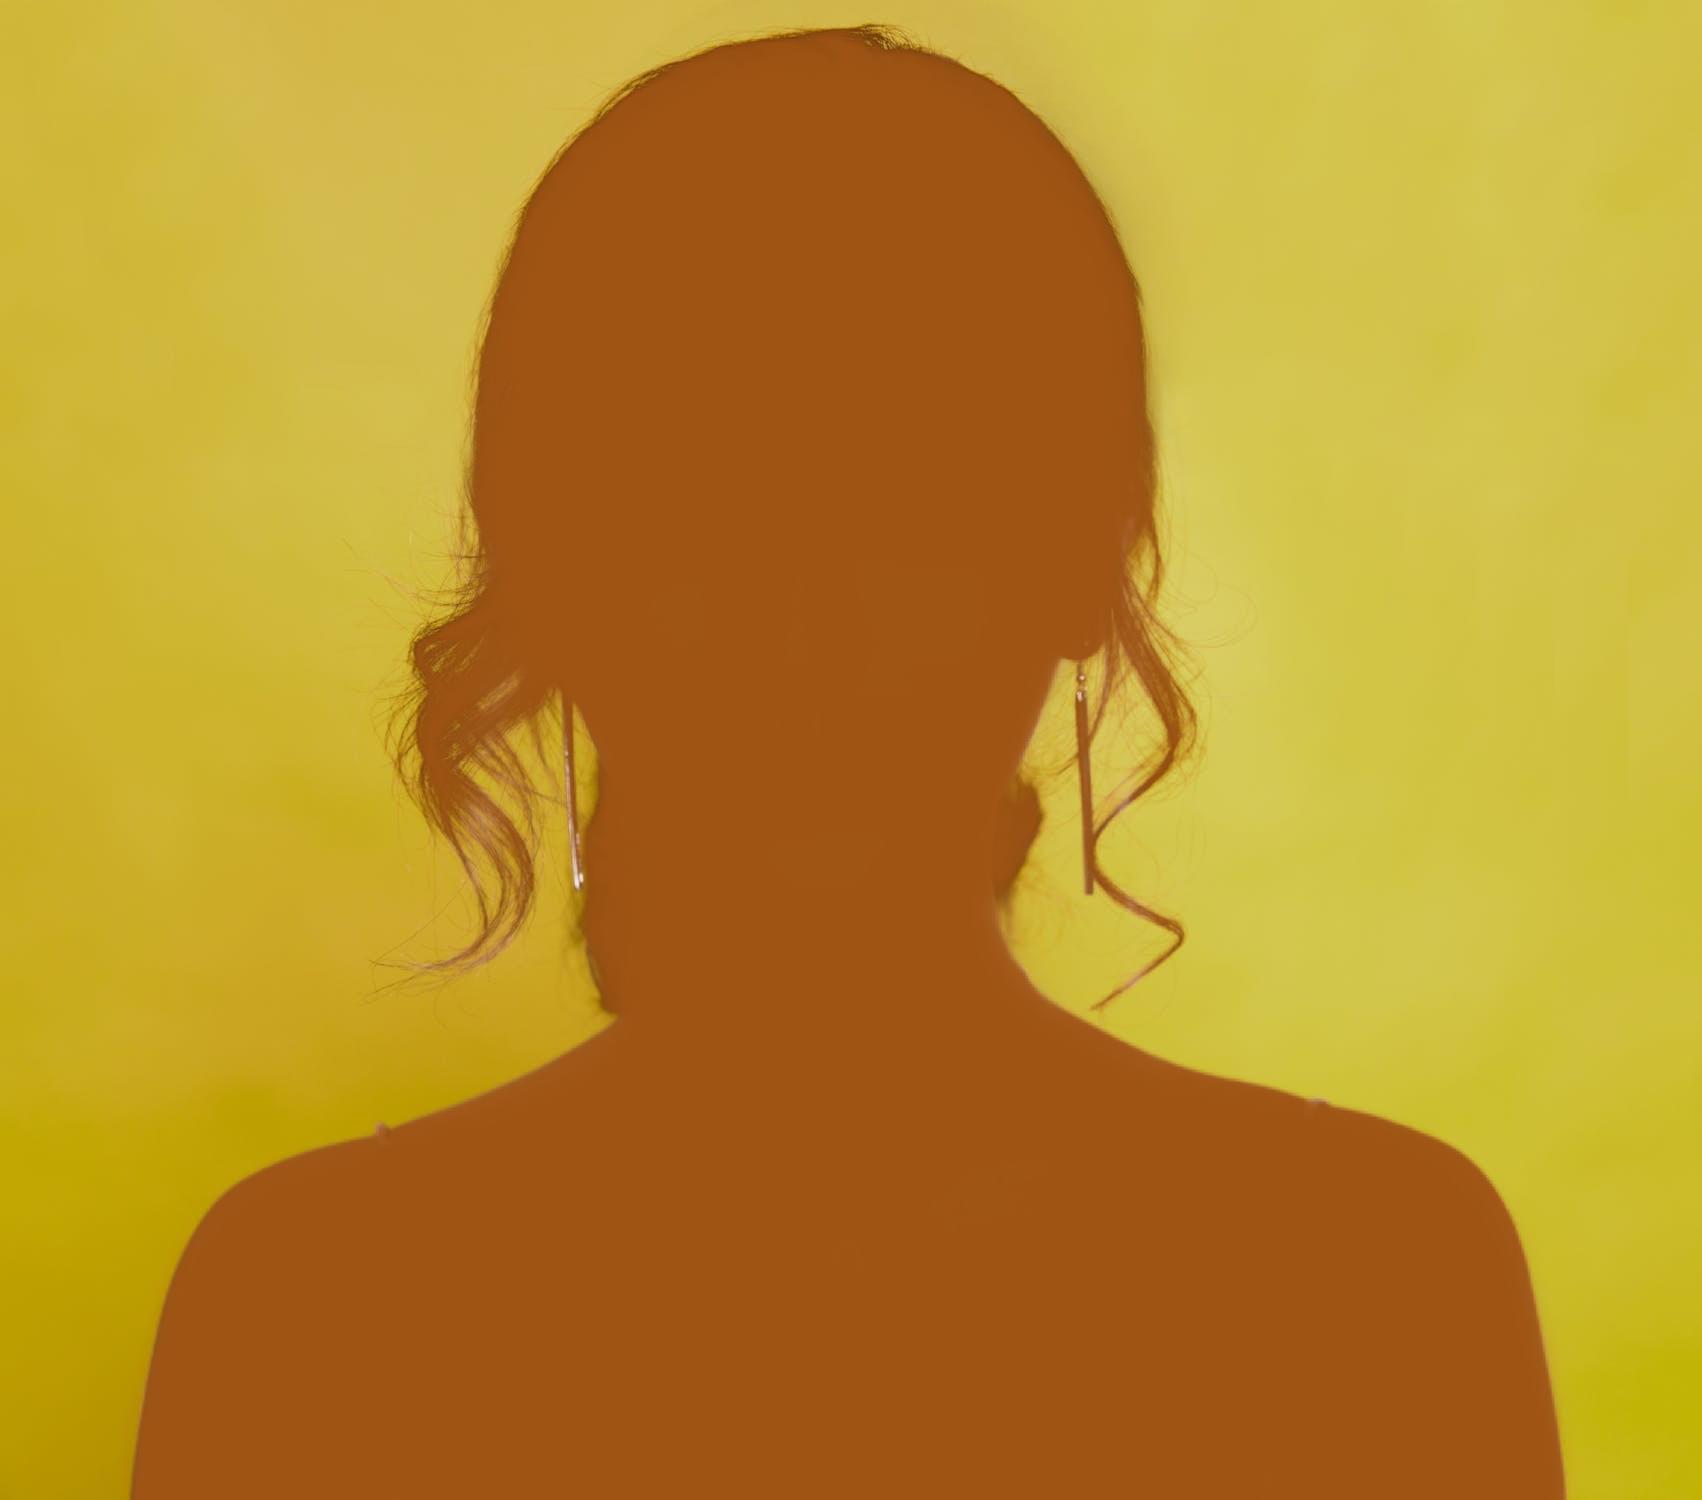 |
A similar effect can be achieved by performing the same procedure with a face mask. If you invert this mask and apply it to a figure region, you will get the following result:
| Original photo | Result |
|---|---|
|
|
 |
Another type of mask that is worth mentioning is a sticker mask. This mask requires at least one Rasterization filter for the user photo region the mask is built based on. When this mask is being built, it takes into account only the transparency of the pixels and ignores all colors of the original sticker.
The example below shows the mask by sticker created with a gradient layer and applied to a solid blue layer.
| Original photo | Photo with a sticker | Sticker dynamic mask |
|---|---|---|
|
|
 |
 |
You can learn more how to use sticker dynamic masks in this section.
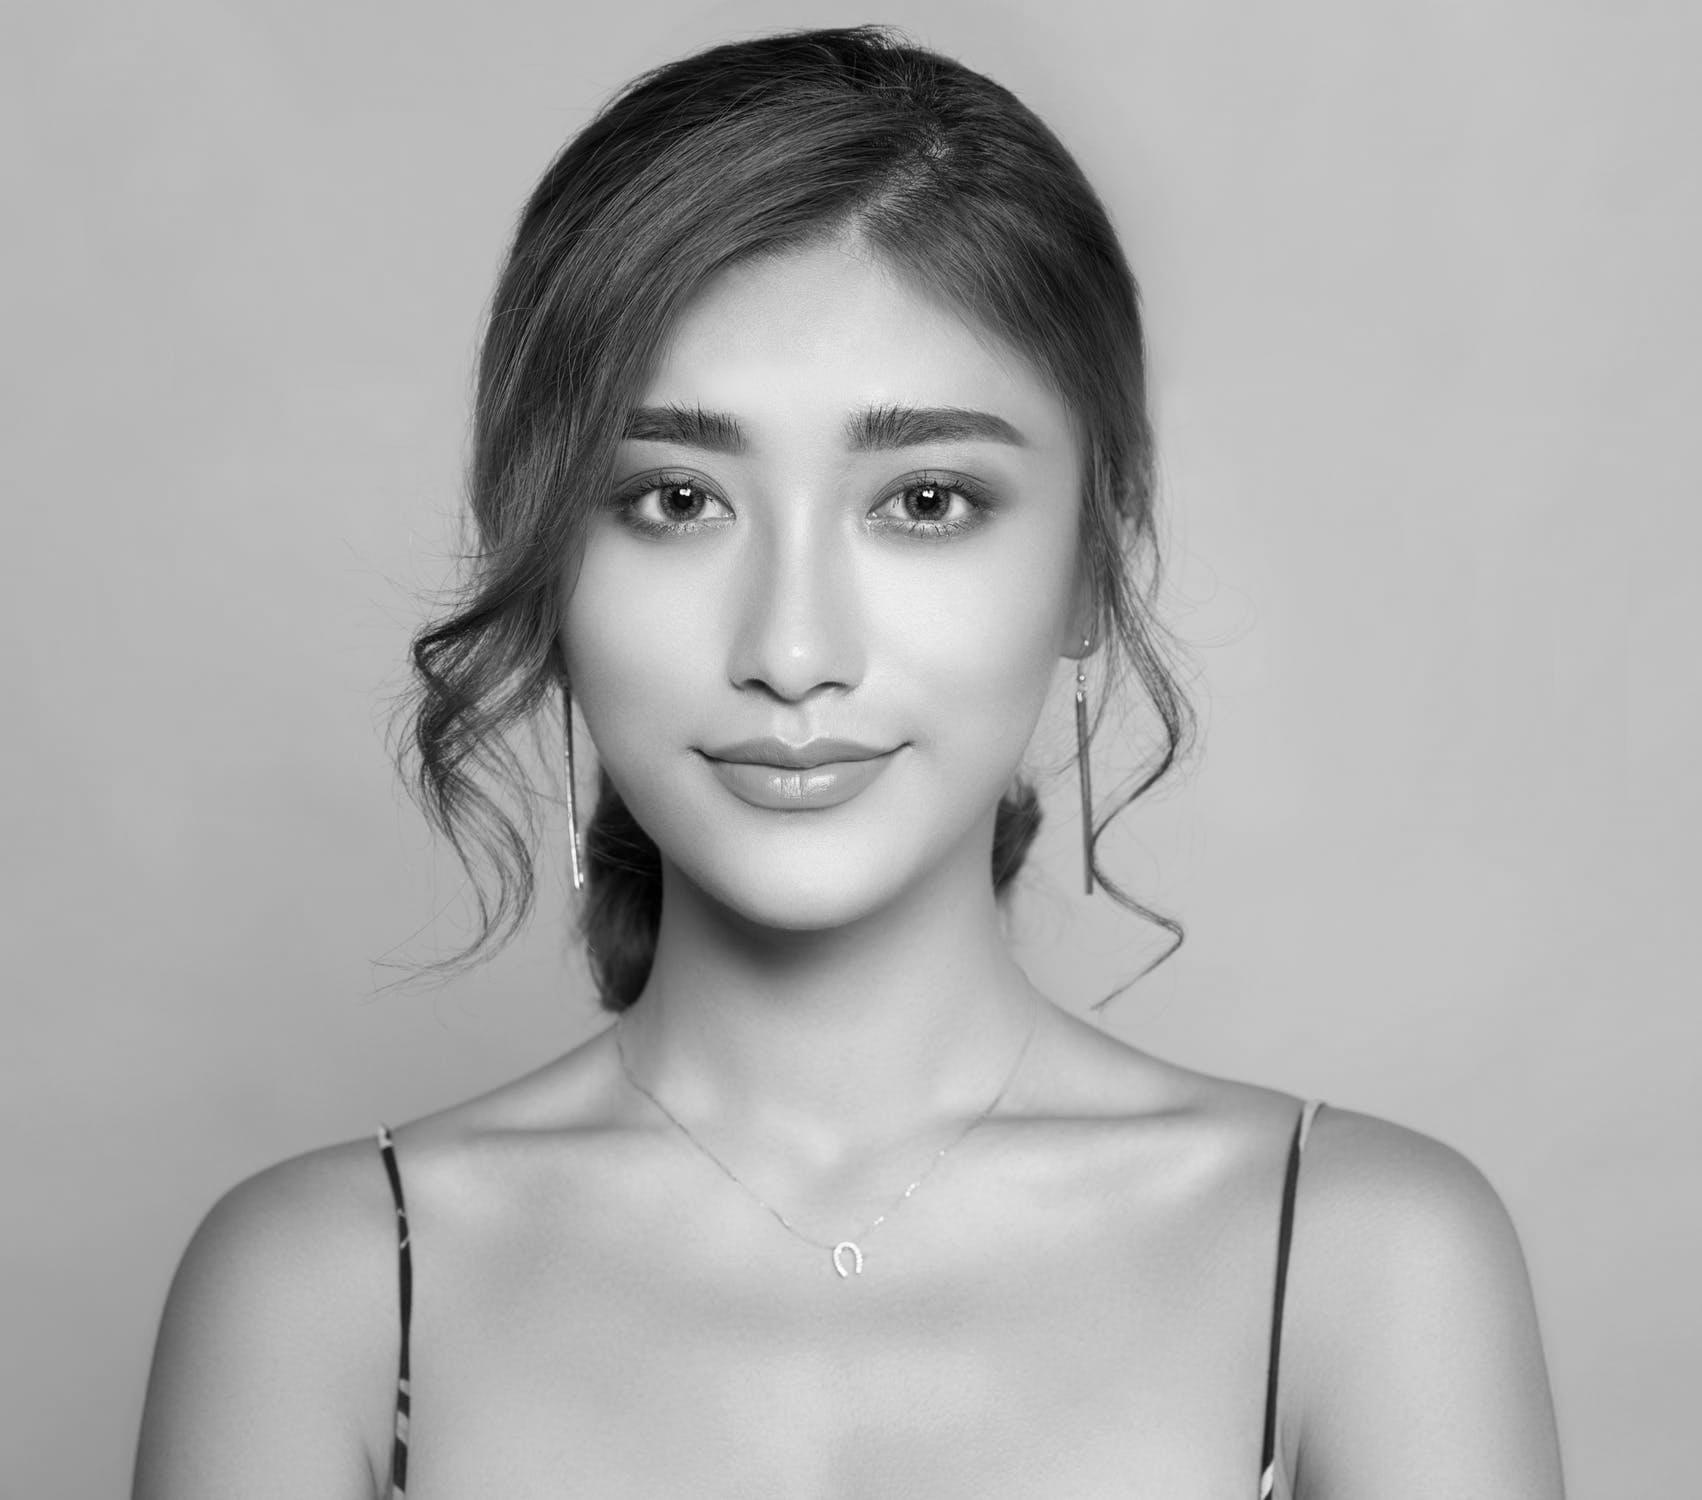
This type of mask is created by converting a photo to grayscale. The resulting image is then interpreted by the Template Creator as a mask.
| Original photo | Result |
|---|---|
|
|
 |
By further processing of the photo you can get more interesting results. In the example below, we added the Edge Detection filter (exponent: 1), made the quadrangular user photo region transparent, and built a mask by applying it to the color graphic layer.
| Original photo | Original photo with a filter | Result of applying the mask |
|---|---|---|
|
|
 |
 |
When working with a user photo mask, it is advisable to set the 'eroding' and 'smooth radius' parameters to zero.
You can find an example of developing a template using dynamic masks based on a user photo in this section.
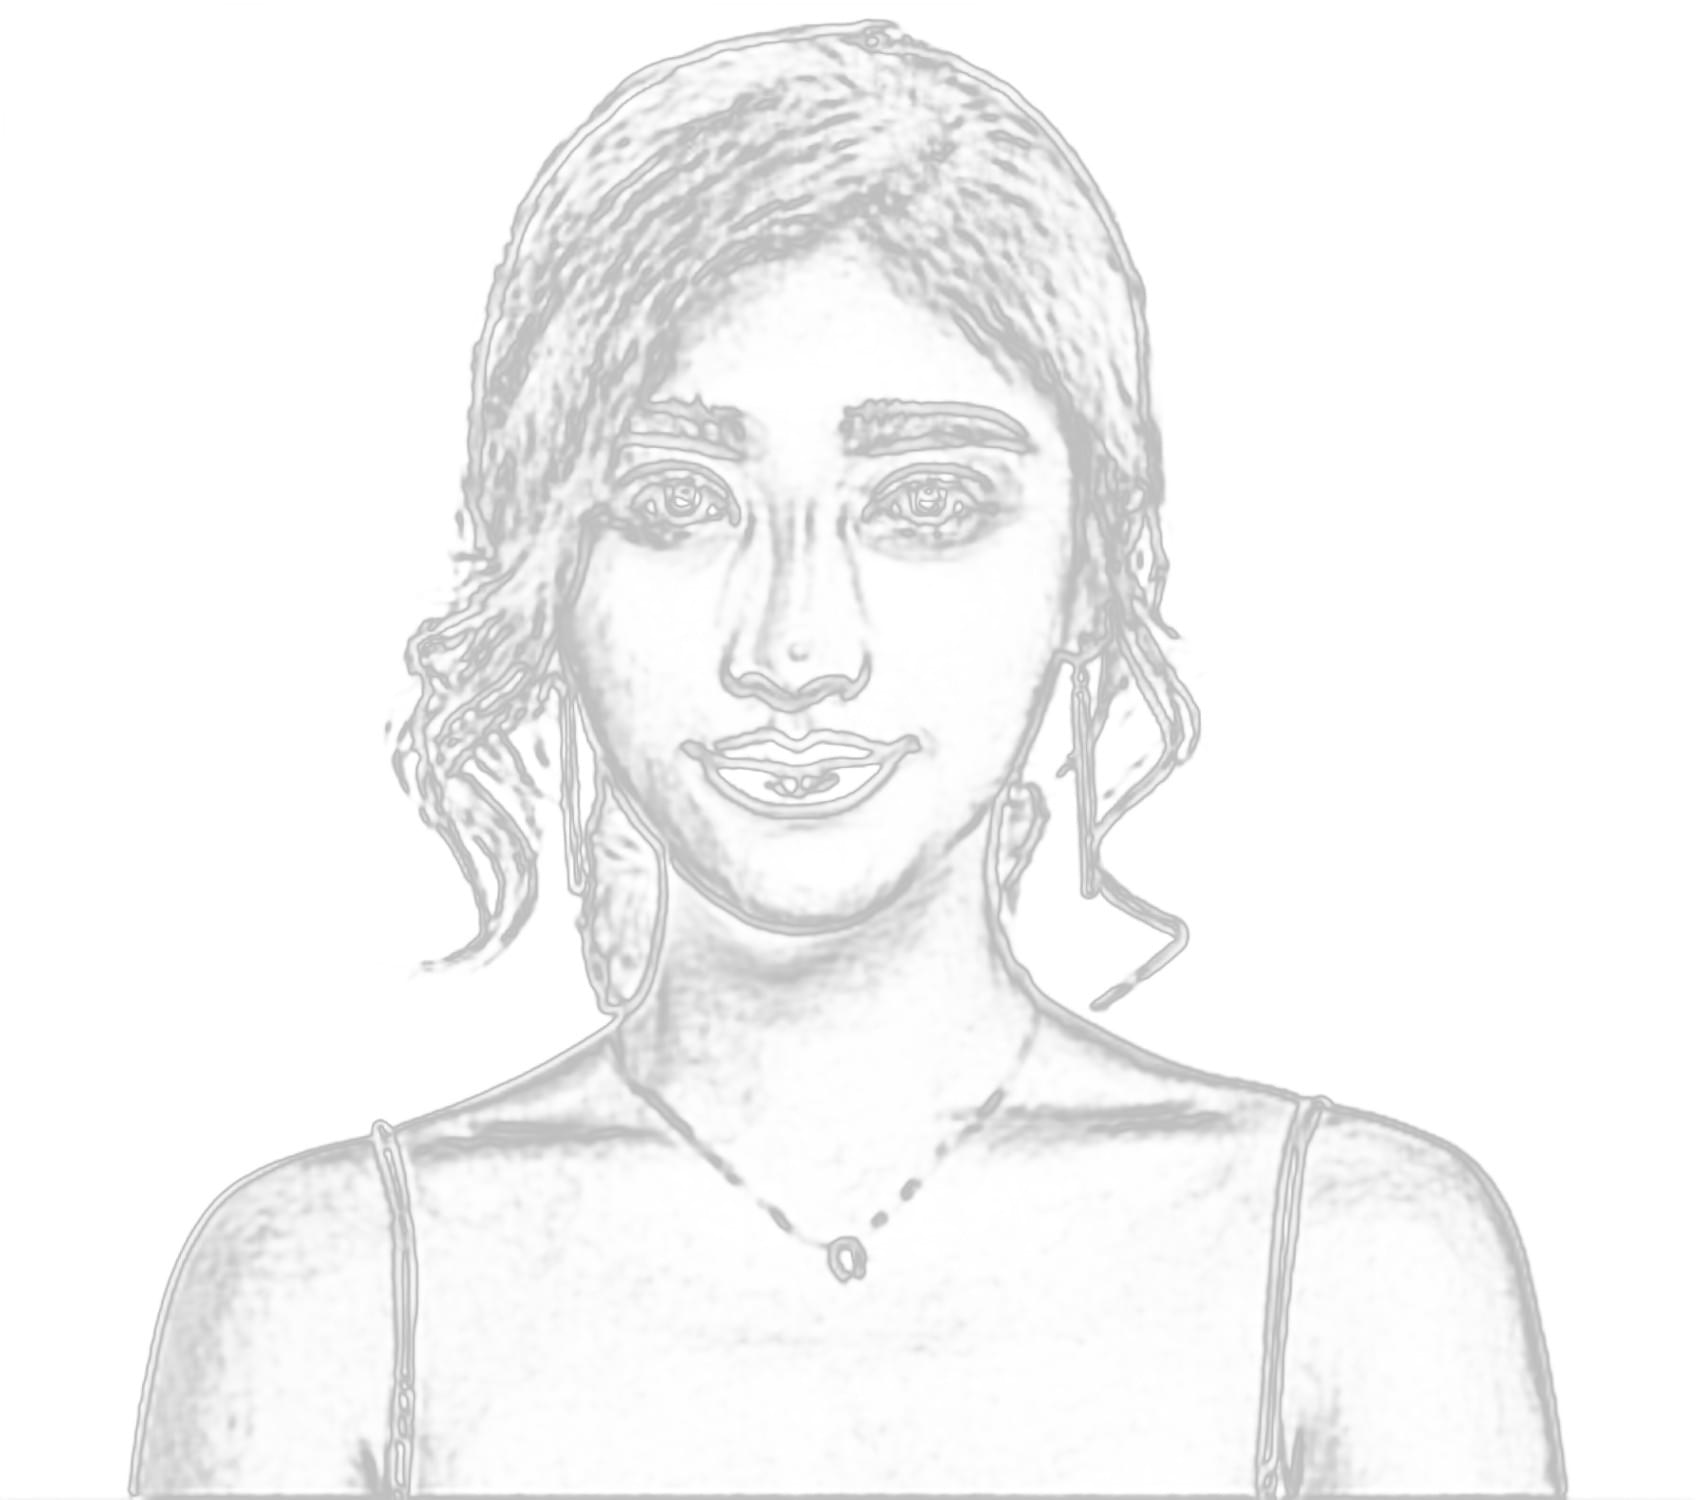
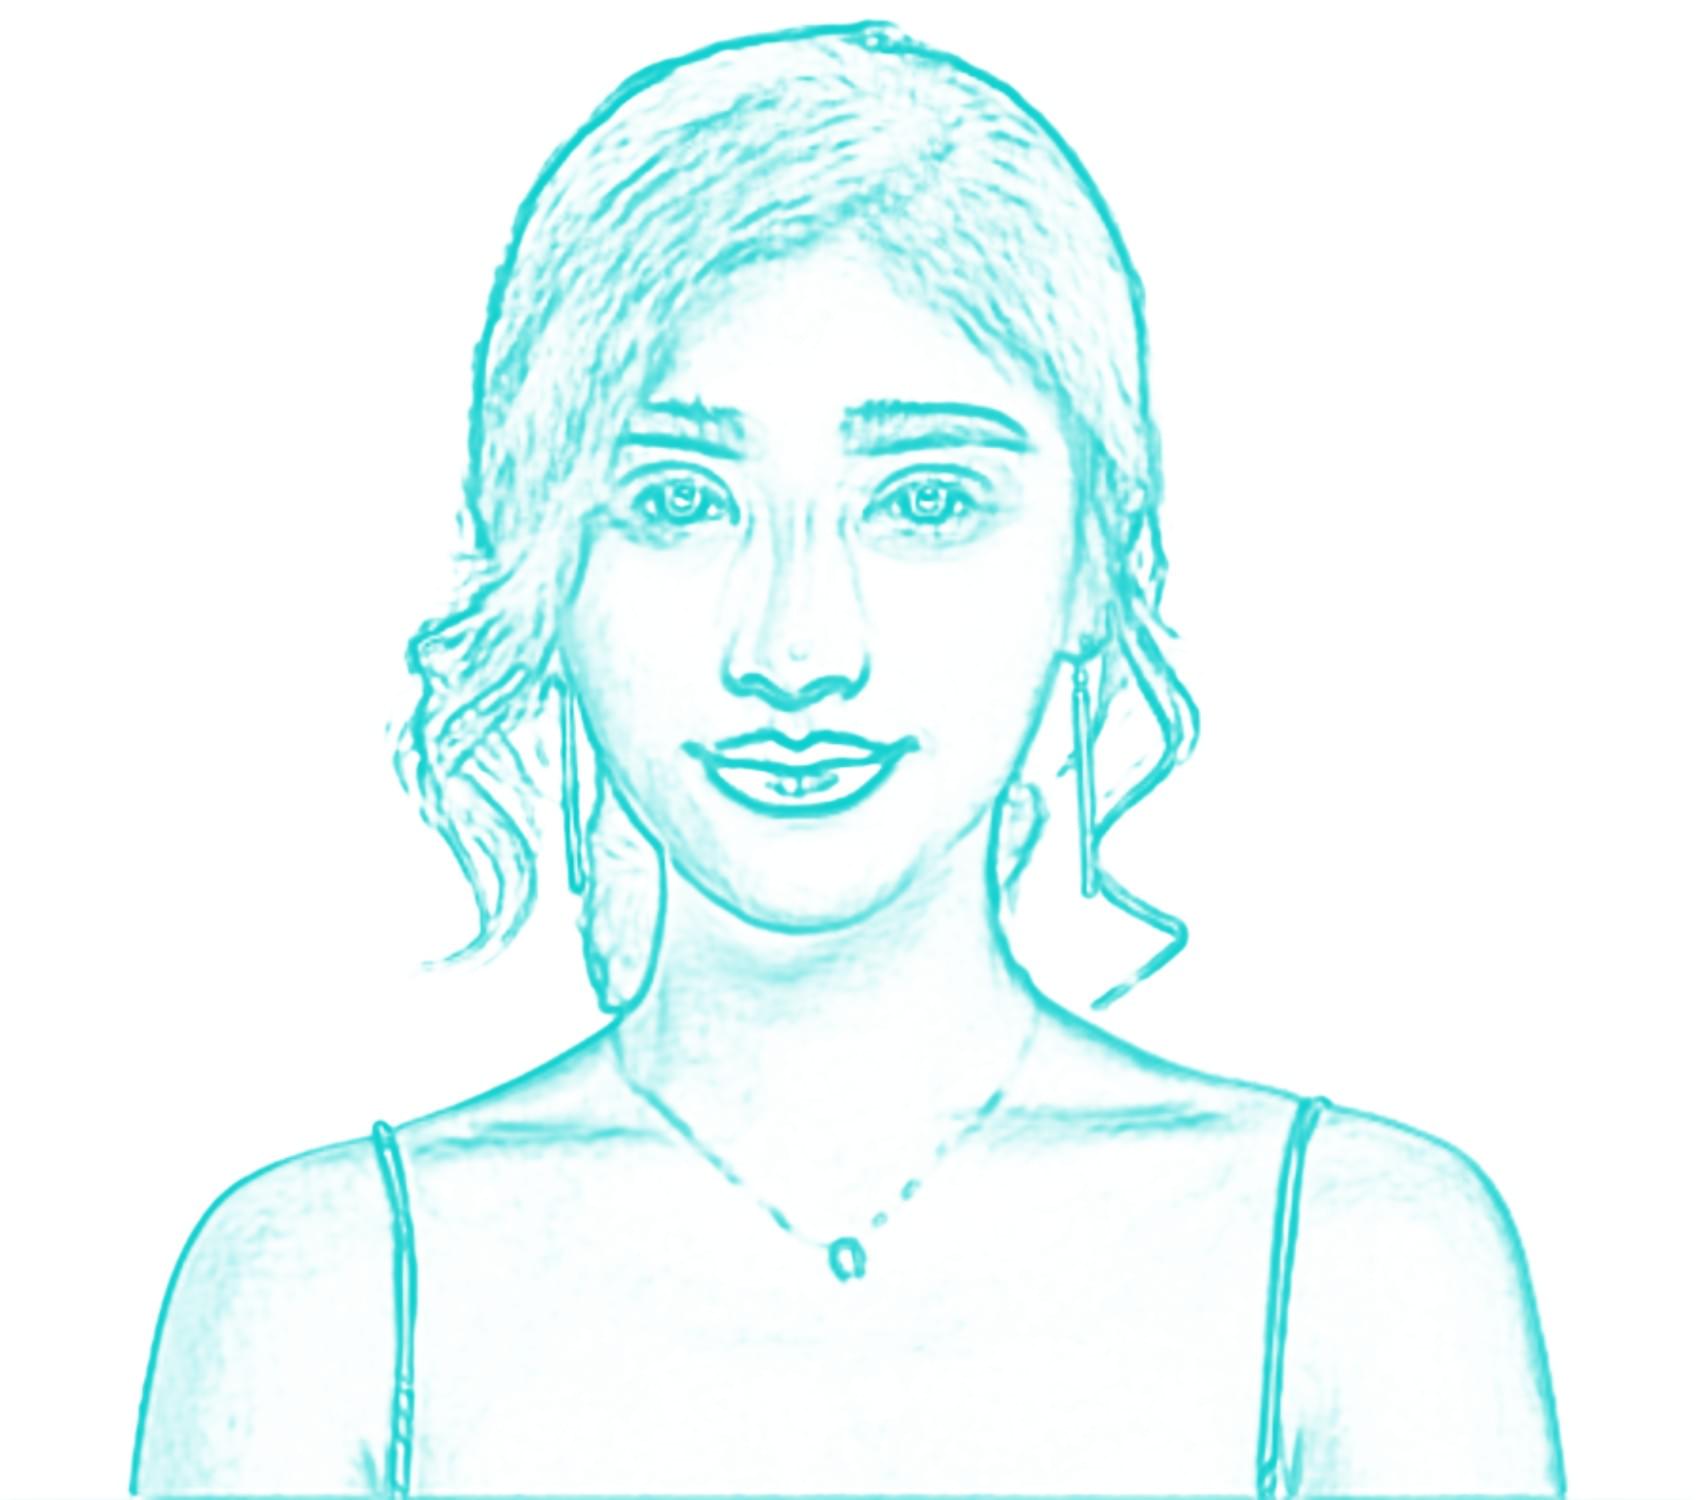
A face segments mask allows you to process certain parts of the face, separately or in a group.
| Original photo | Result |
|---|---|
|
|
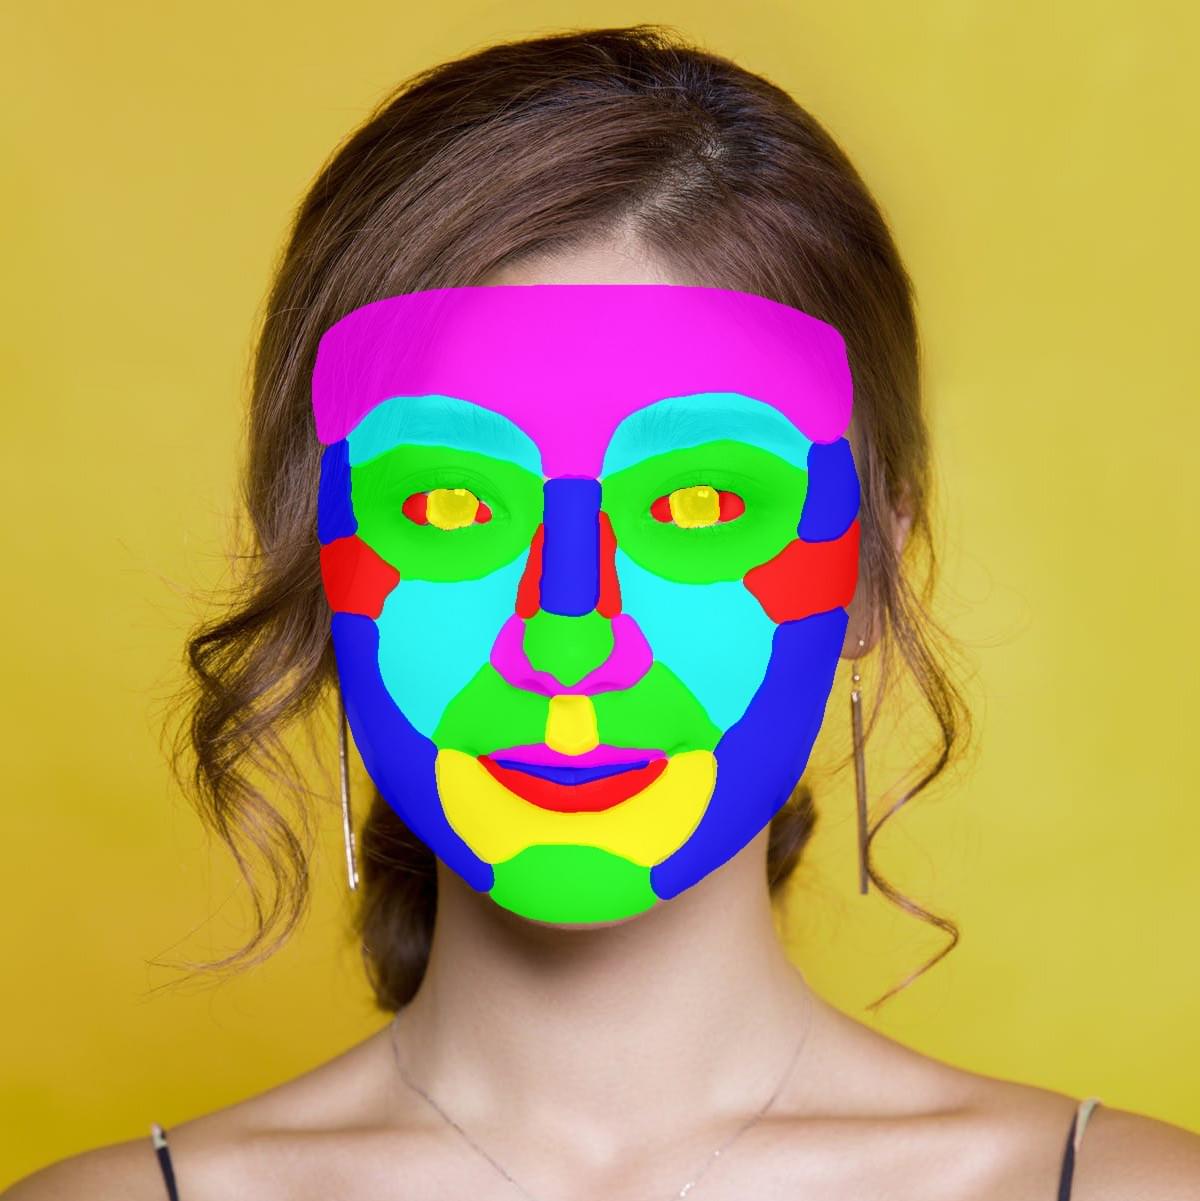 |
To build this mask, open the Dynamic mask application settings dialog, choose Face segments Mask, from the drop-down list, then click the Select mask parts button and select face segments the mask will consist of.
The diagram below shows facial segments that can be used to build a mask based on them
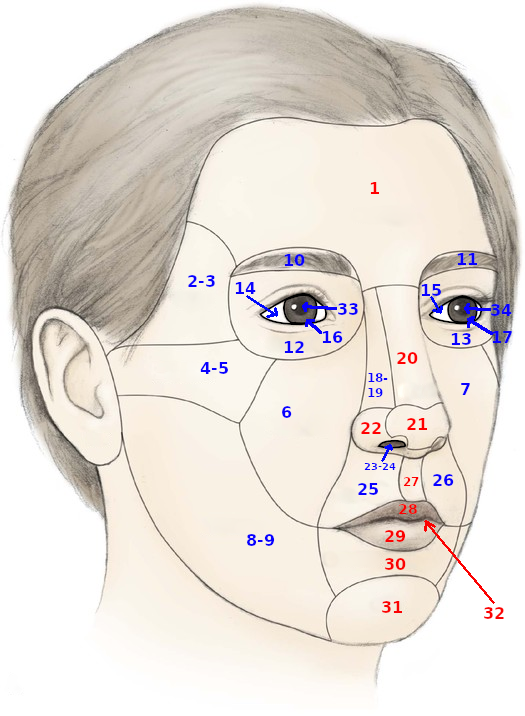
1. Forehead
2-3. Temple left/right
4-5. Infraorbital left/right
6-7. Mandibular left/right
8-9. Zygomatic left/right
10-11. Brow left/right
12-13. Periorbital left/right
14-15. Eye left/right
16-17. Eye iris left/right
18-19. Nose side left/right
20. Nose bridge
21. Nose tip
22. Nose alas
23-24. Nostril left/right
25-26. Moustache left/right
27. Philtrum
28. Lip upper
29. Lip lower
30. Soul patch
31. Chin
32. Mouth
33-34. Eye pupil left/right